
Related Manuals for Quest Engineering Q30


Summary of Contents for Quest Engineering Q30
- Page 1 QUEST m e t a l d etecto r s INSTRUCTION QUICK START MANUAL for Q60 Q30+ Q30 Quest Q30 metal detector...
-
Page 2: Table Of Contents
CONTENTS Scope of delivery Technical specifications Assembly Explanation of terms Interface Buttons Search modes Settings Operation Maintenance Troubleshooting Service... -
Page 3: Scope Of Delivery
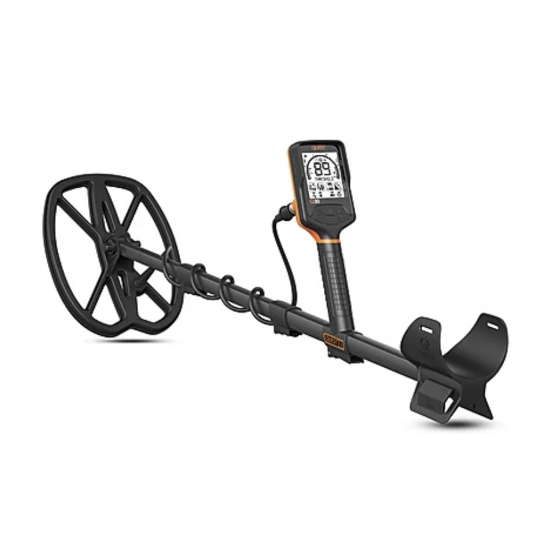
1. Scope of delivery Congratulations on your purchase of the Quest Q30! In the package you will find: Quest Q30 metal detector 28 x 23 cm (11“ x 9“) Turbo DD RaptorX search coil Coil cover (already attached to the coil... -
Page 4: Technical Specifications
2. Technical specifications Search frequency 14 kHz Type of metal detector Digital Number of search modes 6 modes: Park Field Wet sand Saltwater Gold 1 Gold 2 Search coil 28 x 23 cm (11“ x 9“) RaptorX search coil Weight 1.1 kg Extendable shaft length From 80 to 130 cm extendable... -
Page 5: Assembly
3. Assembly 1. Put the end of the shaft with the hole into the search coil like shown in 1. 2. Insert the screw into the hole as shown in 2 and secure by tightening the nut. Open the camlock on the middle shaft and insert the lower shaft with the search coil, as shown in 3. - Page 6 3. Assembly Wind the search coil cable on the shaft without stretching too much. Then, plug the connector to the search coil input socket on the control unit, as shown in 4, and secure it by rotating the ring. You can adjust the distance between armrest and control unit with the camlock attached to the control unit.
-
Page 7: Explanation Of Terms
4. Explanation of terms Ground balancing: In the ground there are several small minerals with metals attached to them. To prevent that your detector permanently reacts to those minerals, it can perform ground balancing. The detector filters the magnetic field of the ground and is able to ignore it. - Page 8 4. Explanation of terms Target ID (object identification): The Target ID Arc shows segments, each one representing several metal IDs. The number in the middle shows the score of the currently detected object based on its conductivity. The exact number varies depending on the characteristics of the ground, the size of the object, how deep it is buried, etc.
-
Page 9: Interface
5. Interface Ground Tracking activated Target ID score Pinpointing activated Target ID arc Headphones connected Audio/vibration on LCD backlight on Battery life indicator Depth indicator Sensitivity indicator Selected search mode/ setting Search modes Discrimination Fesen Threshold... -
Page 10: Buttons
6. Buttons WireFree Volume up on/off Backlight regula- Volume down tion: Press again at Level 1 lowest volume Level 2 for vibration Select or exclude target ID blocks in discrimination setting Sensitivity regulation Hold and press to switch search Up/down modes in settings Hold and pump the... -
Page 11: Search Modes
7. Search modes You can select the search modes by holding the lower -button and switching through with the / -buttons. PARK MODE. Discriminate items with target ID under 5 by default, with optimized recovery speed for high-trash areas such as parks. FIELD MODE. -
Page 12: Settings
8. Settings Press the -button multiple times to navigate through the different settings. Depending on the active search mode, some settings are unavailable. DISCRIMINATION. Navigate along the target ID arc with the / -buttons and activate/deactivate the current ID with the upper -button. - Page 13 8. Settings FREQUENCY SHIFT. Press and hold the lower -button and use the volume regulation-buttons to choose one of 5 different channels. GROUND TRACKING. Press and hold the lower -button and press the -button to activate or deactivate the Ground Tracking function.
-
Page 14: Operation
Underwater search The Q30 is waterproof, so you can take it under water up to 5 meters. For underwater search, please note: - If you are searching without the optionally available waterproof headphones, make sure that the headphone jack protection cap on the backside of the control unit is properly closed and activate the vibration by using the volume regulation. - Page 15 9. Operation Pinpointing When you found a promising signal while detecting, you can use the Pinpoint-function to determine the exact position of the object more accurate. To do so, move the coil to a place without a signal and start to press the Pinpoint- button.
- Page 16 9. Operation Connecting headphones 1. WIRE HEADPHONES. Remove the pro- tection cap on the backside of the control unit and insert the 3.5 mm headphones cable. 2. QUEST UNDERWATER HEADPHONES. (optionally available) Remove the protec- tion cap on the backside of the control unit and insert the 3.5 mm headphones cable by screwing it into the thread.
-
Page 17: Maintenance
10. Maintenance Please note: • Do not twist the coil cable and connector to avoid wire damage. • Do not store the device where prolonged exposure to extreme temperatures can occur to avoid device damage. • Never use a hard or sharp object to operate the buttons to avoid damage. •... -
Page 18: Troubleshooting
11. Troubleshooting Issue Solution The detector doesn‘t start Recharge the detector. If it still doesn‘t start, contact your dealer. The detector doesn‘t make a sound If the detector shows no conductance number in the middle, the coil might not be connected to the control unit. Check the cable between coil and control unit. -
Page 19: Service
12. Service Quest products are designed in California U.S.A. and produced in China by the manufacturer Quest Metal detectors Inc. Quest products are distributed and available in many European count- ries. Go to www.quest-metaldetectors.eu to find your nearest dealer. Quest Europe GmbH is located in Germany and is offering customer ser- vice/after sales and technical support for European customers.
Need help?
Do you have a question about the Q30 and is the answer not in the manual?
Questions and answers