Table of Contents
Advertisement
Quick Links
Advertisement
Table of Contents

Related Manuals for AVer X16


Summary of Contents for AVer X16
- Page 1 User Manual...
- Page 2 WARNING AVERTISSEMENT ALWAYS FOLLOW SAFETY PRECAUTIONS RESPECTEZ TOUJOURS LES CONSIGNES DE SÉCURITÉ Death or serious injury may occur when children climb on audio and/or video equipment furniture. A remote control or toys placed on the furnishing may encourage a child to climb on the furnishing and as a result the furnishing may tip over on to the child.
- Page 3 Secure the cabinet Only Adults should to avoid fall down. move the cabinet. L’armoire ne doit être Sécurisez l’armoire pour déplacé QUE PAR DES éviterqu’elle soit tombée. ADULTES. Poussée Push Never climb, sit or stand on the cabinet. Personne ne doit s'asseoi r, se tenir ou grimper sur armoire.
- Page 4 CAUTION DO NOT allow anyone to sit, stand or climb on the cabinet. DO NOT lift the cabinet. DO NOT block the ventilation holes used for air circulation. DO NOT overload objects on the cabinet shelves. (Work platform ...
- Page 5 The information contained in this documentation is subject to change without notice. In no event will AVer Information Inc. be liable for direct, indirect, special, incidental, or consequential damages arising out of the use or inability to use this product or documentation, even if advised of the possibility of such damages.
- Page 6 ©2020 AVer Information Inc. All rights reserved. All rights of this object belong to AVer Information Inc. Reproduced or transmitted in any form or by any means without the prior written permission of AVer Information Inc. is prohibited. All information or specifications are subject to change without prior notice.
-
Page 7: Table Of Contents
CONTENTS Package Contents ....................1 Tools Required ......................1 Optional Accessory ....................2 Dimensions ......................2 Diagram ........................3 Front and Back ..................... 3 Sides ........................3 Top and Bottom ..................... 4 Installation ....................... 5 Door/Top Cover Lock .................... 5 Charging the Cabinet .................... -
Page 8: Package Contents
The following items are included in the package. Please check if each item is available before using. Concrete Anchors x6 User Manual M5x32L Anchor Screws x6 Drywall Anchors x6 X16 Cabinet Keys x4 Washers x6 Cable Grommets x2 Stacking Kit Tools Required For wall mount use. -
Page 9: Optional Accessory
Optional Accessory Mobile Kit (The following items are included in this kit.) 5” Lockable Casters x2 5” Casters x2 Caster Screws x16 Stacking Kits x3 Handle bar Handle bar Screws and Washers Dimensions 614.1mm (24.18”) 483.4mm (19.03”) -
Page 10: Diagram
Diagram Front and Back Sides... -
Page 11: Top And Bottom
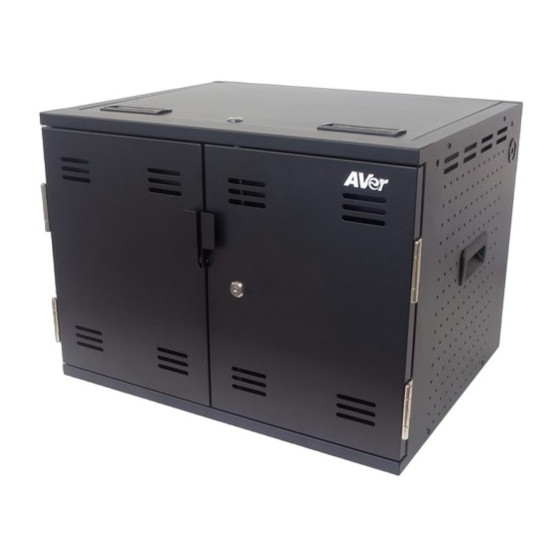
Top and Bottom Front and Back Sides Top and Bottom 1. Cabinet top cover 9. Stacking holes 16. Handles 17. Top cover lock 2. Ventilation holes 10. Handlebar holes 3. Finger pull 11. Ventilation holes 18. Ventilation holes 4. Door lock 12. -
Page 12: Installation
Installation [Note] 1. It is recommended to use cable ties or zip-tie (not supplied) to secure and manage cables. 2. It is recommended to allocate 2 persons for efficient device cabling. Door/Top Cover Lock For security, use the lock key to secure the door and top cover. Open Open Lock... -
Page 13: Charging The Cabinet
Charging the Cabinet 1. Use the included key to open the top cover. 2. Remove the top cover and accessory package. 3. Feed the power cord through the hole space provided and place the cable grommet into the hole space provided. 4. -
Page 14: Adapter Configuration
Adapter Configuration 1. Place the power adapter onto the adapter drawer in order. [Note] Save the power AC socket closest to the smart fan for it. 2. Pass the DC-end of the adapter cable through the hole located on the back of adapter drawer. -
Page 15: Cable Management
Cable Management 1. Use the included key to open the front door. 2. Route the adapter DC-end cable along with the V-shape routing groove. 3. Snap the locking piece until hearing a "click" to firmly secure the DC-end cable. Remember to reserve enough length of power cable to connect the power plug of the device. -
Page 16: Wall Mount
Wall Mount 1. Open the top cover. 2. There are 6 mount holes on the cabinet’s rear panel. (See below figure for exact mount holes locations). Distance: At least 5cm (1.97”) 3. Secure the cabinet to the wall studs for drywall mounting. Drill the holes at the wall studs through the drywall, and firmly tap the drywall anchors in until they are flush with the wall. -
Page 17: Stacking Installation
Stacking Installation With Stacking Kit The X16 cabinets can use the included stacking kit to stack cabinets and secure them together. The stacking installation is illustrated below: [Note] The maximum stack is 2 cabinets. - Page 18 With Mobile Kit (Optional) 1. Use screws to attach four casters to the base of one cabinet. Lockable casters should be installed on the same side with the handle bar holes to allow easy access. 2. Remove two handle caps out of the handle bar. Use washers and screws to attach the handle bar to another cabinet, using Allen wrench to screw the handle bar.
-
Page 19: Troubleshooting
Troubleshooting Q: Why are all of my devices plugged in but not charging? A: 1. Make sure power cords are undamaged. 2. Make sure power cords are firmly inserted into the available socket with stable current. 3. Make sure the power plug and current consumption are compliant with your country specification standards. -
Page 20: Specifications
Specifications Model Capacity Supported Devices Mobile devices up to 15" Charging Type AC/ Fully Charging Power Specification Power Strip: 100-120V ~ 50/60Hz, 12A Front door: 2 points mechanism with key lock function. Padlock hole is combined with handle. Top cover: 1 point key lock function. Security The key of front door and top cover use the same key. -
Page 21: Service And Warranty
Service and Warranty All of our products come with a quality and safety assurance. For customers located in North America, please visit the AVer USA support site for comprehensive RMA, Warranty, and Service information: https://www.averusa.com/classroom-technology/support/... - Page 22 Appendix – Earthing [Caution] High touch current, Connect to earth before connecting to supply. (Yellow/Green wire min. 14AWG) [Note] Installation of the protective earthing connection of the socket-outlet by a skilled person. [Attention] Contact à courant élevé, Reliez l’appareil à la terre avant de la connexion à l’alimentation en courant. (Câble jaune/vert min.
Need help?
Do you have a question about the X16 and is the answer not in the manual?
Questions and answers