Table of Contents
Advertisement
Quick Links
Advertisement
Table of Contents

Related Manuals for Epson EB-PU2010B


Summary of Contents for Epson EB-PU2010B
- Page 1 User's Guide...
-
Page 2: Table Of Contents
Contents Notations Used in This Guide Turning Off the Projector ......................36 Wired Network Connection............. 37 Using the Manual to Search for Information ........9 Connecting to a Wired Network....................37 Selecting Wired Network Settings ..................37 Searching by Keyword ........................9 Jumping Directly from Bookmarks.................... - Page 3 Contents On-Screen Display ........................53 Maintaining the Projector Quality................... 61 Projecting Images.......................... 53 Panel Alignment ........................61 Source Search..........................53 Color Uniformity........................62 A/V Mute ............................. 54 Refresh Mode ..........................62 Freeze............................54 Light Source Calibration ....................... 62 Split Screen ..........................54 Managing the Projector's Settings..................
- Page 4 Test Pattern............................84 Lights-Out Control ........................74 Memory ............................. 85 Reset (Image menu) ........................74 Content Playback........................... 85 Creating Playlists Using Epson Web Control..............86 Signal Menu..................75 Content Playback Mode Restrictions ................87 Resolution............................75 Reset (Settings menu)........................87 Aspect ..............................
- Page 5 Contents Beep..............................93 Projector Name..........................102 Indicators ............................93 PJLink Password .......................... 102 Log Save Destination ........................93 Remote Password ........................102 Batch Setup Range........................93 Web Control Password ......................102 AC Voltage Monitoring........................ 94 Moderator Password........................102 Lens Type............................94 Projector Keyword ........................
- Page 6 Event ID Code List......................... 110 Light Source Info......................... 111 Version ............................111 Projector Monitoring and Control Options......... 125 Status Information........................111 Epson Projector Management ....................125 Voltage Warning Info ........................ 112 Epson Web Control ........................125 Temp Warning Info ........................112 SNMP ............................... 125 Power On/Off History ........................
- Page 7 Projector Specifications..............180 Solutions When the Image is Fuzzy or Blurry ..............159 Supported Features for Epson Projector Content Manager..183 Solutions When the Image Brightness or Colors are Incorrect ......... 160 Solutions When Automatic Adjustments are not Applied Correctly ...... 160 List of Safety Symbols and Instructions ........
-
Page 8: Notations Used In This Guide
Notations Used in This Guide Safety Symbols The projector and its manuals use graphical symbols and labels to indicate content that tells you how to use the projector safely. Read and carefully follow the instructions that are marked with these symbols and labels to avoid injury to persons or damage to property. This symbol indicates information that, if ignored, could possibly result in personal injury or even death. -
Page 9: Using The Manual To Search For Information
Using the Manual to Search for Information We assume that this manual will be used by specialists with technical • Mac OS: Hold down the command key, and then press ←. knowledge and experience of projector installation and adjustment. Make sure you read the Safety Instructions before using your projector. The PDF manual allows you to search for information you are looking for by keyword, or jump directly to specific sections using the bookmarks. -
Page 10: Getting The Latest Version Of The Documents
Getting the Latest Version of the Documents You can get the latest version of the manuals and specifications on the Epson Web site. Visit epson.sn, and enter your model name. -
Page 11: Introduction To Your Projector
Introduction to Your Projector See these sections to learn more about your projector. g g Related Links • "Projector Parts and Functions" p.12... -
Page 12: Projector Parts And Functions
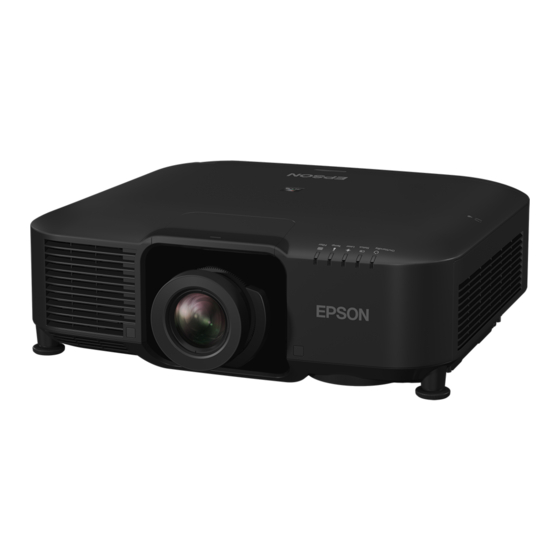
Projector Parts and Functions The following sections explain the projector parts and their functions. Projector Parts - Front/Top g g Related Links • "Projector Parts - Front/Top" p.12 • "Projector Parts - Rear" p.13 • "Projector Parts - Interface" p.14 •... -
Page 13: Projector Parts - Rear
Projector Parts and Functions Name Function Name Function Air exhaust vent Exhaust vent for air used to cool the projector Caution internally. Caution Do not place any objects or put your hand near the projection lens. It could cause burns, fire, or the object to warp because this area reaches While projecting, do not put your face or a high temperature due to the concentrated... -
Page 14: Projector Parts - Interface
Projector Parts and Functions Name Function Attention Power inlet Connects the power cord to the projector. • Check the shape and orientation of the connectors on any cable you plan to connect. Do not force a connector into a port if it does not fit. The device or Control panel Operates the projector. - Page 15 Projector Parts and Functions Name Function Name Function Cable holder Pass a commercially available cable tie through here to HDMI port Inputs video signals from HDMI compatible video secure cables. equipment and computers. (HDMI) Connects the optional base unit. Warning This port is compatible with HDCP2.3.
-
Page 16: Projector Parts - Base
Projector Parts and Functions Projector Parts - Base Name Function Rear feet When the projector is set up on a surface such as a desk, turn to extend and retract the feet to adjust the horizontal tilt. You can adjust the tilt within a range of ±1.5°. The rear feet are detachable. -
Page 17: Projector Parts - Control Panel
Projector Parts and Functions Secure the ring using the M6 × 15 mm bolt supplied with the safety wire set, Name Function and loop the safety wire through the ceiling mount to secure it as shown. [Source Search] Changes to the next input source. button [Menu] button Displays and closes the projector's menu. -
Page 18: Projector Parts - Remote Control
Projector Parts and Functions Name Function Projector Parts - Remote Control [Lens] button Displays the adjustment screens for lens shift, zoom, focus, and distortion in that order each time the button is pressed. Wait 20 minutes after turning on the projector before setting the focus, zoom, and lens shift for maximum accuracy. - Page 19 Projector Parts and Functions Name Function Name Function Switch image source Switch the image source to each port. [Menu] button Displays and closes the projector's menu. buttons Hold down this button for more than 15 seconds to turn on all remote receivers. [Aspect] button Changes the aspect mode.
- Page 20 Projector Parts and Functions Name Function Name Function Numeric buttons Enters numbers in the projector's menu while holding [Default] button Returns the selected setting to its default value. down the [Num] button. Hold down this button for more than 3 seconds to start In Content Playback mode, enter numbers while the lens calibration process.
-
Page 21: Installing Batteries In The Remote Control
Projector Parts and Functions • "Geometry Correction" p.79 Warning • "Memory" p.85 • "Split Screen" p.80 Check the positions of the (+) and (–) marks inside the battery holder to ensure the batteries are inserted the correct way. If the batteries are not used correctly, they could explode or leak causing a fire, injury, or damage to the Installing Batteries in the Remote Control product. -
Page 22: Locking The Remote Control Buttons
Projector Parts and Functions To unlock the buttons, press and hold the [Home] button again for • Depending on your installation environment, the available distance approximately 5 seconds. and angles may be shortened. • Avoid using the remote control in conditions with bright fluorescent lights or in direct sunlight, or the projector may not respond to commands. -
Page 23: Projector Parts - External Camera
Projector Parts and Functions Projector Parts - External Camera Name Function Indicator light Indicates the external camera's status. You can attach the optional external camera to the front of the projector or • Lit: standby lens. See the external camera manual for the installation method. •... -
Page 24: Setting Up The Projector
Setting Up the Projector Follow the instructions in these sections to set up your projector. g g Related Links • "Notes on Transporting" p.25 • "Precautions on Installation" p.26 • "Attaching and Removing a Lens" p.29 • "Operating the Projector Power" p.35 •... -
Page 25: Notes On Transporting
Notes on Transporting There are many glass parts and precision components inside the projector. To prevent damage due to impacts when transporting, handle the projector as follows. Caution The projector should not be carried by one person. At least two people are needed to unpack or carry the projector. -
Page 26: Precautions On Installation
Precautions on Installation You can install the projector or mount it to the ceiling at any horizontal or Attention vertical angle. Note the following precautions when installing the projector. • Use M6 screws (up to a depth of 14 mm) to fix the projector's ceiling mount fixing points and the mounting hardware at four points. - Page 27 Precautions on Installation Installation space Installation space (When installing multiple projectors side by side) Attention Attention Be sure to leave the following amount of space around the projector so as not to • If you are installing multiple projectors next to each other, make sure hot air block the air exhaust and intake vents.
- Page 28 Precautions on Installation Installation space (When installing the optional external air filter) Attention If you are installing the optional external air filter to your projector, be sure to leave the following amount of space around the projector.
-
Page 29: Attaching And Removing A Lens
Attaching and Removing a Lens Follow the instructions in these sections to attach or remove a compatible Pull the lens cover off of the projector. lens. Warning Make sure you turn off the projector and unplug the power cord before attaching or removing a lens. -
Page 30: Attaching And Removing A Lens
Attaching and Removing a Lens Pinch the lock lever and move it to the Release position. When using one of the following lenses, attach the lens connector cap to protect the port. • ELPLS04 • ELPLU02 • ELPLR04 • ELPLW04 •... - Page 31 Attaching and Removing a Lens Insert the lens straight into the projector's lens socket with the white Hold the lens firmly, then pinch the lock lever and move it to the Lock dot facing up. position. Check that the lens cannot be detached.
- Page 32 Attaching and Removing a Lens Reattach the stopper. If projecting down, we recommend securing the lens cover with commercially available screws (M3×12mm). The lever is secured even without using the lever lock, but this If you are prompted when turning on the projector, select Yes to adds an additional measure of safety.
-
Page 33: Removing A Lens
If the message continues to be displayed, stop button for approximately 3 seconds to move the lens to the home using the projector, remove the power plug from the electrical outlet, and contact Epson for help. position. Turn off the projector and unplug the power cord. - Page 34 Attaching and Removing a Lens Pull the lens cover off of the projector. Hold the lens firmly as you pinch the lock lever and move it to the Release position. Remove the stopper, if necessary. Gently pull the lens straight out of the projector.
-
Page 35: Operating The Projector Power
Operating the Projector Power Follow the instructions in these sections to operate the projector power. • When Quick Startup is enabled in the projector's Extended menu, the projector becomes ready for use in several seconds g g Related Links the next time you press the power button. •... -
Page 36: Turning Off The Projector
Operating the Projector Power The projector beeps twice, the light source turns off, and the status • When the Direct Power On setting is set to On in the projector's indicator turns off. Extended menu, the projector turns on as soon as you plug it in. Note that the projector also turns on automatically in cases such as recovery from a power outage. -
Page 37: Wired Network Connection
Make sure you already connected the projector to your wired network using the LAN port. epson.sn • Epson iProjection software sets up your computer for network projection. It Press the [Menu] button, select the Network menu, and press [Enter]. also allows you to hold interactive meetings by projecting the user's computer screen over a network. - Page 38 • "Using the Displayed Keyboard" p.51 Epson iProjection. • Display LAN Info. lets you set the display format for the projector's network information. Use the displayed keyboard to enter numbers and characters.
-
Page 39: Wireless Network Connection
• Epson iProjection (iOS/Android) app allows you to project from iOS, Android, or Chromebook devices. You can download Epson iProjection for free from the App Store or Google Play. Any fees incurred when communicating with the App Store or Google Play are the responsibility of the customer. -
Page 40: Selecting Wireless Network Settings Manually
(User name is EPSONWEB; default password is the projector's serial number.) • Moderator Password lets you enter a four-digit number password for accessing the projector as a moderator using Epson iProjection. (No password is set by default.) • Projector Keyword lets you turn on a security password to prevent access to the projector by anyone not in the room with it. -
Page 41: Selecting Wireless Network Settings In Windows
Home screen, set the SSID Display setting or the IP Epson iProjection. Address Display setting to Off. • Display LAN Info. lets you set the display format for the projector's When you finish selecting settings, select Complete and follow the on- network information. -
Page 42: Setting Up Wireless Network Security
Wireless Network Connection Click the Wi-Fi icon on the menu bar at the top of the screen. Select the security settings to match your network settings. When connecting in Advanced connection mode, make sure Wi-Fi is Do one of the following according to the security you selected. turned on and select the network name (SSID) of the network the •... -
Page 43: Supported Client And Ca Certificates
• Make sure you have installed the latest version of Epson iProjection You can register these types of digital certificates. on your device. • You can download Epson iProjection for free from the App Store or Client Certificate (PEAP-TLS/EAP-TLS) Google Play. Any fees incurred when communicating with the App Store or Google Play are the responsibility of the customer. -
Page 44: Using A Usb Key To Connect A Windows Computer
After a few minutes, your computer image is displayed by the projector. USB key, you can quickly project images from the network projector. Set up the USB key using USB Key Setup Tool of the Epson iProjection When you have finished projecting wirelessly, select the Safely Remove Hardware option in the Windows taskbar, and then remove the USB (Windows) software. - Page 45 Wireless Network Connection g g Related Links • "Getting the Latest Version of the Documents" p.10...
-
Page 46: Secure Http
Secure HTTP You can use the HTTPS protocol to increase security between the projector Select Web Server Cert. and press [Enter]. and a Web browser communicating with it. To do this, you create a server certificate, install it on the projector, and turn on the Secure HTTP setting in Select Register and press [Enter]. - Page 47 Secure HTTP * You need to use your Web browser to enter more than 32 characters.
-
Page 48: Adjusting The Menu Settings
Adjusting the Menu Settings Follow the instructions in these sections to access the projector menu system and change projector settings. g g Related Links • "Home Screen" p.49 • "Using the Projector's Menus" p.50 • "Using the Displayed Keyboard" p.51 •... -
Page 49: Home Screen
Home Screen The Home screen feature allows you to easily select an image source and The Home screen disappears after 10 minutes of inactivity. access useful functions. You can display the Home screen by pressing the [Home] button on the remote control. The Home screen is also displayed when you turn on the projector and no signal is being input. -
Page 50: Using The Projector's Menus
Using the Projector's Menus You can use the projector's menus to adjust the settings that control how your Press [Menu] or [Esc] to exit the menus. projector works. The projector displays the menus on the screen. Press the [Menu] button on the control panel or remote control. You see the menu screen displaying the Image menu settings. -
Page 51: Using The Displayed Keyboard
Using the Displayed Keyboard You can use the displayed keyboard to enter numbers and characters. Text type Details Numbers 0123456789 Use the arrow buttons on the control panel or remote control to Alphabet ABCDEFGHIJKLMNOPQRSTUVWXY highlight the number or character you want to enter and press the [Enter] button. -
Page 52: Using Basic Projector Features
Using Basic Projector Features Follow the instructions in these sections to use your projector's basic features. Execution Method Extended > Display > Messages g g Related Links • "Setting Up the Projector" p.52 • "Projecting Images" p.53 Standby Confirmation • "Adjusting the Image Position and Shape" p.55 When set to Off, you can turn off the projector simply by pressing the power •... -
Page 53: Indicators
Using Basic Projector Features Indicators • Menus and messages are displayed or hidden each time you press the button. When set to Off, you can turn off the indicator lights on the projector. • If On-Screen Display is enabled, you cannot operate the projector's menu (except to switch the color mode and input source). -
Page 54: A/V Mute
Using Basic Projector Features A/V Mute Split Screen You can temporarily turn off the projected image and sound. Any sound or You can use the Split Screen feature to simultaneously project two images video action continues to run, however, so you cannot resume projection at from different image sources. -
Page 55: Test Pattern
You can use the following tool to create content that can be played in Content Test Pattern Playback mode. You can display a test pattern to adjust the projected image without • Epson Projector Content Manager connecting a computer or video device. • Epson Web Control • Epson Creative Projection Execution Method Settings >... -
Page 56: Lens Shift
Using Basic Projector Features • "Point Correction" p.58 • Wait 20 minutes after turning on the projector before setting the lens • "Screen Type" p.58 shift for maximum accuracy. • "Projection" p.58 • When adjusting the image height, position the image lower than where you want it to be and then move it up. -
Page 57: H/V-Keystone
Using Basic Projector Features Execution Method Curved Surface • Press the [Aspect] button on the remote control. You can correct the corners and sides of an image projected on a curved • Change the projector's menu: surface with the same radius. Signal >... -
Page 58: Point Correction
Using Basic Projector Features Execution Method Point Correction Extended > Projection This feature divides the projected image into a grid and corrects the distortion in 0.5 pixel increments by moving the selected point of intersection from side You can change the projection mode to flip the image over top-to- to side and up and down. -
Page 59: Color Mode
Using Basic Projector Features Image Enhancement • If you installed an optional short throw lens, you may need to first focus on the center of your screen and then correct any distortion in You can adjust the resolution of the image to reproduce a clear image with an the surrounding area. -
Page 60: Rgbcmy
Using Basic Projector Features • "Edge Blending" p.60 RGBCMY • "Black Level" p.61 You can adjust the Hue, Saturation, and Brightness of each color R (red), G • "Scale" p.61 (green), B (blue), C (cyan), M (magenta), Y (yellow) individually. •... -
Page 61: Maintaining The Projector Quality
Using Basic Projector Features Extended > Multi-Projection > Edge Blending Extended > Multi-Projection > Scale Black Level Color Matching You can adjust the brightness and color tone of the areas where the images do You can match the display quality of multiple projectors that will project next not overlap to create a seamless image. -
Page 62: Color Uniformity
Using Basic Projector Features Execution Method g g Related Links • "Memory" p.62 Extended > Display > Panel Alignment • "Schedule Settings" p.62 • "Button Lock" p.63 Color Uniformity • "Password Protection" p.64 If the color tone of the image is uneven, you can adjust the color tone balance. Memory You can save customized settings and then select the saved settings whenever you want to use them. -
Page 63: Button Lock
Using Basic Projector Features The remote control buttons lock feature locks the following buttons. Button Lock Button lock security to block operation of the projector using the buttons on the control panel or remote control. Even if you can lock the buttons on the control panel, you can still use the remote control as usual. -
Page 64: Password Protection
"The projector's operation will be locked. Contact Epson as described in your documentation." is displayed and the projector does not accept any more password entries. Contact Epson for help. You can set up the following types of password security using one shared password: •... -
Page 65: Copying Menu Settings Between Projectors (Batch Setup)
Epson takes no responsibility for batch setup failures and associated repair costs • by using a USB flash drive due to power outages, communication errors, or other problems that may cause such failures. -
Page 66: Transferring Settings From A Computer
Copying Menu Settings Between Projectors (Batch Setup) Transferring Settings From a Computer Caution You can copy menu settings from one projector to another of the same model Do not disconnect the power cord or the USB flash drive from the projector while the file is being written. -
Page 67: Batch Setup Error Notification
Stop using the projector, remove the power plug from • Status: Blue - flashing The computer recognizes the projector as a removable disk. the electrical outlet. Contact Epson for help. fast • Laser: Orange - flashing Copy the batch setup file (PJCONFDATA.bin) that you saved to your fast computer to the top level folder of the removable disk. -
Page 68: Menu Settings
Menu Settings Refer to these sections to learn more about your projector's settings. g g Related Links • "Image Menu" p.69 • "Signal Menu" p.75 • "Settings Menu" p.79 • "Extended Menu" p.88 • "Network Menu" p.101 • "Info Menu" p.110 •... -
Page 69: Image Menu
Image Menu Settings on the Image menu let you adjust the quality of your image. The Dynamic available settings depend on the currently selected color mode and input This is the brightest mode. Ideal for use in a bright room. source. -
Page 70: Color Saturation
Image Menu When Color Mode is set to Dynamic, the set Color Temp. may differ from Color Saturation the actual Color Temp. of the light from the projector. Use this menu as a guide. Image > Color Saturation G-M Correction You can adjust the intensity of the image colors. -
Page 71: Image Preset Mode
Image Menu • You cannot select this setting when the Aspect setting is set to • To minimize delays, select Off. Native in the projector's Signal menu. • If you select Off, you cannot set the other items in the Image •... -
Page 72: Noise Reduction
Image Menu Video Super-resolution For most video images. Film/Auto Image > Image Enhancement > Super-resolution For movies, computer graphics, and animation. You can reduce blurring when projecting low resolution images. Fine Line Adjust Setting is only displayed in the following cases. Higher values enhance details such as hair or fabric patterns. -
Page 73: Scene Adaptive Gamma
Image Menu You can reset the settings on the Image Enhancement setting to their default • Project a still picture to adjust the Gamma. You cannot adjust the preset settings. Gamma correctly when projecting movies. • If you set the Color Mode setting to DICOM SIM in the projector's You cannot select this setting when the Image Preset Mode setting is Image menu, select the adjustment value according to the projection set to Off. -
Page 74: Lights-Out Control
Image Menu Lights-Out Control Image > Lights-Out Control You can set the light source to turn off automatically. Lights-Out Control Set to On to automatically turn off the light source when the signal level falls below the reference level for a set period of time. Lights-Out Signal Level Set the brightness level for the video signal being controlled. -
Page 75: Signal Menu
Signal Menu Normally, the projector automatically detects and optimizes the input signal Manual settings. If you need to customize the settings, you can use the Signal menu. You can specify the resolution. This is ideal when connected computer is The available settings depend on the currently selected input source. The fixed. -
Page 76: Tracking
Signal Menu Native Sync. Displays images as is (aspect ratio and resolution are maintained). Areas that exceed the edges of the projected screen are not projected. Signal > Sync. You can adjust the signal to eliminate fuzziness or flickering in computer •... -
Page 77: Blanking
Signal Menu You can change the projected image ratio to make the edges visible by a Dynamic Range selectable percentage or automatically. Signal > Dynamic Range Setting is only displayed when the input signal is component signal. You can set the video range to match the setting of input source. Select Auto to automatically identify the dynamic range of the input signal. -
Page 78: Edid
Signal Menu Scale Mode EDID Select how to change the magnification. • Zoom Display to maintain the image position and aspect ratio. Signal > Advanced > EDID • Full Display to adjust the image according to the image position and Even if you setup multiple displays with different resolutions, you can set the aspect ratio. -
Page 79: Settings Menu
Settings Menu Options on the Settings menu let you customize various projector features. H/V-Keystone Manually corrects distortion in the horizontal and vertical directions g g Related Links independently. If the image aspect is incorrect, adjust the image balance by • "Geometry Correction" p.79 using V-Balance and H-Balance. -
Page 80: Split Screen
Settings Menu direction. You can move the points on the grid between 0.5 to 600 pixels in Audio Source any direction, including outside the projection range. Select the screen from which you want to hear audio. Memory When you select Auto, audio is output from the enlarged screen. If the You can save the shape of an image you have adjusted and load it when screen sizes is set to Equal, audio is output from the screen on the left. -
Page 81: Volume
Settings Menu • Even if you set Display Background to Logo in the projector's Extended • Device -> PJ: automatically turns on the projector when you turn on the menu, the blue screen appears when no image signal is being input. connected device. -
Page 82: Lens Lock
Settings Menu Extended > Multi-Projection > Screen Matching > Brightness Settings > Lens Lock Brightness Level You can select the Custom brightness level you want. Settings > Lock Setting > Lens Lock You can disable [Lens Shift], [Zoom], and [Focus] button operations on the Setting is only displayed when Light Source Mode is set to Custom. -
Page 83: Light Source Operation Time
Settings Menu Constant Brightness Usage Hours The number of hours displayed as Estimated Remains is just a guide. If you turn on Constant Brightness, the number of hours the projector can maintain constant brightness is displayed as Estimated Remains. Light Source Operation Time The light source operation time varies depending on the Brightness Level setting and whether Constant Brightness is on or off. -
Page 84: Remote Receiver
Settings Menu Constant Brightness on You can turn on all remote receivers by holding down the [Menu] button on the remote control for approximately 15 seconds. User Button Settings > User Button You can assign the following menu options to the [User] buttons on the Brightness level remote control for one-touch access. -
Page 85: Memory
Settings Menu Load Memory • Press the [Page] button to change the test pattern while displaying a You can load the saved memory. The settings applied to the current image test pattern. are replaced with the settings in the memory. •... -
Page 86: Creating Playlists Using Epson Web Control
• You can use the following methods to create playlists. • Using Epson Projector Content Manager on your computer. Go to the Epson Web Control screen by entering the projector's IP You can download and install Epson Projector Content Manager from the following Web site. -
Page 87: Content Playback Mode Restrictions
• You can play the playlist from the Remote or Playlist screen. • User Button • When you want to specify when the playlist starts and finishes, schedule the playlist using the Epson Projector Content Manager software. g g Related Links •... -
Page 88: Extended Menu
Extended Menu Settings on the Extended menu let you customize various projector setup • "HDBaseT" p.95 features. • "Color Calibration" p.95 • "Projector ID" p.96 g g Related Links • "Projector Grouping" p.96 • "Home Screen" p.88 • "Tiling" p.96 •... -
Page 89: Message Position
Extended Menu Message Position Standby Confirmation Extended > Display > Message Position Extended > Display > Standby Confirmation You can select the position of messages displayed on the screen. You can display a confirmation message after pressing the [Standby] button on the remote control. -
Page 90: Panel Alignment
• The Screen Type setting is not supported by the Message default settings. Broadcasting feature in the Epson Projector Management software. • You cannot adjust the screen position if you set the Screen Type • Image quality may decline after performing alignment. -
Page 91: Osd Rotation
Extended Menu Reset • If the User's Logo Protection setting in the Password Protection You can reset all adjustment values on the Color Uniformity menu to setting menu is set to On, set to Off before saving the user's logo. their default settings. -
Page 92: Sleep Mode
Extended Menu Set to On to detect the input signal automatically and project images when Sleep Mode there is no input signal. Extended > Operation > Sleep Mode • Setting is only displayed when Content Playback is set to Off. Set to On to automatically turns off the projector after an interval of •... -
Page 93: Usb Power
Extended Menu You can control the beep that sounds when you turn the projector on or off. USB Power Extended > Operation > USB Power Indicators Set to Always On to continue supplying power to the streaming media player when the projector is not projecting images. This lets the streaming media Extended >... -
Page 94: Ac Voltage Monitoring
Extended Menu Internet Time AC Voltage Monitoring Turn on this setting to update the date and time automatically through an Internet time server. Extended > Operation > Advanced > AC Voltage Monitoring Set to On to monitor the projector's voltage status and obtain a log when a When you set Schedule Protection to On in the Password Protection warning, disconnection, or power blockage occurs. -
Page 95: Standby Mode
Extended Menu • Available only when Quick Startup is set to Off. • Control Communications is only displayed when Extron XTP is set to Off. • When set to Always On, you can move the lens position to the home •... -
Page 96: Projector Id
Extended Menu You can project the same image from up to 9 projectors to create one large • You are projecting on a matte white diffusion screen that is flat and even. image using the Tiling feature. • The projector is placed so it squarely faces the screen, not at an angle. Tiling •... -
Page 97: Black Level
Extended Menu Top Edge/Bottom Edge/Right Edge/Left Edge Area Correction Select the edge you want to blend on each projector. If the tone for some areas does not match, you can adjust it individually. • Blending to turn on the Edge Blending feature for the selected edge. Reset You can reset all adjustment values on the Black Level menu to their Gradation is applied to the blending range. -
Page 98: Conditions For Screen Matching
Extended Menu If your projectors are not on a network or automatic adjustment was Color Matching unsuccessful, you can adjust the tint and brightness of multiple projectors manually. Extended > Multi-Projection > Screen Matching > Color Matching You can adjust the tint and brightness for the color tone from white to black. •... -
Page 99: Conditions For Simple Stacking
Extended Menu The projector for which you perform this feature becomes a master • The illuminance ratio on the screen surface when projecting an all-white projector, and the adjustment is performed based on the projector's image screen and when projecting an all-black screen is 8:1 or more. position and shape. -
Page 100: Schedule Status Icons
Extended Menu g g Related Links • Auto Source Search • "Schedule Status Icons" p.100 • USB Power • Release A/V Mute Schedule Status Icons • Lens Type The icons in the calender are described in the following table. • A/V Settings •... -
Page 101: Network Menu
Network Menu Settings on the Network menu let you view network information and set up • "Trap IP Address 1/Trap IP Address 2" p.107 the projector for controlling over a network. • "Community Name" p.107 • "PJLink Notification" p.108 When you set Network Protection to On from the Password Protection •... -
Page 102: Projector Name
Network > Remote Camera Access Setting is only displayed when Content Playback is set to Off. You can display the image taken by the optional external camera using Epson Web Control. Remote Camera Access Set to On to enable the Remote Camera Access function. -
Page 103: Projector Keyword
You can select the display format for the projector's network information. point. By simply reading the QR code with Epson iProjection, you can connect the mobile device to the projector through a network. The default value is Text & QR Code. -
Page 104: Ssid
Network Menu SSID • WPA2-PSK is available only for Quick connection mode. • WPA3-PSK, WPA2/WPA3-PSK, WPA3-EAP, and WPA2/WPA3- Network > Network Configuration > Wireless LAN > SSID EAP are available only for Advanced connection mode. • When the Mail Notification is set to Off, you cannot set security. You can set the SSID (network name) of the wireless LAN system the •... -
Page 105: Channel
Network Menu You can set the EAP settings for WPA3-EAP and WPA2/WPA3-EAP • You can enter up to 32 alphanumeric characters long in the projector security. menu. To enter more than 32 characters, use your Web browser. EAP Type • Password is only displayed when EAP Type is set to PEAP or EAP- Select the protocol for authentication. -
Page 106: Ssid Display
IPv6 is supported to monitor and control the projector over a network • The email address set in From as the mail sender using Epson Web Control and PJLink. • Epson Projector in the subject line Auto Configuration • The name of the projector experiencing a problem Set to On to assign addresses automatically according to the Router •... -
Page 107: Smtp Server
Network Menu Enter the e-mail address to receive notifications up to 64 alphanumeric SMTP Server characters long. (Do not use " ( ) , : ; < > [ \] spaces.) And select the alerts you want to receive. Network > Network Configuration > Notifications > SMTP Server Enter the IP address for the projector's SMTP server using 0 to 255 for each You can enter up to 32 alphanumeric characters long in the projector address field. -
Page 108: Pjlink Notification
Protected Set to On to enable the Web API function. Select when performing a digest authentication using Web Control Password. You need to install the latest version of the Epson Projector Authentication Management software. You can set the security for your projector to use during Web API communications. -
Page 109: Priority Gateway
Network > Network Configuration > Others > Message Broadcasting Network > Network Configuration > Others > AMX Device Discovery Set to On to receive the message delivered by Epson Projector Management. Set to On when you want to allow the projector to be detected by AMX See the Epson Projector Management Operation Guide for details. -
Page 110: Info Menu
Displays the name of the port to which the current input source is If you cannot resolve the problem, contact your network administrator or connected. Epson for technical support. Input Signal Displays the input signal setting of the current input source. -
Page 111: Light Source Info
The internal battery that saves the projector's date and time settings communication status, then turn the projector off and then on again. 04FE is running low. Contact Epson for help. 0484 Communication with computer was disconnected. Restart the network software. -
Page 112: Voltage Warning Info
Info Menu You can view the projector's basic status information. When you select Detail when a Warning or Error is displayed, you can check detailed logs for before and after the error was detected. Each category contains the following information. Status Information The projector's operating status. -
Page 113: Reset Menu
Reset Menu Settings on the Reset menu let you reset certain projector settings to their Light Source Calibration default values. Reset > Light Source Calibration g g Related Links • "Reset All Memories" p.113 The light source calibration process optimizes the color balance of the •... -
Page 114: Nfc Settings
Reset Menu * Only when you set the User's Logo Protection setting to On in the NFC Settings Password Protection setting menu. Reset > NFC Settings You can prevent scanning to the projector's settings. Reset All (Factory Default) NFC Write Protection Prevents anyone from scanning the projector's settings. - Page 115 Reset Menu • Release A/V Mute • Beep • A/V Settings • Standby Mode • Sleep Mode • Language • Wireless Mode • DHCP (in the Wired LAN menu) • Command Communication Password Setting You can set a password when resetting values to the user default setting values or to their factory default values.
-
Page 116: Adjusting Projector Features
Adjusting Projector Features Follow the instructions in these sections to use your projector's adjustment features. g g Related Links • "Multi-Projection Features" p.117 • "External Camera Usage" p.122... -
Page 117: Multi-Projection Features
By using the auto adjustment function that uses the optional external camera This section explains how to perform basic settings before installing the and the Epson Project Professional Tool software you can perform virtually projector and preparing in advance for easier operations later. -
Page 118: Assigning A Master Projector
Multi-Projection Features Assigning a Master Projector • If you do not install the optional external camera or you were unsuccessful performing color calibration, perform Color Select one projector to be the basis for adjustment. Uniformity. • If you set Run Periodically to On in the Light Source Calibration Display test patterns from all projectors and select the one that has less color menu, the color adjusted in multi-projection may be changed due to unevenness as the master projector. -
Page 119: Connecting Projectors To A Network
You can project one large image from up to 15 projectors. • "Lens Shift" p.56 • "Zoom" p.56 Start the Geometry Correction Assist - Tiling Function wizard in the Epson Projector Professional Tool software. • "Focus" p.58 Setting > Camera Assist > Geometry Correction Assist > Tiling > Start... -
Page 120: Stacking
9 minutes. • If the Epson Projector Professional Tool software is not available, • If you have not installed the optional external camera or the Epson start automatic adjustment on the master projector using the Projector Professional Tool software is not available, select the following settings from the Multi-Projection setting in the projector's menu. - Page 121 Multi-Projection Features • Adjust the overall tint of the image. Image > White Balance We recommend displaying the following test patterns: Gray Bars V, Gray Bars H, and White...
-
Page 122: External Camera Usage
By adjusting the approximate size and position of your image, the projectors automatically overlap these images to create one image. If you do not have access to the Epson Projector Professional Tool software, you can easily and quickly create a bright image by using the Simple... - Page 123 External Camera Usage Extended > Multi-Projection > Simple Stacking • Screen Matching You can correct differences in the tint and brightness between projectors to optimize the display quality of the combined image. • Color Calibration When the color tone of the screen declines over time, you can automatically adjust the color tone of the entire screen based on the default color settings.
-
Page 124: Monitoring And Controlling The Projector
Monitoring and Controlling the Projector Follow the instructions in these sections to monitor and control the projector over a network. g g Related Links • "Projector Monitoring and Control Options" p.125 • "Accessing a Networked Projector Using a Web Browser" p.128... -
Page 125: Projector Monitoring And Control Options
Related Links Epson Projector Management • "Accessing a Networked Projector Using a Web Browser" p.128 Epson Projector Management software (Windows only) lets you monitor and control your projector through the network. See the Epson Projector SNMP Management Operation Guide for instructions. -
Page 126: Esc/Vp.net Commands
You can check the additional information on the PJLink support in the connect the projector with version 2.0 or 1.0. Use Monitor Password for projector's Specifications. version 1.0. You can set Monitor Password in Epson Web Control. Network > Network Configuration > Others > Command Communication... -
Page 127: Web Api
Projector Monitoring and Control Options You can access the Crestron Connected operation window from Epson Web Control. You need to enable Crestron Connected in the projector's Network menu before you can use Crestron Connected. Network > Network Configuration > Others > Crestron Connected •... -
Page 128: Accessing A Networked Projector Using A Web Browser
• In Content Playback mode Start your Web browser on the computer or device. Go to the Epson Web Control screen by entering the projector's IP address into the browser's address box. When entering an IPv6 address, wrap the address with [ and ]. -
Page 129: Web Control Options
Network > Network Configuration > Basic > Remote Password • You may need to log in to access some of the options on the Epson Web Control screen. If you see a log in window, enter your user name and password. - Page 130 Options on the OSD Control Pad screen allow you to display the projector's setting menus and select them moving your finger or mouse on the pad. Returns to the Epson Web Control screen. Returns to the Epson Web Control screen.
- Page 131 Accessing a Networked Projector Using a Web Browser Lens Shift screen Displays the Memory screen. Zoom screen The blue square displays the current image position and the red square displays the new image position. Displays the vertical image position; select to change the value. Zoom adjustment slider.
- Page 132 Accessing a Networked Projector Using a Web Browser Test Pattern screen Memory screen Displays available test patterns; select to project a test pattern. Overwrites your current settings with saved settings. Turns off test pattern display. Saves your current settings to memory. Displays a list of saved memories.
- Page 133 Takes a picture of the projected image using the camera on the front of the projector. Adjusts the image exposure. Zooms in or out on the image you captured. Returns to the Epson Web Control screen. Advanced Displays a list of monitored settings. The Advanced screen allow you to select the projector's settings.
- Page 134 • Event ID • HDBaseT Signal Level • Antenna Level You can select the following settings only with Epson Web Control. • Monitor Password (up to 16 alphanumeric characters) (only when Command Communication is set to Compatible) • IPv6 Settings (manual) •...
- Page 135 Select the arrow at the bottom-right to display the following screen. Adjusts the speaker volume. Screen displayed while projecting playlist (only in Content Playback mode) Returns to the Epson Web Control screen. Turns the projector on or off. Selects the input source. (The available sources vary depending on your projector model.)
- Page 136 Options on the Playlist screen allow you to select the playlist you want to play from the list, and create or edit playlists. Create or edit playlist screen (only in Content Playback mode) Returns to the Epson Web Control screen. Edits the playlist name.
- Page 137 Registers the playlist as favorites. If you want to add the .mp4 and .mov files to the playlist, use the Epson Projector Content Manager software or the Epson Creative When registering favorites, you can quickly start playback of the favorite playlist Projection app.
- Page 138 Returns to the Epson Web Control screen. Turns the time table on or off. You can specify when each playlist starts and finishes using the time table feature in the Epson Projector Content Manager software. For details, see the Epson Projector Content Manager Operation Guide.
-
Page 139: Maintaining The Projector
Maintaining the Projector Follow the instructions in these sections to maintain your projector. g g Related Links • "Projector Maintenance" p.140 • "Cleaning the Lens" p.141 • "Cleaning the Projector Case" p.142 • "Air Filter and Vent Maintenance" p.143... -
Page 140: Projector Maintenance
The only parts you should replace are the air filter, remote control batteries, and lens. If any other part needs replacing, contact Epson or an authorized Epson servicer. Warning Before cleaning any part of the projector, turn it off and unplug the power cord. -
Page 141: Cleaning The Lens
Cleaning the Lens Clean the projector's lens periodically, or whenever you notice dust or smudges on the surface. • To remove dust or smudges, gently wipe the lens with lens-cleaning paper. If the lens is very dirty, use a vacuum cleaner or a air blower to remove any dust or smudges, and wipe the lens. -
Page 142: Cleaning The Projector Case
Cleaning the Projector Case Before cleaning the projector case, turn off the projector and unplug the power cord. • To remove dust or dirt, use a soft, dry, lint-free cloth. • To remove stubborn dirt, use a soft cloth moistened with water and mild soap. -
Page 143: Air Filter And Vent Maintenance
0.04 mg/m3 or less.) Attention If regular maintenance is not performed, your Epson projector will notify you when the temperature inside the projector has reached a high level. Do not wait until this warning appears to maintain your projector filter as prolonged exposure to high temperatures may reduce the life of your projector. - Page 144 Air Filter and Vent Maintenance Pull the air filter out of the projector. Attention Do not use excessive force when tapping the air filter, or it may crack and become unusable. Vacuum the front of the air filter (the side with the tabs) to remove any remaining dust.
-
Page 145: Replacing The Air Filter
Air Filter and Vent Maintenance Place the air filter in the projector as shown. Replace the air filter cover as shown and tighten the screws. Replacing the Air Filter You need to replace the air filter in the following situations: •... - Page 146 Air Filter and Vent Maintenance Loosen the screws and remove the air filter cover as shown (it is Pull the air filter out of the projector. attached with a tether). Dispose of used air filters according to local regulations. • Filter frame: Polypropylene •...
- Page 147 Air Filter and Vent Maintenance Place the new air filter in the projector as shown. Replace the air filter cover as shown and tighten the screws.
-
Page 148: Solving Problems
Solving Problems Check the solutions in these sections if you have any problems using the projector. g g Related Links • "Projection Problems" p.149 • "Projector Indicator Status" p.150 • "Projector Status Display Messages" p.153 • "Solving Image or Sound Problems" p.157 •... -
Page 149: Projection Problems
• The Help option on the Home screen can display information about common problems, if the projector is operating. • The solutions in this manual can help you solve many problems. If none of these solutions help, contact Epson for technical support. -
Page 150: Projector Indicator Status
• If the indicators display a pattern not listed in the table below, turn Status: Lit blue the projector off, unplug it, and contact Epson for help. Laser: Indicator status • When the Indicators setting is set to Off in the projector's Extended varies menu, all indicators are off under normal projection conditions. - Page 151 Refresh Mode is in progress. Power: Flashing blue Laser warning. varies s Reset > Refresh Mode Status: Indicator status Turn the projector off, unplug it, and contact Epson for Status: Flashing blue varies help. Laser: Flashing orange Laser: Flashing orange...
- Page 152 A fan or sensor has a problem. Power: Off Lens Shift error Status: Flashing blue Turn the projector off, unplug it, and contact Epson for Status: Flashing blue Turn the projector off, unplug it, and contact Epson for help. help.
-
Page 153: Projector Status Display Messages
Projector Status Display Messages You can monitor the projector's status and view error information in the Source category projector's Info menu. Information Description Info > Status Information Source Displays the source currently being used. Categories on the status display let you view information about the projector and its operation. - Page 154 Projector Status Display Messages Information Description Information Description Signal Mode Displays the signal mode. Projector Name Displays the name used to identify the projector when connected to a network. HDR Mode Displays the HDR mode. Connection Mode Displays the connection mode to use when connecting the EDID Mode Displays the EDID mode.
- Page 155 Description Main Display the projector's firmware version information. Temp Error A high temperature error occurred. You can check the following status in the Epson Projector Video2 Management software or the Projector Config Tool app. • Temp Error 2A Sub2 • Temp Error 2B •...
- Page 156 A sensor error occurred. Internal Error An internal error occurred. You can check the following status in the Epson Projector You can check the following status in the Epson Projector Management software or the Projector Config Tool app. Management software or the Projector Config Tool app.
-
Page 157: Solving Image Or Sound Problems
• If the projector does not respond when you press any buttons on the • "Displaying From a Mac Laptop" p.158 projector, an internal error may have occurred in the projector. Contact Epson for help. • Adjust the Brightness setting in the projector's Image menu. -
Page 158: Displaying From A Windows Laptop
Solving Image or Sound Problems Solutions When Only a Partial Image Appears Displaying From a Windows Laptop If the message "No Signal" is displayed when projecting from a laptop, you If only a partial computer image appears, try the following solutions: need to set up the Windows laptop to display on an external monitor. -
Page 159: Solutions When The Image Is Not Rectangular
Solving Image or Sound Problems • Adjust the Image Enhancement settings in the projector's Image menu. Solutions When the Image is not Rectangular Image > Image Enhancement > Noise Reduction Image > Image Enhancement > MPEG Noise Reduction If the projected image is not evenly rectangular, try the following solutions: Image >... -
Page 160: Solutions When The Image Brightness Or Colors Are Incorrect
• Press the [Color Mode] button on the remote control to try different color • The optional external camera may be defective. Contact Epson for help. modes for the image and environment. • Depending on the lens you installed, automatic adjustments may not be •... -
Page 161: Solutions When Simple Stacking Is Not Applied Correctly
• Check your computer or video source to make sure the volume is turned up • The optional external camera may be defective. Contact Epson for help. and the audio output is set for the correct source. - Page 162 • If the volume for the computer is set to the minimum while the projector is set to the maximum, the noise may be mixed. Turn up the computer's volume and turn down the projector's volume. (When you use Epson iProjection (Windows/Mac).)
-
Page 163: Solving Projector Or Remote Control Operation Problems
Also, when the projector wakes from standby status, the fans may cause an unexpected noise. This is not a malfunction. g g Related Links • The power cord may be defective. Disconnect the cord and contact Epson • "Solutions to Projector Power or Shut-Off Problems" p.163 for help. -
Page 164: Solutions To Password Problems
Provide the request code and proof of ownership for assistance in unlocking the projector. • If you set an Epson Web Control password and forgot the user ID or password, try entering the following: • User ID: EPSONWEB •... -
Page 165: Solutions To Problems In Content Playback Mode
Solutions to Problems in Content Playback Mode If you cannot play back a playlist correctly, try the following solutions: • Make sure Content Playback is set to On. Settings > Content Playback > Content Playback • Make sure the USB flash drive contains a playlist. •... -
Page 166: Solving Network Problems
Solving Network Problems Check the solutions in these sections if you have problems using the projector • If your Web browser is set up to connect via a proxy server, the Epson Web on a network. Control screen cannot be displayed. Make settings for a connection without using a proxy server. -
Page 167: Solutions When The Image Contains Static During Network Projection
Solving Network Problems Solutions When the Image Contains Static During Network Projection If the projected image contains static during network projection, try the following solutions: • Check for any obstacles between the access point, the computer, the mobile device, and the projector, and change their positions to improve communication. -
Page 168: Appendix
• "Optional Accessories and Replacement Parts" p.169 • "Screen Size and Projection Distance" p.171 • "Projector Specifications" p.180 • "Supported Features for Epson Projector Content Manager" p.183 • "List of Safety Symbols and Instructions" p.184 • "Laser Safety Information" p.186 •... -
Page 169: Optional Accessories And Replacement Parts
Optional Accessories and Replacement Parts The following optional accessories and replacement parts are available. Please ELPLM06 purchase these products as and when needed. ELPLM07 ELPLM08 * The following list of optional accessories and replacement parts is current as ELPLM09 of: April 2021. ELPLM10 Details of accessories are subject to change without notice and availability ELPLM11... -
Page 170: Mounts
Includes two wireless transmitters (ELPWT01) and one base unit (ELPBU01). Special expertise is required to suspend the projector from a ceiling. Wireless Transmitter ELPWT01 Contact Epson for help. Additional wireless transmitter for wireless presentation system. External Devices Document Camera ELPDC21 Use when projecting image such as books, OHP documents, or slides. -
Page 171: Screen Size And Projection Distance
Screen Size and Projection Distance Check the tables in these sections to determine how far to place the projector EB‑ ‑ PU2010B/EB‑ ‑ PU2010W: from the screen based on the size of the projected image. 16:10 g g Related Links •... - Page 172 Screen Size and Projection Distance ELPLW0 ELPLM0 Except ELPLM0 ELPLM0 ELPLU03 ELPLU02 Inche Width × ELPLU03 ELPLW0 ELPLW0 ELPLL07 Inche Width × ELPLU03 Height ELPLU04 ELPLW0 ELPLM1 ELPLM1 ELPLR04 Height S/ELPL ELPLM1 ELPLL08 ELPLW0 W05/ELP 323 × 207 - 251 154 - 186 385 - 526 248 - 347 278 - 391 786 - ELPLS04 LR04...
- Page 173 Screen Size and Projection Distance ELPLW0 ELPLM0 Except ELPLM0 ELPLM0 ELPLU03 ELPLU02 Inche Width × ELPLU03 ELPLW0 ELPLW0 ELPLL07 Inche Width × ELPLU03 Height ELPLU04 ELPLW0 ELPLM1 ELPLM1 ELPLR04 Height S/ELPL ELPLM1 ELPLL08 ELPLW0 W05/ELP 133 × 75 82 - 100 154 - 212 97 - 139 112 - 158 315 - 486...
- Page 174 Screen Size and Projection Distance ELPLX02 ELPLW0 ELPLM0 ELPLU02 Inche Width × ELPLU03 ELPLW0 ELPLW0 ELPLX02S Inches Width × Height Height ELPLU04 ELPLW0 ELPLM1 ELPLX02W ELPLX02WS 894 × 702 - 845 519 - 624 1295 - 841 - 933 - 2640 - 508 ×...
- Page 175 Screen Size and Projection Distance EB‑ ‑ PU1008B/EB‑ ‑ PU1008W/EB‑ ‑ PU1007B/EB‑ ‑ PU1007W/EB‑ ‑ PU1006W: ELPLW0 ELPLM0 16:10 ELPLU02 Inche Width × ELPLU03 ELPLW0 ELPLW0 Height ELPLU04 ELPLW0 ELPLM1 ELPLX01 258 × 227 - 274 169 - 203 422 - 576 271 - 379 305 - 429 863 - ELPLX01S 1311...
- Page 176 Screen Size and Projection Distance ELPLM0 ELPLX01 ELPLM0 Except ELPLX01S ELPLL07 Inche Width × ELPLM0 Inches Width × Height ELPLM1 ELPLR04 ELPLX01W Height ELPLM1 ELPLL08 ELPLR04 ELPLX01WS ELPLS04 332 × 187 10 - 47 215 × 1046 - 311 - 500 465 - 751 1555 - -158 - 24 443 ×...
- Page 177 Screen Size and Projection Distance ELPLW0 ELPLM0 ELPLM0 ELPLM0 ELPLU02 Inche Width × ELPLU03 ELPLW0 ELPLW0 Except ELPLL07 Inche Width × ELPLM0 Height ELPLU04 ELPLW0 ELPLM1 ELPLM1 ELPLR04 Height ELPLM1 ELPLL08 ELPLR04 ELPLS04 443 × 393 - 473 291 - 350 728 - 992 470 - 653 526 - 738 1488 - 2254 266 ×...
- Page 178 Screen Size and Projection Distance ELPLX01 ELPLW0 ELPLM0 ELPLU02 Inche Width × ELPLU03 ELPLW0 ELPLW0 ELPLX01S Inches Width × Height Height ELPLU04 ELPLW0 ELPLM1 ELPLX01W ELPLX01WS 406 × 434 - 522 321 - 386 803 - 519 - 720 580 - 813 1640 - 305 ×...
- Page 179 Screen Size and Projection Distance ELPLM0 ELPLM0 Except ELPLL07 Inche Width × ELPLM0 ELPLM1 ELPLR04 Height ELPLM1 ELPLL08 ELPLR04 ELPLS04 244 × 1430 - 424 - 681 635 - 2124 - -215 - 32 2169 1023 2972 305 × 1793 - 532 - 853 795 - 2662 -...
-
Page 180: Projector Specifications
Projector Specifications Product name EB‑PU2010B/EB‑PU2010W/EB‑PU1008B/EB‑PU1008W Light source output power EB‑ ‑ PU2010B/EB‑ ‑ PU2010W/EB‑ ‑ PU1008B/EB‑ ‑ PU1008 /EB‑PU1007B/EB‑PU1007W/EB‑PU1006W Up to 176 W Dimensions 545 (W) × 164 (H) × 436 (D) mm (not including raised EB‑ ‑ PU1007B/EB‑ ‑ PU1007W: section) Up to 132 W Projection system... - Page 181 Projector Specifications Scanning frequency Analog: Standby power Communication On: 2.0 W consumption Horizontal: 31.25 to 92 kHz Communication Off: 0.5 W Vertical: 50 to 85 Hz Thermal output (max.) EB‑ ‑ PU2010B/EB‑ ‑ PU2010W/EB‑ ‑ PU1008B/EB‑ ‑ PU1008 HDMI/HDBaseT/DVI-D: Horizontal: 15 to 135 kHz 100 to 120 V area: 1900.6 BTU/h Vertical: 23.98/24/25/29.97/30/50/59.94/60 Hz 220 to 240 V area: 1819.0 BTU/h...
- Page 182 Projector Specifications Network RJ45 (100BASE-TX/10BASE-T) x 1, USB connector (A type) x 1 (wireless LAN unit Corresponding to IEEE802.11a(5GHz)/b(2.4GHz)/g(2.4GHz)/n(2.4GHz、 5GHz)) * Approximate time until the light source brightness decreases to half of its original value. (Assuming the projector is being used in an environment containing airborne particles of 0.04 mg/m3 or less.
-
Page 183: Supported Features For Epson Projector Content Manager
Supported Features for Epson Projector Content Manager Your projector supports the following features and options of the Epson Projector Content Manager software. Features/Options Simultaneous playback Save the playlist to the projector via a network ✓ Settings > Video Format Auto Select ✓... -
Page 184: List Of Safety Symbols And Instructions
List of Safety Symbols and Instructions The following table lists the meaning of the safety symbols labeled on the No. Symbol mark Approved Description equipment. standards — The same as No. 8. No. Symbol mark Approved Description standards IEC60417 Battery, general IEC60417 "ON"... - Page 185 List of Safety Symbols and Instructions No. Symbol mark Approved Description No. Symbol mark Approved Description standards standards IEC60417 Class II equipment IEC60417 Caution (Sharp Corners) No. 5172 To identify equipment meeting the No. 6043 To indicate sharp corners that should safety requirements specified for Class not be touched.
-
Page 186: Laser Safety Information
Laser Safety Information This projector is a Class 1 laser product that complies with the IEC/EN60825- Inside 1:2014 international standard for lasers. Follow these safety instructions when using the projector. Warning • Do not open the projector's case. The projector contains a high-powered laser. •... - Page 187 Laser Safety Information • When turning on the projector at a distance using the remote control, make sure no one is looking into the lens. • Do not allow small children to operate the projector. Children must be accompanied by an adult. •...
-
Page 188: Hazard Distance According To Iec62471-5
Hazard Distance according to IEC62471-5 When using projectors and interchangeable lenses that change to Risk Group EB‑ ‑ PU2010B/EB‑ ‑ PU2010W: 3, no direct exposure to the beam is permitted. Operators must control access to the beam within the hazard distance or install the product at a height that will prevent eye exposure within the hazard distance. -
Page 189: Notices
• Increase the separation between the equipment and receiver. • Connect the equipment into an outlet on a circuit different from that to We: Epson America, Inc. which the receiver is connected. Located at: 3131 Katella Avenue, Los Alamitos, CA •... -
Page 190: Indication Of The Manufacturer And The Importer In Accordance With Requirements Of Eu Directive
Address: Westside, London Road, Hemel Hempstead, Hertfordshire, HP3 9TD, United Kingdom Trademarks http://www.epson.co.uk EPSON is a registered trademark, EXCEED YOUR VISION and its logos are registered trademarks or trademarks of Seiko Epson Corporation. Mac, OS X, and macOS are trademarks of Apple Inc. -
Page 191: Copyright Notice
App Store is a service mark of Apple Inc. Neither Seiko Epson Corporation nor its affiliates shall be liable to the Chrome, Chromebook, and Google Play are trademarks of Google LLC. purchaser of this product or third parties for damages, losses, costs, or...
Need help?
Do you have a question about the EB-PU2010B and is the answer not in the manual?
Questions and answers