Advertisement
Quick Links
HAMPTON COLLECTION
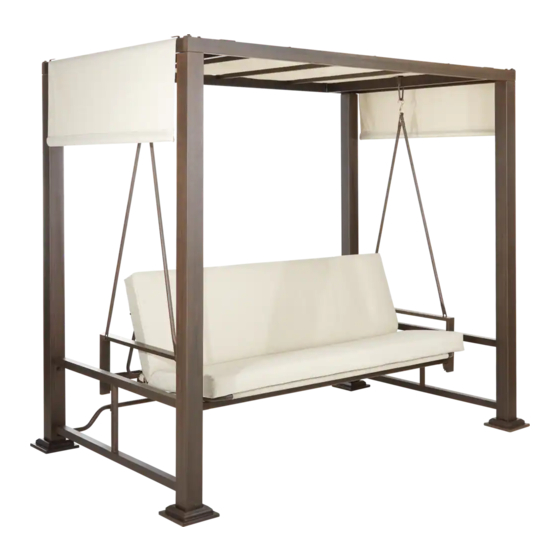
Day Bed and Swing
MODEL NO. 088-1934-4
Attention:
Canopy is for temporary use as sunshade only.
Please remove when not in use.
ASSEMBLY INSTRUCTIONS
Toll-free: 1-888-670-6684
IMPORTANT: Please read this manual carefully before beginning assembly of this product.
Keep this manual for future reference.
Advertisement

Subscribe to Our Youtube Channel
Summary of Contents for Canvas HAMPTON 088-1934-4
- Page 1 HAMPTON COLLECTION Day Bed and Swing MODEL NO. 088-1934-4 Attention: Canopy is for temporary use as sunshade only. Please remove when not in use. ASSEMBLY INSTRUCTIONS Toll-free: 1-888-670-6684 IMPORTANT: Please read this manual carefully before beginning assembly of this product. Keep this manual for future reference.
-
Page 2: Set Up Your Furniture Properly
MODEL NO. 088-1934-4 TABLE OF CONTENTS Important Safety Instructions Parts List Assembly Cleaning and Maintenance Warranty • SET UP YOUR FURNITURE PROPERLY Ensure that all parts are assembled properly and fully tightened as per the instructions. When placing in the desired location, ensure that all legs are resting on the same surface. You may adjust the legs levellers as required to ensure that the item stands in a rigid position. - Page 3 Leg post - 4 Post base - 4 Side panel - 2 Base plate - 4 Top crossbar - 2 M6*12 bolt - 8 + 1 spare M6*15 bolt - 4 Top crossbar - 2 M8*20 bolt - 20 + 2 spares Top crossbar - 2 M8*75 bolt - 8 + 1 spare Canopy crossbar - 3...
- Page 4 MODEL NO. 088-1934-4 Let us help you! DO NOT RETURN YOUR PRODUCT TO THE STORE. CALL US FIRST! 1-888-670-6684 If you have questions regarding your product, require warranty assistance, or have damaged or missing parts, please call our customer service toll-free helpline. Contact us for assistance; we’re here to help. IMPORTANT: Please read and understand this manual before any assembly.
- Page 5 Step 1 Requires 1, 17, 18, A. Insert two bolts A through the base plate 18 and post base 17 , and secure into the leg post 1. Tighten completely. Repeat procedure for the remaining three legs. Note:The side of base plate with sunk hole should be towards outside and the bolt should be level with the base plate.
- Page 6 MODEL NO. 088-1934-4 Step 3 Requires 1, 3, D, G. Attach the top crossbar 3 to the leg 1. Insert a bolt D through a metal washer G, through the top crossbar 3 and secure into the leg post 1. Do not tighten completely.
- Page 7 Step 5 Requires 3, 5, C, G. to the top crossbars 3. Insert a bolt through a metal washer G, Attach top crossbar then through the bracket on the top crossbar 5, and secure into the top crossbar 3. Do not tighten completely. Repeat procedure for the other side and other top crossbar 5.
- Page 8 MODEL NO. 088-1934-4 Step 7 Requires 2, 7, B, F, K, L, M. Place the rear crossbar between the side panels 2. Insert a bolt through a metal washer F, through the rear crossbar 7, and secure into the side panel 2. Do not tighten completely.
- Page 9 Step 9 Requires 8, 9, 12, E, G, H, I, K, M. Unfold the seat and back and lay it on top of the assembled frame. Line up the holes. Insert a bolt (from outside to inside) through the bracket of the arm, through a plastic washer I, through the side bar on the seat and back 12, through a metal washer and secure with a nut H.
- Page 10 MODEL NO. 088-1934-4 Step 11 Requires 5, 8, 9, 13, J, N. First, set the hanging bars into “S” hook. Note: the side with “TOP” label towards “S” hook. Then the other ends of hanging bars into the pin of the arms. Repeat procedure for the other remaning two hanging bars.
- Page 11 Step 13 Requires 1,14, 15. Insert the canopy side bar into the canopy as per drawing. Fasten the ties attached to the canopy to each leg post 1. Step 14 Requires 7, 11, 12. To convert the swing into a hanging bed, first push down the pin on rear support bar Second take out the back support tube from U-shaped bracket on the rear support bar.
-
Page 12: Warranty
Dry frame completely and allow cushions to drip-dry. Do not use bleach or solvents. WARRANTY This CANVAS product carries a one (1) year warranty against defects in workmanship and materials. Trileaf Distribution agrees to replace the defective product free of charge within the stated warranty period, when returned by the original purchaser with proof of purchase.


Need help?
Do you have a question about the HAMPTON 088-1934-4 and is the answer not in the manual?
Questions and answers