Masterzen XPR W7S Installation Manual
Hide thumbs
Also See for XPR W7S:
- Instruction manual (54 pages) ,
- Installation manual (17 pages) ,
- Instruction manual (66 pages)
Advertisement
Quick Links
Wine Cellar Model Dimensions and Installation Guide
Συντηρητές Κρασιών
XPR W7S models
XPR W20S models
XPR W24S models
Milos / Mykonos / Santorini models
XPR W48S / W48DT models
XPR W40S/D/DT models
XPR W46S/D/DT models
XPR W88S/D/DT models
XPR W120S/D/DT models
XPR W180S/D/DT models
XPR W300S/D models
XPR W122S/DT models
0
Installation Guide
Advertisement

Related Manuals for Masterzen XPR W7S


Summary of Contents for Masterzen XPR W7S
- Page 1 Συντηρητές Κρασιών Wine Cellar Model Dimensions and Installation Guide XPR W7S models XPR W20S models XPR W24S models Milos / Mykonos / Santorini models XPR W48S / W48DT models XPR W40S/D/DT models XPR W46S/D/DT models XPR W88S/D/DT models XPR W120S/D/DT models...
- Page 2 Σας ευχαριστούμε που επιλέξατε το Συντηρητή Κρασιών Masterzen. Η τέχνη του Ευ Ζην. Το πάθος μας είναι το κρασί. Το κρασί τοποθετείται στους συντηρητές Μasterzen και αναδεικνύεται ως έργο τέχνης. Installation Guide...
- Page 3 ΑΣΦΑΛΕΙΑΣ ΚΑΙ ΛΕΙΤΟΥΡΓΙΑΣ ΤΟΥ ΣΥΝΤΗΡΗΤΗ Σκανάρετε με το κινητό σας τηλέφωνο και βρείτε συγκεντρωμένες όλες τις οδηγίες χρήσης και ασφαλείας Εναλλακτικά μπορείτε να επισκεφτείτε το site μας στο ακόλουθο σύνδεσμο: https://www.masterzen.gr/content/115/start- ή www.masterzen.gr Τοποθετείστε το συντηρητή στην τελική του θέση. Πριν τη σύνδεση...
- Page 4 ΠΡΙΝ ΑΡΧΙΣΕΤΕ ΝΑ ΓΕΜΙΖΕΤΕ ΚΑΙ ΝΑ ΘΕΤΕΤΕ ΣΕ ΛΕΙΤΟΥΡΓΕΙΑ ΤΟΝ ΣΥΝΤΗΡΗΤΗ ΠΡΟΣΟΧΗ: • Τα μοντέλα XPR W7, W24, W48 είναι αποκλειστικά για εγκατάσταση πλήρους εντοίχισης. Παρακαλούμε να ακολουθήσετε πιστά τις οδηγίες για την σωστή εγκατάσταση και εξαερισμό του συντηρητή. Αποτυχία να προβλεφθεί εξαερισμός...
- Page 5 Αποτυχία στην κάλυψη των ανωτέρω απαιτήσεων, καθώς και ζημιές ως αποτέλεσμα ανάρμοστης μεταφοράς / χρήσης ή αμέλειας θέτουν αυτομάτως το προϊόν εκτός εγγύησης ΕΓΚΑΤΑΣΤΑΣΗ ΤΟΥ ΣΥΝΤΗΡΗΤΗ • Αφαιρέστε όλη τη συσκευασία και τα προστατευτικά μέρη (εσωτερικά και εξωτερικά του συντηρητή) που χρησιμοποιούνται κατά την μεταφορά. •...
- Page 6 κάθε ράφι έχουν αφαιρεθεί από 5°C έως Εντοιχιζόμενη XPR W7S Inox 14,7 x 54 x 82 20°C XPR W7S Full Glass από 5°C έως Εντοιχιζόμενη Black Door 20°C 14,7 x 54 x 82 από 5°C έως Ελεύθερη & XPR W20S Inox 29,5 x 57, x 82 20°C...
- Page 7 5-12°C για την Ελεύθερη & κάτω ζώνη ΝΑΙ Εντοιχιζόμενη και 12-20°C για XPR W180D Inox 59,5 x 71.0 x 172 την πάνω ζώνη 5-20°C για κάθε Ελεύθερη & ΝΑΙ XPR W180DT Inox 59,5 x 71.0 x 172 Εντοιχιζόμενη ζώνη XPR W180DT Full 5-20°C για...
- Page 8 Thank you for purchasing a Masterzen Wine Cooler Wine is our passion. Zen. Masterzen. BEFORE USE, PLEASE READ AND FOLLOW ALL SAFETY RULES AND OPERATING INSTRUCTIONS. Scan with your mobile phone to get access to all the operating instructions Alternatively you can find all the necessary information on the following link https://www.masterzen.gr/content/115/start-...
-
Page 9: Important Safety Instructions
WARNING The information in this document is subject to modification without any prior notice. IMPORTANT SAFETY INSTRUCTIONS To reduce the risk of fire, electrical shock, or injury when using your appliance, follow these basic precautions. Before connecting the wine cooler to power source, let it stand upright for approximately 6 hours. - Page 10 Masterzen offers no guarantee for our wine cellar if it is being used for any purpose other than that for which it was specifically designed. We cannot be held responsible for any error in this manual. Masterzen is not responsible or liable for any spoilage or damage to wines or any other contents incidental or consequential to possible defects of the wine cellar.
- Page 11 BEFORE LOADING & PLUGGING IN THE WINE CELLAR Important: All models without front venting (air opening) are strictly for free standing only. (See technical chart) Before connecting the wine cooler to power source, let it stand upright for approximately 6 hours. This will reduce risk of a malfunction in the cooling system from handling during transportation Recommendations: The location you have selected for your wine cellar should:...
-
Page 12: Installing Your Wine Cellar
Improper use of the grounding plug can result in the risk of electric shock. Consult a qualified electrician or service person if the grounding instructions are not completely understood. If the supply cord is damaged, it must be replaced by a qualified person in order to avoid electrical hazard. - Page 13 INSTALLATION INSTRUCTIONS FOR BUILT IN WINE CELLARS: (UNDERBENCH OR IN COLUMN) FRONT VENTING WINE CELLARS ONLY. XPR W40, XPR W300, Milos, Mykonos, Santorini models are free standing only. Any built in voids the warranty 1. “Built in” wine cellars are front venting but are not designed to be fully integrated behind a joinery door.
-
Page 14: Dimensional Drawings
INSTALLATION DRAWINGS FOR BUILT IN WINE CELLARS: (UNDERBENCH OR IN COLUMN) FRONT VENTING WINE CELLARS ONLY. Note: The appliance must be positioned so that the plug is accessible after installed. Any improper built in installation voids the warranty DIMENSIONAL DRAWINGS: It is built-in model inside cabinet, the cabinet should come with good ventilation space and no backplane, otherwise it will affect the wine cooler working normally. - Page 15 XPR W24 models Installation Guide...
- Page 16 XPR W48 models Installation Guide...
- Page 17 XPR W20S models XPR W46 models Installation Guide...
- Page 18 XPR W88 models XPR W120 models Installation Guide...
- Page 19 XPR W180 models Installation Guide...
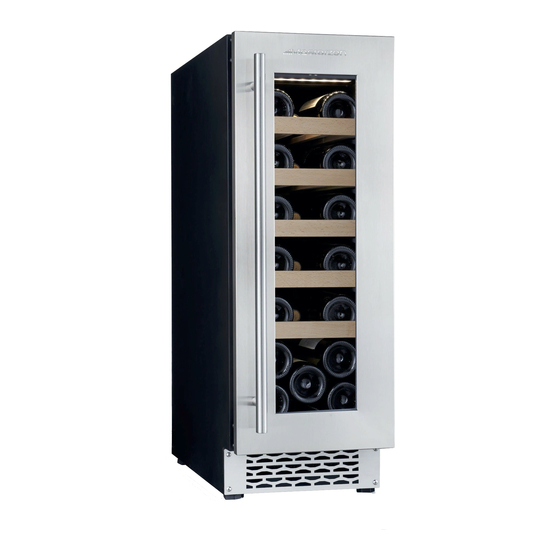
- Page 20 XPR W7S models XPR W122 models Installation Guide...
- Page 21 OPEN ANGLE SIZE DRAWINGS: XPR W20S models XPR W24, XPR W48 models Installation Guide...
- Page 22 XPR W40 models Milos, Mykonos, Santorini models Installation Guide...
- Page 23 XPR W46 models XPR W88 / XPR W120 / XPR W180 models Installation Guide...
- Page 24 XPR W300 models XPR W7S models Installation Guide...
- Page 25 XPR W122 models Installation Guide...
- Page 26 RADIATOR SYSTEM DESCRIPTION XPR W40, XPR W300, Milos, Mykonos, Santorini models use lateral condensation cooling mode XPR W20, W46, W88, W120,W180, W122, Models use side anti-dew tube and Independent cooling system: Installation Guide...
- Page 27 XPR W7S Models use Air cooling system Installation Guide...
- Page 28 VENTILATION FRAME INSTALLATION METHOD 1.Take out Ventilation frame from cabinet, then take out 4 pcs 4 * 12 screws from accessory bag. 2. Open the door, align the ventilation frame to the four screw holes in the bottom of the cabinet and tighten the screw with Phillips screwdriver.
-
Page 29: Reversibility Of The Door
REVERSIBILITY OF THE DOOR REMARK: XPR W300 models can’t be door reversible (If the control panel is on the handle) REMARK: If your wine cabinet is equipped with lock at the bottom of the door , the door is not reversible so you have to order one right opening door to change the opening side. Warning: To avoid accidents during the process of changing the door, we recommend that you get assistance. - Page 30 1.Decorative nail 2. Knife 3. Drop-proof device 4. M5 six angle 5. M5 six angle screwdriver 6. Door spindle core 7. Upper door hinge 8. Lower door hinge Installation Guide...
- Page 31 Milos, Mykonos, Santorini Door Installation Method To put the cabinet on open operation place; 1.the door opened to the maximum angle, use small knife(2) to take off the decorative nail (1) on opposite side (Drawing 1) 2.To pry the shaft cover③ out by a screwdriver④ (Drawing 2) 3.To pry the shaft core⑤...
- Page 32 XPR W24S, XPR W48 models Tools need to prepare: Knife Hexagon wrench Remark: Before operate the reversibility, need to power off at first, and need to cooperate with two people! 1.Open the door, twist off the screws from upper hinge and lower hinge by hexagon wrench, remove the door.( as picture FIG.A and picture FIB.B) Upper hinge Lower hinge...
- Page 33 Trunk-nail FIG.C FIG.D Trunk-nail FIG.E 3.To rotate the door 180 degrees, and to align the upper and lower hinges with the hinge holes of the left side. To adjust the door, and tighten the screws with hexagon wrench, and then complete the door replacement. (as picture FIG.F, FIG.G and FIG.H) FIG.F FIG.G FIG.H...
- Page 34 XPR W24S, XPR W48 models Installation Instruction: 1.Put the wine cooler into the cabinet, then adjust the wine cooler to make it steady. Open the door, take out the fixed plate , 2pcs Inner Hexagon Screws ,and Inner Hexagon Screwdriver from accessory bag , then use the inner hexagon screwdriver to tighten the fixed plate on the lower left side of wine cooler.
-
Page 35: Handle Installation Method
1. Put the wine cooler inside the cabinet and level it. 2. Open the door and take out 2 fixing screws from the plastic spare kit bag. 3. install the fixing screws through the fixing holes on both sides into the cabinet (see fig.) Handle Installation Method 1. - Page 36 Συντηρητές Κρασιών XPR...
Need help?
Do you have a question about the XPR W7S and is the answer not in the manual?
Questions and answers