
Related Manuals for NAMCO Time Crisis


Summary of Contents for NAMCO Time Crisis
- Page 1 This document has been downloaded from: The largest resource for amusement machines documentation on the world wide web!
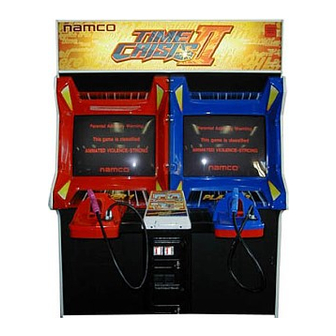
- Page 2 TIME CRISIS 2 Std Operators Manual T IS THE RESPONSIBILITY OF THE OPERATOR TO MAINTAIN CUSTOMER SAFETY AT ALL TIMES AND IT IS IMPERATIVE THAT THE DETAILS SET OUT IN THIS MANUAL ARE FOLLOWED PRECISELY Part No. 90500048...
- Page 4 P O R T A B L E A P P L I A N C E T E S T I N G Please Note: During testing of the machine with a portable appliance tester the insulation test will show a failure due to the fitting of two VDRs between Live/Earth and Neutral/Earth.
- Page 5 SAFETY WARNING...
- Page 6 MOVING THE MACHINE REMOVING AND REPLACING PARTS...
- Page 7 SICHERHEITSHINWEISE...
- Page 8 HINWEISE ZUR AUFSTELLUNG AUS- UND EINBAU VON KOMPONENTEN UND TEILEN...
- Page 9 SIKKERHEDS ADVARSEL SIKKERHEDSREGLER...
- Page 10 Justeringer eller vedligehold af denne maskine bør kun udføres af kvalificeret personale. Skift ikke noget på maskinen uden godkendelse, det kan føre til uforudset fare. Der bør kun bruges dele specificeret af Namco Europe Limited når der skiftes eller repareres dele (inklusiv skruer).
- Page 12 NOTAS DE INSTALACIÓN.
- Page 15 Αυτ το µηχάνηµα είναι για χρήση µ νο σε εσωτερικ χώρο και θα πρέπει να χρησιµοποιείται µ νο για τους λ γους για τους οποίους κατασκευάστηκε. Η εταιρεία NAMCO Ltd δεν φέρει καµία ευθύνη για ατυχήµατα , πληγές ή καταστροφές που µπορεί να προκληθούν απ αλλαγές χωρίς άδεια σε ή εισαγωγείς αυτού του µηχανήµατος.
- Page 16 ∆εν πρέπει να γίνονται µετατροπές στα µηχανήµατα ωρίς έγκριση . Μπορεί να προκληθεί απρ βλεπτος κίνδυνος. Μ νο µέρη που διευκρινίζονται απ την εταιρεία NAMCO EUROPE Ltd µπορούν να χρησιµοποιηθούν για αντικατάσταση ή επιδι ρθωση. (συµπεριλαµβάνοντε και οι βίδες) Να είναι σίγουρα κλειστ το ρεύµα πριν οποιαδήποτε δουλειά στο µηχάνηµα.
- Page 18 Il gioco è fornito di ruote per rendere più facile il suo spostamento. Fare attenzione quando si muove la macchina su una superficie inclinata. La testata ha il baricentro spostato in avanti, è perciò importante che ci siano almeno 2 persone per montare o smontare la testata stessa.
- Page 20 MERKNADER VED INSTALLASJON FJERNE OG UTSKIFTE ENHETER OG DELER.
- Page 22 Opmerkingen aangaande Installatie...
- Page 23 resolvidas.
- Page 25 SÄKERHETS VARNING ALLMÄNNA SÄKERHETSBEAKTANDEN...
- Page 26 Gör inga ändringar på denna maskin utan ett godkännande i förväg. Detta kan förorsaka oförutsägbar fara. Endast delar som är specificerade av Namco Europe Ltd. ska användas vid utbyten eller reparation av delar (inklusive skruvar). Försäkra dig om att strömmen är avstängd innan underhållsarbete påbörjas (felsökning, reparationer etc.)
-
Page 29: Table Of Contents
Contents SPECIFICATIONS ....................1 HOW TO PLAY ....................... 2 MAJOR COMPONENTS ..................3 MOVING THE MACHINE..................4 INSTALLATION ....................... 4 Fitting the Header Assembly ..................8 Fitting the Header Assembly ..................8 Adjusting the Level Adjusters ..................9 Fitting the Coin Tower ....................9 Fitting the Pedal Assembly .................. -
Page 30: Specifications
1. SPECIFICATIONS... -
Page 31: How To Play
2. HOW TO PLAY... -
Page 32: Major Components
3. MAJOR COMPONENTS... -
Page 33: Moving The Machine
4. MOVING THE MACHINE 5. INSTALLATION... - Page 34 DENNE MASKINE ER KUN DESIGNET TIL INDENDØRSBRUG INSTALLER IKKE MASKINEN PÅ FØLGENDE STEDER ESTA MÁQUINA ESTA DISEÑADA ÚNICAMENTE PARA USO EN INTERIORES. NO INSTALE LA MÁQUINA EN LOS SIGUIENTES LUGARES. Exteriores. Bajo luz solar directa, en lugares con polvo o humedad excesiva, lugares donde hay filtraciones de agua, cerca de aparatos de calefacción o de aire acondicionado, lugares con temperatura ambiente muy alta o muy baja.
- Page 35 ΤΟ ΜΗΧΑΝΗΜΑ ΕΙΝΑΙ ΣΧΕ∆ΙΑΣΜΕΝΟ ΓΙΑ ΧΡΗΣΗ ΣΕ ΕΣΩΤΕΡΙΚΟ ΧΩΡΟ ΜΟΝΟ ΜΗΝ ΤΟΠΟΘΕΤΗΣΕΤΕ ΤΟ ΜΗΧΑΝΗΜΑ ΣΤΟΥΣ ΑΚΟΛΟΥΘΟΥΣ ΧΩΡΟΥΣ Εξωτερικά Απευθείας στον ήλιο,σε µέρη που υπάρχει υγρασία ή σκ νη,µέρη που υπάρχει άφθονο νερ ,κοντά σε air-condition ή άλλου είδους θέρµανση,µέρη µε υπερβολική...
-
Page 38: Adjusting The Level Adjusters
Note: If the location site of this machine has a polished floor it is recommended that rubber pads are fitted under the level adjusters to prevent the machine sliding on the floor when in use. -
Page 41: Adjustments
6. ADJUSTMENTS Μετατροπές ή επιδιορθώσεις στα µηχανήµατα πρέπει να γίνονται µ νο απ εξουσιοδοτηµένα άτοµα. -
Page 42: Adjustment Switches
COIN COUNTER 2 Amp Q/B (Coin Fuse) PLAYER 1 PLAYER 2 SELECT SELECT DOWN DOWN SELECT SELECT TEST SERVICE TEST SERVICE... -
Page 43: Test Mode
The Test Switch must always be in the “OFF” position for normal game mode. Do not appear when OK The internal battery’s dead ....... SELECT SW : CHOOSE ENTER SW : ENTER • • • • •... -
Page 44: Coin Options
Note:- The price of play on this machine is set within the Cashflow Coin Mech. Ensure that the Game Cost is set to 1 Coin 1 Credit. s t i - - - - - - - - -... -
Page 45: Game Options
s ' r e f i i l f - - - c i f y t l i t i i l a NOTE: The game will not function correctly unless the difficulty setting is the same for both players. -
Page 46: I/O Test
12345678 [ON:OFF] ON 2 (see Section 6-3-3-2 page 18) -
Page 47: I/O Pcb Check
12345678 [ON:RED] ON 2... -
Page 49: Switch Test
SWITCH TEST DIP 4 123456787 [ON/OFF] LINK ON 2 SWITCH TEST COIN 000 ......... (a) SERVICE OFF ......... (b) TEST ON ......... (c) UP SELECT OFF ......... (d) DOWN SELECT OFF ......... (e) ENTER OFF ......... (f) TRIGGER OFF ......... (g) FOOT PEDAL OFF ......... -
Page 50: Solenid Test
12345678 [ON:RED] ON 2... -
Page 51: Monitor Test
MONITOR TEST GRADATION PATTERN ........(a) CROSSHATCH PATTERN (CRT) ........(b) CROSSHATCH PATTERN (PROJ) ........(c) WHITE WINDOW (H) ........(d) WHITE WINDOW (M) ........(e) WHITE WINDOW (L) ........(f) INTERLACE PATTERN ........(g) VIEW ANGLE ADJUST (CRT) ........(h) VIEW ANGLE ADJUST (PROJ) ........ -
Page 53: Ads Data
OTHERS ROM1 Ver. 97/07/07 21:15:59 ROM2 Ver. 97/06/27 20:11:35 CLOCK 97/08/27 23:11:12 ...... (b) PCB TEST ..........(c) LANGUAGE ENGLISH ..........(d) BACKUP MEMORY INITIALIZE NO .......... (e) EXIT SELECT SW : CHOOSE ENTER SW : ENTER NOTE: The game will not function correctly unless the software version is the same for both players. -
Page 54: Removing And Replacing Assemblies And Parts
7. REMOVING AND REPLACING ASSEMBLIES AND PARTS... - Page 55 Note: Take care not to knock the neck of the monitor tube when handling the monitor as it can be easily damged and the tube destroyed.
-
Page 57: Replacing The Pedal Switch
When replacing the switch, ensure that the wires are fitted to the correct terminals. -
Page 58: Greasing The Pedal Assy Plunger
Note: The plunger is spring loaded. Keep the plunger pressed in when removing the assy and release the plunger slowly. -
Page 60: Gun Assembly
Note: When replacing the gun assembly ensure that the earth wires are located on to the studs before fitting and tightening the whizztite nuts (M6) -
Page 62: Removing The Gun Cover
Ensure that the flat face of the lens is facing the back of the gun). -
Page 63: Replacing The Solenoid
Note: When reassembling match the D-type hole of the solenoid bracket to the D shape of the solenoid and ensure that the ‘E’ ring and spacers are in the correct positions. -
Page 64: Replacing The Solenoid
7-6-4 Replacing the Tigger Switch Remove the gun cover and gun slide (R). (See 7-6-2 page 32 7-6-3 page 33) Replace the microswitch. Take care when replacing the switch that the correct wires are fitted to the correct terminals. Reassemble in reverse order. 7-6-5 Replacing the Flexible Gun Conduit. -
Page 65: Parts
8. PARTS... - Page 66 l a i l a i " 8 l a i l a i e l l t l i c t i c t i...
- Page 67 c i l c i l e l l ½ "...
- Page 68 i f i i f i ¼ " µ ¼ " ½ "...
- Page 70 l i a i l e i l e...
- Page 72 d i l d i l d i l d i l d i l l i a p i l d i l d i l d i l d i l d i l c t i e l i...
- Page 73 c t i...
- Page 74 c t i c t i d i l c t i...
-
Page 75: Schematics
HEADER ASSY V185B EMI PCB ASSY 28" MONITOR ASSY 3.3V CONVERTER PCB V185 AMP PCB ASSY 28" MONITOR ASSY SWITCHMODE POWER SUPPLY V185B EMI PCB ASSY SCHAFFNER MAINS-IN FILTER... - Page 76 GUN ASSY PEDAL ASSY CASHFLOW / CREDIT DISPENSE V185 I/O PCB ASSY SERVICE BRACKET V185 GUN ASSY I/O PCB ASSY PEDAL ASSY...
Need help?
Do you have a question about the Time Crisis and is the answer not in the manual?
Questions and answers