
Related Manuals for battioni Pagani GARDA


Summary of Contents for battioni Pagani GARDA
- Page 1 MANUALE ISTRUZIONI PER L’USO E LA MANUTENZIONE INSTRUCTION MANUAL FOR USE AND MAINTENANCE NOTICE D’EMPLOI ET D’ENTRETIEN GEBRAUCHS-UND WARTUNGSANLEITUNGEN MANUAL DE INSTRUCCIONES DE USO Y MANTENIMIENTO GARDA / LEDRA...
-
Page 3: Introduction
INTRODUCTION The combined groups of the GARDA and LEDRA series were designed and constructed in compliance with the EEC safety regulations and were assessed for risks according to the standard UNI EN ISO 12100:2010; in particular they are in conformity with machinery directive 2006/42/CE and subsequent modifications and additions. -
Page 4: Garda Or Ledra Combined Groups
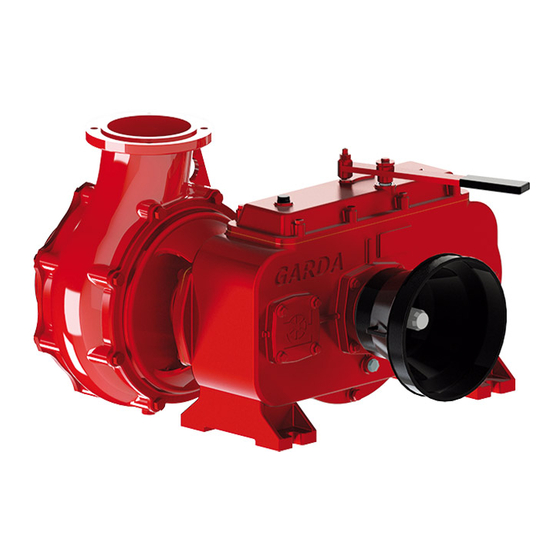
GARDA / LEDRA series Setting the pace since 1953 COMPULSORY SAFETY SIGNS THAT THE MANUFACTURER OF THE SYSTEM MUST DISPLAY IN THE WORK PLACE AND AROUND THE GARDA OR LEDRA COMBINED GROUPS... -
Page 5: Table Of Contents
GARDA / LEDRA series Setting the pace since 1953 TABLE OF CONTENTS INTRODUCTION .......................................18 WARRANTY ......................................18 MANDATORY SAFETY SIGNS THAT THE MANUFACTURER OF THE SYSTEM MUST DISPLAY IN THE WORKPLACE AND AROUND THE GARDA OR LEDRA COMBINED GROUPS ...............................19... - Page 6 GARDA / LEDRA series Setting the pace since 1953 6 - MALFUNCTION, FAULT, FAILURE,PROBLEM, CAUSE AND SOLUTION ....................29 7 - MAINTENANCE, INSPECTIONS AND CHECKS, REPAIRS ........................30 7.1 WASHING THE GEARBOX ................................30 7.2 CHANGING THE CENTRAL GEAR WHEEL ............................30...
-
Page 7: General Information
Activating a selector enables, at distinct times, use of a rotary blades vacuum pump for the inlet and outlet of the sewage from the tank or from the centrifuge pump. Unlike the GARDA Group, it presents the possibility of fitting on the front a hydraulic pump for control of the hydraulic mechanisms. -
Page 8: Identification Label
INSTRUCTIONS FOR USE AND MAINTENANCE 2 -PACKAGING, STORAGE, HANDLING AND TRANSPORTATION 2.1 PACKAGING The GARDA and LEDRA combined groups are supplied unpacked. On request the following packaging can be used: • cardboard boxes, for individual packaging; • wooden base and shrink-wrap;... -
Page 9: Assembly, Fitting, Installation, Disassembly
3) The centrifugal pump, connected to the gearbox, does not have support means; 4) Connect the centrifugal pump to the tank via a suction pipe of Ø 200 mm for GARDA or LEDRA 6500 and Ø 150 mm for GARDA 3500, interrupted by a flexible connection joint on the outside of the same tank;... -
Page 10: Hydraulic Centrifuge Diagram
GARDA / LEDRA series Setting the pace since 1953 3.2 HYDRAULIC CENTRIFUGE DIAGRAM The hydraulic diagram of the operation of the centrifuge is represented in Figure 1 showing the entry of the liquid/slurry "B"... -
Page 11: Start-Up, Setting Up, Testing, Running
4 - START-UP, SETTING UP, TESTING, RUNNING 4.1 DIRECTION OF ROTATION Before starting the GARDA or LEDRA combined group make sure that the P.T.O. shaft turns freely and that the direction of rotation is the same as the one indicated by the arrow. -
Page 12: Testing
Check the functionality of the gear lever and the handle for the suction and compression of the pump. 4.4 RUNNING A running period is not needed. The recommended operating speed is 400/450 rpm for the GARDA or LEDRA 540 rpm group and 800 rpm for the 1000 rpm version. 5 - START, OPERATION, STOP 5.1 START... -
Page 13: Operating Parameters
Spread the slurry Operate the cardan shaft; Under no circumstances apply to the PTO of the GARDA/75 and GARDA/3500 group a power greater than 80 kW to avoid damage to the gearbox. The LEDRA group supports higher powers. 5.3 OPERATING PARAMETERS... -
Page 14: Individual Means Of Protection To Be Used
GARDA / LEDRA series Setting the pace since 1953 5.5 INDIVIDUAL MEANS OF PROTECTION TO BE USED When operating the Group, it is necessary to use the personal protective equipment prescribed by the Manufacturer of the machine on which the Group has been installed. -
Page 15: Maintenance, Inspections And Checks, Repairs
GARDA / LEDRA series Setting the pace since 1953 7 - MAINTENANCE, INSPECTIONS AND CHECKS, REPAIRS, When carrying out maintenance operations, inspections, checks or repairs it is advisable to wear the individual protective devices listed in this manual. -
Page 16: Replacing The Mechanical Seal
GARDA / LEDRA series Setting the pace since 1953 7.4 REPLACING THE MECHANICAL SEAL 1) Insert component (A) (see Figure 3) into the seat of the screw nut support with the tungsten carbide part facing outwards pushing it in;... -
Page 17: Replacing The Screw Nut
GARDA / LEDRA series Setting the pace since 1953 7.7 REPLACING THE SCREW NUT 1) Remove the outer screw nut flange by loosening the relevant screws; 2) Loosen the screws fastening the screw nut to the support;... -
Page 18: Declaration Of Incorporation Of Partly Completed Machinery
GARDA / LEDRA series Setting the pace since 1953 9 - DECLARATION OF INCORPORATION OF PARTLY COMPLETED MACHINERY Below is an example of the declaration of incorporation of the partly completed machinery which you will find attached... - Page 19 Battioni Pagani si riserva il diritto di approntare modifiche ai dati ® e alle caratteristiche illustrate nel catalogo. La riproduzione, anche parziale, del presente catalogo è vietata ai termini di legge. Battioni Pagani reserve the right to modify without notice the ®...
- Page 20 Rotary vanes vacuum pump Centrifugal pump Rotary postive displacement lobes pump Rotary postive displacement lobes pump Rotary lobes vacuum pump Via Cav. Enzo Ferrari, 2 43058 Ramoscello di Sorbolo (PR) - Italy Ph. +39 0521 663203 Fax +39 0521 663206 www.bapag.it info@bapag.it...
Need help?
Do you have a question about the GARDA and is the answer not in the manual?
Questions and answers