Table of Contents
Advertisement
Quick Links
Advertisement
Table of Contents

Related Manuals for FrontRow LessonCam 12X

Summary of Contents for FrontRow LessonCam 12X
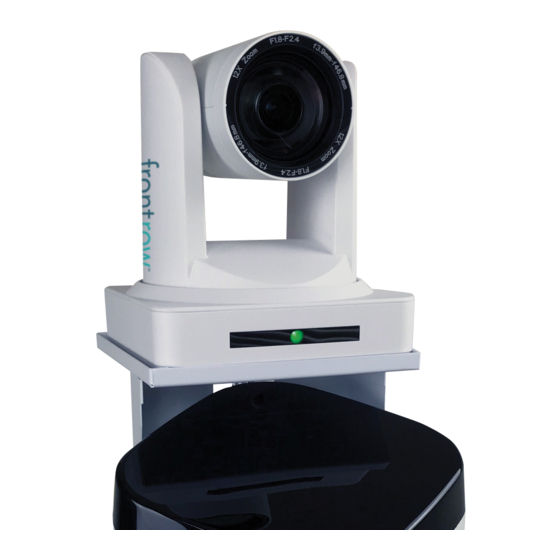
- Page 1 LessonCam ™ Configuration Guide...
- Page 2 • Do not install or use the camera near water or heat sources. • Protect all cables from wear and damage from staples, foot traffic, doors, and other hazards. • Only use accessories specified by FrontRow. • Only refer installation and service to qualified personnel.
-
Page 3: Table Of Contents
HD Color Video Camera User Manual Table of Contents 1. Fast Installation .............................4 1.1 Camera Interface Explanation ......................4 1.2 Power-on Initial Configuration ......................4 1.3 Video Output..........................4 2. Product Overview ..........................5 2.1 Product Introduction ........................5 2.1.1 Dimensions ...........................5 2.1.2 Accessories ...........................5 2.2 Main Features ..........................6 2.2.1 Camera Performance ......................6 2.2.2 Network Performance ......................6... -
Page 4: Fast Installation
HD Color Video Camera User Manual 1. Fast Installation Figure 1 1. Camera Lens 6. RS232 Control Interface (input) 2. Camera Base 7. RS232 Control Interface (output) 3. Remote Controller Receiver Light 8. USB2.0 Interface 4. Bottom Dial Switch 9. Audio Input Interface 5. -
Page 5: Product Overview
HD Color Video Camera User Manual 2. Product Overview Product Introduction There are four main series according to different video formats, lens optical zooms, output interfaces, and remote control modes. Please refer to corresponding features in this manual. NOTE: 5G WiFi is optional for ST (standard) series only. 2.1.1 Dimensions Figure 2.1: Camera Dimensions 2.1.2 Accessories... -
Page 6: Main Features
HD Color Video Camera User Manual 2.2 Main Features 2.2.1 Camera Performance This camera offers perfect functions, superior performance, and rich interfaces. The features include advanced ISP processing algorithms to provide clear images with a strong sense of depth, high resolution, and fantastic color rendition. It supports H.265/H.264 encoding, which makes motion video fluent and clear even with less than ideal bandwidth conditions. -
Page 7: Technical Specifications
HD Color Video Camera User Manual 2.3 Technical Specifications Model Camera Parameter Sensor 1/2.8 inch high quality HD CMOS sensor Effective Panels 16:9 2.07 megapixel Video Formats U2 interface video format 176x144/320x240/320x180/352x288/640x480/720x576/640x360/800x600/960x540/ 1024x576/1024x768/1600x896/1920x1080/1280x720; P30/25/20/15/10/5 Optical Zoom f=3.9~46.1mm View Angle 6.3° (tele) 72.5°(wide) F1.8 –... -
Page 8: Interface Instructions
HD Color Video Camera User Manual 2.3 Technical Specifications (continued) Model Other Parameters Supply Adapter AC110V-AC220V to DC12V/2A Input Voltage DC12V±10% Input Current 1A(Max) Consumption 12W (Max) Store Temperature -10°C to +60°C Store Humidity 20% - 95% Working Temperature -10°C to +50°C Working Humidity 20%-80% Dimensions... -
Page 9: Rs-232 Interface
HD Color Video Camera User Manual Two DIP switches are set to ON or OFF to select different modes of operation as shown in Table 2.2 Table 2.2 Dial Switch Setting Number Explanation Working Mode Updating Mode NOTE: Working mode can be applicable for web upgrade. 2.4.3 RS-232 Interface 1. -
Page 10: Application Instruction
HD Color Video Camera User Manual 3. Application Instructions 3.1 Video Output 3.1.1 Power-On Initial Configuration When connecting the power, the camera will have will enter a self diagnostic mode upon power up, as indicated by a flashing light. The camera head will return to the HOME position (forward facing, level horizontally). The light will turn solid when the self diagnostic is complete. - Page 11 HD Color Video Camera User Manual 4.1 Connecting mode (continued) Click “Start” and select “Operation” to input cmd as in the picture below to verify if the network segment has been successfully added. Click “OK” and open the DOS command window. Input ping 192.168.5.163 and press Enter. It will show results similar to those below, which means that the network segment adding is successful and the camera is accessible.
-
Page 12: Browser Login
HD Color Video Camera User Manual 4.2 Browser Login 4.2.1 Web client 1) Web client Log In Input the IP address "192.168.5.163" of the device in the address field of your browser and click Enter to enter into Web Client login page. The user can log in as an administrator and normal user. If logged in as an administrator (Default User name/Password: admin), users can preview, playback, configuration and cancel in the Web Client. -
Page 13: Video Configuration
HD Color Video Camera User Manual 1) Local Configuration Video Preview Mode: For video preview, the user can choose between either real-time or fluency priority. Real time priority mode features less delay, while fluency priority mode features cleaner fluency. Set this based on your needs (Default values are: real time normal (2), real time best (1), fluency normal (3), fluency good (4) and fluency best (5)). - Page 14 HD Color Video Camera User Manual Click on the "Save" button to display the "Save successful" message, then the settings take effect. Method of obtaining RTSP: rtsp://device IP address: 554/live/av0 (av0 main stream; av1 secondary stream) 3) RTP Broadcasting Main/Sub Stream: On/Off Protocol: RTP or TS Address: Default 224.1.2.3.
-
Page 15: Network Configuration
HD Color Video Camera User Manual Flip Horizontal: Set Flip Horizontal (default Off, On options). Flip Vertical: Set vertical flip (default Off, On options). e: Noise Reduction: 2D noise reduction, 3D noise reduction and dynamic dead pixel correction available. 2D Noise Reduction: Set 2D noise reduction level (default Auto, 1-7 and Off options). 3D Noise Reduction: Set 3D noise reduction level (default 5, 1-8 and Off options). -
Page 16: System Configuration
HD Color Video Camera User Manual RTSP Port: Set the RTSP port. The device will restart automatically after changed (default 554, 0-65535 optional). Visca Port: Set the Visca port. The device will restart automatically after changed (default 3001, 0-65535 optional). Click on the "Save"... - Page 17 HD Color Video Camera User Manual Date Format: Set the Date Format (YYYY-MM-DD default, and different options are available). Date Separator: Set the Date Separator (default '/', and different options are available). Time Zone: Set the Time Zone (default East eight districts, and different options are available). Time Type: Set the Time Type (default 24 hours, optional 12 hours).
-
Page 18: Logout
HD Color Video Camera User Manual 4.2.8 Logout Point "Logout" pop-up "Confirmation" dialog, select "yes" or "no", and choose “yes” to exit the current page and return to the user login interface again. 4.2.9 Wireless network If the user's equipment has a wireless network module, the Web page "Network Configuration" has a "Wireless Network"... -
Page 19: Serial Communication Control
HD Color Video Camera User Manual 5. Serial Communication Control Under common working conditions, the camera could be controlled through the RS232/RS485 interface (VISCA). RS232C serial parameter are as follows: Baud rate: 2400/4800/9600/115200 bits/sec; Start bit: 1; data bits: 8; Stop bit: 1; Parity: None. After powering on, the camera first goes left, then back to the middle position. - Page 20 HD Color Video Camera User Manual Auto 8x 01 04 35 00 FF 3000K 8x 01 04 35 01 FF 4000k 8x 01 04 35 02 FF One Push mode 8x 01 04 35 03 FF 5000k 8x 01 04 35 04 FF Manual 8x 01 04 35 05 FF Cam_WB...
- Page 21 HD Color Video Camera User Manual Reset 8x 01 04 21 00 FF 8x 01 04 21 02 FF WDR Level Setting CAM_WDRStrength Down 8x 01 04 21 03 FF Direct 8x 01 04 51 00 00 00 0p FF p: WDR Level Position CAM_NR (2D) 8x 01 04 53 0p FF...
-
Page 22: Inquiry Command
HD Color Video Camera User Manual P: 0~E Video format 0: 1080P60 8: 720P30 1: 1080P50 9: 720P25 2: 1080i60 A: 1080P59.94 CAM_VideoSystem Set camera video system 8x 01 06 35 00 0p FF 3: 1080i50 B: 1080i59.94 4: 720P60 C: 720P59.94 5: 720P50 D: 1080P29.97 6: 1080P30... - Page 23 HD Color Video Camera User Manual CAM_BGaininq 8x 09 04 44 FF y0 50 00 00 0p 0q FF pq: B Gain y0 50 00 FF Full Auto y0 50 03 FF Manual CAM_AEModelinq 8x 09 04 39 FF y0 50 0A FF Shutter priority y0 50 0B FF Iris priority...
- Page 24 HD Color Video Camera User Manual CAM_GammaInq 8x 09 04 5B FF y0 50 0p FF p: Gamma setting ab cd: vender ID (0220) mn pq: model ID ST (0950) CAM_VersionInq 8x 09 00 02 FF y0 50 ab cd mn pq rs tu vw FF U3 (3950) rs tu: ARM Version vw: reserve...
-
Page 25: Pelco-D Protocol Command List
HD Color Video Camera User Manual 5.2: Pelco-D protocol command list Function Byte 1 Byte 2 Byte 3 Byte 4 Byte 5 Byte 6 Byte 7 0xFF Address 0x00 0x08 Pan Speed Tilt Speed Down 0xFF Address 0x00 0x10 Pan Speed Tilt Speed Left 0xFF... -
Page 26: Camera Maintenance And Troubleshooting
192.168.5.163. Press Enter to display the following message: Description network connection is normal. © 2021 FrontRow Calypso LLC Phonic Ear, FrontRow, Calypso and the names of Phonic Ear, Calypso, and FrontRow products are trademarks or registered trademarks of FrontRow Calypso LLC in the U.S. and other countries. 1530-00072/ RevA 0321...
Need help?
Do you have a question about the LessonCam 12X and is the answer not in the manual?
Questions and answers