Table of Contents
Advertisement
HAZARD OF ELECTRICAL SHOCK, EXPLOSION, OR ARC FLASH
•
Read and understand this quick start guide before installing and operating the transfer switch
•
The installer is responsible for compliance with national electrical code requirements with respect to installation of this equipment.
•
Many components of this equipment operate at line voltage. DO NOT TOUCH. Use only electrically isolated tools.
•
Install and close ATS door before applying power to this equipment
•
Do not open door to equipment until ALL power sources are disconnected
•
This equipment must be installed and serviced only by qualified electrical personnel utilizing safe work practices and appropriate Personal
Protective Equipment (PPE).
Failure to do so may cause personal injury or death
Introduction ............................................................................................................................... 2
Check Equipment Delivery....................................................................................................... 2
Check Line Voltage/Amperage ................................................................................................ 2
Installation Requirements ........................................................................................................ 2
ATS Interior Component Layout (Typical) .............................................................................. 3
ATS Controller Description ...................................................................................................... 4
Power Contactor Description .................................................................................................. 6
Electrical Ratings/Enclosure Dimensions/Cable Terminals ................................................. 7
I.
Customer Control Wiring Connections .................................................................................. 8
AC Voltage Change Procedures .............................................................................................. 9
Equipment Energization Procedure ...................................................................................... 14
ATS Manual Operation ........................................................................................................... 16
TS 930-DS Schematic Diagrams ............................................................................................ 18
TS 930-CA Schematic Diagrams ............................................................................................ 20
QUICK START GUIDE
DANGER
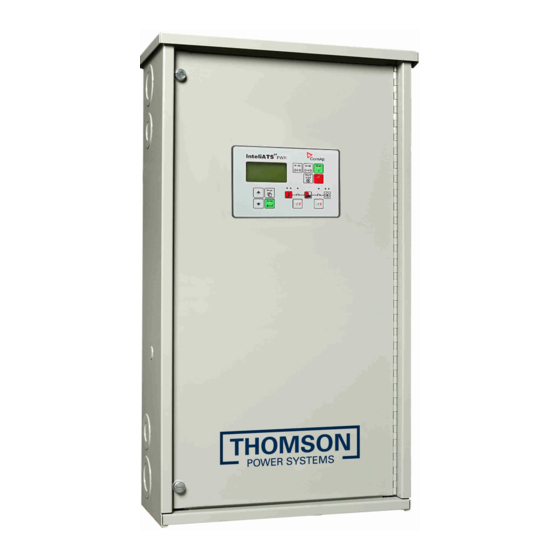
TS 930
125A - 630A
PAGE
Advertisement
Table of Contents

Subscribe to Our Youtube Channel
Related Manuals for THOMSON TS 930 Series


Summary of Contents for THOMSON TS 930 Series
-
Page 1: Table Of Contents
QUICK START GUIDE TS 930 125A – 630A DANGER HAZARD OF ELECTRICAL SHOCK, EXPLOSION, OR ARC FLASH • Read and understand this quick start guide before installing and operating the transfer switch • The installer is responsible for compliance with national electrical code requirements with respect to installation of this equipment. •... -
Page 2: Introduction
For other product types please contact Thomson Power Systems. This quick start guide contains all the information you need to install and set up your new Thomson Power Systems TS 930 Transfer Switch. To conserve our natural resources, your transfer switch does not include a printed owner’s manual. An owner’s manual containing complete information and download TS 930 Owner’s Manual. -
Page 3: Ats Interior Component Layout (Typical)
ATS POWER NEUTRAL CONTACTOR ATS CONTROL ISOLATION PLUG (PL-15) GEN SUPPLY GROUND (TOP LUGS) LOAD (BOTTOM LUGS) CUSTOMER CONTROL CONNECTION TERMINALS: • ENGINE START • 24Vdc CONTROL POWER INPUT • SYSTEM VOLTAGE JUMPERS PM158 Rev 1 17/05/05 Thomson Power Systems... -
Page 4: Ats Controller Description
Each controller provides a door mounted faceplate with LCD display and operator pushbuttons to select operating modes or to view system parameters. For detailed information on the ATS controller supplied, refer to the ATS controllers’ original manufacturer instruction manuals supplied with the ATS or download from Thomson Power Systems website. DeepSea Electronics... - Page 5 Generator Status Indicators (Red=Gen failure) Utility Status Indicators (Green = Gen Available) (Red=Utility failure (Green = Utility Available) Gen Manual Control Button Utility Manual Control Button (Contactor Status Indicator above) (Contactor Status Indicator Above) PM158 Rev 1 17/05/05 Thomson Power Systems...
-
Page 6: Power Contactor Description
Utility (A) Aux Switch Utility Position Indicator Select B Manual Control Gen (B) Aux Switch Trip Manual Control Gen (B) Power Connections Manual Operation Shaft Load Power Connections Control Terminals Gen Position Indicator PM158 Rev 1 17/05/05 Thomson Power Systems... -
Page 7: Electrical Ratings/Enclosure Dimensions/Cable Terminals
Following power cable installation, and isolating the ATS controller, all power cables shall be appropriately insulation resistance tested to ensure no cross phase connections or conduction to ground. Once insulation resistance testing is complete, re-insert all the ATS controller isolation plugs. PM158 Rev 1 17/05/05 Thomson Power Systems... -
Page 8: Customer Control Wiring Connections
All control wiring connections are made to the terminal block located on the right-hand side wall of the enclosure per the following photo and schematic diagram. CUSTOMER CONTROL CONNECTIONS: • ENGINE START • 24VDC CONTROL POWER • SYSTEM VOLTAGE JUMPERS PM158 Rev 1 17/05/05 Thomson Power Systems... -
Page 9: Ac Voltage Change Procedures
De-energize all AC Power, open the ATS door and locate the terminal blocks on the right side sheet. Terminal blocks Factory default jumper locations for 277/480V configuration, connect N1 to UN, and N2 to GN. PM158 Rev 1 17/05/05 Thomson Power Systems... - Page 10 Install the latest DEEPSEA configuration suit file in the laptop. Download from https://www.deepseaplc.com/ats/automatic-transfer-switch-control-modules/dse334/software Connect the DEEPSEA controller to a laptop via a USB cable. Double click the 240V configuration file provided by Thomson Power Systems. PM158 Rev 1 17/05/05 Thomson Power Systems...
- Page 11 A popup window will indicate the progress of downloading and click on OK once it reaches 100%. Close the DSE configuration suit and disconnect the USB cable. The ATS has been successfully configured to 120/240V. PM158 Rev 1 17/05/05 Thomson Power Systems...
- Page 12 Press the Page button under the display to enter into the setting menu. Select the Basic Settings by pressing the Down button and hit the Enter. Press the Down button to navigate to NomVolts PH-PH. PM158 Rev 1 17/05/05 Thomson Power Systems...
- Page 13 (COMAP does not provide the selection of specific voltage configuration like high-leg delta 120/240V. The over and under voltage protection is evaluated according to the PH-PH voltage if user chooses 3Ph4wire as connection type,) PM158 Rev 1 17/05/05 Thomson Power Systems...
-
Page 14: Equipment Energization Procedure
12. Ensure the inside of the transfer switch is clean from all dust, and other foreign materials. 13. Close the enclosure door and tighten all door screws. 14. Visually verify on the transfer switch enclosure that there are no gaps, holes, or potential for water ingress. PM158 Rev 1 17/05/05 Thomson Power Systems... - Page 15 Automatic Sequence. 14. Return the transfer switch to utility power by re-closing the upstream utility breaker. The load should re-transfer back to the utility supply as per Automatic Sequence. PM158 Rev 1 17/05/05 Thomson Power Systems...
-
Page 16: Ats Manual Operation
- DO NOT over-torque the Shaft Wrench/Operating Shaft handle once position has been attained - DO NOT turn the Shaft Wrench in the opposite direction as the Operating Shaft turns in one direction only. PM158 Rev 1 17/05/05 Thomson Power Systems... - Page 17 Once ATS is manually operated to the Generator ON position, remove the Shaft Wrench & Screwdriver from the Power contactor and secure them away from any live power sources. Close ATS door and re-energize Generator power to return power to the load. PM158 Rev 1 17/05/05 Thomson Power Systems...
-
Page 18: Ts 930-Ds Schematic Diagrams
TS 930 Quick Start Guide M. TS 930-DS Schematic Diagrams PM158 Rev 1 17/05/05 Thomson Power Systems... - Page 19 TS 930 Quick Start Guide PM158 Rev 1 17/05/05 Thomson Power Systems...
-
Page 20: Ts 930-Ca Schematic Diagrams
TS 930 Quick Start Guide N. TS 930-CA Schematic Diagrams PM158 Rev 1 17/05/05 Thomson Power Systems... - Page 21 TS 930 Quick Start Guide PM158 Rev 1 17/05/05 Thomson Power Systems...
Need help?
Do you have a question about the TS 930 Series and is the answer not in the manual?
Questions and answers