Subscribe to Our Youtube Channel
Summary of Contents for Schmidt DT Series
- Page 1 S C H M I D T c o n t r o l i n s t r u m e n t s Edition DT 03.2.E DT Series Model DT-311N Operating Instructions DT-315N Valid as of: 01.07.2011 • Please keep the manual for future reference!
-
Page 2: Table Of Contents
Content 1 Warranty and Liability ....................3 1.1 Notices within the Operating Instructions ............... 3 1.2 Responsibilities of the Operating Company ............3 1.3 Responsibilities of the Personnel ................3 1.4 Informal Safety Measures ..................4 1.5 Training of the Personnel ..................4 1.6 Intended Use ...................... -
Page 3: Warranty And Liability
1 Warranty and Liability In principle, the supply of the device is subject to our “General Conditions of Sale and Delivery.” These have been provided to the operating company on conclusion of the contract, at the latest. Warranty: - Stroboscopes are warranted for 12 months. Parts subject to wear, electronic components and measuring springs are not covered by the warranty. -
Page 4: Informal Safety Measures
The device is intended exclusively to be used as a Stroboscope. Any other use or any use exceeding this intention will be regarded as misuse. Under no circumstances shall HANS SCHMIDT & Co GmbH be held liable for damage resulting from misuse. The intended use also includes: - Complying with all notices included in the Operating Instructions and observing all inspection and maintenance works. -
Page 5: Available Models
Available Models These Operating Instructions refer to the DT-311N and DT-315N Models. 2.1 Specifications Model DT-311N and DT-315N INTERNAL Signal Mode (normal operation) Flash Range: 0.7 - 585 Hz = 40.0 - 35000 rpm or FPM (flashes/min) with automatic range control Accuracy: ±... -
Page 6: Delivery Includes
2.1 Specifications (Forts.) Model DT-315N Low Battery Indicator: Display shows all L’s Power Requirement: Internal NiCd battery pack, Capacity: ¾ hour continuous use Charging voltage: 230 V AC, 30 VA External Power Supply: 10.5 to 15 V, 2.3 A, stabilized 0.3 Vp·p Weight, net (gross): 2000 g (3200 g) Dimensions:... -
Page 7: Connecting The Power Cord (Dt-311N Only)
Connecting the Power Cord (DT-311N only) Before connecting the power cord 16, ensure proper supply voltage (230 V). Connection: - Connect the power cord 16 to the power line. 3.2.1 Connecting the AC Adapter/Charger (DT-315N only) The instrument is provided with a battery pack, allowing either battery-or line-operation. For line-operation, use the AC adapter/charger as a power supply to power the strobe Connector continuously. -
Page 8: Operating Elements
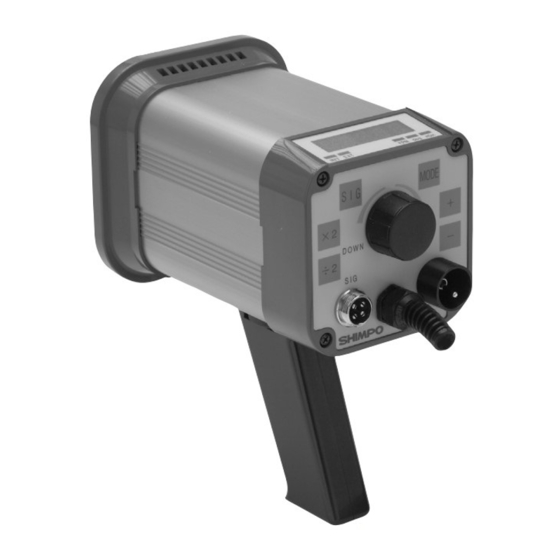
3.3 Operating Elements 1 LED display Displays function and value 2 LED EXT External mode indicator 3 LED INT Internal mode indicator 4 LED B-CH Battery charge indicator (DT-315N only) 5 LED RPM Flashes per minute indicator 6 LED deg Phase shift indicator 7 LED mSec Millisecond indicator... -
Page 9: True Rpm Measurement
3.3.1 True RPM Measurement General: Stroboscopes are highly stable industrial quality instruments for non-contact RPM mea- surement as well as for inspection and observation of moving parts. They give the operator the illusion of “stopped motion” where in actuality the equipment under observation is in a moving state. -
Page 10: Measuring With The Stroboscope
Measuring with the Stroboscope 3.4.1 Internal Signal Mode Normal operation Operation without the trigger signal: 1. Firmly plug in the power cord. 2. Turn the power switch 17 ON. 3. If the INT indicator is not on, press ; the INT light will then turn on. 4. -
Page 11: Delay Mode
3.4.2.1 Delay Mode rpm: Light will flash in correspondence with input signal; the input signal will be calculated into rpm and displayed. deg: One cycle of input signal is 360°. A delayed angle will be displayed from 0 up to 359°. (The delayed angle can be changed by turning the setter as previously described). -
Page 12: Synchronous Output Signal
3.4.2.4 Synchronous Output Signal For triggering and controlling additional stroboscopes, the synchronous output signal is applied at pin #2 (see below). Memory The following parameters are set at the factory: • Decimal point: autorange • Internal timer: continuous • External trigger edge: L-H (Lo to Hi) These parameters can be changed in the field to facilitate different situations. To change any of the above parameters, follow these steps: 1. -
Page 13: Troubleshooting
3.5 Memory (Cont.) Press to go back to normal operation. The above settings can be checked quickly by performing steps A to C as described above and then pressing 3.6 Troubleshooting RPM reading is displayed but unit is not flashing: • Flash tube may need to be replaced (see „Flash Tube Replacement“ section) Stroboscope is in external signal mode, no flash: • Check flash tube. Replace if necessary... -
Page 14: Service And Maintenance
Service and Maintenance Stroboscope is easy to maintain. 4.1 Flash Tube Replacement When rpm reading is displayed but unit is not flashing, flash tube may need to be replaced: 1. Unplug line cord from power line. 2. Turn power switch off (wait a few minutes until stroboscope is cool before proceeding). -
Page 15: Cleaning
Please indicate in your order whether you require an calibration certificate with calibration report. Service address: HANS SCHMIDT & Co GmbH Schichtstr. 16 D-84478 Waldkraiburg... - Page 16 Yarn Package Durometer and Shore-A Durometer Sample Cutter Balance Moisture Meter Leak Tester Softometer More than 60 years - Worldwide - Hans Schmidt & Co GmbH Mailing address: Phone: e-mail: P. O. B. 1154 int. + 49 / (0)8638 / 9410-0 info@hans-schmidt.com...


Need help?
Do you have a question about the DT Series and is the answer not in the manual?
Questions and answers