Table of Contents
Advertisement
Quick Links
Advertisement
Table of Contents

Subscribe to Our Youtube Channel
Summary of Contents for Woodley Clinispin HCT II
- Page 1 User Manual...
-
Page 2: Table Of Contents
Table of Contents Introduction ............................ 3 Intended Use ........................... 3 Features ............................3 Standard Accessories ........................3 Technical Specifications ........................4 Safety Precautions .......................... 4 Installation ............................5 Standard Parts Listing ........................7 User Interface and Display ......................7 10. Rotor Installation ..........................8 11. -
Page 3: Introduction
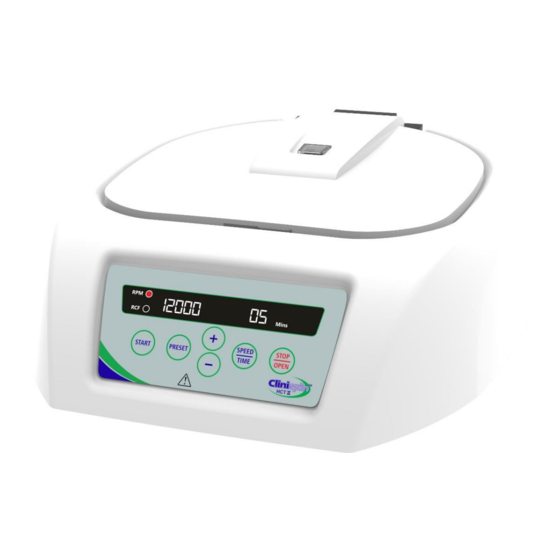
It should be kept near the centrifuge for quick and easy reference. The Clinispin HCT II Centrifuge is equipped with a maintenance free drive, a large display and simple interface for silent & efficient operation. This haematocrit centrifuge is supplied with a host of safety features including imbalance detection. -
Page 4: Technical Specifications
• Repairs must only be performed by authorised Woodley Equipment Company personnel. • Only use rotors and spare parts supplied by Woodley Equipment Company for best results and safety. • The centrifuge must be used for the specified application only. It must not be operated in a hazardous or flammable environment and must not be used to centrifuge explosive or highly reactive media. -
Page 5: Installation
Do not use any other power adaptor. 7. Installation The Clinispin HCT II is supplied in a packaging box. Upon receiving the centrifuge, gently remove the upper packaging and take out the centrifuge by holding it from the bottom. - Page 6 7.2 Connecting Power Adaptor 1. Connect one side of the power adaptor to the rear side of the centrifuge and the other side to the power supply as shown in the figure below. 2. Rotate the adaptor nut clockwise to secure the adaptor to the centrifuge. Ensure the power switch is off while connecting the power adaptor.
-
Page 7: Standard Parts Listing
8. Standard Parts Listing 9. User Interface and Display Item Name Function Press button to START the centrifugation. START BUTTON Press button to STOP the ongoing operation. Lid STOP/OPEN BUTTON opens automatically after rotor comes to a stop. Long press button to select TIME mode. Press “+” SPEED/TIME BUTTON or “-”... -
Page 8: Rotor Installation
10. Rotor Installation 10.1 Rotor Removal and Replacement Upon receiving the centrifuge, its rotor comes pre-installed. If the rotor needs to be removed or replaced, follow the procedure below. 10.1.1 Removing Rotor 1. Do not try to remove or loosen the rotor with bare hands 2. -
Page 9: Operating The Centrifuge
5. Below is the incorrect method of loading tubes in the centrifuge rotor. 11. Operating the Centrifuge 11.1 Switch on the Centrifuge After connecting the power adaptor, switch the centrifuge on at the main power supply and the switch at the rear side of the centrifuge. Make sure to check the rotor fitment before use. -
Page 10: Maintenance And Cleaning
RPM and time combination. 11.4 Switching to RCF Display On the Clinispin HCT II Centrifuge, SPEED and RCF toggle alternatively on the display once the SET speed is attained. The centrifuge is preset for 12,000 RPM for 5 minutes. -
Page 11: Troubleshooting
13. Troubleshooting The Clinispin HCT II has a self-diagnostic function. If a problem occurs, an error/warning code will be displayed on the screen and the operator can determine the malfunction with the error codes below. -
Page 12: Warranty
The warranty is invalidated by any non-factory modification which will immediately terminate all liabilities on Woodley Equipment Company Ltd for the products or damages cause by its use. The buyer and its customer shall be responsible for the product or use of products as well as any supervision required for safety. -
Page 13: Product Disposal
Products received without proper authorisation will not be entertained. All items returned for service should be returned in the original packaging or suitable carton, padded to avoid damage. Woodley Equipment Company is not responsible for any damage incurred by improper packaging. - Page 14 Old Station Park Buildings St. John Street Horwich Bolton BL6 7NY, UK Tel: +44 (0) 1204 669033 Email: sales@woodleyequipment.com Web: www.woodleyequipment.com...


Need help?
Do you have a question about the Clinispin HCT II and is the answer not in the manual?
Questions and answers