
Related Manuals for Veria Veria 8276B


Summary of Contents for Veria Veria 8276B
- Page 1 VERIA User's guide Videophone Model: Veria 8276B Please read this manual carefully before use and keep it in case of further need.
-
Page 2: Table Of Contents
Content page 1.Warnings and warnings ..…………………………………………………………………………………………………………………………..1 2.Function and description of the device ... ………………………………………………………………………………………………..2 3.Features and main functions ....…………………………………………………………………………………………………………. ….2 4.Contents of the package..…………………………………………………………………………………………………………………………….2 5.Installation ....………………………………………………………………………………………………………………………………………..3 6. Technical specification..... ………………………………………………………………………………………………………………4 6. Possibilities of connection.......................... ….5,6,7 6. -
Page 3: Warnings And Warnings
1.Warnings and warnings Do not use multiple extension cords to Do not connect the device to other power the device. Otherwise, an elevated devices, otherwise it may become temperature and a risk of fire may be permanently damaged. generated. Do not place, place heavy objects on the Do not connect the power cord to the socket with wet or wet hands, there is a device... - Page 4 2. Features and description of the device №. Name Speaker Microphone Button menu SD Card Slot Back button Left button Right button Call button Track button Open button...
-
Page 5: Features And Main Functions
3.Features and main functions - Hands-free video intercom - Digital signal transmission - Clear interface with touch screen - 2-wire connection without polarity, easy to connect - Easy installation as with a conventional/traditional 2-wire analog system - 256 photos and 16 video files can be stored on integrated memory - H. -
Page 6: Technical Specification
For example,cables: CYH 2x0.5 mm², H03VVH2-F 2x0.5mm², JYTY-O 2x1mm². Installation canonly be carried out by a person is and usedforthe installation of VERIA videophone systems. 6. Technical specification N.O. Item Content Display Colour 7"... - Page 7 Description of contacts: (1)Power contact (DC24V/1A Max) (2)SW1SwitchNo 2-wirebus. : To adjust the contact of the Setting: Set the last monitor on the2-wirebus to set the SW1 to the ON position. Other SWmonitorsto position (3) 2 wire bus buses...
- Page 8 6. Connectivity options 230V/24V DC adapter.1: 1xmonitor, 1x access station.
- Page 10 2x monitor, 1x entry station 4x monitor, 2x entry station 5x monitor, 1x entry station...
-
Page 11: Operating Instructions
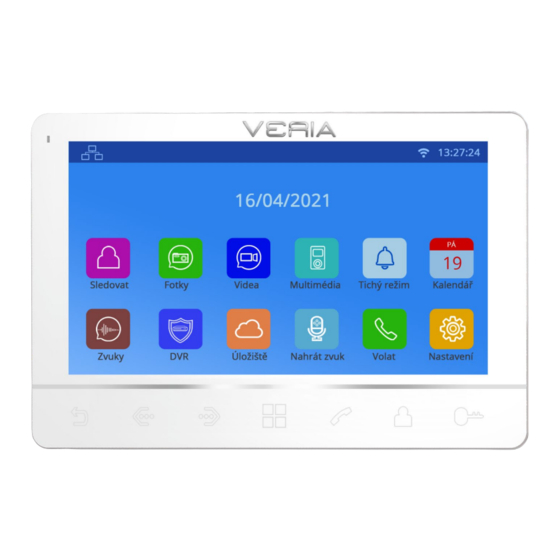
6.Operating instructions Basicopera withtouchscreen gestures. (1)Touch Selection : Confirmation (2) Scroll left: Return to the last menu (3) Scroll up:Go to page the next (4) Scrolldown: Goto previous page Receiving calls Boththeringtone displays the visitor's image on the display and the Icon screen It also displays theicons listedon the screen. -
Page 12: Intercom Function
This icon meansthat communication with the entrystation in place. This icon meansthat there is nocommunication the mail. Beforethefirst communication or ifthere is a communication problem, this icon will appear on the screen. As soon as there is an "?" icon in the communication system with the input station, it disappears. - Page 13 Method 2: Press the settings icon on the main menu the submenu and settings to go to enable the "Silent" menu, and the icon in the main menu automatically changes to an icon 10. Taking a photo and video (1)Recording: Whentalkingor watching, press the icon the image.
-
Page 14: Storage Information
and hold the selected file to display an icon and confirm that you will delete the file. Note: To delete all photos/video recordings/audio files press the settings icon on the main menu select delete menu and select delete all content from internal memory or Delete all content from external memory. 13. -
Page 15: Setting The Address Of The Room
19. Password settings: Password for system settings and settings. Press the "Settings" icon in the main menu and select the "Password Protection" menu. 3 protection modes are possible: (1) Unprotected : No password required for all settings (2) Partial protection: You need to enter a password to set up your system. To access you do not need to enter a password on the settings menu. -
Page 16: Device Number
24. Reset some parameters in the system. Press the settings icon in the main menu to select the reset menu and select the parameters you want to reset. 25. Setting up the entrance station. Press the "settings" icon in the main menu, select "device configuration ",then "List of input stations ", and select the desired input station , go to "Edit ", enter correct password (default password is "0") and confirm with the "#"... -
Page 17: Check The Condition Of The Door
34. Status assigned from the washing machine. Related information aboutthe device displayed until it is connected from the will not be device to the system. 35. Status of the elevator controller. You can enable/disable the elevator control function. Note: This feature only works if an elevator control module is installed on the system. 36. - Page 18 Intercom ringtone: Set the ringtone for an internal call. Ring time Set the ring time (10-60 seconds). Ring volume Ringtone volume Monitor ringtone volume Set the date and time View information It is turned off by default. You must enable this display in standby about standby date feature if you want to use it.
- Page 19 The name of the Edit the monitor name. device. Room address settings (one apartment/family address must be the same). Room address. If enabled, you can set the address of the Call center. center. You can set up any internal monitor as the The address of the control center.
- Page 20 Gate lock status: set the unlock time of the lock and the signal type for unlocking. Outgoing button type: Select the destination of the outgoing button, door, or gateway. You can enable/disable the status of the assigned unlocking device (if there is a station with RFIDfunctionality on the system).
- Page 21 SAFE HOME europe, s.r.o. Seat of the company: Havlíčkova 1113/47, 750 02 Přerov Czech Republic Tel.: +420 581 222 262 Website: www.veria.eu SAFE HOME europe, s.r.o. reserves the right to modify and change product specifications without notice. All materials are carefully inspected, but the company SAFE HOME europe, s.r.o.