Table of Contents
Advertisement
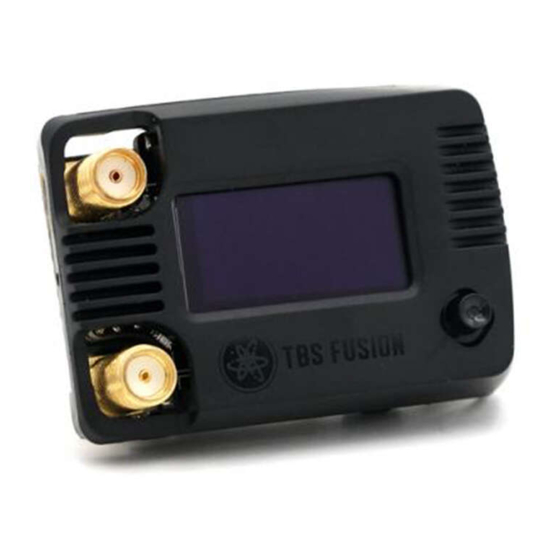
TBS FUSION receiver module
Real time image processing analog receiver module
A Fusion of the best: The image processing developed by BrainFPV, the OSD and UI by Achilles, and the
hardware engineered and manufactured by TBS. When the brightest minds of the FPV industry work
together, being the best at merging two analog video streams was simply not good enough!
Through active video fusion, the displayed video instantly has less breakup and more range, without
color-deterioration or video desync often experienced at the edge of reception. A state-of-the-art OSD
engine drives cutting edge interactivity, while reducing the need for on board OSD. The TBS Fusion both
raises the bar at reception quality and paves the way for system-wide integration with TBS Crossfire and
other devices.
Key features
●
Compatible Fatshark Dominator V1, V2, V3, HD1, HD2, HD3, HDO 1/2, Orqa and many more
External Power Kit: Included. Required for older goggles that can't deliver enough power, or for
●
connectivity
RF Sensitivity: -96dBm
●
●
Power: 5V @ 340mA, 500mAh with connectivity enabled
●
Collaboration with: BrainFPV (video fusion), AchillesFPV (UI), TBS (hardware)
●
Crossfire and TBS Cloud connectivity
●
Real-time telemetry based OSD
1
Revision 2021-03-21
Advertisement
Table of Contents

Summary of Contents for Team Blacksheep TBS FUSION
- Page 1 A state-of-the-art OSD engine drives cutting edge interactivity, while reducing the need for on board OSD. The TBS Fusion both raises the bar at reception quality and paves the way for system-wide integration with TBS Crossfire and other devices.
-
Page 2: Table Of Contents
Table of contents Getting ready Note Updating Overview Mode switch on Fatshark goggles Power Mod Do I need it How to install the mod Upgrade receiver modules Antenna selection General functions Navigation Main Screen Startup channel Favorites User frequency A user frequency can also be set as favorite like any other channel. Autolock Multilock Spectrum analyzer... - Page 3 Focus Target Invert L/R Button CRSF Fusion WiFi Other devices Fusion WiFi VTx Sync Dynamic VTx Mute VRX Calibrate About Additional informations TBS CLOUD Menu Initiate the WiFi module Connection to a WiFi hotspot Direct Crossfire/ Tracer connection VTX sync setup (Follow/ Lead/ Auto) Dynamic VTX power setup OSD with real-time telemetry data...
- Page 4 Micro USB, 2x SMA antenna connector Connector: Pins: 2,5mm pin header, 9 Pins Weight: 30,5g WiFi: IEEE 802.11 b/g/n (2.4 GHz) OLED: 64x128 Oled (blue) Kit contents: 1x TBS FUSION, 1x power mod board, 2x ribbon cable, 1x 90° SMA adapter...
-
Page 5: Getting Ready
Getting ready Getting set up and ready to fly is a quick and simple task. In most cases plug&play when using TBS equipment. If you got any question after reading this manual you should visit the TBS FAQ section Note This manual is written based on FUSION FW 2.16 and WiFi FW 1.41 . -
Page 6: Overview
Overview Mode switch on Fatshark goggles On the bottom of your Fatshark goggles you got a small switch to select the module bay or an external source. When you switch to the external source, your Fusion module will turn off unlike other modules on the market. -
Page 7: How To Install The Mod
How to install the mod There are different methods to provide battery voltage to your Fusion module. This can be done by the included power mod pcb and the ribbon cable as well as by just a single wire on the soldering spots on the pcb. -
Page 8: General Functions
General functions Main Screen The startup mode of the Fusion when you power it up. You can switch channels and bands easily with the joystick. Up/Down to change the band, Left/Right to change the channel. When the OSD Status shows locked, you can not change the channel or band. To unlock it, just push the joystick in any direction and wait for 2 seconds. - Page 9 When you change the band or the channel with UP/ DOWN or LEFT/ RIGHT a “mini band scanner” instantly show you the best channel, with ENTER the Fusion will switch the channel: Selected Channel: Position of the selected channel on the 5.8GHz band ●...
-
Page 10: Startup Channel
Startup channel On startup the Fusion will tune in to a certain channel. Permanent Startup: If you want your Fusion to always start with the same channel, Set this channel as a Favorite , navigate to the X band, push and hold the joystick for a moment until the menu shows up and select Permanent Startup. -
Page 11: Favorites
Favorites Up to 8 channels can be set as a Favorite. For this, select a channel from any band in the Matrix menu, push and hold the joystick for a moment till the menu shows up and select Save 5860 . The channels will be sorted in the order they have been set as favorite. -
Page 12: User Frequency
User frequency In the Main overview, you can switch from the standard band selection to a manual selected frequency. To do so, select any channel in the Main menu and hold down the joystick for about 2 sec till the sub-menu shows up. -
Page 13: Multilock
Multilock The Fusion searches for up to 8 channels. Those channels are listed in the OSD on the left side and you can navigate through them with UP/ Down. This feature comes in handy when you are on a race with up to 8 active pilotes, and want to watch their video feed. - Page 14 During the scanning the OSD shows the same as the OLED. After the scan:...
-
Page 15: Spectrum Analyzer
Spectrum analyzer With the spectrum analyser you can check the entire 5.8GHz band for signals. This will only affect the markers on the frequency line so you can see where the signal is located on your band. OLED Band: The band that’s scanned ●... -
Page 16: Laptimer
Laptimer If you want to count your lap times on a race track, you can do it by your Fusion module. To increase a setting, push or hold the joystick. ● Laps: Amount of laps you want to race (1 - 30) Time: Maximum time till a lap will be counted as finished (10 - 50s) ●... - Page 17 During the race: After the race:...
-
Page 18: Quad Find
Quad find If you crashed your drone and have no idea where it’s now, you can use the Quad Find feature. It works best with a high gain antenna or no antennas at all. Move your Fusion around like a radar and check for the RSSI bar and the sound from the beeper to find the direction of your grounded drone. -
Page 19: Settings
Settings Sound Enables or disables the beeper when you navigate in the menu or in the Quad Find mode. OSD Settings Mirror Menu to OSD Show the menu in the OSD or not. This has no effect on the other OSD elements. RSSI Bars Enable/ disable the RSSI bar in your OSD and change the position by the presets. - Page 20 FCs like Kiss that are connected by CRSF and upcoming devices. Fusion Here you can select if you want to use the advanced image processing of the TBS Fusion module or just use it as a diversity module. We suggest to use the Fusion mode all the time unless you experience issues with your video. Then you can try switching to diversity mode.
- Page 21 Details on how to set it up can be found here. Dynamic VTx With this feature your Fusion changes the power level of your VTx according to the RSSI. It works like the Crossfire dynamic power feature. Details about the wiring and setup can be found at Dynamic Vtx power setup.
- Page 22 TBS Cloud. This allows to use features like VTX follow*, dynamic VTX power* and other upcoming features. Note: at the moment all the Cloud features require a hotspot with internet access. *TBS Fusion video receiver required Menu WiFi Client ●...
- Page 23 Update the WiFi module ● Download and unpack the firmware files for the WiFi module from Power up your Fusion and make sure the WiFi is enabled (Settings -> WiFi) ● On your PC or phone search for a new WiFi network like “TBS_FUSION_AP_xxxxxx” ●...
- Page 24 Agent X menu work as well: ● Power up your Fusion and connect it by USB to your Agent X Navigate in the Fusion menu to WiFI/ General ● Hit Scan to search for available networks ● Under SSID you can select the found network ●...
- Page 25 VTX sync setup (Follow/ Lead/ Auto) VTx sync allows you to sync the channel of the Fusion and your video transmitter over the Crossfire/ Tracer. To get it up and running, connect your Fusion to the Crossfire Tx WiFi AP. Depending on the sync type there are different options for the wiring available.
- Page 26 Dynamic VTX power setup The setup for Dynamic Vtx power is the same as for VTx follow. Connect your Fusion to the AP of the Crossfire/ Tracer Tx and enable Dynamic Vtx. Your VTx needs to be connected to the Crossfire/ Tracer Rx by CSRF or SmartAudio.
- Page 27 OSD with real-time telemetry data The Fusion can show you real time- telemetry based data of your drone in the OSD. You need to be connected to the Crossfire/ Tracer over WiFi (direct connection or by Cloud) and need a source for the Voltage information like an FC or a Unify Evo, Core Pro or the in-build voltage sensor of the Crossfire/ Tracer receiver.
Need help?
Do you have a question about the TBS FUSION and is the answer not in the manual?
Questions and answers