Advertisement
Quick Links
Advertisement

Related Manuals for Horizon Fitness GR7


Summary of Contents for Horizon Fitness GR7
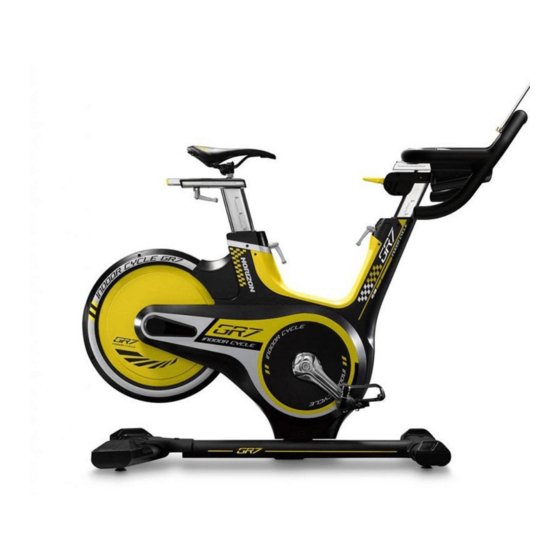
- Page 1 GR7s INDOOR CYCLE OWNER’S MANUAL...
- Page 3 INDOOR CYCLE OPERATION...
- Page 4 IMPORTANT SAFETY INSTRUCTIONS SAVE THESE INSTRUCTIONS READ ALL INSTRUCTIONS BEFORE USING THIS EXERCISE EQUIPMENT. • Keep children off your Bike at all times. • When the Bike is in use, young children and pets should be kept at least 10 feet away. •...
- Page 5 HOW TO MOVE THE INDOOR CYCLE WARNING Due to the weight of the Indoor Cycle, it is recommended To reduce the risk of injury, use extreme caution that two persons move it. While one person lifts the back while moving the indoor cycle. Do not attempt to of the indoor cycle, the second person firmly holds the move it over uneven surfaces and make sure there’s handlebar and tips the indoor cycle forward until it rolls...
-
Page 6: Saddle Adjustment
HOW TO ADJUST THE INDOOR CYCLE The Indoor Cycle can be adjusted for maximum comfort and exercise effectiveness. The instructions below describe one approach to adjusting the Indoor Cycle to ensure optimal user comfort and ideal body positioning; you may choose to adjust the Indoor Cycle differently. - Page 7 GR7s TO ADJUST THE SADDLE HEIGHT: Rotate the adjustment lever counterclockwise and adjust the saddle to a comfortable pedaling position. Rotate the lever clockwise to lock saddle position. TO ADJUST THE SADDLE HORIZONTAL POSITION: Rotate the adjustment lever counterclockwise to slide the saddle forward or backward as desired. Rotate the lever clockwise to lock saddle position.
- Page 8 GR7s The pedal straps should be adjusted to hold the foot snugly in the pedal . TO ADJUST THE HANDLEBAR HEIGHT: Rotate the adjustment lever counterclockwise to adjust the handlebar height. Raise or lower the handlebar to the desired height. Rotate the lever clockwise to lock handlebar position. TO ADJUST THE PEDAL STRAPS: Place each foot ankle on the pedal and in the toe clip that the foot ankle is centered over the pedal spindle (center of the pedal).
- Page 9 RESISTANCE CONTROL AND EMERGENCY BRAKE The preferred level of difficulty in pedaling (resistance) can be regulated in fine increments by use of the resistance control lever. To increase the resistance, push down the resistance control lever. To decrease the resistance, pull up the lever. Resistance control / IMPORTANT: Emergency brake...
- Page 10 GR7s...
- Page 11 ASSEMBLY WARNING There are several areas during the assembly process that special attention must be paid. It is very important to follow the assembly instructions correctly and to make sure all parts are firmly tightened. If the assembly instructions are not followed correctly, the indoor cycle could have parts that are not tightened and will seem loose and may cause irritating noises.
-
Page 12: Model Information
MODEL INFORMATION SHOWN Handlebar Set Saddle Set Main Frame Front Stabilizer Pedal Rear Stabilizer... -
Page 13: Pre-Assembly
PRE ASSEMBLY MAIN PARTS INCLUDED: Main Frame Front & rear stabilizer UNPACKING Handlebar Set Due to the weight of the indoor cycle, it is recommended that two persons Saddle Set perform the assembly. Set the indoor cycle in a cleared area and remove all GR7s Pedals packing materials;... -
Page 14: Assembly Step
ASSEMBLY STEP 1 Attach FRONT STABILIZER to the MAIN FRAME using BOLTS (2 x Z01 and 2 x Z02) and fasten by ALLEN WRENCH. Attach REAR STABILIZER to the MAIN FRAME GR7s using BOLTS (3 x Z01) and fasten by ALLEN WRENCH. - Page 15 ASSEMBLY STEP 2-1 (for GR7) A. Release the 4 x BOLTS (L26) from the BOTTLE HOLDER. Attach HANDLEBAR to the BOTTLE HOLDER SHOWN using FASTEN PLATE (G03) and 4 x BOLTS (L26) then fasten by ALLEN WRENCH.
- Page 16 ASSEMBLY STEP 2-2 (for GR7) Release KNOB (B30) and FIXING BASE (C06). Attach HANDLEBAR to the CONSOLE MAST using KNOB (B30) and FIXING BASE (C06). SHOWN...
- Page 17 ASSEMBLY STEP 2 (for GR7s) A. Release 4 x BOLTS (L30) from the bottom of HANDLEBAR. GR7s Attach HANDLEBAR to the CONSOLE MAST SHOWN using 4 x BOLTS (L30) and fasten by ALLEN WRENCH.
- Page 18 ASSEMBLY STEP 3 (GR7) Release PEDAL (R) onto the CRANK in the right hand side, between CRANK and PEDAL (R), A WASHER (T03) is necessary. Then tighten the SHOWN PEDAL (R) by WRENCH. Repeat the assembly process on the left hand...
- Page 19 ASSEMBLY STEP 4 ASSEMBLY COMPLETE! GR7s Dimension: 134 x 56 x 106 cm Product Weight: 50 kg Max. User Weight: 136 kg GR7s Dimension: 134 x 56 x 104 cm Product Weight: 48 kg Max. User Weight: 136 kg GR7/GR7s...
-
Page 21: Troubleshooting And Maintenance
TROUBLESHOOTING & MAINTENANCE... -
Page 22: Common Product Questions
COMMON PRODUCT QUESTIONS ARE THE SOUNDS MY Indoor Cycle MAKES NORMAL? Our Indoor Cycles are some of the quietest available because they use belt drives and cantilever brake resistance. We use the highest grade bearings and chains/belts to minimize noise. However, because the resistance system itself is so quiet, you will occasionally hear other slight mechanical noises. - Page 23 TROUBLES HOOTING PROBLEM: The Indoor Cycle makes a squeaking or chirping noise. SOLUTION: Verify the following: • The Indoor Cycle is on a level surface. • Loosen all bolts attached during the assembly process, grease the threads, and tighten again. If this does not remedy the problem, you may CONTA CT CUSTO MER TECH SUPPORT AT THE NUMBER ON THE INFORMATION CARD.
-
Page 24: Maintenance
MAINTENANCE The safety level given by the design of the Indoor Cycle can only be maintained when the equipment is regularly examined for damage and wear. Inoperable components should be replaced or the equipment should be put out of use until it is repaired. DAILY •... - Page 25 GR7 EXPLODED VIEW L24X2 L29X2 L25X3 Q13X2 L30X4 Q08X2 L25X2 L28X2 Q08X2 L27X2 Q08X4 Q07X4 Z01X2 Z02X2 R27X2 R12X2 R47X2 B66X2 C83X2 B40X2 K13X2 B35X2 J05X2 R32X4 F10X4 K50X2 B42X4 R23X4 T13X5 Q06X2 R13X2 Q09X2 Q10X3 B50X2 Q11X4 R20X2 B51X2...
- Page 26 GR7 PARTS LIST DESCRIPTION DESCRIPTION FRAME SET CENTRAL TUBE CONSOLE MAST SET FIXING PLATE SEAT SLEEVE SET PRESSING BLOCK;LEFT SEAT PAD ADJUSTABLE SET PRESSING BLOCK;RIGHT HANDLEBAR KNOB;BERAING;M16X1.75 STABILIZER SET FIXING PLATE;SPHC;93X45X4.0T STABILIZER SET FIXING PLATE;SPHC;32X25X3.0T PEDLA MAIN AXLE FIXING PLATE;79X38.5X4.0T...
- Page 27 DESCRIPTION DESCRIPTION SCREW;M4X15L FIXING AXLE;Φ22X65L WASHER;Φ10.0XΦ20.0X1.5T GUIDE BLOCK SCREW;M4X12L FIXING PLATE;SPHC;204X86X3.0T SCREW;M8X1.25PX50L NUT;M8X1.25P PLASTIC LINER;Ф10XФ12X6.5L CAP;RIGHT-FRONT CONSOLE MAST;Φ30.0XΦ60.0X2.0TX472L CAP;STABILIZER TUBE;LEFT-FRONT FIXING BLOCK CAP;STABILIZER TUBE;LEFT-REAR FIXING PLATE;SPHC;75X63X3.0T CAP;RIGHT-REAR FIXING BASE;M10X1.5P SCREW;Φ4X12L FIXING BASE ARM REST TUBE;Φ31.8X2.0TX1130L ARM REST TUBE;Φ31.8X2.0TX885L SNUG PLATE FASTEN PLATE;ARM REST;40X70X20 FIX BUCKLE SET SPRING;Φ12X37L...
- Page 28 DESCRIPTION DESCRIPTION FIXING PLATE;FRAME;RR;SPHC;245X165X4.0T COVER;BACK TRANSPORT WHEELS COVER;UP FOOT PAD;W3/8-16UNC SCREW;M4X8L HANDLEBAR FIXING PILLAR SPRING;Φ4.5X27L SCREW;Φ4X12L LOCATION HOOK SCREW;ΦX4X20L SWIVEL AXLE SCREW;M4X12L STEEL BALL;Φ5MM SCREW;M4X8L SPRING PIN AXLE,TRANSIMISSION;PEDAL AXLE COVER;HANDLEBAR;LEFT FIXING PLATE;Φ50X5.0T COVER;HANDLEBAR;RIGHT DISK;Φ340 SCREW;M4X0.7PX5L DISK;Φ408X12.0T SCREW;M4X0.7PX10L FIXING DISK SCREW;M6X1.0PX20L MAIN AXLE SCREW;M4X8L AXLE;IDLER...
- Page 29 DESCRIPTION DESCRIPTION FIX PLATE BATTERY BASE;NO.5 WASHER;Φ10.2XΦ20.0X2.0T TAPE;FOAM;TWO-SIDED;48X14X4T FIXING PLATE;Φ320X3.0T SCREW;HEX SOCKET;BUTTON HEAD;M6X1.0PX40L SHIM;Φ38.5XΦ30.5X2.0T SEAT PAD NUT;M6X1.0P BEARING;BALL;6001;Φ12XΦ28X8L(C3) STEEL ROPE WASHER;WAVE;Φ12.7XΦ18.0X0.3T CRANK;L=170MM;LEFT NUT;WELD;M10X1.5P;G10;OIL; CRANK;R=170MM;RIGHT SCREW;M6X1.0PX20L SHIM;Φ15.0XΦ22 BEARING;BALL;6004ZZ;Φ20XΦ42X12T PEDAL SET;W/ BELT;L/R SCREW;BUTTON HEAD;M10X1.5PX20 WASHER;DISC SPRING;Φ10.0XΦ20.0X1.0T;SWPA POWERFUL MAGENT;Φ25.0X9.0T SCREW SET SCREW;Φ3X6L BELT;POLY-V;FLEXONIC;1612-J8 SCREW;Φ4X12L BEARING;BALL;6005ZZ;Ψ25XΨ47X12T SCREW;Φ4X12L...
- Page 30 DESCRIPTION DECAL;SIDE COVER;LEFT-REAR DECAL;SIDE COVER;RIGHT-UP DECAL;SIDE COVER;RIGHT-REAR DECAL;HANDLEBAR;UP WARNING LABEL;UP MANUAL;ASSEMBLY/MANIPULATE EN LABEL WARNING LABEL DECAL;SIDE COVER;MIDDLE SCREW;M8X1.25PX20L SCREW;BUTTON HEAD;M8X1.25PX15L WRENCH;HEX;L-TYPE;#5MMX140L WRENCH;OPEN-TYPE;#17...
- Page 31 GR7S EXPLODED VIEW L25X2 L24X2 L26X4 L29X2 L25X3 Q13X2 Q08X2 L25X2 L28X2 Q08X2 L27X2 Q08X4 Q07X4 Z01X2 Z02X2 R31X4 R27X2 R32X2 R12X2 R47X2 B66X2 C83X2 B40X2 K13X2 B35X2 J05X2 R32X4 F10X4 K50X2 B42X4 R23X4 T13X5 Q06X2 R13X2 Q09X2 Q14X3 B50X2 Q11X4 R20X2 B51X2...
- Page 32 GR7S PARTS LIST DESCRIPTION DESCRIPTION FRAME SET CENTRAL TUBE CONSOLE MAST SET FIXING PLATE SEAT SLEEVE SET PRESSING BLOCK;LEFT SEAT PAD ADJUSTABLE SET PRESSING BLOCK;RIGHT HANDLEBAR KNOB;BERAING;M16X1.75 STABILIZER SET FIXING PLATE;SPHC;93X45X4.0T STABILIZER SET FIXING PLATE;SPHC;32X25X3.0T PEDLA MAIN AXLE FIXING PLATE;79X38.5X4.0T HARDWARE SET MP3 SUPPORT RACK SUPPORT TUBE;Φ50.0XΦ100.0X2.0TX700...
- Page 33 DESCRIPTION DESCRIPTION SCREW;M8X1.25PX50L CAP;RIGHT-FRONT NUT;M8X1.25P CAP;STABILIZER TUBE;LEFT-FRONT PLASTIC LINER;Ф10XФ12X6.5L CAP;STABILIZER TUBE;LEFT-REAR CONSOLE MAST;Φ30.0XΦ60.0X2.0TX472L CAP;RIGHT-REAR FIXING BLOCK SCREW;Φ4X12L FIXING PLATE;SPHC;75X63X3.0T ARM REST TUBE;Φ31.8X2.0TX1130L FIXING BASE ARM REST TUBE;Φ31.8X2.0TX885L FASTEN PLATE;ARM REST;40X70X20 SNUG PLATE FIXING PLATE;ARM REST;U;176.5X112X4 FIX BUCKLE SET SPRING;Φ12X37L SCREW;M5X10L STABILIZER;Φ50XΦ100X2.0TX520L POSITION AXLE STABILIZER;Φ50XΦ100X2.5TX645L...
- Page 34 DESCRIPTION DESCRIPTION SPRING;Φ4.5X27L SCREW;ΦX4X20L SWIVEL AXLE SCREW;ΦX4X15L STEEL BALL;Φ5MM SCREW;M4X12L SPRING PIN SCREW;M4X8L COVER;HANDLEBAR;LEFT AXLE,TRANSIMISSION;PEDAL AXLE COVER;HANDLEBAR;RIGHT FIXING PLATE;Φ50X5.0T SCREW;M4X0.7PX5L DISK;Φ340 SCREW;M4X0.7PX10L DISK;Φ408X12.0T SCREW;M4X8L FIXING DISK SCREW;Φ4X20L MAIN AXLE SCREW;M4X15L AXLE;IDLER SCREW;M8X1.25PX15L IDLER SIDE COVER PLASTIC RACK SIDE COVER;RIGHT SNAP RING COVER;FRONT SNAP RING COVER;BACK...
- Page 35 DESCRIPTION DESCRIPTION SEAT PAD WASHER;DISC SPRING;Φ10.0XΦ20.0X1.0T;SWPA BEARING;BALL;6001;Φ12XΦ28X8L(C3) SCREW SET WASHER;WAVE;Φ12.7XΦ18.0X0.3T BELT;POLY-V;FLEXONIC;1612-J8 NUT;WELD;M10X1.5P;G10;OIL; BEARING;BALL;6005ZZ;Ψ25XΨ47X12T SCREW;M6X1.0PX20L BEARING;BALL;6006ZZ;Φ30XΦ55X13T BEARING;BALL;6004ZZ;Φ20XΦ42X12T SNAP RING;EXTERNAL C-SHAPED;S-25 SCREW;BUTTON HEAD;M10X1.5PX20 SCREW;M6X1.0PX15L POWERFUL MAGENT;Φ25.0X9.0T MAGENT;TWO-SIDED;Φ15X7T;1900GS SCREW;Φ3X6L DECAL;SIDE COVER;LEFT-UP SCREW;Φ4X12L DECAL;SIDE COVER;LEFT-DOWN SCREW;M6X1.0PX60L-15L DECAL;SIDE COVER;LEFT-REAR SPEED SENSOR WIRE DECAL;SIDE COVER;RIGHT-UP DECAL;SIDE COVER;RIGHT-REAR SCREW;HEX SOCKET;BUTTON HEAD;...
- Page 36 DESCRIPTION WRENCH;HEX;L-TYPE;#5MMX140L WRENCH;OPEN-TYPE;#17...
- Page 37 Horizon Fitness - Produkte sind recyclebar. Führen Sie das Gerät am Ende der Nutzungsdauer einer sachgerechten Entsorgung zu (örtliche Sammelstelle). GB: Waste Disposal Horizon Fitness products are recyclable. At the end if its useful life please dispose of this article correctly and safely (local refuse sites). F: Remarque relative à la gestion des dèchets Horizon Fitness sont recyclables.
- Page 38 INDOOR CYCLE OWNER’S MANUAL GR7 & GR7s Owner’s Manual 040318’ Rev. 1.0 © 2018 Horizon Fitness...
Need help?
Do you have a question about the GR7 and is the answer not in the manual?
Questions and answers