Advertisement
Table of Contents
- 1 General Standards
- 2 Technical Data
- 3 Main Components
- 4 Work Curves
- 5 Boiler Assembly
- 6 Lmo Equipment
- 7 Wiring Diagram
- 8 Electrodes - Deflector Setting
- 9 Head Combustion Adjustments
- 10 Pump Pressure Adjustment
- 11 Air Damper Adjustment
- 12 Combustion Control
- 13 Maintenance
- 14 Operating Irregularities
- Download this manual
СЕРТИФИЦИРОВАННАЯ КОМПАНИЯ UNI EN ISO 9001
IT
UK
FR
DE
ES RU
AZIENDA CERTIFICATA UNI EN ISO 9001
UNI EN ISO 9001 CERTIFIED COMPANY
3 - 3R - 3 ST - 3R ST - 5 N
5R N - 5 R N ST
MANUAL PARA LA INSTALLACI
РУКОВОДСТВО ПО ЭКСПЛУАТАЦИИ И ТЕХНИЧЕСКОМУ
BRULEUR FIOUL DOMESTIQUE
QUEMADORES PARA GASÓLEO
ГОРЕЛКА НА ДИЗЕЛЬНОМ ТОПЛИВЕ
MANUALE DI INSTALLAZIONE E MANUTENZIONE
INSTALLATION AND MAINTENANCE MANUAL
NOTICED'INSTALLATIONET D'ENTRETIEN
INSTALLATIONS-UNDWARTUNGSANLEITUNG
BRUCIATORE DI GASOLIO
LIGHT OIL BURNERS
ÖLBRENNER
ECO
-
-
7R
Ó
N Y EL MENTENIMIENTO
ОБСЛУЖИВАНИЮ
7/2
Advertisement
Table of Contents

Subscribe to Our Youtube Channel
Related Manuals for Lamborghini Caloreclima ECO 3


Summary of Contents for Lamborghini Caloreclima ECO 3
- Page 1 AZIENDA CERTIFICATA UNI EN ISO 9001 UNI EN ISO 9001 CERTIFIED COMPANY СЕРТИФИЦИРОВАННАЯ КОМПАНИЯ UNI EN ISO 9001 BRUCIATORE DI GASOLIO LIGHT OIL BURNERS BRULEUR FIOUL DOMESTIQUE ÖLBRENNER QUEMADORES PARA GASÓLEO ГОРЕЛКА НА ДИЗЕЛЬНОМ ТОПЛИВЕ 3 - 3R - 3 ST - 3R ST - 5 N 5R N - 5 R N ST MANUALE DI INSTALLAZIONE E MANUTENZIONE INSTALLATION AND MAINTENANCE MANUAL...
-
Page 2: General Standards
GENERAL STANDARDS This manual is an integral and essential part of the product and must be given to the installer. Read the warnings given in this manual as they supply important indications regarding instal-lation, use and maintenance safety.Keep this manual carefully for future referen- ce. - Page 3 The burner room must have openings towards the outside in compliance with local Standards in force. If in doubt relative to the circulation of air, first of all we recommend that the CO2 value is measured, with the burner functioning at maximum flow rate and the room ventilated, only via the apertures destined to feed air to the burner andthen by measuring the CO2 value again, with the door open.The value of CO2 measured in both cases must not change in a significant manner.If there are more than one burner...
- Page 4 Never touch the burner with wet body parts or without wearing shoes. Never stretch (force) power supply cables and keep them away from heat sources.The length of the cables used must allow the burner and any boiler door to be opened. The electric connections must be made exclusively by qualified staff and the regula- tions in force on the subject of electricity must be respected.After all packaging ma- terial has been re moved, control the contents and ensure that these have not been...
- Page 5 DIMENSIONS ECO 3 -3R - 5 N - 5 N R - 7 R - 7/2 ECO 3 ST -3R ST - 5 N ST - 5 N R ST Ø F Ø G ECO 3 ECO 3R ECO 3 - ST...
-
Page 6: Technical Data
TECHNICAL DATA ECO 3 ECO 3 R ECO 5 R N Model ECO 5 N ECO 3 ST ECO 3 R ST ECO 5R N Heat output 16,6 - 35,6 14,2 - 35,6 29,6 - 59,3 30,8 - 59,3 Flow rate... -
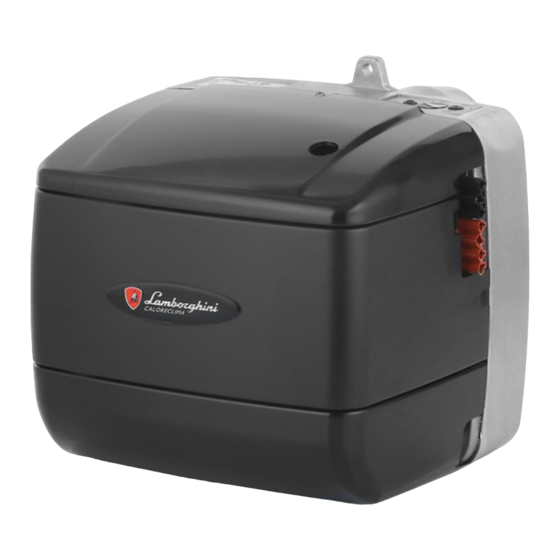
Page 7: Main Components
WORK CURVES The curves shown in the diagram were obtained by performing combustion tests in accordance with the specifications and characteristics of fire required by law. ECO 3 R - ECO 3 R ST ECO 3 - ECO 3 ST -0,2... - Page 8 ECO 5 N ECO 5 R N -0,2 -0,2 ECO 7 R ECO 5 R N ST -0,2 -0,2 ECO 7/2 * Working range obtainable in 1st stage. -0,2 kg/h 10 20 30 40 50 60 70 80...
-
Page 9: Boiler Assembly
BOILER ASSEMBLY ECO 3 - 3 R - 3 ST - 3 R ST - 5 N - 5N R - 5 N R ST Insert screw 1 (M8 x 30) in flange 2 - Fasten flange 2 onto Boiler with screws 3 (N° 4 screws M8 x 20) placing the insulation gasket 4.Insert... -
Page 10: Lmo Equipment
FUEL FEED PIPES ASPIRATED SYSTEM GRAVITY-DROP SYSTEM ø 10 ø 12 ø 8 ø 10 ø 6 ø 8 Diagrams refer to light oil with max viscosity 1.5°E (6 cSt) at 20°C. A Fuel aspiration line B Fuel filter C Fuel aspiration line gate D Flow-stop solenoid valve E Return line gate F Return line... - Page 11 EQUIPMENT STATE INDICATORS Description Condition Colour sequence Standby, other intermediate states No light Fuel preheating “on”, waiting time 5s.max Yellow Ignition stage Yellow, flashing Correct operation Green Incorrect operation, current level of Green, flashing flame detector below permitted minimum Drop in voltage Alternating yellow red Burner lock out Fault...
-
Page 12: Wiring Diagram
- Make the connection to an effi cient earthing system. - Bridge 3-8 on base is found only on versions withouth preheater. ECO 3 - 3R - 3 ST 3 3 R ST - 5 N - 5 R N - 5 R N ST - 7 R 101112... - Page 13 ECO 7/2...
-
Page 14: Electrodes - Deflector Setting
It is adviseable to check levels after every intervention on head. ECO 3 - 3R - 3 ST 3 3 R ST - 5 N - 5 R N - 5 R N ST - 7 R ECO 7/2... - Page 15 NOZZLE CHOICE Inside every PUMP/NOZZLE PRESSURE box there are two values. The flow rate in kg/h is expressed at the top, in kW at the bottom. INSTALLING NOZZLE. Once the nozzle adapt to the boiler power has been chosen proceed with its mounting onto the burner following the instructions given in the paragraph “MAINTENANCE”...
-
Page 16: Pump Pressure Adjustment
PUMP PRESSURE ADJUSTMENT ECO 3 - 3R - 3 ST 3 3 R ST - 5 N - 5 R N - 5 R N ST - 7 R The pump pressure is pre-set during production at 12 bar.For controlling pressure use an oil bathed manometer. -
Page 17: Air Damper Adjustment
AIR DAMPER ADJUSTMENT ECO 3 - 3R - 3 ST 3 3 R ST - 5 N - 5 R N - 5 R N ST - 7 R After having untightened the screw C, whith the screw A it obtains the air combustion adjustment, according tothe indications of index B. - Page 18 AIR SEVOMOTOR ADJUSTMENT ECO 7/2 The geared motor limit switch and auxiliary contacts are triggered by easily accessible adju-stable cams, which can be set against o graduated scale SETTING THE CONTACT TRIGGERING POINT General information: CAM V (2 Stage) - Cam controlling air valve fully open position (maz. firing rate with both stages in operation).
-
Page 19: Combustion Control
COMBUSTION CONTROL In order to obtain the best combustion performance and efficiency, and for respect of the envi- ronment, checksand adjustment of the combustion must be carried out, and with appropriate tools.Basic values to be considered are: —CO2 indicates the amount of excess air during combustion; if air is increased, CO2 % value- sdecrease, and if combustion air is decreased, CO2 % values increase. - Page 20 Fig. C - C1 To dismount the nozzle: a)Loosen screw 1 and extract deflector/electrode set. b)Unscrew the nozzle with spanner/counter-spanner. Centering tongue for vertical position or lightly to the right position (max 10°) Fig. D IMPORTANT:fix the deflector/electrodes set on the- nozzle holder tube in position as per fig.
-
Page 21: Operating Irregularities
OPERATING IRREGULARITIES PROBLEM PROBABLE CAUSE SOLUTION Motor does not work No power supply a) check fuses b) check thermostats Motor works but there is a) electrodes are not dischar- a) check correct position of noflame formation and tipsand clean them with b) nozzle is dented b) clean or replace nozzle... - Page 22 Le illustrazioni e i dati riportati sono indicativi e non impegnano. La Lamborghini Calor si riser- va il diritto di apportare senza obbligo di preavviso tutte le modifiche che ritiene più opportune per l’evoluzione del prodotto. The illustrations and data given are indicative and not binding. Lamborghini Calor reserves the right to make all modifications it deems appropriate for improvement of the product without forewarning.
Need help?
Do you have a question about the ECO 3 and is the answer not in the manual?
Questions and answers