Table of Contents
Advertisement
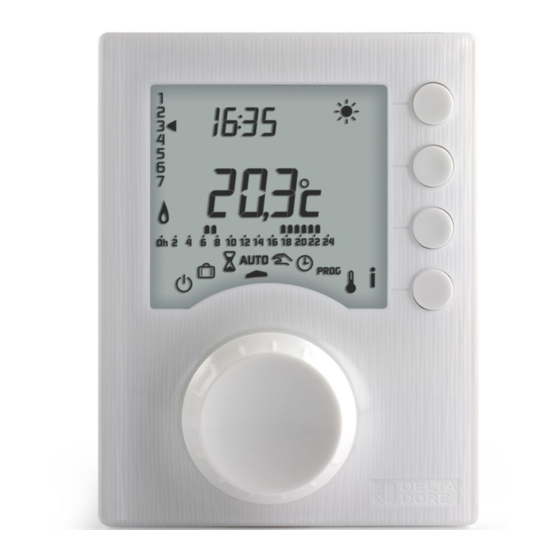
Tybox 1117
www.deltadore.com
Contents
Installation
1.
Installing the transmitter ............................................................................................ 3
1.1
Location ...................................................................................................................................3
1.2 Mounting/Connection .......................................................................................................3
2.
Time and date setting ................................................................................................. 4
3.
Configuring your device (Menu 1) .............................................................................. 5
Menu 1-02 Programme duration ..............................................................................................5
Menu 1-03 Pre-heat activation/deactivation ...................................................................5
Menu 1-08 Controlling the Comfort temperature ...........................................................5
Menu 1-09 Anti-seize activation/deactivation .................................................................5
4. Configuring your device (Menu 2) ............................................................................. 6
Menu 2-01 Locking or unlocking the settings .....................................................................6
Menu 2-02 Correcting the measured temperature .........................................................6
Menu 2-04 Temperature displayed in AUTO mode (setpoint or room).....................6
Menu 2-05 12h/24h time and date format ..........................................................................6
Menu 2-06 Automatic summer/winter changeover ........................................................6
Menu 2-07 Time to boiler/heat pump maintenance .......................................................7
Menu 2-08 Control time base ..................................................................................................7
Menu 2-11 Hysteresis setting (if 2-08 = tor) ...........................................................................7
Menu 2-17 Resetting the boiler/heat pump operating hours meter ..........................7
5.
Settings reset ................................................................................................................ 8
6.
Technical characteristics ........................................................................................... 8
Installation and User
Guide
1
Advertisement
Table of Contents

Subscribe to Our Youtube Channel
Related Manuals for DELTA DORE Tybox 1117


Summary of Contents for DELTA DORE Tybox 1117
-
Page 1: Table Of Contents
Installation and User Guide Tybox 1117 www.deltadore.com Contents Installation Installing the transmitter .................... 3 Location ...........................3 1.2 Mounting/Connection .......................3 Time and date setting ....................4 Configuring your device (Menu 1) ................5 Menu 1-02 Programme duration ....................5 Menu 1-03 Pre-heat activation/deactivation ..............5 Menu 1-08 Controlling the Comfort temperature ............5... - Page 2 Utilisation Description ........................9 Automatic mode (AUTO) ..................... 9 Override ......................... 9 4. Information button ...................... 10 Time setting ........................10 Adjusting temperature settings ................10 Programming ......................... 11 7.1 Quick programming ......................11 7.2 Customising a programme ....................12 7.3 Programme verification .....................13 7.4 Return to initial programme .....................13 Manual mode ........................
-
Page 3: Installing The Transmitter
INSTALLATION 1. Installing the transmitter ~1,50 m 1.1 Location The thermostat can be mounted on the wall in a room whose temperature is representative of the location’s average temperature, with a Mini 20 cm recommended height of 1.5m and it should also be nowhere near any heat sources (fireworks, sunlight, etc.) or air flows (window, door, etc.). -
Page 4: Time And Date Setting
2. Time and date setting 2021... EXIT ❽-> ❿ Set the hour then the minutes with + or -. ❶ Turn the knob to ⓫ Confirm with OK. ❷-> ❻ Set the day, month, year with + or -. ⓬ To exit the mode, turn the knob. ❼... -
Page 5: Configuring Your Device (Menu 1)
3. Configuring your device (Menu 1) >5s EXIT ❸ Press the 1 button. ❻ To exit the mode, turn the knob. ❶ Turn the knob to , then press To change the various settings, the i button for 5 seconds (❷). press the + or - buttons (❹), then press OK to confirm the change and go to the next setting (❺). -
Page 6: Configuring Your Device (Menu 2)
4. Configuring your device (Menu 2) >5s EXIT ❸ Press the 2 button. ❻ To exit the mode, turn the knob. ❶ Turn the knob to , then press To change the various settings, the i button for 5 seconds (❷). press the + or - buttons (❹), then press OK to confirm the change and go to the next setting (❺). -
Page 7: Menu 2-07 Time To Boiler/Heat Pump Maintenance
Menu 2-07 Time to boiler/heat pump maintenance Reprogramme after every maintenance session. Default setting: “---” (function off). If you don't want to use this function, leave Adjustable "---" (function off) or from 1 to 365 days the setting on “---”. Menu 2-08 Control time base The control quality depends on parameters like the building’s insulation, the number of radiators or the flooring type. -
Page 8: Settings Reset
5. Settings reset The factory settings may be restored for each of the menus. Init Menu 1 >5s >5s Init Menu 2 EXIT ❸ Press the button on the menu ❹ Then press the OK button to ❶ Turn the knob to , then press you wish to reset, and hold the confirm the reset. -
Page 9: Description
1. Description Selector knob Off mode Absence mode Programme profile Manual mode Room AUTO Follows programming Day (1 = Monday) Date and time settings Time PROG Programming Current setpoint Adjusting Information setpoint temperature settings Comfort Low batteries Economy Frost protection 2. -
Page 10: Information Button
4. Information button In AUTO, manual or off mode, successive presses on the button enable you to: - find out the room temperature or the setpoint temperature (depending on the configuration during installation (menu 2-04), - show the boiler/heat pump operating hours meter, as well as the number of days remaining before maintenance (if this setting is on, menu 2-07), - show any faults (see §... -
Page 11: Programming
7. Programming You can opt for weekly (PROGx7) or daily (PROGx1) PROG x 7 programming. PROG x 1 You can select your choice using the switch on the back of the device. You can programme in increments of one hour, 30 minutes or 15 minutes (menu 1-02). -
Page 12: Customising A Programme
7.2 Customising a programme How to set a daily programme (PROG x1) ❶ Turn the knob to PROG. ❷ Press + or - to choose the programme to change (P1 or P5). EXIT ❸ Confirm with OK. You can check your programme by pressing The programme profile flashes. -
Page 13: Programme Verification
7.3 Programme verification EXIT Once your programme has been If it suits you, confirm with OK and To exit the mode, turn the selector changed, you can check it by go to the next day knob. (if PROGx7). successively pressing the button 7.4 Return to initial programme You want to reset to the initial programmes. -
Page 14: Manual Mode
8. Manual mode This mode is used to choose a temperature setting (5 to 30°C) that remains 30°C constant. This setting may be restricted (menu 2-01 = 1). 5°C Turn the knob to exit the mode. In this mode, programming is no longer taken into account. 9. -
Page 15: Pre-Heat Function
11. Pre-heat function When changing from Economy to Comfort temperature in AUTO mode, your thermostat will anticipate the rise in temperature so that it reaches the right temperature at the scheduled time. Example (see opposite): 6:30 am, Economy period, currently pre-heating to reach the temperature of 20°C at 8:00 The pre-heating function’s speed and accuracy is based on the heater type used and its heating inertia..
Need help?
Do you have a question about the Tybox 1117 and is the answer not in the manual?
Questions and answers