
Related Manuals for Price Prodigy


Summary of Contents for Price Prodigy
- Page 1 MANUAL – INSTALLATION Prodigy Prodigy Digital VAV Diffusers ® v200 – Issue Date: 10/19/20 © 2020 Price Industries Limited. All rights reserved.
-
Page 2: Table Of Contents
Price Power Module Optional Accessory ....... 7 Troubleshooting Guide ..........31 TR115 / TR277 Transformer Optional Accessory ... 8 Master Specifications ..........33 Prodigy Pressure Relief Collar Optional Accessory ..8 Drone Specifications ........... 33 Baffle Optional Accessory ..........9 Supply Air Temperature Sensing ........9 Thermostat Installation .......... -
Page 3: Product Overview & Installation Instructions General Description
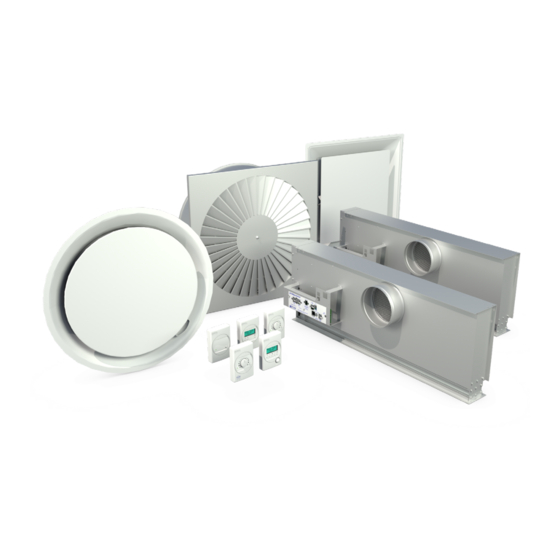
PRODIGY - DIGITAL VAV DIFFUSERS ® PRODUCT OVERVIEW & INSTALLATION INSTRUCTIONS General Description FIGURE 1 Prodigy diffusers are digital VAV diffusers with built-in electric motor and controller MAXIMUM FLOW MINIMUM FLOW providing VAV cooling and VAV heating. INLET INLET The damper modulates open and close to vary the air flow (warm or cool) into the room in response to room temperature. -
Page 4: Power Supply To Master
® PRODUCT OVERVIEW & INSTALLATION INSTRUCTIONS Power Supply to Master All Prodigy Master units require a 24 VAC power supply and each draws 3.0 VA. There are three options for power: Field Supplied 24 VAC Price Power Module (PPM) Connect 24 VAC and common lines to optional TP (See Mounting/Installation Instructions on Page 8) (Terminal Plug). -
Page 5: Drone Power Supply Connection
Use cable to connect unit with PPM 115 / 277 POWER SUPPLY (ONE OUTPUT JACK) DRONE OUT (Fig. 4) on Prodigy Master (PPD1, PPD2 or PPD3) or previously connected PPDD using a free Drone output Drone Jack (Fig. 5). Cable length may be extended by using a CC (cable connector) for longer runs. -
Page 6: Model Nomenclature
- DIGITAL VAV DIFFUSERS ® PRODUCT OVERVIEW & INSTALLATION INSTRUCTIONS Thermostat Options FIGURE 8 - DRONE WIRING DIAGRAM The Prodigy Master uses a wall thermostat to accurately sense room RED LED DC SIGNAL STATUS TO DRONE temperature in both cooling and heating modes. - Page 7 Master and Drone. Balancing To correctly balance a VAV diffuser, set the maximum flow, the diffuser must be in the 100% open position. The Prodigy diffuser may be opened to 100% by: • Accessing the override open command using the menus availble on the LCD thermsotat >Service Menu >Balanacing >Dpr Override >Goto Full Open (see Balancing Menu page 16)
-
Page 8: Model Configuration / Setpoint Adjustment
Auxiliary Heat All Prodigy Master con trol units will pro vide a 24 VAC pulsed output signal for supple men tal auxiliary heating. Two ter min als are located on the junction board for this pur pose (Figure 9). The signals can be wired to an intermediate relay to control a auxiliary heating system. -
Page 9: Optional Accessories
96 VA TRANSFORMER masters and associated drones. Overload indicator LEDs on each line light up if too many Prodigy diffusers (or PIC’s) are connected or if there is a short in the cable. • Max 15 Prodigy diffusers or PIC controllers per PPM •... -
Page 10: Tr115 / Tr277 Transformer Optional Accessory
TR115 / TR277 Transformer Optional Accessory OPTIONAL 20 VA TRANSFORMER Optional 20 VA transformer mounts to the junction bracket of Prodigy Diffuser. Support up to 6 Prodigy units - any combination of masters and associated drones. Installation Instructions Remove lid from junction box. -
Page 11: Baffle Optional Accessory
For automatic changeover the Prodigy uses a dynamic neutral mode for optimal use of the supply air. Basically if the supply air can help the Prodigy meet the room set point it is used as such. For example if the supply air is 70F and the room temperature is 80F with a set point of 72F, the Prodigy will consider the supply air as cold and modulate appropriately. - Page 12 PRODUCT OVERVIEW & INSTALLATION INSTRUCTIONS Prodigy Thermostat Options All thermostats are connected with a connection from the Prodigy to the back of the selected thermostat. Each thermostat has an RJ-12 Service Port on the bottom, used to connect an LCD-SETUP tool for balancing and parameter changes without having to access the penum.
- Page 13 Humidity sensor allows for monitoring • The LCD Thermostat with CO2 and Humidity can Service Port be used as a balancing tool for the Price Intelligent Controller system by simply connecting the RJ-45 *Note: Requires connection to cable to the back of the thermostat.
-
Page 14: Thermostat Installation
The Prodigy thermostats are all physically the same size and SURFACE MOUNT DETAIL 1. The Price Intelligent Controller (PIC) Thermostats must be mounted to a wall and wired to the PIC mounting instructions will be typical. controller via the supplied plenum rated 35ft CAT-5 cable. This cable plugs into the thermostat Surface Mount Detail and the PIC controller with the ease of RJ-45 connections. -
Page 15: Display Navigation Initial Setup
- DIGITAL VAV DIFFUSERS ® DISPLAY NAVIGATION Initial Setup LCD Thermostats Only When the LCD thermostat is powered from the Prodigy, it will Day Setpoint Adjustment display the following information on power up: Increase and decrease push buttons for day set point adjustment... -
Page 16: Information Menu (Lcd Stats Only)
· Must be set to match frequency of the supply power. Prodigy Application Model PRODIGY APP SQUARE · Displays model (geometry) of Prodigy diffuser. Exit – This will exit the info menu if you select Yes. PRESS MENU TO EXIT Note: Info menu will automatically time out after 60 seconds. -
Page 17: Service Menu (Lcd Stats Only)
· Only available with LCD Tstat with CO2 and Humidity (See page 11) Exit – This will exit the info menu if you select Yes PRESS MENU TO EXIT Note: Info menu will automatically time out after 60 seconds priceindustries.com | PRICE PRODIGY - Manual ®... -
Page 18: Balancing Menu
DPR. OVERRIDE for damper to meet GOTO HEAT MAX Chases heat min flow target within 5 % POS. · Prodigy will remain in this mode until Neutral Flow DPR. OVERRIDE user exits the menu GOTO NEUTRAL Chases neutral flow ... -
Page 19: Vvt Menu (Pressure Dependant Mode)
DPR. NEUTRAL · Sets the neutral flow · Range 0-100% Default: 0% Unocc Dpr Pos UNOCC DPR POS* · When Prodigy is unoccupied damper will ‘rest’ at this position · Range: 0-100% Default: 0% Inlet Size INLET SIZE* 10 INCHES ·... -
Page 20: Setpoint Menu (Setpoint Limits And Temperature Units)
· Fahrenheit or Celsius FAHRENHEIT · Default: °F Night Heat Setpoint NITE HEAT SET* · Prodigy will maintain this heating setpoint when unoccupied 62.0°F · Range: 10.0°F – 100.0°F Default: 62.0°F Night Cool Setpoint NITE COOL SET* · Prodigy will maintain this cooling setpoint when unoccupied 83.0°F... -
Page 21: Input Menu (Supply Air Temp And Neutral Mode)
· When supply air temp (SAT) is below room temp it is considered cooling. · When supply air temp (SAT) is above room temp it is considered heating. · This mode is recommended because Prodigy will always use the supply air if it can help satisfy the room load. Neutral Mode = Conventional NEUTRAL MODE ·... -
Page 22: Output Aux Binary Menu
· Disabled = cooling 0VAC, heating 24VAC (valve open) · Enabled = cooling 24VAC (valve closed), heating 0VAC PRESS MENU TO EXIT OUTPUT See Output Analog Menu (next page) ANALOGS PRESS MENU TO EXIT - Manual | priceindustries.com PRICE PRODIGY ®... -
Page 23: Output Analog Menu
· Default: 0.0 VDC. Auxiliary unoccupied voltage AUX. UNOCC. · Outputs this voltage when Auxiliary Analog pin is set to unoccupied. 0.0 VDC PRESS MENU TO EXIT PRESS MENU TO EXIT priceindustries.com | PRICE PRODIGY - Manual ®... -
Page 24: Bacnet Menu (Bacnet Addressing Setup)
· Range: 1 – 4,194,303. · Note: After changing device instance the STAT will send a RESET command to the Prodigy to apply the ADDRESS changes. Addresses are DEVICE INST. only READ on startup, so after any changes you must reset the controller either via STAT (which is automatic) or cycle 24 VACpower. -
Page 25: Stat Setup Menu
CtlName/SP en, CtlName/SPdis, NameTemp/SPen, NameTemp/SPds, Name and SetP Thermostat Name CONTROLRNAME · Configure an identifier or tag for the thermostat RESET CONTROLLER Thermostat Reset · Returns thermostat to factory configuration PRESS MENU Exit TO EXIT priceindustries.com | PRICE PRODIGY - Manual ®... -
Page 26: Display Options Menu
Menu item will only appear if thermostat with CO2 sensor connected. See thermostat with CO2 for more details. Prodigy App Menu Prodigy Application Model Selection Scroll through with Up and Down buttons, press Menu button to apply your changes *---wait---* will display as changes are applied. -
Page 27: Native Bacnet Network Interface Optional Accessory
Dual RJ-45 jacks on each diffuser allow daisy chaining each device without splitters or any tools. Included with each Prodigy diffuser is a 35 foot plenum rated network cable to simplify installation in the field. -
Page 28: Bacnet Wiring
Termination helps reduce reflections and noise. The terminating can be done with a 100 ohm resistor across the + and - lines. Prodigy Diffusers have ELECTRICAL NOISE EXAMPLE the option for enabling termination via a DIP switch or by a software menu selection. -
Page 29: Network Wire Specifications
® NATIVE BACNET NETWORK INTERFACE OPTIONAL ACCESSORY Use Price supplied CAT-5 cables for BACnet whenever WIRING possible. If not possible to use Price supplied cables, follow these wire specifications. Network Wire Specifications PIN 1 For the BACnet MS/TP network specific wire is required. -
Page 30: Bacnet Service Menu
DIP switched on the BACnet BACNET board must be set to set the MAC address. For easier setup, Price recommends setting the MAC over software which will override the DIP switch settings. MAC SET IN:... - Page 31 The baud rate is the speed that the MS/TP network runs at. EVERY device on the network must run at the same speed. Price controllers are defaulted to a baud rate of 76800, but can be changed to 38400, 19200, or 9600. For a network segment with all Price controllers (including Price PRTU systems), it’s...
-
Page 32: Bacnet Networking And Setup
LCD SETUP TECH TIP When using a DIAL thermostat, you must purchase a setup tool LCD-SETUP and use this to configure the Prodigy diffuser. Remember, all settings are stored in the Prodigy diffuser and not the thermostat. - Manual | priceindustries.com PRICE PRODIGY ®... -
Page 33: Maintenance Troubleshooting Guide
Status LED’s are provided on the Junction Panel of all Prodigy Diffusers to aid in field diagnostics. Green LED – Indicates presence of 24 VAC power supply. Red LED – Indicates presence of 2 - 10 VDC Drone Signals. - Page 34 Red Fault Light On above Output Jack If Red fault LED lights, cable is faulty. Replace. If Red fault LED remains off, reconnect remaining components (CS, CC, C35, Prodigy Masters) one at a time until LED lights. Replace faulty component. Redundant Power Supply...
-
Page 35: Master Specifications
1 Binary Triac zero crossing output at 24 VAC (thermally protected) 12VA maximum 2x RJ12 jacks for Prodigy Drone units (maximum 6 total per master) Input 1x RJ45 Thermostat jack (works with Price line of thermostats and Prodigy PPD1 jumper) Communication BACnet Master MS/TP module supports 9600/19200/38400/76800 baud rates, 2x RJ45 connections, Green Transmit LED, Red Receive LED, MAC address settable through DIP switches or LCD thermostat, Device Instance settable through LCD thermostat, or LINKER service tool. - Page 36 This document contains the most current product information as of this printing. For the most up-to-date product information, please go to priceindustries.com. © 2020 Price Industries Limited. All rights reserved.
Need help?
Do you have a question about the Prodigy and is the answer not in the manual?
Questions and answers