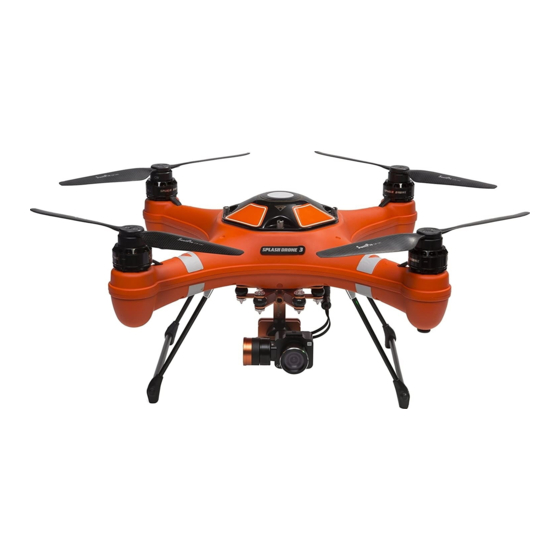
SWELLPRO SPLASH DRONE 3 Tuning Manual
Hide thumbs
Also See for SPLASH DRONE 3:
- User manual (51 pages) ,
- Operation manuallines (12 pages) ,
- Safety manualline (8 pages)
Table of Contents
Advertisement
Advertisement
Table of Contents

Related Manuals for SWELLPRO SPLASH DRONE 3


Summary of Contents for SWELLPRO SPLASH DRONE 3
- Page 1 Flight Control and tuning Manual...
-
Page 2: Table Of Contents
Other settings Real time data Log Download Note: the flight control parameters have been adjusted and no adjustment is required in general. W ithout permission, any loss caused by the customer, shall not be responsible for SwellPro, please be careful. -
Page 3: Install Drive And Tune Up Software
Install drive and tune up software a. Open the computer, visit the official website of SwellPro (www.swellpro.com), download driver and Assistant 3 from SwellPro download area. b. Install driver and Assistant 3, according to the instructions to complete the installation. - Page 4 Root Yan 29/8/17 16:24 Comment [1]: For Anthouny, pls kindly help to make a English screen shot as below, b. In the tuning software, select the correct serial number, click "connect" button, as follows: After the connection is successful, the following diagram:...
-
Page 5: Debugging Steps
[1] Flight control serial number: select the correct serial number. [2] Connection button: connect flight control and disconnect flight control. [3] View interface: see the basic flight control status. [4] Basic settings interface: set the basic configuration of flight control. [5] Advanced function interface: set up advanced functions of flight control. - Page 6 [1] Aircraft interface help instructions [2] Aircraft structure type: the number shown in the diagram corresponds to the flight control input port M1 to M4. [3] Motor test function: Click to enter the motor test function interface. motor test Click on the "motor test" button to enter the motor test interface. When using this function, remove the propeller and connect the power battery.
-
Page 7: Remote Control Settings
Remote control calibration Splash Drone 3 remote control receiver type is SBUS. The remote controller has been cali brated before leaving the factory and does not need to be calibrated again under normal c onditions. If you find the middle,maximum and minimum amount of rod is inconsistent with the software interface, please click the "Joystick Calibration", push the two joysticks rotate... -
Page 8: Sensitivity
1. when you change a different remote control, you must adjust the remote control. 2. please set the remote control to the multi rotor mode and turn off the hybrid control. 3. make sure that the joystick moves in the same direction as the software prompt. -
Page 9: Accelerometer Calibration
The basic sensitivity is mainly used to adjust the aircraft rack, set the range from 0% to 1000%, the default value is 50%, basic sensitivity too high will cause aircraft posture shaking, too low will cause the aircraft stability and control sense become worse. Suggestion and adjustment method of basic sensitivity: Sensitivity increases 10% each time, until the aircraft starts to shake;... -
Page 10: Gyroscope (Compass) Calibration
[4] Six sides calibration button, click to start calibration. Special note: to replace flight control, the user must calibrate the accelerometer. If the following conditions occur, th e accelerometer shall be calibrated again: In attitude stabilization model, the tilt angle of aircraft is larger when taking off; ü... - Page 11 [1] Compass interface assistance statement. [2] Calibration prompt area is used to direct and prompt the user compass calibration steps. [3] Calibration button, click start calibration. Calibration method Click the "start the two sides calibration" button, the yellow light is constant on, and enter the level calibration.
-
Page 12: Senior
Senior a. Voltage The flight control detects battery voltage through the power module and provides low voltage protection function. The interface is used to set up the low voltage protection function of the flight control, set the alarm voltage and voltage calibration. [1] Voltage interface assistance statement. -
Page 13: Other Settings
remote controls, IMU, barometers, magnetic compasses, and GPS. [1] Flight control self-inspection interface. [2] Attitude angle display includes pitch angle, roll angle and yaw angle. [3] Remote control self-inspection, feedback status includes: remote controller not connected, remote controller not calibrated or normal. [4] IMU self-inspection, feedback status includes: accelerometer fault, accelerometer not calibrated, gyro fault or normal. - Page 14 [1] Automatic return setting, setting flight parameters for return flight. Return with nose position (default setting): when returning, the nose is directed toward the return point. Fixed course: when heading, the nose remains the same. Height: minimum flight height during automatic return. Landing speed: speed of return landing.
-
Page 15: Real Time Data
Maximum horizontal speed : maximum horizontal speed in GPS- speed mode. [4] Motor idle settings Adjust the size of the motor after unlocking, disable, indicate not to turn. From very slow to fast, the speed at which the motor can reach is faster. [5] Maximum tilt angle: allows maximum tilt angle in all flight modes. -
Page 16: Log Download
[1] GPS data display box [2] IMU data display box [3] Barometer and magnetic compass data display box [4] Gesture data display box [5] Remote channel data display box e. Log Download The log is mainly used to analyze the flight data of the flight control, if users encounter abnormal flights to solve, you can download the log submitted to the Schweppe company analysis, to solve the problem.
Need help?
Do you have a question about the SPLASH DRONE 3 and is the answer not in the manual?
Questions and answers