SWELLPRO Splash Drone 3 User Manual
Hide thumbs
Also See for Splash Drone 3:
- User manual (48 pages) ,
- Tuning manual (17 pages) ,
- Operation manuallines (12 pages)

Subscribe to Our Youtube Channel
Related Manuals for SWELLPRO Splash Drone 3


Summary of Contents for SWELLPRO Splash Drone 3
- Page 1 User Manual well Join our facebook group "Swellpro Splash Drone Owners" for product updates and support. www.swellpro.com...
-
Page 2: Reading Note
Thank you for purchasing this SwellPro Splash Drone. We have designed and manufactured the Splash Drone to the highest quality standards, to provide you a safe and reliable product for many years. Please read the entire contents of this manual thoroughly, to comprehensively familiarize yourself with the product before using it. - Page 3 Remote Control Overview Remote Control LED Indicators Conversion of the remote control throttle position Remote Controller Pairing (to the drone) FPV Screen Waterproof Camera & Gimbal Camera Gimbal Calibration Gimbal Accelerometer Calibration Gimbal Gyroscope Calibration ©2018 SwellPro All Rights Reserved...
- Page 4 Accelerometer Calibration Compass Calibration Starting/Stopping Motors Basic Flight Operation Frequently Used Parts Video Transmitter Channel Selection Payload Release APP Control How to use the APP Flight path setting Follow Me Point-to-Fly Appendix Specifications Warranty Information ©2018 SwellPro All Rights Reserved...
-
Page 5: Product Overview
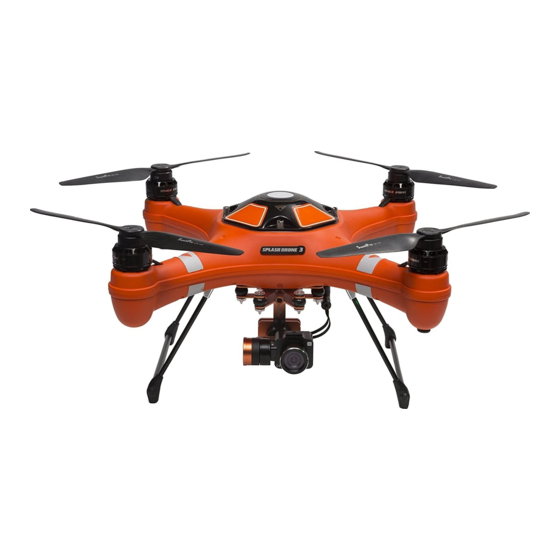
Product Overview This section introduces the various drone functions, how to assemble the drone, the various part names of the drone, and it’s remote control. ©2018 SwellPro All Rights Reserved... - Page 6 The Splash drone 3 is the most advanced waterproof drone ever released. It is the rst fully integrated modular amphibious ying platform. Thanks to the new flight control system, the Splash Drone 3 is more reliable than ever. Its brand new propulsion system with the new custom designed 620KV motor system and quick release carbon fiber propellers, provides you with the perfect balance between power and...
- Page 7 2. The waterproof payload release system can be used to deliver up to 1kg payloads, including but not limited to life-saving equipment, lines, or fishing bait. 3. Swellpro’s 3rd generation waterproof gimbal integrated with a 4k camera, is quickly and easily mounted with the new quick release design.
- Page 8 Note: When opening the top cover, be careful to not strain the GPS cable. When closing the top cover, ensure that the hatch is oriented correctly with the arrow facing the front of the drone. ©2018 SwellPro All Rights Reserved...
- Page 9 Auto search/Menu Select Channel / Decrease (-) Use the auto search function to select Manual channel Selection / the most suitable channel / Switch Decrease value between the different menus [19] ©2018 SwellPro All Rights Reserved...
- Page 10 Once the Splash Drone has successfully booted up, please switch the camera switch to the Preview position. ©2018 SwellPro All Rights Reserved...
-
Page 11: About The Drone
About the drone This section introduces the drone, and its functions. ©2018 SwellPro All Rights Reserved... - Page 12 -Positioning system, -Power system including the battery, ESC, motors and propellers. Flight Modes The Splash Drone 3 utilizes a brand new flight control system, incorporating 3 of the best flight modes. GPS mode: This mode uses the GPS module to achieve accurate and stabilized hovering, intelligent flight, intelligent return and other intelligent flight mode functions.
- Page 13 Second level low battery warning, the drone will start it’s auto landing sequence. Two-Sided compass calibration Yellow ON Horizontal Calibration Green ON Vertical Calibration Calibration Failure Red ON Alternating - Red, Green, Calibration Success Yellow slow flashing ©2018 SwellPro All Rights Reserved...
- Page 14 The Splash Drone 3 provides two auto return home modes, they are: one key return and failsafe return.
- Page 15 When the remote control communication is recovered, the control of the drone can be resumed after a single switching of the flight mode Switch, regardless of whether the currently selected mode is ATTI or GPS. ©2018 SwellPro All Rights Reserved...
- Page 16 Failure to provide this support could result in bending or breaking the landing gear. Prior to each fight, please check that the propellers are smooth all over and are correctly installed and securely fastened. ©2018 SwellPro All Rights Reserved...
-
Page 17: Battery Installation
Please do not get too close to the rotating propellers and motors, to avoid cuts or injury. Please use the propellers provided by Swellpro, they cannot can be mixed with different types of propeller. Battery Before use, please fully charge the drone battery, and the remote battery. - Page 18 fip and be inverted. The fight controller will shut down the motors if the drone becomes inverted. Do not leave the drone floating inverted for more than a few minutes. Recover the drone as soon as possible to avoid water entering the drone. ©2018 SwellPro All Rights Reserved...
-
Page 19: Remote Control
2.4GHz is for the drone control, and 5.8GHz is for the FPV video signal. The remote controller is integrated with the camera and gimbal controls, which is convenient for the user to easily maintain comprehensive control during flight, and can easily shoot wonderful videos or pictures. ©2018 SwellPro All Rights Reserved... -
Page 20: Camera Control
Airdrop:Releases the payload Airdrop Camera Control Description Remote Control Operation Video:Record Video Video Preview:Preview Photo:Take Picture Preview Photo Flight Mode Description Remote Control Operation GPS:GPS mode Smart Cruise:Smart Cruise Mode Smart Cruise ATTI:ATTI mode ATTI ©2018 SwellPro All Rights Reserved... - Page 21 Horizontal Tilt Control Thumbwheel: Controls tilt of the gimbalin the the horizontal axis. Drone Control Mode 1 - Left hand throttle- (American/ European con guration) Left Stick Right Stick Mode 3 - Right hand throttle- (Japanese con guration) Left Stick Right Stick ©2018 SwellPro All Rights Reserved...
- Page 22 Yaw and pitch. Left pairing button Left led Joystick con guration The left led will ash 1 Green Flash Mode1:Left hand throttle 2 Green Flashes Mode2:Not used ©2018 SwellPro All Rights Reserved...
- Page 23 1. Connect the jumper (which is supplied with the drone) into B/VCC channel of the remote receiver located inside the drone, now power on the drone, the receiver red light will flash fast and indicates the start of the pairing sequence. ©2018 SwellPro All Rights Reserved...
-
Page 24: Display Interface
When the pairing is successful, make sure to remove the JUMPER on the receiver's B/VCC channel. FPV screen The Splash Drone 3 uses 5.8G video transmission technology, reducing the delay to a minimum. The 5.8G transmission range can reach 1km. 40 channels are available to select from. -
Page 25: Gimbal & Camera
Gimbal & Camera This section introduces the camera and the gimbal, and how to use them. ©2018 SwellPro All Rights Reserved... - Page 26 Camera working indicator Gimbal firmware upgrade USB port The Splash Drone 3 supports Micro SD cards with a maximum capacity of 64GB. Because the camera requires fast reading and writing capability for high stream video data, please use a card with a minimum of Class 10 or UHS-1, or better.
-
Page 27: Camera Settings
1920*1080 P60 1280*720 P30 1280*720 P60 Video Format MOV MP4 Time Stamp OFF ON Note: The APP and remote control camera recording video resolutions are different, please select the best resolution according to your specific needs. ©2018 SwellPro All Rights Reserved... -
Page 28: Gimbal Calibration
After hearing a “DI” tone, the Gimbal is activated and ready for calibration. 2. Simultaneously roll the 2 thumbwheels for the Gimbal horizontal and tilt control to the left-most position, and maintain this position for 6s. After the Gimbal appears powerless, release both of the thumbwheels. ©2018 SwellPro All Rights Reserved... - Page 29 During the accelerometer calibration procedure, the camera Gimbal must be placed on a horizontal surface, without any vibration. If any abnormality still persists after completing the calibrations, please power off the drone, and re-calibrate the Gimbal once again. ©2018 SwellPro All Rights Reserved...
- Page 30 Flight This section introduces discusses flying hazards, flight restrictions, and drone care and attention. ©2018 SwellPro All Rights Reserved...
-
Page 31: Flight Restrictions
Safety fence: has a maximum flight radius of 500 meters, and a maximum flight altitude of 200 meters. If, for any reason, you need to remove this safety fence, please refer to the Swellpro Assistant 3 reference method. ©2018 SwellPro All Rights Reserved... -
Page 32: Accelerometer Calibration
4. If the drone has been subjected to heavy shaking during transportation. 5. If, following a successful compass calibration, the motors do unlock, but the red LED stays on solid when trying to start up the motors. ©2018 SwellPro All Rights Reserved... -
Page 33: Remote Control Operation
Emitting base stations, metal objects, etc.) Calibration is necessary in below cases: 1. Before flying the drone for the first time. 2. If 100KM or more away from the last compass calibration location. ©2018 SwellPro All Rights Reserved... -
Page 34: Operation Illustration
Six Axis Calibration (six sides of a cube) Operation Illustration Description 1. Place the drone on a horizontal surface, power on the controller, and then power on the drone. After “DI” sounds, flick the return home switch to Return Home. Return Home ©2018 SwellPro All Rights Reserved... - Page 35 6. Whilst vertical, turn the drone so the nose is to the left (3 o’clock), and perform a counter clockwise rotation for 360 degrees. 7. Whilst vertical, turn the drone such its nose is pointing down (6 o’clock), and perform a counter clockwise rotation for 360 degrees. ©2018 SwellPro All Rights Reserved...
- Page 36 Unlocking: Pull both the left and right joysticks simultaneously towards the inner side of the lower side, at an angle of 45 degrees, and maintain this position for 3 seconds, the motors will now be unlocked, and will start rotating. ©2018 SwellPro All Rights Reserved...
- Page 37 6. While flying, apply the minimum of movement on the joysticks, this will allow for smooth video and good quality still pictures. Flight safety awareness is very important for you, the people and the environment around you. Be sure to read the disclaimer, and the safe operating instructions carefully. ©2018 SwellPro All Rights Reserved...
- Page 38 Frequently Accessed Modules This section introduces the more frequently used parts. ©2018 SwellPro All Rights Reserved...
- Page 39 E and channel 5, long press the button for 2 seconds, the dot in the lower right corner will flash once to confirm the selection, release the button. On completion, the system will display “E” first, followed by “5”, and finally the dot will flash representing the transmission power level. ©2018 SwellPro All Rights Reserved...
- Page 40 800 metre radius, this level is a good nominal level and also extends the flying time. If it is required to fly in areas of obstructions and/or exceeding 800m, it may be required to switch to 600mW transmission power. ©2018 SwellPro All Rights Reserved...
- Page 41 The patented payload release device is a powerful and versatile accessory to expand the use and applications of the Splash Drone 3. With the help of the payload release, Splash Drone 3 can help fishermen to put the fishing bait far away from the shore. Rescuers use Splash Drone 3 to search for stranded person/s, and deliver vital rescue equipment to them in advance.
-
Page 42: App Control
APP Control ©2018 SwellPro All Rights Reserved... - Page 43 Bluetooth datalink module will stop blinking). 3. Run the “Swellpro Fly” APP, click the Bluetooth icon to link the device (UAV..). When it links, you will see the drone parameters on the screen, e.g battery voltage, GPS coordinates, height, distance, GPS signal etc.
- Page 44 fly. 6. Flight path setting: a). click “+”, click the map to set the flight point, you will see all the selected flight points on the bottom of the screen. You can delete them. ©2018 SwellPro All Rights Reserved...
- Page 45 7. Follow Me: The target (to be followed) should carry the Bluetooth Datalink and the (connected) smart phone, the drone recognizes the GPS coordinates of the smartphone. Press the “Follow Me” button, the drone will then start following. Follow Me ©2018 SwellPro All Rights Reserved...
- Page 46 3. The Bluetooth data link module is paired with the corresponding module onboard the drone. Normally, it won’t link to other drones. When you see many drones or Bluetooth datalink units working in the same place, please make sure you link to the right drone. ©2018 SwellPro All Rights Reserved...
- Page 47 Appendix ©2018 SwellPro All Rights Reserved...
- Page 48 Video Resolution Remote Control:2880*2160 24p 2560*1440 30p 1920*1080(30/60p) 1280*720(30/60p) Max video stream 28000Kbps Picture Format JPEG Video Format MOV MP4 Supports memory card Class 10 or UHS-1 and above specifications Micro SD card, maximum support 64GB ©2018 SwellPro All Rights Reserved...
- Page 49 800X480Pixels Brightness 500 cd/m² Warranty Information Please visit the Swellpro website to find out the latest information on: Swellpro’s After-sales service policy: Swellpro’s Maintenance service policy: Note:Click on the Buyer Registration to complete the registration to activate the after sales (this is very important, it will ensure that your equipment in the warranty period for the Swellpro customer service clause).
- Page 50 User Manual V1.7 2018.05...
Need help?
Do you have a question about the Splash Drone 3 and is the answer not in the manual?
Questions and answers