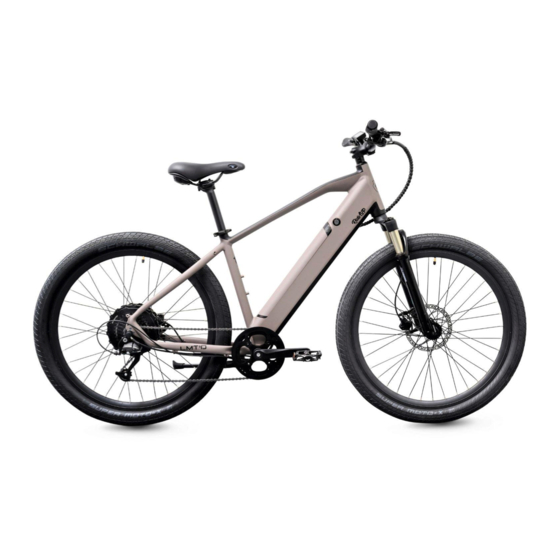
Summary of Contents for Ride1up LMT'D
- Page 1 E-bike Owner’s Manual Model: LMT’D gen2 For the most up to date documents, bike models, additional information, instructional videos, and more, visit us at Ride1up.com...
- Page 2 NOTE: ◆ THIS IS FOR YOUR RECORDS ONLY. YOUR SERIAL NUMBER IS THE NUMBER STAMPED UNDER THE BOTTOM BRACKET. Thank you for purchasing a Ride1UP LMT’D e-bike! This manual contains important safety, performance & maintenance information. Please take a moment to read the manual and review our instructions before start riding &...
-
Page 3: Table Of Contents
5. Display Instructions 6. Error Code Troubleshooting 6.1) Error Codes/Source of the Error 7. Warranty Information 7.1) How to Handle Warranty Claim For the most up to date documents, bike models, additional information, instructional videos, And more visit us at Ride1UP.com... -
Page 4: Safety Notes
1.3) Electrical Safety: Only use the charger supplied by Ride1UP. Do not store the bike or battery plugged into a wall outlet. Unplug the battery before leaving the bike alone. Never modify the charger in any way. The charger has been designed for a specific voltage, always check that the outlet’s voltage is the same as that stated on the rating... -
Page 5: Brake Safety
& never be under the influence of alcohol or drugs while riding. For the most up to date documents, bike models, additional information, instructional videos, And more visit us at Ride1UP.com... - Page 6 Be sure to follow all requirements of airlines and air couriers regarding lithium batteries if you take your e-bike with you during air travel, or if you ship your e-bike by air courier. For the most up to date documents, bike models, additional information, instructional videos, And more visit us at Ride1UP.com...
-
Page 7: Installation Steps: Assembling Your Bike
(Do not over tighten or you will cause the star nut in the fork steerer tube to come out) For the most up to date documents, bike models, additional information, instructional videos, And more visit us at Ride1UP.com... - Page 8 Do not squeeze the brake lever before the rotor is installed in between the brake pads. This may damage the brake caliper. • Do not stress, stretch, or kink your hydraulic brake line. For the most up to date documents, bike models, additional information, instructional videos, And more visit us at Ride1UP.com...
- Page 9 3. Reinstall the lockring, as mentioned it is reverse threaded, turn it counter clockwise to tighten. This needs to be tightened to 40 nm. For the most up to date documents, bike models, additional information, instructional videos, And more visit us at Ride1UP.com...
- Page 10 Open the seat clamp and insert the seat post to or past the minimum insertion point. (Figure 8 & 9) • Adjust the suitable height and rotate the clamp to tighten and then shut it. (Figure 10) For the most up to date documents, bike models, additional information, instructional videos, And more visit us at Ride1UP.com...
- Page 11 The right pedal (marked with an “R”) must be installed in the right crank arm. It is standard thread, rotate clockwise to install and tighten. • Use an adjustable wrench to finish tightening the pedal in place. For the most up to date documents, bike models, additional information, instructional videos, And more visit us at Ride1UP.com...
- Page 12 DO NOT USE A BICYCLE TIRE PUMP. You may damage the air fork. The acceptable PSI range is from 40-120 PSI based on rider weight and preference. For more information please check our support page at www.Ride1UP.com The dial on the top right is a lockout. Turning this to the locked position will lock the fork from compressing and in this mode, it acts as a rigid fork.
-
Page 13: Spoke Tension
Adjusting your derailleur properly will be done best by a mechanic, however it can be accomplished by following a helpful video. Please check our support pages at www.Ride1UP.com for the latest tips and video on how to do this properly. -
Page 14: Charging The Battery
Also, it must not be covered. If you ever see a spark while charging your battery. Please inspect the charging port of the battery and the tip of the charger. Please contact Support@Ride1UP.com and share pictures. Follow the steps below when charging the battery: Step 1. -
Page 15: Display Instructions
Press and hold POWER button for 2 seconds to power on and off. The Display automatically shuts down when the bike is not used for 10 minutes. For the most up to date documents, bike models, additional information, instructional videos, And more visit us at Ride1UP.com... - Page 16 NOTE: ◆ THE DISPLAY MAY VARY BASED ON GENERATION. PLEASE REFER TO OUR ONLINE USER MANUAL BASE FOR UPDATED OR PREVIOUS MODELS. For the most up to date documents, bike models, additional information, instructional videos, And more visit us at Ride1UP.com...
-
Page 17: Error Code Troubleshooting
Disconnect electronic brake shut offs. Likely a magnet sensor Brake Abnormality issue. This can happen often after a crash or when the bike is dropped. See video on Ride1UP YouTube channel, or under instructional videos on the support page to resolve. Communication... -
Page 18: Warranty Information
After the first 30-days Ride1UP will ship replacement parts of defective items within one year at no charge. The owner will be responsible for labor. Warranty parts will be shipped within the U.S. only at our cost. It will... - Page 19 Ride 1up reserves the right to make judgment determinations of proper use based on the evidence provided and may require additional photos and or videos of the item or issue in question.


Need help?
Do you have a question about the LMT'D and is the answer not in the manual?
Questions and answers