Table of Contents
Advertisement
Quick Links
Advertisement
Table of Contents

Related Manuals for BenQ DVY23


Summary of Contents for BenQ DVY23
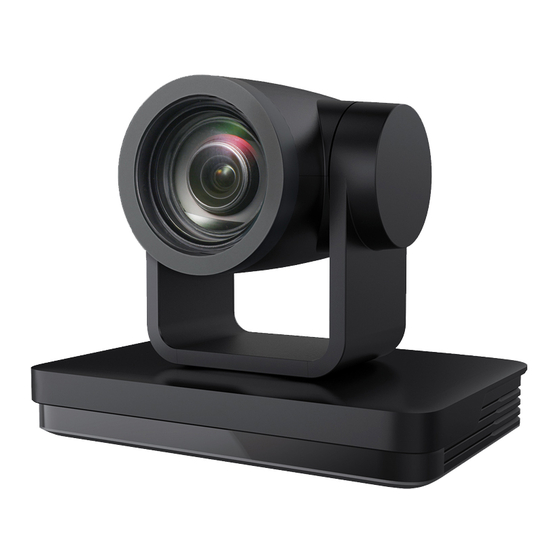
- Page 1 DVY23 Full HD Camera User Manual...
- Page 2 Disclaimer BenQ Corporation makes no representations or warranties, either expressed or implied, with respect to the contents of this document. BenQ Corporation reserves the right to revise this publication and to make changes from time to time in the contents thereof without obligation to notify any person of such revision or changes.
-
Page 3: Table Of Contents
Table of Contents Table of Contents Warning.................. 5 Important notices ..............6 Use attention..................6 Electric safety..................6 Careful installation................6 Magnetic interference ..............7 Installation instructions ............8 Product interface ................8 Interface wiring ................9 Bracket mount.................. 9 Product overview .............. - Page 4 Table of Contents Streaming media ................34 Software upgrade ................36 Serial communication control......... 37 VISCA protocol list ..............37 Product information............54 Specifications.................. 54 Dimensions..................56 Maintenance and troubleshooting ......... 57 Maintenance ................... 57 Troubleshooting................57 11/11/20...
-
Page 5: Warning
Warning Warning The improper operation may destroy the structure of the product and lead to abnormal operation of the camera. Please pay attention to the following operations. Do not grasp the lens barrel with your hand while moving the camera. Move the camera by holding the bottom with both hands or one hand. -
Page 6: Important Notices
Important notices Important notices This manual introduces functions, installation and operations for the camera in details. Please read this manual thoroughly before installation and use. Use attention • During transportation, storage, installation and use, it is necessary to prevent heavy pressure, severe vibration and immersion so as to avoid damage to products. -
Page 7: Magnetic Interference
Important notices Magnetic interference The electromagnetic field at a specific frequency may affect the local image.The product is Class A product. Radio interference may occur in the home environment, and users need to take appropriate measures. -
Page 8: Installation Instructions
Installation instructions Installation instructions Product interface Name Lens Audio input (LINE-IN) Camera base Rotary dial switch Remote control receiver light RS232 input Infrared reception RS232 output RS422 input (compatible with RS485) Tripod screw hole Network LAN (Power over Ethernet) HDMI output Power In (DC12V) USB3.0 output (compatible with ON/ OFF switcher... -
Page 9: Interface Wiring
Installation instructions Interface wiring 1. If the No. 0 preset is set, the camera will switch to the No. 0 preset when the power- on self-check is completed. 2. The default address of the remote control is 1#; the menu is restored to the factory default, and the address of the remote control is restored to 1#. - Page 10 Installation instructions...
- Page 11 Installation instructions 2. Ceiling mount steps...
- Page 12 Installation instructions...
-
Page 13: Product Overview
Product overview Product overview Accessory When you unpack, check that all the supplied accessories are included: Configuration Standard Optional Upside-down ceiling Power adapter*1 mounting bracket USB3.0 cable*1 Wall mounting bracket Accessory RS232 cable*1 IR remote control*1 RS-232 Interface 1. RS-232 interface Computer or control keyboard and product connection method... - Page 14 Product overview 2. Mini-DIN8-pin port Port Definition Data Terminal Ready Receive Data Data Set Ready Signal ground Transmit Data IR OUT IR Commander Signal Signal ground No Connection 3. RS232(DB9) port Port Definition Data Carrier Detect Data Set Ready Receive Data Request to Send Transmit Data Clear to Send...
- Page 15 Product overview 4. VISCA networking mode is as follows Product cascade connection Method The product has RS232 input and output interface, which can be cascaded following the instructions shown above.
- Page 16 Product overview Rotary DIP Switch Dial-up video format Dial-up video format 1080P60 1080P59.94 1080P50 1080I59.94 1080I60 1080P29.97 1080I50 720P59.94 1080P30 720P29.97 1080P25 720P60 video format to be set 720P50 on the menu • Remember to reboot the camera to take effect when switching video formats. •...
- Page 17 Product overview Main features DVY23 offers perfect functions, superior performance and rich interfaces. The features include advanced ISP processing algorithms to provide vivid images with a strong sense of depth, high resolution and fantastic color rendition. It supports H.265/H.264 encoding which makes motion video fluent and clear even with less than ideal bandwidth conditions.
-
Page 18: Remote Control
Remote control Remote control Remote controls are divided into two types: infrared remote controls and wireless remote controls. Please read the following according to the actual type of remote controls. Key instructions Standby Key Long press the remote control for three seconds, the camera will step into standby mode. - Page 19 Remote control Pan/Tilt Control Key Press Key: Press Key: Press Key: Press Key: “HOME” Key: Return to the middle position or enter the next level menu. BLC Control Key Back Light ON/OFF: Turn on or off the back light Menu Setting Open or close the OSD menu Enter/exit the OSD menu or return to the...
-
Page 20: Applications
Remote control Applications After finishing initialization, it can receive and execute the IR commands. Press the remote control button, and the indicator light will flash; release the button, and the indicator light stops flashing. Users can control the pan/tilt/zoom, setting and running preset positions via the IR remote control. - Page 21 Remote control Focus (near): Press “focus +” key (Valid only in manual focus mode) 5. Focus Control Focus (far): Press “focus -” key (Valid only in manual focus mode) Auto Focus: Yes Manual Focus: Yes Press and hold the key, then the action of focus will continue and stops as soon as the key is released.
-
Page 22: Menu Settings
Menu settings Menu settings To modify the parameters in the menu, you need to exit the menu before you can save it by power off. Menu control key 1. MENU: Enter/exit OSD menu or return to previous menu. 2. HOME: Go to the next menu. 3. -
Page 23: Main Menu
Menu settings Main menu In the normal working mode, press the MENU key to display the menu, then use the scroll arrow to point at or highlight the selected items. Name Descriptions Language Chinese/English Setup Enter System setting. -
Page 24: System Setting
Menu settings Camera option Enter Camera setting. PTZ option Enter Pan tilt setting. Version Enter Camera version setting. Restore Default Enter Reset setting. Select For selecting menu Change Value For modify parameters [MENU] Back Press MENU to return. [HOME] OK Press HOME to confirm. -
Page 25: Camera Setting
Menu settings Camera setting Move the pointer to Camera in the main menu, then click the HOME key and enter CAMERA as follow. Name Descriptions Exposure Enter Exposure setting. Color Enter Color setting. Image Enter Image setting. Focus Enter Focus setting. Noise Reduction Enter Noise Reduction. - Page 26 Menu settings Name Descriptions Mode Auto, Manual, SAE, AAE, and Bright. On/Off (only available in Auto mode) Compensation Level -7~7 (only available in Auto mode when EV is ON) ON/OFF for options (only available in Auto mode) OFF/50Hz/60Hz for options (only available in Auto/ Flicker Iris priority/Brightness priority modes) 0~15 (only available in Auto/ Iris priority /...
- Page 27 Menu settings 0~14 AWB Sensitivity High/Middle/Low 3. Image setting Move the pointer to Image in the main menu, then click the HOME key and enter IMAGE as follow. Name Descriptions Brightness 0~14 Contrast 0~14 Sharpness 0~15 Flip-H On/Off Flip-V On/Off B&W Mode Color, Black &...
- Page 28 Menu settings 4. Focus setting Move the pointer to Focus in the main menu, then click the HOME key and enter IMAGE as follow. Name Descriptions Focus Mode Auto, Manual, One push AF-Zone All, Top, Center, Bottom AF-Sensitivity High, Middle, Low 5.
-
Page 29: P/T/Z
Menu settings P/T/Z Move the pointer to P/T/Z in the main menu, then click the HOME key and enter P/T/Z as follow. Name Descriptions Only effective for remote control, On/ Off. When Depth of field zoom in, the PT control speed by remote control will become slow. -
Page 30: Video Format
Menu settings Video Format Move the pointer to Video Format in the main menu, then click the HOME key and enter VIDEO FORMAT as follow. • 1080P60 Downward Compatibility. • Exit the menu after modifying the parameter to save it after power off. Version Move the pointer to Version in the main menu, then click the HOME key and enter VERSION as follow. -
Page 31: Restore Default
Menu settings Restore Default Move the pointer to Restore Default in the main menu, then click the HOME key and enter RESTORE DEFAULT as follow. Name Descriptions Options: Yes/No; after restoring default, the video Restore default format won't be restored. If the address of the former remote control is not 1 but another one from 2,3,4, the corresponding camera address will restore to 1 when all parameters or system parameters are restored. -
Page 32: Network Connection
Network connection Network connection Network connection: Connect products directly with PC external network ports by network wires or connect products to Internet network. Access network can be through routers or switches. Users can login product IP through browsers. Caution: Do not place wires where they are easily touched, so as not to cause unstable signal transmission caused by poor line contact and affect video quality. -
Page 33: Ie Login
Network connection IE login Web client log in Input the IP address 192.168.5.163 of the device in the address filed of browser and click Enter button to enter Web Client login page as below picture. User can login as administrator and normal user. If login as administrator (Default User name/Password: admin), users can preview, playback, configuration and cancel in the Web Client;... -
Page 34: Streaming Media
Network connection Streaming media Getting Video Stream Select Configuration > Video Configuration > Video Coding to enter the following interface. Configure parameters according to the network environment; note: stream name live/ av0 (e.g. live/xxx) If the default IP address of the camera is 192.168.5.163, the way to obtain the RTSP video stream is as follows: rtsp://192.168.5.163:554/live/av0?av0 Main stream) rtsp://192.168.5.163:554/live/av1?av1 Secondary bitstream) - Page 35 Network connection Push Video Stream: Select Configuration > Video Configuration > Stream Publishing to enter the following interface. To push RTMP audio and video streams to the server, the camera IP must be mapped to the external network, otherwise the connection to the server will be unsuccessful. Host address: Server address, either domain name or IP address Host Port: Server Default Port Number Stream name: live/test (for example: live/xxx)
-
Page 36: Software Upgrade
Network connection Software upgrade 1. After successful login, it enters the management interface. By default, it enters the video preview interface. In the preview interface, you can control the platform, zoom, focus, video, snapshot, sound, amplification, full screen and preset settings, operation, deletion and other operations. -
Page 37: Serial Communication Control
Serial communication control Serial communication control Under common working condition, the camera could be controlled through RS232/ RS485 interface (VISCA); RS232C serial parameter are as follows: Baud rate: 2400/4800/9600/115200 bits / sec; Start bit: 1; data bits: 8; Stop bit: 1; Parity: None. - Page 38 Serial communication control VISCA Camera control command Command Function Command packet Note AddressSet Broadcast 88 30 0p FF p: Address setting IF_Clear Broadcast 88 01 00 01 FF I/F Clear CommandCancel 8x 21 FF CAM_Power 8x 01 04 00 02 FF Power ON/OFF 8x 01 04 00 03 FF CAM_Zoom...
- Page 39 Serial communication control Command Function Command packet Note CAM_AFSensitivity High 8x 01 04 58 01 FF Focus sensitivity Setting Normal 8x 01 04 58 02 FF 8x 01 04 58 03 FF CAM_AFZone 8x 01 04 AA 00 FF Focus Region Setting Center 8x 01 04 AA 01 FF...
- Page 40 Serial communication control Command Function Command packet Note CAM_RGain Reset 8x 01 04 03 00 FF Manual Control of R Gain 8x 01 04 03 02 FF Down 8x 01 04 03 03 FF Direct 8x 01 04 43 00 00 0p 0q pq: R Gain CAM_ Bgain Reset...
- Page 41 Serial communication control Command Function Command packet Note CAM_Iris Reset 8x 01 04 0B 00 FF Iris Setting 8x 01 04 0B 02 FF Down 8x 01 04 0B 03 FF Direct 8x 01 04 4B 00 00 0p 0q pq: Iris Position CAM_Gain Limit Reset...
- Page 42 Serial communication control Command Function Command packet Note CAM_WDRStrength Reset 8x 01 04 21 00 FF WDR Level Setting 8x 01 04 21 02 FF VISCA has no DRCcommand; leverage Down 8x 01 04 21 03 FF WDR to adjust DRC parameter.
- Page 43 Serial communication control Command Function Command packet Note CAM_LR_Reverse 8x 01 04 61 02 FF Image Flip Horizontal ON/ 8x 01 04 61 03 FF CAM_PictureFlip 8x 01 04 66 02 FF Image Flip Vertical ON/OFF 8x 01 04 66 03 FF CAM_ColorSaturation Direct 8x 01 04 49 00 00 00 0p...
- Page 44 Serial communication control Command Function Command packet Note CAM_Flip 8x 01 04 A4 00 FF Single Command For Video Flip Flip-H 8x 01 04 A4 01 FF Flip-V 8x 01 04 A4 02 FF Flip-HV 8x 01 04 A4 03 FF CAM_VideoSystem Set camera video 8x 01 06 35 00 0p FF...
- Page 45 Serial communication control Command Function Command packet Note Pan_tiltDrive 8x 01 06 01 VV WW 03 VV: Pan speed 01 FF 0x01 (low speed) to 0x18 (high Down 8x 01 06 01 VV WW 03 speed) 02 FF WW: Tilt speed 0x01 (low speed) Left 8x 01 06 01 VV WW 01...
- Page 46 Serial communication control VISCA Inquiry command Command Function Command packet Note CAM_PowerInq 8x 09 04 00 y0 50 02 FF y0 50 03 FF Off (Standby) CAM_ZoomPosInq 8x 09 04 47 y0 50 0p 0q 0r 0s FF pqrs: Zoom Position CAM_FocusAFModeInq 8x 09 04 38...
- Page 47 Serial communication control Command Function Command packet Note CAM_WBModeInq 8x 09 04 35 y0 50 00 FF Auto y0 50 01 FF 3000K y0 50 02 FF 4000K y0 50 03 FF One Push Mode y0 50 04 FF 5000K y0 50 05 FF ManualManual y0 50 06 FF...
- Page 48 Serial communication control Command Function Command packet Note CAM_IrisPosInq 8x 09 04 4B y0 50 00 00 0p 0q FF pq: Iris Position CAM_Gain LimitInq 8x 09 04 2C y0 50 0p FF p: Gain Position CAM_ BrightPosiInq 8x 09 04 4D y0 50 00 00 0p 0q FF pq: Bright Position CAM_ExpCompModeInq...
- Page 49 Serial communication control Command Function Command packet Note SYS_MenuModeInq 8x 09 06 06 y0 50 02 FF y0 50 03 FF CAM_LR_ReverseInq 8x 09 04 61 y0 50 02 FF y0 50 03 FF CAM_PictureFlipInq 8x 09 04 66 y0 50 02 FF y0 50 03 FF CAM_ColorSaturationInq 8x 09 04 49...
- Page 50 Serial communication control Command Function Command packet Note CAM_Low-LightModeInq 8x 09 04 2D y0 50 00 FF y0 50 01 FF VideoSystemInq 8x 09 06 23 y0 50 0p FF P: 0~E Video format 0:1080P60 1:1080P50 2:1080i60 3:1080i50 4:720P60 5:720P50 6:1080P30 7:1080P25 8:720P30...
- Page 51 Serial communication control Function Byte1 Byte2 Byte3 Byte4 Byte5 Byte6 Byte7 DownLeft 0xFF Address 0x00 0x14 Pan Speed Tilt Speed SUM DownRight 0xFF Address 0x00 0x12 Pan Speed Tilt Speed SUM Zoom In 0xFF Address 0x00 0x20 0x00 0x00 Zoom Out 0xFF Address 0x00...
- Page 52 Serial communication control Function Byte1 Byte2 Byte3 Byte4 Byte5 Byte6 Byte7 Byte8 Down 0xA0 Address 0x00 0x10 Pan Speed Tilt Speed 0xAF Left 0xA0 Address 0x00 0x04 Pan Speed Tilt Speed 0xAF Right 0xA0 Address 0x00 0x02 Pan Speed Tilt Speed 0xAF Upleft 0xA0 Address 0x00...
- Page 53 Serial communication control Function Byte1 Byte2 Byte3 Byte4 Byte5 Byte6 Byte7 Byte8 Query 0xA0 Address 0x00 0x5D Value High Value Low 0xAF Zoom Byte Byte Position Response...
-
Page 54: Product Information
Product information Product information Specifications Specifcations Item DVY23 Optical zoom 20X, f=5.5~110mm Sensor 1/2.8 inch high quality HD CMOS sensor Effective pixels 16:9, 2.07 megapixel HDMI/SDI video format 1080P60,1080P50,1080I60,1080I50,1080P30, 1080P25,720P60,720P50 “P”: progressive scan format image. “i”: interlaced scan format image. - Page 55 Product information HDMI, LAN (POE), USB3.0 (Type B compatible USB2.0), SDI, A-IN, RS232-IN, RS232-OUT, Video interfaces RS422 (compatible with RS485), Dial Code, Power Switch Video output HDMI, SDI, LAN, USB3.0 Video stream Dual stream output LAN Interface: H.265, H.264, Dual stream output Video compression format USB3.0 Interface: YUY2, MJPEG, H.264, NV12, H.265, Dual stream output...
-
Page 56: Dimensions
Product information Dimensions Unit: mm... -
Page 57: Maintenance And Troubleshooting
Maintenance and troubleshooting Maintenance and troubleshooting Maintenance 1. If the equipment is not in long-term use, disconnect the power switch when not in use and disconnect the AC power adapter from the AC socket. 2. When removing dust from the outer shell of the equipment, please use soft cloth or cotton paper to avoid scratches. - Page 58 Maintenance and troubleshooting - Open “Start” in the computer, select “Run” and enter cmd; click “OK” and then open the computer DOS command window and enter Ping 192.168.5.163. Press the Enter key and the information appears as follows: Describe the network connection.
Need help?
Do you have a question about the DVY23 and is the answer not in the manual?
Questions and answers