Table of Contents
Advertisement
Available languages
Available languages
Quick Links
Advertisement
Table of Contents

Related Manuals for Rizzoli S Series


Summary of Contents for Rizzoli S Series
- Page 1 Istruzioni d’uso • Gebrauchsanweisung Instructions • Manuel d’utilisation...
- Page 3 ITALIANO Avvertenze pag. Installazione pag. pag. Manutenzione pag. Cosa fare se... pag. Dati tecnici pag. Garanzia pag. DEUTSCH Einfürung Montage Gebrauch Wartung Was tun, wenn... Technische Daten Garantie ENGLISH Warnings pag. Installation pag. pag. Maintenance pag. What to do if.. pag.
- Page 4 Col tempo la Rizzoli ha continuato ad affinare che rendono indispensabile in ogni casa una le proprie cucine utilizzando tecnologie sem- cucina a legna.
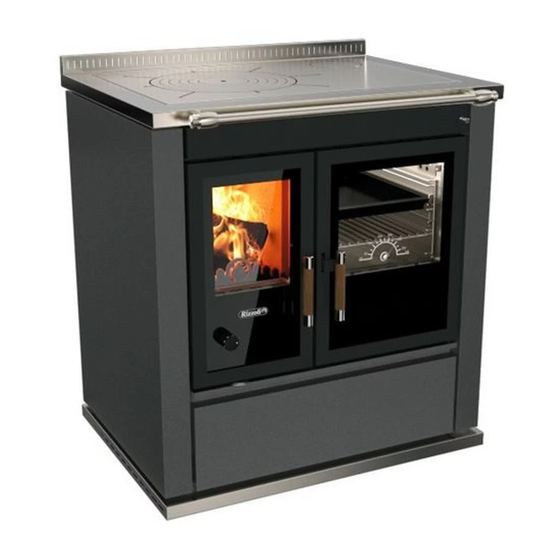
- Page 5 COMPONENTI DELLA CUCINA A LEGNA Figura 1 S 60 SF Telaio Camera di combustione Fianco Avviamento Porta della camera di combustione Manopola aria primaria Zoccolo Cassa legna Corrimano Piastra Porta del forno Forno S 60 CF S 80 SF...
- Page 6 Figura 2 Telaio S 80 Camera di combustione Fianco Avviamento Porta della camera di combustione Manopola aria primaria Zoccolo Cassa legna Corrimano Piastra Porta del forno Forno Archetto S 90 S 90 con Archetto...
- Page 7 ACCESSORI Con le cucine a legna vengono consegnati zione, la manutenzione e l’uso quotidiano alcuni accessori che semplificano l’installa- dell’apparecchio. • Libretto istruzioni di uso e manutenzione fumi • Libretto verde e certificato di garanzia • Olio salvapiastra della cucina a legna •...
- Page 8 2. INSTALLAZIONE GENERALITÀ Le cucine a legna sono di facile installazione; stra di distribuzione del carico). vanno comunque osservate alcune precau- In caso di pavimento formato da materia- zioni per evitare danneggiamenti dovuti a le infiammabile è necessario mettere una imperizia.
- Page 9 DIMENSIONI E FORME CORRETTE DEL CAMINO La canna fumaria deve avere una misura leg- Altri dati utili al dimensionamento della germente più grande rispetto a quella del canna fumaria sono presenti nei dati tecnici raccordo, che va realizzato della stessa mi- nel capitolo 6.
- Page 10 CORRETTO ALLACCIAMENTO AL CAMINO Nella figura 6 sono rappresentati alcuni esem- cina a legna e la canna fumaria sia più corto pi per un corretto collegamento di una cucina possibile. Il raccordo deve sempre essere di- a legna. sposto orizzontalmente o inclinato verso l’al- Per avere un collegamento sicuro alla canna to, mai verso il basso.
- Page 11 80 cm necessario predisporre un condotto collega- Su richiesta Rizzoli può fornire delle valvole to direttamente con l’esterno dell’abitazio- Figura 9 - Installazione mediante presa d’aria nel locale e installazione con presa d’aria esterna collegata direttamente...
- Page 12 Sono possibili altre soluzio- pavimento in corrispondenza dell’interno ni per il collegamento, ma vanno preventi- dello zoccolo, oppure a parete attraverso la vamente concordate con Rizzoli. parte posteriore della cucina secondo speci- Cucine standard Cucine con archetto...
- Page 13 ATTENZIONE! Cappe aspiranti o ventilatori di estrazione di aria del locale po- trebbero causare problemi per il corretto funzionamento dell’apparecchio in mancanza di apposita presa d’aria o in caso di presa d’aria sottodimensionata. COLLEGAMENTI ELETTRICI (MODELLI CON FORNO) I modelli con forno richiedono un allaccia- nel retro della cucina a legna.
- Page 14 o più lati. Per effettuare questa operazione è la barra del corrimano dai portanti, sfilare i sufficiente un cacciavite a stella e utilizzare pomoli dei portanti e la curva del corrimano. l’apposita chiave a brugola e le viti fornite A questo punto occorre inserire il finale dove in dotazione con la cucina a legna.
- Page 15 I modelli S 60 CF, S 60 SF e S 80 SF sono do- viti apposite. A questo punto si toglie il finale tati del solo corrimano frontale. E’ possibile dal lato in cui si vuole aggiungere il corrima- richiedere gli accessori per aggiungere il cor- no e si inserisce la curva e quindi le restanti rimano su uno o entrambi i lati.
- Page 16 5) rimettere la porta sulla cucina inserendo 6) infine reinserire la cassa portalegna. le spine. Figura 19 - Elementi mobili della porta. 1) Vite di fissaggio maniglia 2) Perni cerniere 3) Viti di fissaggio tappo Figura 20 - Corretta posizione della cerniera Figura 21 - Corretta posizione delle rondelle bombate 2.10 MONTAGGIO FORNO ESTERNO (OPTIONAL)
- Page 17 fissare il forno alla parete in modo che sia essere fissate a inserti o tasselli in grado di perfettamente orizzontale e che il tubo di sopportare alte temperature. collegamento sia perfettamente inserito. Se fosse necessario, in seguito, si potranno L’inserimento corretto deve garantire la te- smontare le tubazioni e accedere alla parte nuta dal passaggio di fumo e il giusto spazio interna del forno senza staccare il forno dalla...
- Page 18 2.11 MURATURA INTERNA La malta refrattaria utilizzata per la mu- Per lo stesso motivo il materiale refrattario ratura interna contiene sempre un po’ di interno subisce un processo di assestamen- umidità che viene eliminata dopo le prime to a causa del quale si possono creare pic- accensioni: è...
- Page 19 Figura 24 - Regolazione aria secondaria ACCENSIONE E FUNZIONAMENTO Per accendere il fuoco potete utilizzare il fuoco questo si mantiene fino all’esauri- come combustibile legna ben secca spacca- mento del combustibile. ta molto sottile insieme ai prodotti specifici Per mantenere la fiamma occorre reinserire disponibili in commercio.
- Page 20 CHIAVE PER L’AVVIAMENTO (S 60 CF, S 80, S 90, S 80 SF) I modelli con forno, per consentire con mag- L’asta va estratta a cucina fredda e richiusa giore facilità l’accensione del fuoco a cami- quando la combustione è ben avviata. no freddo, sono dotati di una chiave di av- Sul modello S 80 SF sono presenti due chia- viamento comandata da un’asta, vedi figura...
- Page 21 l’interruttore si trova lateralmente rispetto tore si trova nella parte superiore del vano alla cassa porta legna. Per accedervi occorre dello zoccolo in posizione centrale, vedi fi- estrarre la cassa porta legna, vedi figura 26. gura 27. Nelle cucine a legna con archetto, l’interrut- VALVOLA PER L’ECCESSO DI VAPORE (S 60 CF, S 80, S 90) La cottura di pietanze in taluni casi può...
- Page 22 3.10 TEGLIA CON GUIDE SCORREVOLI (S 60 CF, S 80, S 90) Su tutte le cucine a legna con forno è in vole è presente solo in una sola posizione dotazione un sistema a guida scorrevole di all’interno del forno, ma questa può essere supporto per la teglia.
- Page 23 3.12 PORTATEGLIA (S 60 CF, S 80, S 90) In dotazione alla cucina a legna è presente presine o degli stracci. Il portateglia va ag- un dispositivo portateglia che permette di ganciato al bordo della teglia e utilizzato a estrarre la teglia dal forno caldo in tutta si- due mani.
- Page 24 UTILIZZO DELLA PORTINA PULIZIA (S 80, S 90) Per consentire una rimozione dei residui Per procedere alla pulizia aprite lo sportello di combustione anche dalle zone meno ac- svitando i pomoli di fissaggio, quindi, avva- cessibili, i modelli S 80 e S 90 sono dotati di lendosi del raschietto eliminate i residui car- uno sportello pulizia al di sotto del forno.
- Page 25 ATTENZIONE! Non mettete prodotti facilmente infiammabili nella cassa porta legna! Gli oggetti depositati non possono assolutamente arrivare fino alla pa- rete superiore della cassa legna. MANUTENZIONE E PULIZIA DELLA PIASTRA Le piastre radianti in acciaio speciale delle se. In questo caso è sufficiente ripassare con cucine a legna necessitano di regolare ma- uno straccio imbevuto di olio non acido.
- Page 26 La lampadina del forno è soggetta ad alte padina, inserire la nuova lampadina e infine temperature. Pur essendo specificamente riavvitare il coprilampada. Di tanto in tanto studiata per questo utilizzo è soggetta a è necessario effettuare la pulizia del vetro usura e rotture accidentali.
- Page 27 Figura 36 - Smontaggio tubo di raccordo del forno esterno 4.11 DILATAZIONE TERMICA Durante l’uso tutti i materiali della cucina a le deformazioni e anche delle rotture. Per legna sono soggetti a dilatazione e a piccoli questo vanno tenuti liberi e puliti gli spazi movimenti dovuti alle variazioni di tempera- che permettono la dilatazione sia all’interno tura.
- Page 28 5. COSA FARE SE... Problemi Effetti Possibili rimedi Malfunzionamento Combustione irregolare • Verificare che il regolatore dell’aria primaria sia Combustione incompleta aperto • Verificare che cenere e residui non ostru- Esce fumo dalla piastra iscano la griglia • Verificare che la griglia non sia Esce fumo da altre parti della cucina montata alla rovescia (la parte piana va in alto) •...
- Page 29 6. DATI TECNICI DATI TECNICI S Modello S 60 SF S 80 SF S 60 CF S 80 S 90 Peso 167 kg 200 kg 169 kg 190 kg 210 kg Potenza nominale 5,9 kW 12,5 kW 6,0 kW 9,0 kW 10,5 kW Rendimento 71,5%...
- Page 30 3 mesi. Per le riparazioni cabile giudizio deciderà se la prestazione di ga- presso i Centri di Assistenza della ditta Rizzoli il ranzia debba essere fatta in loco oppure presso i cliente è tenuto a versare le spese di trasporto.
- Page 31 TRIBUNALE COMPETENTE Per qualsiasi controversia o contestazione sarà competente sempre e solo il foro di Trento. Avvertenza Rizzoli S.r.l. è costantemente impegnata nel migliorare i propri prodotti, per questo il contenuto del presente libretto di istruzioni può cambiare senza preavviso.
- Page 32 Usi previsti del prodotto conformemente Cottura dei cibi alla relativa specifica tecnica armonizzata Riscaldamento domestico Nome o marchio registrato del fabbricante (art. 11-5) Rizzoli S.r.l. Nome e indirizzo del mandatario Sistema di valutazione e verifica della costanza System 3 della prestazione (allegato 5) Laboratorio notificato ACTECO S.r.l.
- Page 33 Usi previsti del prodotto conformemente Cottura dei cibi alla relativa specifica tecnica armonizzata Riscaldamento domestico Nome o marchio registrato del fabbricante (art. 11-5) Rizzoli S.r.l. Nome e indirizzo del mandatario Sistema di valutazione e verifica della costanza System 3 della prestazione (allegato 5) Laboratorio notificato Istituto di ricerche e collaudi M.Masini S.r.l.
- Page 34 Usi previsti del prodotto conformemente Cottura dei cibi alla relativa specifica tecnica armonizzata Riscaldamento domestico Nome o marchio registrato del fabbricante (art. 11-5) Rizzoli S.r.l. Nome e indirizzo del mandatario Sistema di valutazione e verifica della costanza System 3 della prestazione (allegato 5) Laboratorio notificato ACTECO S.r.l.
- Page 35 Usi previsti del prodotto conformemente Cottura dei cibi alla relativa specifica tecnica armonizzata Riscaldamento domestico Nome o marchio registrato del fabbricante (art. 11-5) Rizzoli S.r.l. Nome e indirizzo del mandatario Sistema di valutazione e verifica della costanza System 3 della prestazione (allegato 5) Laboratorio notificato KIWA Italia S.p.A.
- Page 36 Usi previsti del prodotto conformemente Cottura dei cibi alla relativa specifica tecnica armonizzata Riscaldamento domestico Nome o marchio registrato del fabbricante (art. 11-5) Rizzoli S.r.l. Nome e indirizzo del mandatario Sistema di valutazione e verifica della costanza System 3 della prestazione (allegato 5) Laboratorio notificato IMQ Primacontrol S.r.l.
- Page 37 INDICE AVVERTENZE pag. Disposizioni pag. Componenti della cucina a legna pag. Accessori pag. Cucine a legna con archetto pag. Combustibili raccomandati pag. Altri combustibili pag. INSTALLAZIONE pag. Generalità pag. Canna fumaria pag. Dimensioni e forme corrette del camino pag. Corretto allacciamento al camino pag.
- Page 38 INDICE Pulizia dei vetri pag. 22 Cassa porta legna pag. 22 Manutenzione e pulizia della piastra pag. 23 Manutenzione dell’impianto di illuminazione (S 60 CF, S 80, S 90) pag. 23 4.10 Smontaggio e manutenzione forno esterno (optional) pag. 24 4.11 Dilatazione termica pag.
- Page 40 Holzherden im typischen Stil der angenehme Duft des aus unseren Wäldern Dolomitentäler begann. stammenden Holzes sind Argumente, die Mit der Zeit hat Rizzoli seine Produkte durch den Einsatz eines Holzherdes im privaten den Einsatz modernster und zukunftsori- Wohnbereich nicht nur interessant, son- entierter Technologien ständig verbessert,...
- Page 41 HERDBESTANDTEILE Abb. 1 S 60 SF Herdrahmen Brennkammer Seitenwand Anheizklappe Feuerraumtür Primärluftregulierung Sockel Holzlade Herdstange Herdplatte Backofentür Backofen S 60 CF S 80 SF...
- Page 42 Abb. 2 Herdrahmen S 80 Brennkammer Seitenwand Anheizklappe Feuerraumtür Primärluftregulierung Sockel Holzlade Herdstange Herdplatte Backofentür Backofen Rundbogen S 90 S 90 mit Rundbogen...
- Page 43 Holz nicht die Sockelverklei- In diesem Fall ist keine Holzlade vorhanden. dung beschädigen. EMPFOHLENER BRENNSTOFF Rizzoli-Holzherde sind ausdrücklich zur Ver- meleistung und verhindert gleichzeitig die wendung von Brennholz bestimmt. Es wird Bildung von Kohlenstoffrückständen und empfohlen, qualitativ gutes, luftgetrockne- Ruß.
- Page 44 2. MONTAGE ALLGEMEINES Rizzoli-Holzherde sind problemlos kehrungen getroffen werden (z.B. Verwen- einfach zu montieren. Trotzdem sind eini- dung einer Gewichtsausgleichsplatte). ge Vorsichtsmaßnahmen zu beachten, um Bei Fußböden aus leicht brennbarem Mate- eventuelle Schäden aufgrund von Unerfah- rial ist eine feuerfeste Schutzmatte am Bo- renheit zu verhindern.
- Page 45 RICHTIGE ABMESSUNGEN UND FORMEN DES RAUCHABZUGS Der Rauchabzug muss leicht größer als der gegeben. Rauchrohrstutzen sein, der dieselbe Größe Weitere nützliche, diesbezügliche techni- wie der Rauchausgang des Herdes aufweist. sche Daten finden Sie unter Punkt 6. Für alle Modelle werden Rauchabzüge mit Abgasrohre dürfen nie waagrecht sondern einem Durchmesser von 15 oder 16 cm emp- nur mit Steigung zum Schornstein hin mon-...
- Page 46 KORREKTER KAMINANSCHLUSS In der Abb. 6 wird anhand einiger Beispiele wie möglich gehalten und immer waagrecht der richtige Anschluss eines Holzherdes dar- oder mit Steigung zum Schornstein hin mon- gestellt. Für den sicheren Anschluss empfeh- tiert werden. Der Einsatz von Rohrbögen und len wir eine doppelte Abdichtung der Wand.
- Page 47 FRISCHLUFTZUFUHR Beim traditionellen Einbau des Holzherdes sen. erfolgt die Frischluftzufuhr direkt aus dem Auf Anfrage liefert Rizzoli Lüftungsklappen, Aufstellungsraum über die Luftzufuhröff- die sich nur bei Bedarf automatisch öffnen, nungen des Herdes im Inneren des Sockels. um einen maximalen Unterdruck von 3 Pa In diesem Fall muss im Raum stets für aus-...
- Page 48 Bodenhöhe oder an der Rückwand des Her- sind eventuell möglich, jedoch nur nach vor- des, je nach Modell (siehe Tabelle und Abbil- heriger Absprache mit Rizzoli. ACHTUNG! Dunstabzugshauben oder Lüftungsanlagen im Aufstellungsraum können die Funktionstüchtigkeit des Herdes, bei fehlender, eigens dafür vorge- sehener Frischluftklappe oder bei unterdimensionierter dieser, beeinträchtigen.
- Page 49 ELEKTRISCHE ANSCHLÜSSE (MODELLE MIT BACKOFEN) Der elektrische Anschluss von Holzherden das Klemmbrett auf der Herdrückseite ange- dient ausschließlich zur Stromversorgung schlossen werden. der Backofenlampe. Der Anschluss an die Alle Anschlüsse an die Stromversorgung Stromversorgung muss von einem qualifi- (Phase, Neutralleiter und Schutzleiter) müs- zierten Fachmann gemäß...
- Page 50 oder mehreren Seiten abmontiert werden und den Außenteil der Halterungen sowie den müssen. Hierfür verwenden Sie einfach einen Herdstangenbogen entfernen. Nun wird das Kreuzschlitz-Schraubendreher und den eigens Endstück an jener Stelle, an der sich der Herd- dazu bestimmten Inbusschlüssel sowie die im stangenbogen befand, eingesetzt, die Herd- Lieferumfang enthaltenen Schrauben.
- Page 51 Die Modelle S 60 CF, S 60 SF und S 80 SF sind befestigt die zwei Herdstangenhalterungen, nur mit einer Herdstange auf der Vorder- entfernt das Endstück auf der Seite, auf der seite ausgestattet. Auf Anfrage sind die Zu- man die Herdstange ergänzen möchte und behörteile für die Ergänzung der seitlichen setzt den Bogen sowie die restlichen Teile Herdstangen erhältlich.
- Page 52 5) Bringen Sie die Feuerraumtür wieder mit 6) Schieben Sie zum Schluss wieder die Holz- den Stahlstiften an. lade ein. Abb. 19 - Abmontierbare Elemente der Feuerraumtür. 1) Befestigungsschraube des Türgriffs 2) Scharnierstifte 3) Schrau- ben der Türgriffloch-Abdeckung Abb. 20 - Korrekte Position des Scharniers Abb.
- Page 53 fügt werden. Nun kann der Backofen an der Abb. 23). Die verwendeten Schrauben müs- Wand befestigt werden. Wichtig ist, dass er sen dem Gewicht des Backofens standhalten perfekt waagrecht ausgerichtet ist und dass und müssen mit hitzebeständigen Dübeln das Verbindungsrohr gut eingefügt wird. befestigt werden.
- Page 54 2.11 AUSMAUERUNG Der für die Ausmauerung verwendete feu- Aus demselben Grunde unterliegen die im erfeste Mörtel enthält immer etwas Feuch- Inneren des Herdes verwendeten Schamot- tigkeit, die jedoch nach einigen Inbetrieb- testeine einem natürlichen Setzungsprozess, nahmen des Herdes allmählich austrocknet. wobei kleine Risse und Sprünge entstehen Es ist daher normal, dass anfänglich etwas können, die jedoch keinesfalls die Funktion...
- Page 55 Abb. 24 - Regulierung der Sekundärluft ANHEIZEN UND BETRIEB Zum Anheizen verwenden Sie als Brennstoff abzug und den Witterungsbedingungen ab. gut getrocknetes, sehr dünnes Scheitholz Nachdem der Herd richtig angeheizt wurde, zusammen mit den im Handel erhältlichen bleibt das Feuer bis zum Abbrand des Heiz- speziellen Zündhilfen.
- Page 56 ANHEIZKLAPPE (S 60 CF, S 80, S 90, S 80 SF) Um das Anheizen bei kaltem Rauchabzug zu bei kaltem Herd herausgezogen und wieder erleichtern, sind die Herdmodelle mit Backo- geschlossen, sobald das Feuer gut brennt. fen mit einer durch ausziehbarem Hebel ge- Bei dem Modell S 80 sind zwei Anheizklappen steuerten Anheizklappe ausgestattet (siehe vorhanden, auf jeder Seite eine.
- Page 57 rung befindet sich der Lichtschalter seitlich Abb. 26). Bei Holzherden mit Rundbogen der Holzlade. Um ihn zu betätigen muss befindet sich der Lichtschalter in der Mitte die Holzlade herausgezogen werden (siehe des oberen Sockelteils (siehe Abb. 27). DAMPFABLEITUNGSVENTIL (S 60 CF, S 80, S 90) Beim Backen oder Braten gewisser Speisen kann es manchmal zu übermäßiger Dampf- bildung im Inneren des Backofens kommen.
- Page 58 3.10 BACKBLECH AUF TELESKOPSCHIENEN (S 60 CF, S 80, S 90) Alle Holzherde mit Backofen sind mit einem scher gestaltet wird, da beide Hände frei Teleskopschienensystem für den sicheren zum Bearbeiten und Entnehmen der Spei- und festen Halt des Backbleches ausgestat- sen sind.
- Page 59 3.12 BACKBLECHHALTER (S 60 CF, S 80, S 90) Im Lieferumfang des Holzherdes steht ein los aus dem heißen Backofen genommen Backblechhalter zur Verfügung, anhand werden kann. Der Halter wird einfach am dessen - ohne Einsatz von Topflappen oder Rand des Backblechs angebracht und mit Tüchern - das Backblech sicher und problem- beiden Händen verwendet.
- Page 60 Die Edelstahlteile werden bei kaltem Herd durch eine gründliche Reinigung alles wie- mit neutralen Reinigungsmitteln oder - bei der wie neu. Auf Anfrage liefert Rizzoli spe- hartnäckigen Verschmutzungen - mit spezi- zielle Edelstahlreiniger. Zur Reinigung von ellen, im Handel erhältlichen Edelstahlreini- emaillierten oder lackierten Teilen niemals gern, gereinigt.
- Page 61 ACHTUNG! Bewahren Sie keine leicht entflammbaren Produkte in der Holz- lade auf! Die gelagerten Gegenstände dürfen keinesfalls bis an den oberen Rand der Holzlade reichen. REINIGUNG UND PFLEGE DER HERDPLATTE Die Spezialstahl-Herdplatten der Holzherde diesem Falle reicht es, die Platte mit einem erfordern eine regelmäßige Reinigung und Lappen, der mit einem nicht säurehaltigen Pflege und zwar insbesondere nach jedem...
- Page 62 Die Glühlampe im Backofen ist hohen Tem- nehmen die Lampe heraus und ersetzen peraturen ausgesetzt. Auch wenn sie spezi- sie durch eine neue. Zum Schluss bringen ell für diesen Einsatz entwickelt wurde, ist Sie die Abdeckung wieder an. Von Zeit zu ihre Lebensdauer nicht uneingeschränkt.
- Page 63 Abb. 36 - Entfernung des Verbindungsrohrs des zusätzlichen Backofens 4.11 WÄRMEAUSDEHNUNG Während dem Betrieb des Holzherdes un- te Verformungsschäden und Rissbildungen terliegen alle Herdbauteile Ausdehnungs- hervorrufen. Achten Sie deshalb darauf, und kleinen Bewegungserscheinungen, die dass sowohl die externen wie auch internen durch Temperaturschwankungen hervorge- Dehnungsfugen des Holzherdes stets frei rufen werden.
- Page 64 5. WAS TUN, WENN... Probleme Anzeichen Mögliche Lösungen Funktionsstörung Unregelmäßige Verbrennung • Kontrollieren, ob der Primärluftregler offen ist • Unvollständige Verbrennung Kontrollieren, ob keine Asche und Verbrennungs- Rauch dringt aus der Herdplatte rückstände den Feuerrost verstopfen • Kontrol- Rauch dringt aus anderen Herdteilen lieren, ob der Feuerrost nicht verkehrt montiert wurde (der flache Teil gehört nach oben) •...
- Page 65 6. TECHNISCHE DATEN TECHNISCHE DATEN SERIE S Modell S 60 SF S 80 SF S 60 CF S 80 S 90 Gewicht 167 kg 200 kg 169 kg 190 kg 210 kg Nennwärmeleistung 5,9 kW 12,5 kW 6,0 kW 9,0 kW 10,5 kW Wirkungsgrad 71,5%...
- Page 66 Gerät beiliegenden Garantieschein (bitte Bei Inanspruchnahme von Garantieleistungen sorgfältig aufbewahren) vorweisen. GARANTIEBESTIMMUNGEN Die Firma Rizzoli behält sich das Recht vor, rem Werk vorzunehmen. Für Garantieleistun- nach ihrem freien Ermessen die zur Lösung gen an Ort und Stelle wird dem Kunden die zu des Garantiefalls am besten geeigneten Maß-...
- Page 67 Käufers als zuständigen Gerichtsstand Firma Rizzoli das Recht vor, auch einen an- auszuwählen. Hinweis Die Firma Rizzoli GmbH ist stets um die Verbesserung seiner Erzeugnisse bemüht und behält sich deshalb das Recht vor, eventuelle Änderungen dieser Gebrauchsanweisung ohne Vorankündigung vorzunehmen.
- Page 68 Vorgesehene Verwendung des Produkts in Kochen von Speisen Übereinstimmung mit der geltenden, harmonisierten Raumheizer technischen Spezifikation Name oder eingetragene Marke des Herstellers Rizzoli GmbH (Art. 11-5) Name und Adresse des autorisierten Stellvertreters System zur Bewertung und Überprüfung der System 3 Leistungsbeständigkeit (Anlage 5) Prüflabor...
- Page 69 Vorgesehene Verwendung des Produkts in Kochen von Speisen Übereinstimmung mit der geltenden, harmonisierten Raumheizer technischen Spezifikation Name oder eingetragene Marke des Herstellers Rizzoli GmbH (Art. 11-5) Name und Adresse des autorisierten Stellvertreters System zur Bewertung und Überprüfung der System 3 Leistungsbeständigkeit (Anlage 5) Prüflabor...
- Page 70 Vorgesehene Verwendung des Produkts in Kochen von Speisen Übereinstimmung mit der geltenden, harmonisierten Raumheizer technischen Spezifikation Name oder eingetragene Marke des Herstellers Rizzoli GmbH (Art. 11-5) Name und Adresse des autorisierten Stellvertreters System zur Bewertung und Überprüfung der System 3 Leistungsbeständigkeit (Anlage 5) Prüflabor...
- Page 71 Vorgesehene Verwendung des Produkts in Kochen von Speisen Übereinstimmung mit der geltenden, harmonisierten Raumheizer technischen Spezifikation Name oder eingetragene Marke des Herstellers Rizzoli GmbH (Art. 11-5) Name und Adresse des autorisierten Stellvertreters System zur Bewertung und Überprüfung der System 3 Leistungsbeständigkeit (Anlage 5) Prüflabor...
- Page 72 Vorgesehene Verwendung des Produkts in Kochen von Speisen Übereinstimmung mit der geltenden, harmonisierten Raumheizer technischen Spezifikation Name oder eingetragene Marke des Herstellers Rizzoli GmbH (Art. 11-5) Name und Adresse des autorisierten Stellvertreters System zur Bewertung und Überprüfung der System 3 Leistungsbeständigkeit (Anlage 5) Prüflabor...
- Page 73 INHALTSVERZEICHNIS EINFÜHRUNG Sicherheitshinweise Herdbestandteile Zubehör Holzherde mit Rundbogen Empfohlener Brennstoff Andere Brennstoffe MONTAGE Allgemeines Rauchabzug Richtige Abmessungen und Formen des Rauchabzugs Korrekter Kaminanschluss Rauchausgänge Frischluftzufuhr Elektrische Anschlüsse (Modelle mit Backofen) Herdstange Türanschlag wechseln (S 60 CF, S 60 SF, S 80 SF) 2.10 Montage des zusätzlichen Backofens (optional) 2.11...
- Page 74 INHALTSVERZEICHNIS Reinigung der Sichtfenster Holzlade Reinigung und Pflege der Herdplatte Wartung der Backofenbeleuchtung (S 60 CF, S 80, S 90) 4.10 Abbau und Wartung des zusätzlichen Backofens (optional) 4.11 Wärmeausdehnung 4.12 Austausch von Herdbestandteilen WAS TUN, WENN... TECHNISCHE DATEN Technische Daten Serie S Einstellungen Nennwärmeleistung GARANTIE Erklärung über die fachgerechte Konstruktion...
- Page 78 Year after year Rizzoli continued to refine its are the qualities that make wood fired cook- cookers using even more advanced technol- ers indispensable in every house.
- Page 79 PARTS OF THE WOOD FIRED COOKER Picture 1 S 60 SF Frame Combustion chamber Side Starting device Combustion chamber’s door Primary air hand grip Base Wood box Handrail Plate Oven’s door Oven S 60 CF S 80 SF...
- Page 80 Picture 2 Frame S 80 Combustion chamber Side Starting device Combustion chamber’s door Primary air hand grip Base Wood box Handrail Plate Oven’s door Oven Rustic bow S 90 S 90 with rustic...
- Page 81 ACCESSORIES Together with the wood fired cookers you installation, the maintenance and the daily will find some accessories that simplify the use of the device. • Instruction booklet for use and • Oil for the care of the plate maintenance •...
- Page 82 2. INSTALLATION GENERAL NOTES Wood fired cookers are easy to install; any- example you can use a late to distribute the way you must take some cares to avoid dam- weight). In case of floor made of inflam- ages due to unskillfulness. Do not drag the mable materials it is necessary to put a fire- cooker, move it keeping it lifted from the proof protection on the floor in font of the...
- Page 83 DIMENSIONS AND CORRECT FORMS OF CHIMNEY The chimney hood must have a bigger size the flue are available in the technical data than the conjunction that must have the in chapter 6. same size of the flue outlet on the device. The wood fired cooker must not be connect- For all the models it is suggested the use of a ed to a shared flue, moreover the connec-...
- Page 84 CORRECT CONNECTION TO CHIMNEY In picture 6 you can see some examples for is as short as possible. The connection must a correct connection of a wood fired wood be always placed horizontally or inclined up- fired cooker. wards, never downwards. Bended or winding For a safe connection to the flue, we suggest parts of pipe must be avoided.
- Page 85 Picture 8 - Tolerance for smoke outlet on the top or rear. The tolerance depends on the orientation of the conjunction AERATION The standard installation of the wood fired On demand, Rizzoli can give specific valves wood fired cooker considers that the com- which can allow the automatic opening of...
- Page 86 Are also possible other solutions for the con- of the plinth, or on the wall through the nection but they must be decided together rear part of the cooker according to speci- with Rizzoli. Standard cookers Cookers with rustic bow External air entry...
- Page 87 WARNING! Aspiring hoods or extracting air fans in the room may generate problems to the device if there is not a suited air intake or in case of air intake sub-dimensioned. ELECTRIC CONNECTIONS (MODELS WITH OVEN) The models with oven require a connection cooker.
- Page 88 sides. To make this operation, you need a pommels of the carryings and the bend of star screwdriver and the hex key with the the handrail. screws given together with the wood fired Now you must insert the final part where cooker.
- Page 89 The S 60 CF, S 60 SF and S 80 SF models are the special screws. Now, remove the final endowed only with the frontal handrail. It part from the side in which you want to add is possible to request the tools to add the the handrail and insert the bend and the handrail to one or each side.
- Page 90 5) Put again the door on the cooker insert- 6) Reinsert the wood box. ing the thorns. Picture 19 - Movable elements of the door. 1) Handle fixing screw. 2) Hinges pins. 3) Cap fixing screws Picture 20 - Correct position of the handle Picture 21 - Correct position of the rounded washers 2.10 FIXING THE EXTERNAL OVEN (OPTIONAL)
- Page 91 fectly inserted. The correct insertion must resist high temperatures. guarantee the holding of the fume conduct When necessary, later, you will be able to and the correct space inside the fume circuit remove the pipes and access to the internal of the oven.
- Page 92 2.11 INTERNAL WALLING The refractory mortar used for the internal For the same reason the internal refractory walling contain always a little moisture that bricks experience a bedding that may gen- is eliminated after the first periods of use: so erate small holes on the bricks, such holes it is normal that the first times you light the do not preclude anyway the working of the...
- Page 93 Picture 24 - Secondary air regulation LIGHTING AND WORKING To light the fire you can use well dried bro- tains till the exhaustion of the combustible. ken and thin wood together with the specif- To maintain the flame it is necessary to re- ic products available in commerce.
- Page 94 STARTING KEY (S 60 CF, S 80, S 90, S 80 SF) The models with oven, in order to allow an shall be reinserted in when the combustion easier lighting with cold chimneys, are en- is well under way. dowed with a starting key ruled by a rod, On the S 80 SF model there are two starting see picture 25.
- Page 95 cookers, the switch is lateral to the wood cookers with rustic bow, the switch is locat- box. To access to it, you have to extract the ed in the upper part of the vain in central wood box, see picture 26. In wood fired position, see picture 27.
- Page 96 3.10 TELESCOPIC PULLOUT FOR BAKING PAN (S 60 CF, S 80, S 90) All the wood fired wood fired cookers with pullout is placed in a single position inside oven have a telescopic pullout for endowed the oven but this can be changed by moving baking pan system.
- Page 97 3.12 BAKING-PAN HOLDER (S 60 CF, S 80, S 90) The baking-pan holder allows to extract the der must be hooked to the baking-pan edge baking-pan in a safe way, with no need to and used with two hands. use rags or hot pads. The baking-pan hol- Picture 32 - Baking-pan holder 4.
- Page 98 On request Rizzoli gives specific products to to remove dirt. Do not use at all abrasive clean stainless steel. For enamelled or paint- sponges that may scratch the surface.
- Page 99 PLATE CLEANING AND MAINTENANCE Radiating plates in special steel need regular plate with a rag soaked with non acid oil. maintenance, in particular they need clean- If the rusty stain is not being cleaned, you ing after every use that brings moisture or could have to wipe the plate with a lightly dust on the plate itself.
- Page 100 4.10 UNFIXING AND MAINTENANCE OF THE EXTERNAL OVEN (OPTIONAL) To clean the connection pipes and the inter- wall. To make this, the firs step is the remov- nal conducts of the external oven, it is pos- al of the oven door and of the other internal sible to unfix the oven itself.
- Page 101 Picture 36 - Removal of the connecting pipe of the external oven 4.11 THERMAL EXPANSION During the use, all the materials of the wood might happen. For this reason, the spaces fired cooker are subjected to expansion which allow the expansion inside and out- and little movements due to the variation side the wood fired cooker must be kept of temperature.
- Page 102 5. WHAT TO DO IF... Problems Effects Possible solutions Bad working Irregular combustion • Verify that the primary air regulator is open • Incomplete combustion Verify that ash or other residuals do not obstruct Smoke comes out of the plate the grill •...
- Page 103 6. TECHNICAL DATA TECHNICAL DATA S Model S 60 SF S 80 SF S 60 CF S 80 S 90 Weight 167 kg 200 kg 169 kg 190 kg 210 kg Nominal power 5,9 kW 12,5 kW 6,0 kW 9,0 kW 10,5 kW Efficiency 71,5%...
- Page 104 This device is the result all the quality controls and internal tests. of the pluridecennial experience of Rizzoli, Rizzoli also warrants that the device is work- who warrants a perfectly made product. ing, without imperfections due to building...
- Page 105 COMPETENT LAW COURT In case of controversy will be competent the law-court of Trento only. Note Rizzoli S.r.l. is constantly working to improve its products, for this reason the contents of this booklet may vary without notice.
- Page 106 Intended use of the product in accordance with Meals cooking the relative harmonized technical specification Domestic heating Name or regist. trademark of the manufact. (art. 11-5) Rizzoli S.r.l. Name and Address of the manufacturer System of assessment and verification of constancy System 3 of performance (Attachment 5) Notified laboratory ACTECO S.r.l.
- Page 107 Intended use of the product in accordance with Meals cooking the relative harmonized technical specification Domestic heating Name or regist. trademark of the manufact. (art. 11-5) Rizzoli S.r.l. Name and Address of the manufacturer System of assessment and verification of constancy System 3 of performance (Attachment 5) Notified laboratory Istituto di ricerche e collaudi M.Masini S.r.l.
- Page 108 Intended use of the product in accordance with Meals cooking the relative harmonized technical specification Domestic heating Name or regist. trademark of the manufact. (art. 11-5) Rizzoli S.r.l. Name and Address of the manufacturer System of assessment and verification of constancy System 3 of performance (Attachment 5) Notified laboratory ACTECO S.r.l.
- Page 109 Intended use of the product in accordance with Meals cooking the relative harmonized technical specification Domestic heating Name or regist. trademark of the manufact. (art. 11-5) Rizzoli S.r.l. Name and Address of the manufacturer System of assessment and verification of constancy System 3 of performance (Attachment 5) Notified laboratory KIWA Italia S.p.A.
- Page 110 Intended use of the product in accordance with Meals cooking the relative harmonized technical specification Domestic heating Name or regist. trademark of the manufact. (art. 11-5) Rizzoli S.r.l. Name and Address of the manufacturer System of assessment and verification of constancy System 3 of performance (Attachment 5) Notified laboratory IMQ Primacontrol S.r.l.
- Page 111 INDEX WARNINGS pag. Instructions pag. Parts of the wood fire cooker pag. Accessories pag. Wood fired cookers with rustic bow pag. Recommended combustibles pag. Other combustibles pag. INSTALLATION pag. General notes pag. Chimney pag. Dimensions and correct forms of chimney pag.
- Page 112 INDEX Cleaning of the glasses pag. Wood box pag. Plate cleaning and maintenance pag. Maintenance of the light (S 60 CF, S 80, S 90) pag. 4.10 Unfixing and maintenance of the external oven (optional) pag. 4.11 Thermal expansion pag. 4.12 Replacement of the parts pag.
- Page 114 écologique, la douce chaleur du feu naturel, typique des vallées Dolomitiques. le parfum du bois de nos forêts sont des va- Depuis, Rizzoli a affiné sa propre production, leurs qui rendent presque indispensable, dans utilisant des technologies toujours plus mo- chaque foyer, la présence d’un poêle à...
- Page 115 COMPOSANTS DE LA CUISINIERE A BOIS Figure 1 S 60 SF Plan Chambre de combustion Flanc Clé de tirage Porte foyère Bouton de réglage d’admission d’air primaire Socle Tiroir à bois Main courante Plaque de cuisson Porte de four Four S 60 CF S 80 SF...
- Page 116 Figure 2 Plan S 80 Chambre de combustion Flanc Clé de tirage Porte foyère Bouton de réglage d’admission d’air primaire Socle Tiroir à bois Main courante Plaque de cuisson Porte de four Four Niche S 90 S 90 avec niche...
- Page 117 ACCESSOIRES Pour faciliter toutes les opérations d’ins- tidienne, les cuisinières à bois RIZZOLI sont tallation, d’entretien et d’utilisation quo- dotées des accessoires suivants: • Le présent manuel d’instructions et • 1 buse de raccordement du carneau d’entretien • 1 flacon d’huile de nettoyage de la sole •...
- Page 118 2. INSTALLATION GENERALITES L’installation d’une cuisinière à bois est des çonnement. Si la construction existante ne plus simples. Quelques précautions sont ce- satisfait pas à ces exigences, il conviendra de pendant à observer afin d’éviter des dété- prendre les mesures adéquates (une plaque riorations imputables fréquemment à...
- Page 119 DIMENSIONS ET FORMES DU CONDUIT DE FUMEES Le conduit de fumées doit avoir une section Voir à ce sujet le tableau 2. légèrement supérieure à celle du carneau Les autres données utiles au dimensionne- de raccordement qui, lui sera d’une section ment du conduit sont indiquées dans les identique à...
- Page 120 RACCORDEMENT CORRECT AU CONDUIT DE FUMEES En figure 6 sont représentés quelques être le plus court possible. Celui-ci doit être exemples pour un raccordement correct d’une positionné horizontalement ou en pente as- cuisinière à bois. Pour un raccordement en cendante, mais jamais en contre-pente vers le toute sécurité...
- Page 121 PRISE D’AIR L’installation traditionnelle de la cuisinière 100 cm². prévoit que l’air comburant soit prélevé Sur demande, Rizzoli peut fournir des cla- dans le local d’installation et admis dans pets permettant l’ouverture automatique la chambre de combustion au travers de la de la prise d’air lorsque cela est nécessaire...
- Page 122 D’autres solutions sont possibles pour le rac- dans le socle ou encore sur le mur d’ados à cordement selon accord préalable de Rizzoli. un emplacement variable selon les modèles Cuisinières standard Cuisinières avec niche...
- Page 123 ATTENTION! Les hottes aspirantes et les systèmes d’extraction d’air dans le local peuvent causer des dysfonctionnements de l’appareil en cas d’absence de prise d’air ou de sous dimensionnement. RACCORDEMENTS ELECTRIQUES (MODELES AVEC FOUR) Les modèles avec four nécessitent un raccor- à...
- Page 124 partie de cette main courante. Pour ce faire, main courante de ses supports, retirer le(s) munissez-vous d’un tournevis cruciforme, de coulisseau(x) des supports et le(s) coude(s) de la clé allen et des vis fournis. Tout d’abord, la main courante. Sur les éléments restants, retirer l’embout simplement inséré...
- Page 125 En revanche, les modèles S 60 CF, S 60 SF et S et de visser à ces emplacements les supports 80 SF ne sont livrés qu’avec la main courante adéquats. Ensuite, retirer le (ou les) em- frontale. Il vous est possible de demander la bout(s) de la barre frontale ;...
- Page 126 de la porte. axes. 5) Remettre la porte en place en insérant les 6) Enfin, remettre le tiroir à bois en place. Figure 19 - Eléments mobiles de la porte. 1) Vis de fixation de la poignée 2) Axes des charnières 3) Vis de fixation du cache Figure 20 - Position correcte de la charnière Figure 21 - Position correcte des rondelles bombées 2.10...
- Page 127 à ce qu’il soit parfaitement de niveau et que du four et doivent engagées dans des scel- le tuyau de raccordement soit bien emboîté lements ou chevilles résistant à des hautes et bien vertical. températures. L’emboîtement correct doit garantir l’étan- En cas de nécessité...
- Page 128 2.11 LES REFRACTAIRES DU FOYER Le mortier utilisé pour l’assemblage des Pour la même raison, les briques réfractaires éléments réfractaires du foyer contient subissent un phénomène d’adaptation au toujours un peu d’eau qui ne sera éliminée cours de laquelle peuvent se créer des mi- qu’après les premiers allumages.
- Page 129 Figure 24 - Réglage de l’air secondaire ALLUMAGE ET FONCTIONNEMENT Pour allumer le feu, utilisez du petit bois ment du combustible. bien sec et un produit allume-feu du com- Pour maintenir le feu, charger du bois dans merce. La combustion peut s’avérer difficile la chambre de combustion à...
- Page 130 CLE DE DEMARRAGE (S 60 CF, S 80, S 90, S 80 SF) Les modèles avec four sont dotées d’un volet est tirée lorsque la cuisinière est froide et re- de démarrage commandé par une manette poussée dès que la combustion est avivée. pour faciliter l’allumage du feu lorsque le Sur le modèle S 80 SF sont présentes deux conduit est froid (voir fig.
- Page 131 lance de la cuisson. L’interrupteur est placé 26). Sur les cuisinières avec niche, l’interrup- sur le côté du logement de bois. Pour y accé- teur est placé en position centrale sur l’arc der, tirez vers vous le tiroir à bois (voir figure de la niche (voir figure 27).
- Page 132 Figure 31 - Mode d’emploi pour la modification de la position des glissières télescopiques 3.11 COUVERCLE DE PLAQUE (OPTION) Toutes les cuisinières Rizzoli peuvent (sur place le couvercle que sur une cuisinière ri- demande) être livrées avec un couvercle de goureusement froide.
- Page 133 3.12 POIGNEES DE LECHEFRITE (S 60 CF, S 80, S 90) En dotation avec les cuisinières dotées de torchons. Les poignées s’accrochent sur le four, est présent un dispositif de poignées rebord de la lèchefrite et s’utilisent à deux qui permet d’extraire la lèchefrite en toute mains.
- Page 134 être nettoyées à froid, à l’aide d’un produit tant rendra votre cuisinière comme neuve. neutre ou, en cas de taches rebelles, avec un Sur demande, Rizzoli peut fournir des pro- produit du commerce spécifique pour acier duits spécifiques pour le nettoyage de l’acier inox.
- Page 135 ATTENTION! Ne jamais mettre de produits inflammables dans le tiroir à bois! Ne jamais surcharger le tiroir à bois à ras bord. ENTRETIEN ET NETTOYAGE DE LA PLAQUE DE CUISSON Les plaques radiantes en acier spécial des minuscules taches de rouille. Il suffira alors cuisinières (plaques de cuisson) nécessitent de repasser un chiffon imbibé...
- Page 136 La lampe du four est soumise à de hautes fectueuse, mettre en place la nouvelle am- températures. Tout en étant conçue pour poule et, enfin revisser le hublot. De temps résister à ces températures, elle peut, dans en temps, il est nécessaire de nettoyer le le temps être amenée à...
- Page 137 Figure 36 - Démontage du tuyau de raccordement du four extérieur 4.11 DILATATION THERMIQUE Lors de l’utilisation, tous les matériaux pas provoquer de déformations voire de constitutifs de la cuisinière sont sujets à la ruptures. C’est pourquoi tous les espaces dilatation et à...
- Page 138 5. QUE FAIRE SI... Problèmes Effets Solutions Dysfonctionnement Combustion irrégulière • Vérifier que le régulateur d’admission d’air primaire Combustion incomplète est ouvert • Vérifier que la grille foyère n’est pas obs- De la fumée sort par la plaque truée par un excès de cendres ou de résidus divers • De la fumée sort à...
- Page 139 6. DONNÉES TECHNIQUES DONNÉES TECHNIQUES S Modèle S 60 SF S 80 SF S 60 CF S 80 S 90 Poids 167 kg 200 kg 169 kg 190 kg 210 kg Puissance nominale 5,9 kW 12,5 kW 6,0 kW 9,0 kW 10,5 kW Rendement 71,5%...
- Page 140 La société Rizzoli, de manière non contes- Pour toute réparation au Centre d’Assistan- table, décidera si la prestation de garantie ce Technique de la société Rizzoli, les frais de doit se faire sur site ou bien dans son propre transport seront à charge du client.
- Page 141 Tribunal de TRENTO Avis La société Rizzoli s’emploie en permanence à l’amélioration de sa production. Dans ce but, elle se réserve le droit de modifier sans préavis les caractéristiques de ses modèles et le contenu de ce manuel.
- Page 142 Cuisson des aliments à la relative spécification technique harmonisée Chauffage domestique Nom et marche déposée du fabricant (Art. 11-5) Rizzoli S.r.l. Nom et adresse du mandataire Système d’évaluation et de vérification Système 3 de la constance de la prestation (Annexe 5) Laboratoire déclaré...
- Page 143 Cuisson des aliments à la relative spécification technique harmonisée Chauffage domestique Nom et marche déposée du fabricant (Art. 11-5) Rizzoli S.r.l. Nom et adresse du mandataire Système d’évaluation et de vérification Système 3 de la constance de la prestation (Annexe 5) Laboratoire déclaré...
- Page 144 Cuisson des aliments à la relative spécification technique harmonisée Chauffage domestique Nom et marche déposée du fabricant (Art. 11-5) Rizzoli S.r.l. Nom et adresse du mandataire Système d’évaluation et de vérification Système 3 de la constance de la prestation (Annexe 5) Laboratoire déclaré...
- Page 145 Cuisson des aliments à la relative spécification technique harmonisée Chauffage domestique Nom et marche déposée du fabricant (Art. 11-5) Rizzoli S.r.l. Nom et adresse du mandataire Système d’évaluation et de vérification Système 3 de la constance de la prestation (Annexe 5) Laboratoire déclaré...
- Page 146 Cuisson des aliments à la relative spécification technique harmonisée Chauffage domestique Nom et marche déposée du fabricant (Art. 11-5) Rizzoli S.r.l. Nom et adresse du mandataire Système d’évaluation et de vérification Système 3 de la constance de la prestation (Annexe 5) Laboratoire déclaré...
- Page 147 INDEX AVERTISSEMENT pag. Dispositions pag. Composant de la cuisinière à bois pag. Accessoires pag. Cuisinières à bois avec niche cintrée pag. Combustibles recommandés pag. Autres combustibles pag. INSTALLATION pag. Généralites pag. Conduit de fumées pag. Dimensions et formes du conduit de fumées pag.
- Page 148 INDEX Nettoyage des vitres pag. Tiroir a bois pag. Entretien et nettoyage de la plaque de cuisson pag. Entretien de l’éclairage du four (S 60 CF, S 80, S 90) pag. 4.10 Démontage et entretien du four extérieur (option) pag. 4.11 Dilatation thermique pag.
- Page 152 Rizzoli s.r.l. Zona Artigianale 1, Frazione San Lugano 39040 Trodena nel Parco Naturale (BZ) - Italia Tel. +39 0471 887551 - Fax +39 0471 887552 info@rizzolicucine.it - www.rizzolicucine.it...
Need help?
Do you have a question about the S Series and is the answer not in the manual?
Questions and answers