Advertisement
Quick Links
Overview
Because the Precis SD (Slam Dunk) Distribution Matrix is available in eight
configuration sizes of RGBHV, four with and four without stereo audio, the illustrations
in this guide may differ from the model(s) you purchased. For complete documentation
for this product (including signal specifications), see the AMX AutoPatch CD or visit
www.amx.com. This product supports full Device Discovery through the Duet module.
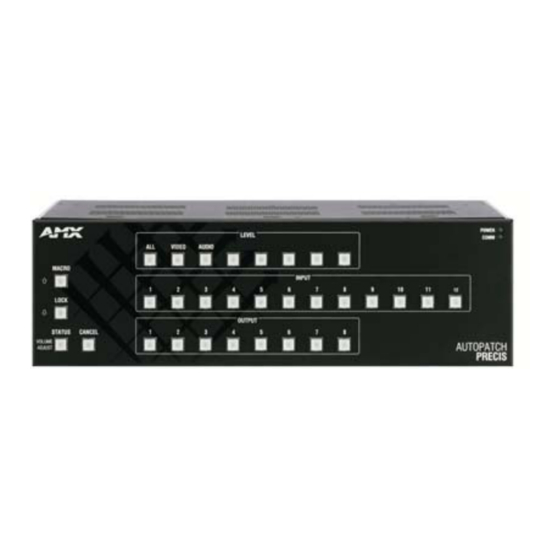
FIG. 1
Precis SD 12x8 enclosure
Precis SD systems are available in the following configurations; all models have front
control panels.
Model
Configuration
FGP37-0804-560
FGP37-0804-567
FGP37-0808-560
FGP37-0808-567
FGP37-1204-560
FGP37-1204-567
FGP37-1208-560
FGP37-1208-567
* DVC – Digital Volume Control
General Specifications
Specifications
Approvals
CE, ETL, cETL
MTBF
86,600 hours
Operational Temperature
32° to 110° F (0° to 43° C)
Humidity
0 to 90% non-condensing
AC Power
100 VAC to 240 VAC single phase, 50 Hz to 60 Hz
Power Consumption
80 Watts per enclosure (max.)
57 Watts per fully loaded enclosure (typical)
Thermal Dissipation
273 BTU (max.)
194 BTU per fully loaded enclosure (typical)
Dimensions
10.4 in. (26.4 cm) depth
17.4 in. (44.2 cm) width without rack ears
18.8 in. (47.7 cm) width with rack ears
5.2 in. (13.2 cm) height, 3 RU
Weight
Approximately 12 lbs (5.4 kg) per enclosure
Installation
Rack Mounting
To rack mount a Precis SD enclosure:
1.
Attach the rack ears as shown in FIG. 2 (screws provided).
2.
Install in a rack leaving a minimum of one empty rack unit above and below
(required); three empty rack units above and below are recommended.
FIG. 2
Attach rack ears to sides of enclosure
AutoPatch Precis SD Distribution Matrix
Description
8x4
RGBHV
8x4
RGBHV+Stereo, DVC*
8x8
RGBHV
8x8
RGBHV+Stereo, DVC*
12x4
RGBHV
12x4
RGBHV+Stereo, DVC*
12x8
RGBHV
12x8
RGBHV+Stereo, DVC*
Attaching Input & Output Cables/Wires
Before connecting all input and output cables/wires, attach only the first two inputs and
outputs and execute a test switch (see "Completing the Installation," next page). When
the test switch is successful, attach the rest of the input and output cables and wires.
500 MHz Video & Hi-Z Sync Connectors – BNC
Five connectors are required to route an RGBHV signal. FIG. 3 shows five BNC cable
connectors attached for routing R, G, B, H, and V signals to the destination device
through Output 8. Input cable connectors are attached in the same way.
FIG. 3
Five BNC connectors are required for an RGBHV signal
Stereo Audio Connectors – 5-Term
Precis SD models featuring stereo audio have 5-position terminal block connectors
that can be wired for balanced (differential) or unbalanced (single-ended) audio
(FIG. 4).
Balanced audio
FIG. 4
5-Term stereo audio wiring
Note: When using shielded twisted-pair wire, connect the shield (ground) at one end
only (recommend receiving end) to minimize low frequency noise (see FIG. 5).
Source and destination devices require either balanced or unbalanced connections.
More than one of the options shown in FIG. 5 can be used in the same system.
FIG. 5
Options for source-to-Precis SD-to-destination 5-Term wiring
Establishing External Control (if applicable)
The Precis SD can be controlled by attaching an external control device/system to the
CONTROL port or to the REMOTE port, which uses AutoPatch XNNet protocol for
AMX AutoPatch devices.
Serial Control (PCs, AMX Control Devices, & third-party controllers)
Use the pinout in FIG. 6 when connecting a PC to the CONTROL port.
FIG. 6
RS-232 null modem cable pin diagram
Quick Start Guide
R
G
B
H
V
Unbalanced audio
Advertisement

Related Manuals for AMX Precis SD


Summary of Contents for AMX Precis SD
- Page 1 Options for source-to-Precis SD-to-destination 5-Term wiring Establishing External Control (if applicable) The Precis SD can be controlled by attaching an external control device/system to the CONTROL port or to the REMOTE port, which uses AutoPatch XNNet protocol for AMX AutoPatch devices.
- Page 2 If the enclosure contains stereo audio, “Adjust Audio” is to the left of the Status Key and arrows are to the left of the Macro and Lock Keys (FIG. 10). All Precis SD models with stereo audio support Volume Control and Input Gain Control.