Table of Contents
Advertisement
Available languages
Available languages
Automatic Battery Charger
Cargador de baterías automático
Chargeur de batterie automatique
108-1
OWNERS MANUAL / MANUAL DEL USUARIO /
MANUEL D'UTILISATION
PLEASE SAVE THIS OWNERS MANUAL AND READ BEFORE EACH USE. This manual
will explain how to use the battery charger safely and effectively. Please read and follow
these instructions and precautions carefully.
POR FAVOR CONSERVE ESTE MANUAL DEL USUARIO Y LEALO ANTES DE CADA
USO. En este manual le explica cómo utilizar el cargador de batería de manera segura y
confiable. Por favor, lea y siga las siguientes instrucciones y precauciones.
GARDER LE MANUEL D'INSTRUCTION ET LISEZ LE AVANT CHAQUE UTILISATION.
Ce manuel explique comment utiliser le chargeur de batterie d'une façon securitaire et efficace.
S'il vous plaît lisez et suivez ces instructions et precautions.
0099001822E-03
Advertisement
Table of Contents

Related Manuals for Schumacher Electric FR01335


Summary of Contents for Schumacher Electric FR01335
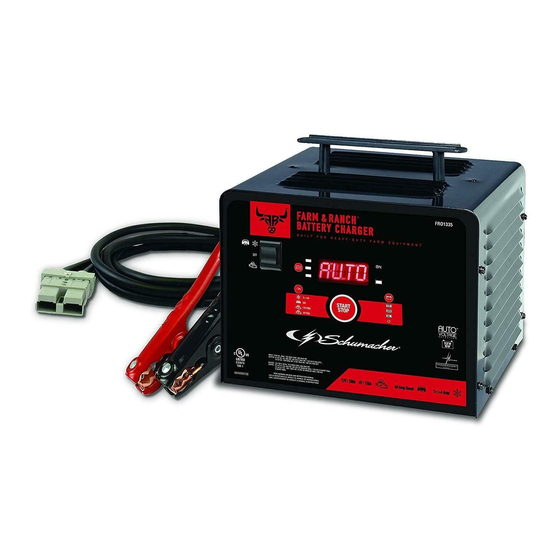
- Page 1 Automatic Battery Charger Cargador de baterías automático Chargeur de batterie automatique 108-1 OWNERS MANUAL / MANUAL DEL USUARIO / MANUEL D’UTILISATION PLEASE SAVE THIS OWNERS MANUAL AND READ BEFORE EACH USE. This manual will explain how to use the battery charger safely and effectively. Please read and follow these instructions and precautions carefully.
-
Page 2: Table Of Contents
CONTENTS IMPORTANT SAFETY INSTRUCTIONS – SAVE THESE INSTRUCTIONS ..........5 PERSONAL SAFETY PRECAUTIONS .......................5 PREPARING TO CHARGE .........................6 CHARGER LOCATION ..........................6 DC CONNECTION PRECAUTIONS ......................6 FOLLOW THESE STEPS WHEN BATTERY IS INSTALLED IN VEHICLE ..........6 FOLLOW THESE STEPS WHEN BATTERY IS OUTSIDE VEHICLE ............6 GROUNDING AND AC POWER CORD CONNECTIONS .................7 ASSEMBLY INSTRUCTIONS ........................7 CONTROL PANEL ............................7... - Page 3 CONTENIDOS INSTRUCCIONES IMPORTANTES DE SEGURIDAD – GUARDE ESTAS INSTRUCCIONES ....14 PRECAUCIONES DE SEGURIDAD PERSONAL ..................14 PREPARACIÓN PARA LA CARGA ......................15 UBICACIÓN DEL CARGADOR.........................15 PRECAUCIONES DE CONEXIÓN EN CC ....................15 SIGA ESTOS PASOS CUANDO LA BATERÍA ESTÉ COLOCADA EN EL VEHÍCULO ......16 SIGA ESTOS PASOS CUANDO LA BATERÍA SE ENCUENTRE FUERA DEL VEHÍCULO ....16 CONEXIONES A TIERRA Y ENERGÍA DE CA ..................16 INSTRUCCIONES DE MONTAJE ......................17...
- Page 4 TABLE DES MATIÈRES CONSIGNES DE SÉCURITÉ IMPORTANTES – CONSERVER CES INSTRUCTIONS ......24 MESURES DE SÉCURITÉ PERSONNELLE ....................24 PRÉPARATION POUR LE CHARGEMENT ....................25 EMPLACEMENT DU CHARGEUR ......................25 PRÉCAUTIONS SUR LA CONNEXION C.C....................25 ÉTAPES À SUIVRE QUAND LA BATTERIE EST INSTALLÉE DANS UN VÉHCULE ......25 ÉTAPES À...
-
Page 5: Important Safety Instructions - Save These Instructions
Automatic Battery Charger OWNERS MANUAL 108-1 PLEASE SAVE THIS OWNERS MANUAL AND READ BEFORE EACH USE. This manual will explain how to use the charger safely and effectively. Please read and follow these instructions and precautions carefully. IMPORTANT SAFETY INSTRUCTIONS – SAVE THESE INSTRUCTIONS SAVE THESE INSTRUCTIONS –... -
Page 6: Preparing To Charge
PREPARING TO CHARGE If necessary to remove battery from vehicle to charge, always remove grounded terminal from battery first. Make sure all accessories in the vehicle are off, so as not to cause an arc. Be sure area around battery is well ventilated while battery is being charged. Clean battery terminals. -
Page 7: Grounding And Ac Power Cord Connections
Connect POSITIVE (RED) charger clip to POSITIVE (POS, P, +) post of battery. Position yourself and free end of cable as far away from battery as possible – then connect NEGATIVE (BLACK) charger clip to free end of cable. Do not face battery when making final connection. When disconnecting charger, always do so in reverse sequence of connecting procedure and break first connection while as far away from battery as practical. -
Page 8: Operating Instructions
RATE SELECTION BUTTON Use this button to select one of the following: 2<>6A CHARGE/MAINTAIN – For charging small and large batteries. Not recommended for industrial applications. BOOST – For quickly adding energy to a severely discharged or large capacity battery. 200A ENGINE START (12V) –... - Page 9 CHARGING A BATTERY OUTSIDE OF THE VEHICLE 1. Place battery in a well-ventilated area. 2. Clean the battery terminals. 3. Set the ON/OFF switch to the OFF position. 4. Connect the battery, as described in section 7. 5. Connect the charger to an electrical outlet. 6.
- Page 10 NOTE: After 3 minutes in Engine Start mode, the charger will enter into a cool-down period of 180 seconds, to allow the charger and the battery to cool down. 6. If the engine fails to start, use the Boost rate for 5 minutes before attempting to crank the engine again. 7.
-
Page 11: Display Messages
12. DISPLAY MESSAGES 0.0V – No battery is detected. CONNECT CLAMPS (Voltage LED lit) – Plugged into the AC outlet without the clamps connected to a 6 or 12V battery. xx.xV – Battery voltage is displayed. ---- – Battery percentage is not yet available (starting voltage is below 8.0V). xx.xA –... -
Page 12: Troubleshooting
14. TROUBLESHOOTING PROBLEM POSSIBLE CAUSE SOLUTION The charger will not turn on AC outlet is dead. Check for open fuse or circuit breaker when properly connected. supplying AC outlet. Poor electrical connection. Check power cord and extension cord for loose fitting plug. Battery is defective. -
Page 13: Before Returning For Repairs
16. LIMITED WARRANTY For information on our one year limited warranty, please visit batterychargers.com or call 1-800-621-5485 to request a copy. Go to batterychargers.com to register your product online. Schumacher is a registered trademark of Schumacher Electric Corporation. ® • 13 •... -
Page 14: Instrucciones Importantes De Seguridad - Guarde Estas Instrucciones
Cargador de baterías automático MANUAL DEL USUARIO 108-1 POR FAVOR CONSERVE ESTE MANUAL DEL USUARIO Y LEALO ANTES DE CADA USO. En este manual le explica cómo utilizar el cargador de batería de manera segura y confiable. Por favor, lea y siga las siguientes instrucciones y precauciones. INSTRUCCIONES IMPORTANTES DE SEGURIDAD –... -
Page 15: Preparación Para La Carga
NUNCA fume o permita la presencia de chispas o llamas en la proximidad de una batería o motor. Tenga especial cuidado para reducir el riesgo de dejar caer una herramienta de metal sobre la batería. Esto podría provocar chispas o un cortocircuito en la batería o en cualquier otra pieza eléctrica que podría provocar una explosión. -
Page 16: Siga Estos Pasos Cuando La Batería Esté Colocada En El Vehículo
SIGA ESTOS PASOS CUANDO LA BATERÍA ESTÉ COLOCADA EN EL VEHÍCULO ADVERTENCIA: UNA CHISPA PROVOCADA CERCA DE LA BATERÍA PUEDE CAUSAR LA EXPLOSIÓN DE LA BATERÍA. PARA REDUCIR EL RIESGO DE PROVOCAR CHISPAS CERCA DE LA BATERÍA: Ubique los cables de C.A. y C.C. para reducir el riesgo de daños a la cubierta, a la puerta y a las piezas móviles o calientes del motor. -
Page 17: Instrucciones De Montaje
USO DE UN CABLE DE EXTENSIÓN El uso de una extensión no se recomienda. Si debe usar una extensión, siga estas pautas: • Las clavijas del enchufe del cable de extensión debe ser el mismo número, tamaño y forma que las del enchufe del cargador. -
Page 18: Instrucciones De Operación
INDICADORES LED LED PINZAS INVERTIDAS (rojo) parpadea: Las conexiones están inversas. LED IMPULSAR / CARGA (amarillo / naranja) encendido: El cargador está cargando la batería. LED CARGADO / MANTENIMIENTO (verde) encendido: La carga de la bateria está completa y que el cargador cambió... - Page 19 CARGA DE LA BATERÍA FUERA DEL VEHÍCULO 1. En primer lugar, coloque la batería un área bien ventilada. 2. Limpie las terminales de la batería. 3. Ajuste el interruptor ON/OFF a la posición OFF. 4. Conecte el conjunto del cable de batería a la batería, según se describe en la sección 7. 5.
- Page 20 NOTA: Bajo clima frío extremo o si la batería es inferior a 2 volts, impulsar la batería por 5 minutos antes de poner en marcha el motor. NOTA: Después de 3 minutos en el modo de arranque del motor, el cargador entrará en un período de enfriamiento de 180 segundos para permitir que el cargador y la batería se enfríen.
-
Page 21: Muestra De Mensajes
12. MUESTRA DE MENSAJES 0.0V – No se detecta ninguna batería. CONNECT CLAMPS (LED Voltaje encendido) – Conectado a la toma de CA sin las pinzas conectadas a la batería de 6 o 12V. xx.xV – Se muestra el voltaje de la batería. ---- –... -
Page 22: Localización Y Resolución De Problemas
14. LOCALIZACIÓN Y RESOLUCIÓN DE PROBLEMAS PROBLEMA CAUSA POSIBLE SOLUCIÓN El cargador no se enciende Tomacorriente de CA fuera de Controle la posible presencia de incluso al estar bien funcionamiento. fusibles abiertos o disyuntores que conectado. suministren energía al tomacorriente de CA. -
Page 23: Antes De Devolver A Reparaciones
Para obtener información sobre nuestra garantía limitada de un año, visite batterychargers.com o llame al 1-800-621-5485 para solicitar una copia. Visite nuestra página en batterychargers.com para registrar su producto en línea. Schumacher es una marca registrada de Schumacher Electric Corporation. ® • 23 •... -
Page 24: Consignes De Sécurité Importantes - Conserver Ces Instructions
Chargeur de batterie automatique MANUEL D’UTILISATION 108-1 GARDER LE MANUEL D’INSTRUCTION ET LISEZ LE AVANT CHAQUE UTILISATION. Ce manuel explique comment utiliser le chargeur de batterie d’une façon securitaire et efficace. S’il vous plaît lisez et suivez ces instructions et precautions. CONSIGNES DE SÉCURITÉ... -
Page 25: Préparation Pour Le Chargement
Enlevez vos objets personnels en métal comme les bagues, les bracelets, les colliers et les montres quand vous travaillez avec une batterie d’accumulateurs au plomb. Une batterie d’accumulateurs au plomb peut produire un court-circuit thermique assez fort pour souder une bague ou autre chose du même genre au métal, causant de graves brûlures. -
Page 26: Étapes À Suivre Quand La Batterie Est Installée Hors Du Véhicule
Si la borne négative est mise à la masse, raccorder la pince POSITIVE (ROUGE) du chargeur à la borne POSITIVE (POS, P, +) non mise à la masse de la batterie. Raccorder la pince NÉGATIVE (NOIRE) au châssis du véhicule ou au moteur, loin de la batterie. Ne pas raccorder la pince au carburateur, aux canalisations d’essence ni aux pièces de la carrosserie en tôle. -
Page 27: Panneau De Contrôle
10. PANNEAU DE CONTRÔLE SELECTEUR MARCHE / ARRÊT Utilisez ce sélecteur pour choisir entre la Charge / Maintien, Boost ou le mode de Aide-Démarrage. OFF (ARRÊT) – Lorsque le commutateur est dans cette position (au milieu), le chargeur est éteint. BOOST ou CHARGE / MAINTIEN –... -
Page 28: Consignes D'utilisation
AGM – La construction de Glass Mat absorbée permet à l’électrolyte à être suspendu à proximité de matière active de la plaque. En théorie, cela améliore à la fois la charge et l’efficacité de la recharge. Les batteries AGM sont une variante des batteries scellées VRLA (Valve Régulage plomb-acide). Usages populaires comprennent la haute performance du moteur de démarrage, les sports de puissance, cycle profond, batteries solaires. - Page 29 MODE BOOST REMARQUE : L’unité passe automatiquement en mode Boost, en fonction de la tension. Pour sélectionner le mode Charge / Maintien, appuyez sur le bouton Sélection du Taux. Au mode Boost, l’écran affichera « BOOST ON ». Si une mauvaise batterie est détectée, « BAD BATTERY » sera affiché sur l’écran. REMARQUE : Le mode Boost reste activé...
- Page 30 CHARGE AVORTE Si la charge ne peut être achevé normalement, la charge avorté. Lorsque la charge est abandonnée, la sortie du chargeur est coupée et l’affichage affichera CHARGE ABORTED - BAD BATTERY. N’essayez pas de continuer le chargement de cette batterie. Vérifiez la batterie et remplacez-la si nécessaire. MODE DE DÉSULFATATION L’écran affichera «...
-
Page 31: Affichage Des Messages
12. AFFICHAGE DES MESSAGES 0.0V – Aucune batterie n’est détectée. CONNECT CLAMPS (La DEL de tension est allumée) – Branchement effectué à la prise de courant alternatif sans que les pinces soient raccordées à une batterie de 6 à 12 V. xx.xV –... -
Page 32: Dépannage
14. DÉPANNAGE PROBLÈME CAUSE POSSIBLE SOLUTION Vérifiez si un fusible est coupé ou le Le chargeur ne s’allume pas La prise de courant CA quand il est correctement est morte. disjoncteur pour cette prise de courant. branché. Mauvaise connexion électrique. Vérifiez le cordon d’alimentation et la rallonge pour le raccordement des fiches. -
Page 33: Avant De Retourner Pour Les Réparations
Pour plus d’informations sur notre garantie limitée d’un an, veuillez visiter batterychargers.com ou appeler le 1-800-621-5485 pour demander une copie. Aller sur batterychargers.com pour enregistrer votre produit en ligne. Schumacher est une marque déposée de Schumacher Electric Corporation. ® • 33 •...
Need help?
Do you have a question about the FR01335 and is the answer not in the manual?
Questions and answers