
Subscribe to Our Youtube Channel
Related Manuals for SMC Networks D-M9 Series


Summary of Contents for SMC Networks D-M9 Series
- Page 1 No.D-※S-OMG0002-E PRODUCT NAME Solid State Auto Switch MODEL / Series / Product Number ∗∗ D-M9...
-
Page 2: Table Of Contents
Contents Safety Instructions Model Indication and How to Order Summary of Product parts Definition and terminology Mounting and Installation Installation Maintenance Troubleshooting Specification Specifications Dimensions No.D-※S-OMG0002-E... -
Page 3: Safety Instructions
Safety Instructions These safety instructions are intended to prevent hazardous situations and/or equipment damage. These instructions indicate the level of potential hazard with the labels of "Caution", "Warning" or "Danger". They are all important notes for safety and must be followed in addition to International ∗1) standards (ISO/IEC) and other safety regulations. - Page 4 Caution The product is provided for use in manufacturing industries. The product herein described is basically provided for peaceful use in manufacturing industries. If considering using the product in other industries, consult SMC beforehand and exchange specifications or a contract if necessary. If anything is unclear, contact your nearest sales branch.
- Page 5 Operator ♦This operation manual is intended for those who have knowledge of machinery using pneumatic equipment, and have sufficient knowledge of assembly, operation and maintenance of such equipment. Only those persons are allowed to perform assembly, operation and maintenance. ♦Read and understand this operation manual carefully before assembling, operating or providing maintenance to the product.
- Page 6 ■NOTE •Follow the instructions given below when designing, selecting and handling the product. ■The instructions on design and selection (installation, wiring, environment, adjustment, operation, described below must also be followed. maintenance, etc.) ♦Product specifications •Use the specified voltage. Otherwise failure or malfunction can result. •Do not place two or more actuators close together.
- Page 7 •Design the system to prevent reverse current when the product is forced to operate for operational check. Depending on the circuit used, insulation may not be maintained when operation is forced, allowing reverse current to flow, which can cause malfunction and damage the product. •Keep wiring as short as possible to prevent interference from electromagnetic noise and surge voltage.
- Page 8 ♦Adjustment and Operation •Adjust the Auto switch in the middle of the operating range and then fix it. Adjust the position of the Auto switch so that the piston stops in the middle of the operating area (where Auto switch is in ON status).
-
Page 9: Model Indication And How To Order
Model Indication and How to Order D-M9 Output type Lead wire length Symbol Specification Symbol Specification 3-wire, NPN 500 mm (Half strip) 3-wire, PNP 1000 mm (Half strip) 2-wire 3000 mm (Half strip) 5000 mm (Half strip) Electric entry SAPC 500 mm (M8 3 pin pre-wired) Symbol Specification... -
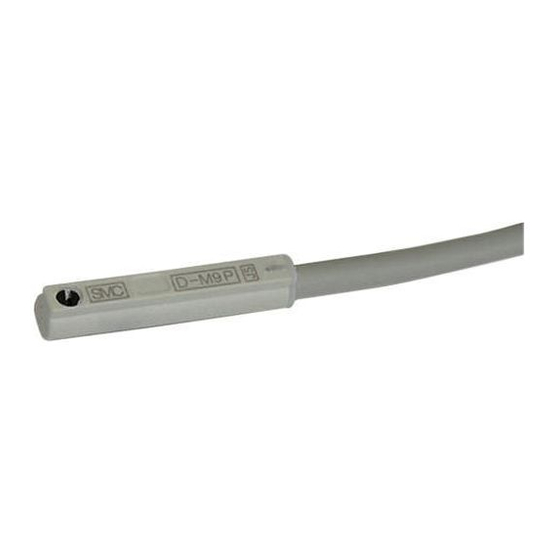
Page 10: Summary Of Product Parts
Summary of Product parts •Summary of Product parts D-M9B/M9N/M9P D-M9BV/M9NV/M9PV No.D-※S-OMG0002-E... -
Page 11: Definition And Terminology
■Definition and terminology Term Meaning and definition 2-wire Auto switch Auto switch which has only signal line and COM line. Current leakage The current flowing to the load when the Auto switch turns off. The difference between the points when the Auto switch Hysteresis turns on and off, which is provided to prevent... -
Page 12: Mounting And Installation
Mounting and Installation ■Installation When mounting the Auto switch to the actuator, the appropriate mounting bracket should be used. "How to mount" depends on the actuator type and bore size. Please refer to the actuator catalogue. For new Auto switch applications, confirm that the actuator includes a magnet before assembling the Auto switch and bracket. -
Page 13: Maintenance
•Internal circuit D-M9N(V) D-M9P(V) D-M9B(V) (Sink input mode) D-M9B(V) (Source input mode) ∗: The number marked on each lead wire color shows the pin number of pre-wired connector. Maintenance After the power has been disconnected, please observe the following precautions:- Regarding the actuator operation set up, the contents of the program may be maintained by the customer's application system. -
Page 14: Troubleshooting
Troubleshooting When the Auto switch falls in operation failure, identify the trouble with the following flow chart. A failure of the Auto switch might depend on operating environment (application etc.) and needs to be given a measure by contacting to us separately. The switch Is the actuator Misapplication... - Page 15 •Trouble list Trouble Investigation to find possible Trouble Possible cause Countermeasure cause Malfunction due The effect of magnetic field Place a magnetic shield plate to to disturbance The switch generated by adjacent actuator the actuator. magnetic field output doesn’t turn off. The Improper setting The presence of the following Displace the Auto switch set...
- Page 16 Trouble Investigation to find possible Trouble Possible cause Countermeasure cause Adjust power supply voltage to a given value. Power supply Power supply voltage (zero or (Refer to "Power supply voltage failure extremely low) or Load voltage" in Specifications on page 17.) Correct wiring.
- Page 17 Trouble Investigation to find possible Trouble Possible cause Countermeasure cause Satisfaction of the following relations by the load current Mismatch the specification Select 3-wire Auto switch or reed load current Load voltage is "ON" level Auto switch. specification > Load voltage - (Internal (2-wire) voltage drop x n) Reduce the number of switches.
-
Page 18: Specification
Specifications ■Specification Switch part no. D-M9N D-M9NV D-M9P D-M9PV D-M9B D-M9BV Wiring 3-wire 2-wire Output Lead wire In line Perpendicular In line Perpendicular In line Perpendicular orientation Applicable load IC circuit/Relay/PLC 24 VDC Relay/PLC Power supply 5/12/24 VDC (4.5 to 28 VDC) voltage Current 10 mA or less... -
Page 19: Dimensions
■Dimensions D-M9B/N/P D-M9BV/NV/PV -18- No.D-※S-OMG0002-E... - Page 20 •Operating range Air cylinder *: The table below shows the operating range of the direct-mounted Auto switch on the round groove. Please contact us if a mounting bracket is used. Unit: [mm] Bore size Series MY1B MY1M MY1C MY1H MY1*W REBR CEP1 *1: It is not for guarantee but measure including hysteresis.
- Page 21 Air cylinder (continued) Unit: [mm] Bore size Series MY2H MY2HT MY2C CY3R CXSJ CY1R CY1F ZCUK *1: It is not for guarantee but measure including hysteresis. (Dispersion is approx. ±30%) It might be changed drastically depending on the ambient. -20- No.D-※S-OMG0002-E...
- Page 22 Electric actuator Unit: [mm] Bore size Operating range Series LXF* LXPB*B LXPB*S LXS* LZB*3 LZB*5 LZC*3 LZC*5 *1: It is not for guarantee but measure including hysteresis. (Dispersion is approx. ±30%) It might be changed drastically depending on the ambient. Air gripper Unit: Hysteresis [mm] Bore size...
- Page 23 Rotary actuator/Gripper Unit: Angle [° ] Bore size Series CRQ2 Unit: Hysteresis [mm] Bore size Series MRHQ *1: It is not for guarantee but measure including hysteresis. (Dispersion is approx. ±30%) It might be changed drastically depending on the ambient. *2: Please contact SMC sales division regarding another models.
- Page 24 Revision history A: Add the D-M9*V series and the applicable Actuator. B: Add the applicable Actuator. Change the torque range for mounting switch. Change the product spec. C: Modify the contents. D: Modify the contents. E: Limited warranty and Disclaimer are added. URL http://www.smcworld.com 4-14-1, Sotokanda, Chiyoda-ku, Tokyo 102-0021 Japan Tel:+81 3 5207 8249...
Need help?
Do you have a question about the D-M9 Series and is the answer not in the manual?
Questions and answers