Advertisement
Quick Links
OWNER'S MANUAL
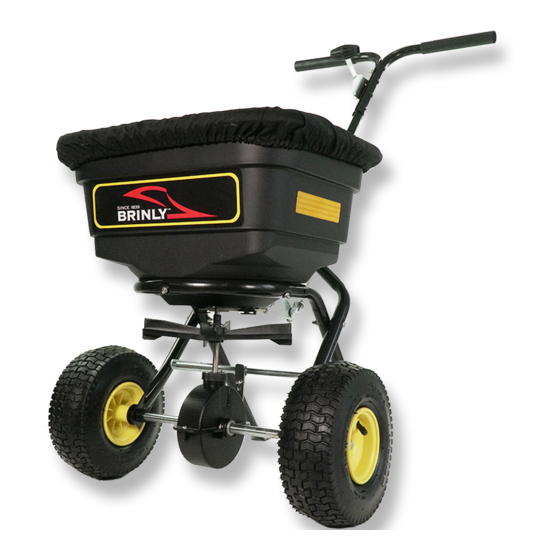
7 0 l b I C E M E L T S P R E A D E R
MODEL:
P S 1 0 - 7 0 B H
• Assembly
• Installation
• Operation
• Repair Parts
Visit us on the web!
www.brinly.com
English Manual
Call Customer Service, Toll-Free: 877-728-8224
Important: This manual contains information for the safety
of persons and property. Read it carefully before
assembly and operation of the equipment!
English, Spanish &
French Manual
1019008-B
Advertisement

Subscribe to Our Youtube Channel
Summary of Contents for Brinly PS10-70BH
- Page 1 • Operation • Repair Parts Call Customer Service, Toll-Free: 877-728-8224 Important: This manual contains information for the safety Visit us on the web! of persons and property. Read it carefully before www.brinly.com assembly and operation of the equipment! English Manual 1019008-B...
-
Page 2: Table Of Contents
INTRODUCTION AND SAFETY ================================================================================================== CONGRATULATIONS on your new Brinly-Hardy Spreader! This accessory has been designed, engineered and manufactured to give you the best possible dependability and performance. Should you experience any problem you cannot easily remedy, please do not hesitate to contact our knowledgeable customer service department toll-free at 1-877-728-8224. - Page 3 - Keep all nuts, bolts and screws tight to be sure the equipment is in safe working condition. Installation Questions? Missing Parts? Replacement Parts? DON’T GO BACK TO STOP THE STORE! Please call our Customer Service Department, Toll Free: 877-728-8224 or customerservice@brinly.com English Manual 1019008-B...
-
Page 4: Parts
PARTS ================================================================================================== English Manual 1019008-B... - Page 5 Bolt, M6 x 45 SS 1008031 Pin, Cotter 2.9 x 28mm SS 1007092 Washer, Nylon M6 1008209 Impeller, drilled 1007093 Flat washer, M 6,big SS 1019008 Manual PS10-70BH 1008022 Screen, Flat 1007124 Hex locknut, M5 SS 1007095 Handle cover 1007125 Cross brace 1007846...
-
Page 6: Assembly
ASSEMBLY ================================================================================================== Assembly Step 1 1. Remove two M6 locknuts and M6 x 45mm long bolts to remove pivot and bracket assembly from wheel frame tubes. Set bolts and nuts to the side. You will re-install them in Step 2. Assembly Step 2 2. - Page 7 ASSEMBLY ================================================================================================== Assembly Step 3 3. Rotate control rod and insert into adjustment handle, illustrated here. Remove one nut from end of control rod. Insert control rod into pivot and bracket assembly as illustrated. Note orientation of bracket. Install the second nut (finger tight only).
-
Page 8: Use And Care
USE AND CARE ================================================================================================== BEFORE PUTTING MATERIAL IN THE HOPPER Become familiar with the operation of the spreader before you put material in the hopper. Practice walking with the spreader, opening and closing the rate gate at the appropriate times. Travel at a constant Remember: Open the rate gate AFTER Close the rate gate... - Page 9 USE AND CARE ================================================================================================== ROTARY AGITATOR NOW YOU ARE READY TO SPREAD Use the rotary agitator - Keep spinner blade clean. Excess material build-up can only if needed. cause an uneven spread pattern. (Free-flowing, - Keep the impeller level when spreading. lump-free materials - DO NOT overload.
-
Page 10: Calibration
USE AND CARE ================================================================================================== CLEANING THE SPREADER TROUBLESHOOTING Problem Possible Cause Solution CLEAN AND OIL THE SPREADER IMMEDIATELY AFTER EACH USE. Spreader does The "feet" or the Using a hammer not sit flat flattened portion or pliers, bend the METHOD #1 - Wipe spreader thoroughly with an oily cloth. of the spreader feet to be equal Oil all bearings and bearing areas. -
Page 11: Service
Please find your product serial number and model number, then contact our Customer Service department: In North America and Canada call Toll-Free: 877-728-8224 Chat online: www.brinly.com Email: customerservice@brinly.com Additional info and videos are available on our website: BRINLY.COM English Manual... -
Page 12: Warranty
Hardy Co. During the period of the warranty, the exclusive remedy is repair or replacement of the product as set forth above. Brinly-Hardy Company • 3230 Industrial Parkway • Jeffersonville, IN 47130 • (877) 728-8224 • brinly.com English Manual 1019008-B...


Need help?
Do you have a question about the PS10-70BH and is the answer not in the manual?
Questions and answers