
Related Manuals for Beka Hospitec CARLO Alu Classic 230


Summary of Contents for Beka Hospitec CARLO Alu Classic 230
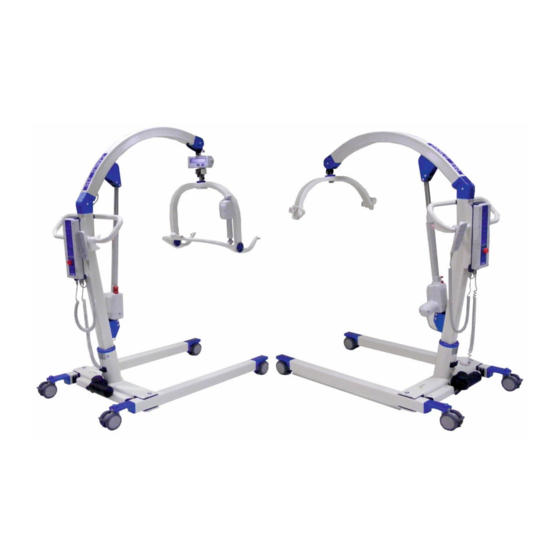
- Page 1 Operating manual Original operating manual CARLO Alu Classic 230 & Comfort EP 230 Sling lift Version 2.7 / E Subject to technical modifications 2019-08-20...
-
Page 2: Table Of Contents
BEKA Hospitec GmbH Table of contents Imprint ........................5 Acknowledgement ................... 5 Manufacturer’s address ................... 5 TÜV quality seal ....................5 Introduction ......................6 Preface ......................6 Liability and warranty ..................6 The operating manual .................... 7 Validity ......................7 Type plate ...................... - Page 3 13.2 Dimensions CARLO ALU, Classic / EP ............38 13.3 Declaration of Conformity ................39 13.4 Accessories of the Sling Hoists CARLO Alu Classic 230 Kg .......40 13.5 Accessories CARLO Alu Comfort EP 230 ...........41 13.6 Spare parts / Consumables .................44 Operating manual CARLO Alu 230 V2.7 E...
- Page 4 BEKA Hospitec GmbH 13.7 Mounting instructions ..................44 13.7.1 Rear Castor Replacement ..............44 13.7.2 Front Castor Replacement ..............45 13.7.3 Control including Handle, Mounting Plate and Battery Compartment ...46 13.7.4 Replacing the Battery ................48 13.8 Electromagnetic Compatibility ..............49 13.9 Journal ......................53 Operating manual CARLO Alu 230 V2.7 E...
-
Page 5: Imprint
1.1 Acknowledgement Dear customer, we would like to express our sincere thanks for the trust you have placed in us by purchasing this BEKA Hospitec GmbH product. Our products are manufactured and tested according to stringent quality criteria. 1.2 Manufacturer’s address BEKA Hospitec GmbH Am Rübenmorgen 3... -
Page 6: Introduction
The maintenance, inspection, assembly and installation as well as well as further technical interventions on the product must only be executed by BEKA Hospitec either by specialised companies authorised to this effect by BEKA Hospitec. The operation of the product as well as technical interventions on the product must only be carried out by specially trained personnel. -
Page 7: The Operating Manual
The operating manual 3 The operating manual 3.1 Validity This operating manual contains information, which is required for the operation and use of the product. In addition to the description of the equipment, the operating manual also includes a number of abstractions and exemplary illustrations. The equipment of the product therefore may differ in part from the descriptions and illustrations. -
Page 8: Variants
The operating manual 3.4 Variants 3.4.1 CARLO ALU Variants Article number Description Spreader bar 924001500 CARLO Alu, Classic 230 4-point spreader bar 924001508 CARLO Alu, Classic 230 4-point spreader bar 924001518 CARLO Alu, Classic 230 4-point spreader bar 925003008 CARLO Alu, Classic 230 IL 6-point spreader bar 925003018 CARLO Alu, Classic 230... -
Page 9: Safety
The manufacturer BEKA Hospitec shall not accept any liability for any damages, failures or faults caused by improper operation or handling. -
Page 10: List Of Used Safety Instructions
Safety 4.4 List of used safety instructions Please observe the accompanying documents/operating manual. Warning Hazardous Area. Applied part “Type B” to DIN EN 60601-1. Do not push/pull the motor. Do not push/pull the spreader bar. Special waste, no household waste. The device and the packaging materials never must be disposed of in the domestic waste stream. -
Page 11: Warnings
Safety 4.5 Warnings Note ▪ Please read the operating manual and the safety instructions before starting to use the CARLO ALU. Keep the operating manual near the device for future reference. ▪ The product may only be used for the specified purpose. ▪... - Page 12 Safety ▪ Activate the brakes of the castors of the wheelchair, the healthcare bed, the stretcher, etc. to ensure a safe lifting and positioning of the resident. The brakes of the CARLO ALU must be unbraked (released) during this operation. ▪...
-
Page 13: Transport
Transport 5 Transport Use a lift truck or similar for the transport. 5.1 Unpacking the product To remove the packaging materials, you will need a cutter knife. NOTE Take care so as to not damage the product when using tools. Do not cut with the cutter in the cardboard. -
Page 14: Installation
Installation 6 Installation The product is supplied ready for use. 6.1 Electrical connection Before you start to use our products, your electrical installation must be checked in accordance with the relevant VDE-regulations 0100 and 0100-710. This requirement is only applicable in Germany. In other countries, other requirements might be applicable. - Page 15 Installation The emergency stop switch is released by turning the button to the right (i.e. clockwise). Operating manual CARLO Alu 230 V2.7 E Page 15 of 56...
-
Page 16: Operating Elements And Their Function
Operating elements and their function 7 Operating elements and their function Description Description Rear castors with brake Emergency lowering system Spreader bar Control unit with battery Motor for the spreader bar adjustment (only EP) Handset Attachment point only for slings with clips Caution: no slings with loops Spreader bar... -
Page 17: Classic Spreader Bar Version
Operating elements and their function 7.1 Classic Spreader Bar Version Description Description Scale, optionally available Attachment points for slings with loops Caution: no slings with clips 7.2 Handset Description Description Only EP spreader bar, sitting and Overload lying function Spreader bar up/down Service indication Spreading the carrier frame Battery charge level indication... -
Page 18: Explanation Of The Led-Indications On The Handset
Operating elements and their function 7.3 Explanation of the LED-indications on the Handset Green LED: battery full, no charging required (100-50%) Yellow LED: battery requires charging (50-25%) Red LED: battery requires charging (less than 25%) When you push a button, an audible signal will be emitted. Service indication (orange LED flashes). -
Page 19: Canadian Control Unit
Operating elements and their function 7.4.2 Canadian Control Unit Description Description Emergency stop switch Handset connection Electrical emergency lowering Lifting motor connection (in case of failure of the handset) Adjustment of the spreading Spreading motor connection (in case of failure of the handset) Power and charging indicator Charger cable connection Explanation of the LED-indications... -
Page 20: External Charging Unit/Wall Charging Unit
Operating elements and their function 7.6 External Charging Unit/Wall Charging Unit The external charging unit (wall charging unit) is a switch-mode charger and is supplied ready assembled (on a mounting rail). It can be installed on any suitable wall. The required power cable is included in the delivery. The charging time for the battery units is approx. -
Page 21: Electrical Emergency Lowering
Operating elements and their function Activating the Emergency Lowering System: 1. Slide the red safety lock upwards in the direction of the arrow (PULL- EMERGENCY label). 2. Now, the motor is lowering slowly (lowering weight approx. 20 kg). 3. The motor stops, when the safety lock is positioned back in its normal position = release the safety lock. -
Page 22: Emergency Stop Switch
Operating elements and their function 7.9 Emergency stop switch When the emergency stop switch is pressed, the electrical motors are immediately disconnected from the power supply. The motor stops immediately. The emergency stop switch should be used only in case of immediate danger to the resident or the caregivers. -
Page 23: Impact And Jamming Protection (Hoist Motor)
8.1.2 During Use Check that the sling fittings at the sling hoist match the sling clips. The use of incompatible (i.e. non-BEKA Hospitec) slings can cause accidents! Check that the sling is not twisted when attaching the sling. Always check that the sling clips are correctly attached prior to and during the lifting procedure and that they are tensioned while supporting the patient’s weight. - Page 24 Operation 8.1.2.1 Safe Attachment of the Clips in the Support Always check that the fastening clips are secured and correctly positioned prior to lifting the patient/resident! 8.1.2.2 Safe Suspension of the Sling in the Support 4-point Classic spreader bar 4-point Classic spreader bar: Check that the loops are secured and correctly positioned prior to lifting the patient/resident!
- Page 25 Check that the loops are secured and correctly positioned prior to lifting the patient/resident! 8.1.2.3 Applying the BEKA Hospitec Sling in Sitting Position Caution: Lead the sling with your hand downwards to the sitting surface so that the bottom of the sling is aligned with the coccyx (butt bone).
- Page 26 Operation For 4-point Suspensions with Safety Clips for the 4-point Suspension: Never suspend the leg loop crosswise! Always suspend individually with the safety clips to the 4-point spreader bar. 8.1.2.4 Applying the BEKA Sling in Lying Position 1. Turn the patient so that he/she is facing you. Fold the sling lengthways together and position the sling sideways as close as possible to the patient/resident.
-
Page 27: After Use
Operation In case of a correct operation, this prevents the patient/resident from slipping through the butt opening. Apply the toilet sling to the patient/resident so that the head support area of the sling is at the same height as the patient’s/resident’s head. The bottom part of the sling is fixed at approx. -
Page 28: Operation Of The Carlo Alu
Operation 8.2 Operation of the CARLO ALU The spreader bar of the CARLO ALU sling hoist is raised or lowered by means of the handset, which is included in the delivery. The direction of motion is indicated by symbols. The rear castors have (ease-to-operate) brakes. When lifting a patient/resident, the brakes of the castors must be activated to avoid any uncontrolled movement of the CARLO ALU. -
Page 29: Lifting A Patient/Resident
Operation Keep the button of the handset pressed to change the sitting position of the patient/resident. The spreader bar is tilted backwards, Tilting the thus bringing the patient/resident into a lying position. Release the Spreader Bar button as soon as the desired position is reached. The tilting movement is stopped. -
Page 30: Putting The Patient/Resident Down
Operation 8.2.3 Putting the patient/resident down When you have reached the desired location, you can put the patient/resident e.g. on a chair or in bed. Proceed in the following manner: 1. Spread the carrier frame if needed up to the maximum possible spread width. 2. -
Page 31: Digital Scale Sls (Option)
Repairs may be carried out only either by BEKA Hospitec or by companies authorized to this effect by BEKA Hospitec. If the battery is discharged, recharge it as soon as possible to extend the lifetime. Batteries stored in the warehouse/stock must be recharged every 6 months (a possible deep discharge may destroy the battery). -
Page 32: Cleaning The Sling Lift
10 Checks/tests In order to ensure a safe use of our product and the protection of the users and the patients, BEKA Hospitec prescribes an annual safety check. The execution of the safety checks and maintenance must be documented and proven on request. -
Page 33: Prior To Each Use
At the end of the product’s lifetime, contact your BEKA dealer, who will recycle the product in accordance with the locally applicable regulations and laws. For an environmentally-sound disposal, the company BEKA Hospitec GmbH will provide more information in its capacity of manufacturer. -
Page 34: Troubleshooting/After-Sales Service
Troubleshooting/After-sales service 12 Troubleshooting/After-sales service 12.1 Troubleshooting help Problems with the Sling Hoist Remedy a) Check if the emergency stop switch is released/pressed. b) Check that the cables of the control box are The travel adjustment and the spreading correctly connected. of the carrier frame of the CARLO ALU do not function. - Page 35 When your bath tub does not function properly and you cannot eliminate the error by means of the remedies listed in paragraph 12 please contact the after-sales services of your dealer either the manufacturer. BEKA Hospitec GmbH Am Rübenmorgen 3 35582 Wetzlar...
-
Page 36: Appendix
Appendix 13 Appendix 13.1 Technical data Dimensions and weights - Length: 140.0 cm - Width in closed condition: 70.0 cm - Width in open condition: 124.0 cm - Min. height: 134.0 cm -Max. height: 217.0 cm - Travel with hanger bar: 20.0 - 158.0 cm - Travel without hanger bar: 68.5 - 208.5 cm... - Page 37 Appendix External wall charger: 100V – 240 V ~ (AC) /50 /60 Hz - Power Supply - Power Output: 24 V (DC) I in max. 400 mA - current consumption: - Fuse: T1,25 A / 250V - Protection class: IPX 5 Battery: Lead acid battery - battery type...
-
Page 38: Dimensions Carlo Alu, Classic / Ep
Appendix 13.2 Dimensions CARLO ALU, Classic / EP Shift- direction Note: Depending on the hanger bar used and the use of the optionally available scale, the distance from the floor to the sling suspension is different! Operating manual CARLO Alu 230 V2.7 E Page 38 of 56... -
Page 39: Declaration Of Conformity
Appendix 13.3 Declaration of Conformity Operating manual CARLO Alu 230 V2.7 E Page 39 of 56... -
Page 40: Accessories Of The Sling Hoists Carlo Alu Classic 230 Kg
Appendix 13.4 Accessories of the Sling Hoists CARLO Alu Classic 230 Kg Basic device Description Article number Description Article number CARLO Alu Classic CARLO Alu Classic 924001500 Incl. 4-point spreader Incl. 6-point spreader 924003008 924001508 bar (only for slings 924003018 924001518 (Only for slings with with loops) -
Page 41: Accessories Carlo Alu Comfort Ep 230
Appendix Transfer sling with loops Guideline for sling sizes Description Size Weight Color 35-65 kg made of nylon 55-85 kg yellow washable at max. 75-125 kg green 60°C 120-160 kg blue 160-210 kg orange Bathing sling with loops Guideline for sling sizes Description Size Weight... - Page 42 Appendix Slings with clips Europe Description Size Article number Nylon transfer sling Size “S” 922005100 Nylon transfer sling Size “M” 922005200 Nylon transfer sling Size “L” 922005300 Nylon transfer sling Size “XL” 922005400 Nylon transfer sling Size “XXL” 922005500 Bathing sling Size “S”...
- Page 43 Appendix Slings with clips Description Art. N° Nylon toilet sling Size S 922007103 Nylon toilet sling Size M 922007203 Nylon toilet sling Size L 922007303 Nylon toilet sling Size XL 922007403 Slings with clips + 10 cm Description Art. N° (extended leg loops) Nylon toilet sling Size S...
-
Page 44: Spare Parts / Consumables
Appendix 13.6 Spare parts / Consumables Spare parts and consumables are available upon request from your BEKA Hospitec distributor or directly from the manufacturer. Please note: You cannot change all parts yourself. The installation may require the expertise of a trained specialist in electrical / plumbing. -
Page 45: Front Castor Replacement
Appendix Image 7: Prior to screwing a new castor, you must apply thread lock fluid (medium tight at least 21 Nm) to the thread of the screw. Caution: the thread lock fluid must dry at least 3 hours before the device can be loaded. -
Page 46: Control Including Handle, Mounting Plate And Battery Compartment
Appendix 13.7.3 Control including Handle, Mounting Plate and Battery Compartment Image 1: Image 2 Required tools: Tool for the battery 1 x 4 mm T-handle mounting plate: 1 x 4 mm Allen 1 x 2.5mm T-handle wrench 1 x 4mm T-handle Image 4: Image 3: Unscrew and remove... - Page 47 Appendix Image 11: Image 12: Remove the front left- Remove the diode hand screw from the plug of the handset handle. from the control box. Image 14: Image 13: Remove the jack plug Remove the jack plug of the spreading of the lifting motor motor from the control from the control box.
-
Page 48: Replacing The Battery
Appendix 13.7.4 Replacing the Battery Image 2: Image 1: Unlock the battery by The image shows the means of the release inserted battery. lever in the battery handle. Image 4: The image shows the Image 3: removed battery. You can lift the When replacing the battery up to remove battery, please check... -
Page 49: Electromagnetic Compatibility
EMC and must be installed and operated in accordance with the EMC instructions included in the accompanying documents. For the devices and systems from BEKA Hospitec GmbH, no special measures must be observed. Portable and mobile HF-communications equipment can interfere with electrical medical equipment. - Page 50 Appendix Guidance and manufacturer’s declaration - electromagnetic immunity (Table 202) The product been designed for use in the hereafter listed ELECTROMAGNETIC ENVIRONMENTS. The customer or the user of the product must ensure that the appliance is used in such environment. Immunity IEC 60601- Test level Compliance...
- Page 51 Appendix Guidance and manufacturer’s declaration - electromagnetic immunity (Table 204) The product been designed for use in the hereafter listed electromagnetic environments. The customer or the user of the product must ensure that the appliance is used in such environment. Immunity IEC 60601- Compliance...
- Page 52 Appendix Recommended distance between portable and mobile communications equipment and the product (Table 206) The product is intended for use in an electromagnetic environment with controlled HF interferences. The customer or the user of the product can avoid electromagnetic interference by respecting and observing the minimum distance between portable and mobile HF telecommunication devices (transmitters) and the product depending on the rated output of the communication device as given below.
-
Page 53: Journal
According the Medical Device Directive, you are compelled to keep a journal for this device. You can use this journal as template. Journal Device: CARLO Alu Manufacturer: BEKA Hospitec GmbH, Am Rübenmorgen 3, 35582 Wetzlar Serial number: _____________________________________________ Date of purchase: _____________________________________________ Site: _____________________________________________... - Page 54 Appendix Type of Date Result Measure Signature: inspection Operating manual CARLO Alu 230 V2.7 E Page 54 of 56...
- Page 55 Appendix Your notes …………………………………………………………………………………………………… …………………………………………………………………………………………………… …………………………………………………………………………………………………… …………………………………………………………………………………………………… …………………………………………………………………………………………………… …………………………………………………………………………………………………… …………………………………………………………………………………………………… …………………………………………………………………………………………………… …………………………………………………………………………………………………… …………………………………………………………………………………………………… …………………………………………………………………………………………………… …………………………………………………………………………………………………… …………………………………………………………………………………………………… …………………………………………………………………………………………………… …………………………………………………………………………………………………… …………………………………………………………………………………………………… …………………………………………………………………………………………………… …………………………………………………………………………………………………… …………………………………………………………………………………………………… …………………………………………………………………………………………………… …………………………………………………………………………………………………… …………………………………………………………………………………………………… …………………………………………………………………………………………………… …………………………………………………………………………………………………… …………………………………………………………………………………………………… Operating manual CARLO Alu 230 V2.7 E Page 55 of 56...
- Page 56 V2.7 E geändert: 26.08.2019 Warnhinweis: Bremsen sollen ungebremst sein BEKA Hospitec GmbH ●Am Rübenmorgen 3 ●35582 Wetzlar Germany● Phone/Fax:+49(0)6 41-9 22 20-0...
Need help?
Do you have a question about the CARLO Alu Classic 230 and is the answer not in the manual?
Questions and answers