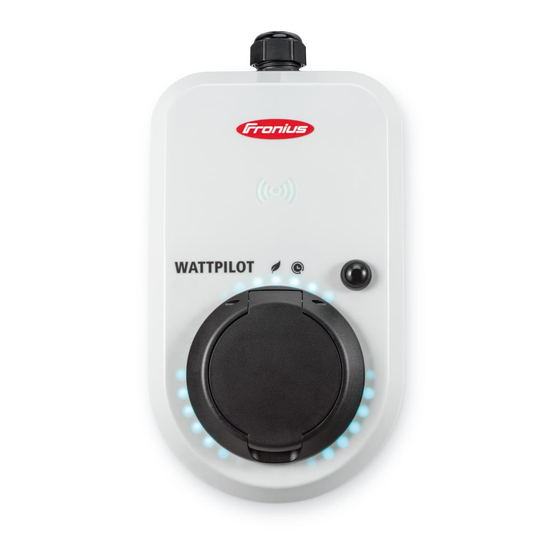
Fronius Wattpilot Go 11 J Operating Instructions Manual

Fronius Wattpilot Go 11 J Operating Instructions Manual

Hide thumbs Also See for Wattpilot Go 11 J:

Advertisement

/ Perfect Charging / Perfect Welding / Solar Energy
Fronius Wattpilot Go 11/22 J
Fronius Wattpilot Home 11 J
42,0426,0400,EN 003-23042021
Fronius prints on elemental chlorine free paper (ECF) sourced from certified sustainable forests (FSC).
Operating instructions
Charging solution

Advertisement

Table of Contents
loading
Need help?

Need help?

Do you have a question about the Wattpilot Go 11 J and is the answer not in the manual?

Questions and answers

Summary of Contents for Fronius Wattpilot Go 11 J

  • Page 1 / Perfect Charging / Perfect Welding / Solar Energy Operating instructions Fronius Wattpilot Go 11/22 J Fronius Wattpilot Home 11 J Charging solution 42,0426,0400,EN 003-23042021 Fronius prints on elemental chlorine free paper (ECF) sourced from certified sustainable forests (FSC).
  • Page 3: Table Of Contents

    Connecting the Wattpilot General information Installing the Wattpilot HOME 11 J Backup power mode Start-up Stopping charging Data communication with the inverter Fronius Solar.wattpilot app Overview General Download Connecting via WLAN Launching the app Setting up a hot spot Setting up the WLAN...
  • Page 4 Cable release Earthing test ID chips Password Internet Firmware update Appendix Technical data Technical data Residual current detection Spare parts Safety functions Standard settings Status codes and remedy Status Codes Warranty terms and conditions, and disposal Fronius manufacturer's warranty Disposal...
  • Page 5: Safety Rules

    Safety rules Explanation of DANGER! safety notices Indicates immediate danger. ▶ If not avoided, death or serious injury will result. WARNING! Indicates a potentially hazardous situation. ▶ If not avoided, death or serious injury may result. CAUTION! Indicates a situation where damage or injury could occur. ▶...
  • Page 6: Environmental Conditions

    For the meaning of the safety and danger notices on the device, refer to the section headed "Information on the device" in the Operating Instructions for the device. Before switching on the device, remedy any faults that could compromise safety. This is for your personal safety! Environmental Operation or storage of the device outside the stipulated area will be deemed as not in...
  • Page 7: General Information

    General information...
  • Page 9: General

    General Intended use The Fronius Wattpilot Go 11 J/22 J is a mobile charging station for charging electric vehicles for connection to an AC/three-phase network. The Fronius Wattpilot Home 11 J is a charging station for charging electric vehicles for fixed connection to an AC/three-phase network.
  • Page 10: Scope Of Supply

    Use original miniature fuses. ▶ Use original adapter sets. Fronius Wattpilot Go 11 J/22 J Mounting bracket, incl. screws and dowels Wattpilot Go 11 J or Wattpilot Go 22 J Miniature fuse (only use original miniature fuses) Anti-theft device Reset card...
  • Page 11: Safety

    Fronius Wattpilot Home 11 J Mounting bracket, incl. screws and dowels Wattpilot Home 11 J Miniature fuse (only use original miniature fuses) Anti-theft device Reset card ID chip Quick Guide Safety WARNING! Danger due to incorrect operation and incorrectly performed work.
  • Page 12 WARNING! Danger due to cables! Damaged or exposed cables can result in severe personal injury and damage to prop- erty. ▶ Do not use the device if the cables attached to or plugged into the device are dam- aged. ▶ Adequately support the weight of the device and the charging cable.
  • Page 13 Wattpilot. The device may only be operated at the following connections: CEE red 32 A, 3-phase, 400 V (Wattpilot Go 22 J) CEE red 16 A, 3-phase, 400 V (Wattpilot Go 11 J) With original adapters: • CEE red 16 A, 3-phase, 400 V (Wattpilot Go 22 J) •...
  • Page 14: Controls And Indicators

    Current level). Standard settings Fronius Wattpilot Go 11 J/Home 11 J: 6 A, 10 A, 12 A, 14 A, 16 A Fronius Wattpilot Go 22 J: 10 A, 16 A, 20 A, 24 A, 32 A ID chip The ID chip can be used to personalise access to the Fronius Wattpilot. The ID chip is used for authentication and for recording user-specific charging amounts.
  • Page 15: Reset Card

    confirmation in the app. To scan, hold the ID chip directly in front of the card reader of the Wattpilot. Each ID chip can be assigned a name in the app under "ID chips". The stored charging amount per ID chip can be viewed in this menu (see chips).
  • Page 16 Starting The Wattpilot is starting up or restarting. The LEDs light up in rainbow colours. Ready The Wattpilot is ready for operation. The number of LEDs that light up indicates the set charging current. Each LED represents 1 ampere (A). A maximum of 32 A can be displayed, whereby the first two LEDs are reserved for the charging modes.
  • Page 17 1-phase charging The Wattpilot is carrying out 1-phase (230 V) charging with low to high charging current. One series of blue LEDs moves in a clockwise direction. The level of charging current is indicated by the number of LEDs and the speed of rotation. 3-phase charging The Wattpilot is carrying out 3-phase (400 V) charging with low to high charging current.
  • Page 18 Earthing test deactivated The earthing test is deactivated. Four LEDs light up at 3, 6, 9 and 12 o'clock. Internal communication fault The Wattpilot displays an internal communication error. The error code is displayed in the app. For more information, see Status Codes.
  • Page 19 Update successful The LEDs light up alternately pink and green. Update failed The LEDs light up alternately pink and red. Reset card detected The Wattpilot has detected the reset card and the settings are reset. All LEDs light up red for 2 seconds.
  • Page 20: Functions

    5 minutes is stored. The surplus energy of a PV system (photovoltaic system) can be used. The prerequisites for this are a compatible inverter in the same network as the Wattpilot and a Fronius Smart Meter (for more information, see Data communication with the inverter).
  • Page 21 The settings for the start-up power level and 3‑phase power level can be made under Cost optimisation in the Fronius Solar.wattpilot app. The power level can only be regulated in increments of 1 ampere. The table below lists the charging current in amperes (A) and the corresponding charging power for 1‑phase and 3‑phase charging in kilowatts (kW).
  • Page 22 NOTE! If no temperature sensor is connected to the Fronius Ohmpilot, a temperature of 0 °C is assumed. If the Wattpilot is to be prioritised over the Ohmpilot, set the "Ohmpilot limit value" to 0 °C. In the event of a sensor break, the Ohmpilot is supplied with power before the Wattpilot.
  • Page 23: Flexible Electricity Tariff

    IMPORTANT! The energy management with the digital outputs (I/Os) on the Fronius inverter must not be used for load management of the Wattpilot! The priorities of the loads are not clearly assigned.
  • Page 24: Different Charging Modes

    Eco Mode can be configured in the app under Cost optimisation and activated by pressing the pushbutton (< 0.5 s) or via the Fronius Solar.wattpilot app. NOTE! The battery of the photovoltaic system is discharged first! If the system contains a stationary battery, the battery of the photovoltaic system is dis- charged when the electricity price falls below the threshold before mains current is drawn.
  • Page 25: Next Trip Mode

    In the Fronius Solar.wattpilot app, the PV surplus and/or flexible electricity tariff must be activated and set under Cost optimisation. Household consumption is covered by photovoltaic generation and the electric vehicle is charged with the PV surplus.
  • Page 26 When setting the char- ging amount, the actual state of charge of the electric vehicle battery is not read out. The mode can be set under "Next Trip Mode" in the Fronius Solar.wattpilot app (see Next Trip Mode).
  • Page 27 The daily journey to work and back home is 50 km and must start at 08:00. In the Fronius Solar.wattpilot app, the kilometres and the departure time must be entered once under Next Trip Mode. 18 kWh is used as the basis for the calculation of 100 km. The electric vehicle is plugged in and charged at approximately 15:00.
  • Page 29: Installation And Commissioning

    Installation and commissioning...
  • Page 31: Installation Location And Position

    Installation location and position Choice of loca- The following criteria must be taken into account when choosing a location. tion The Wattpilot is suitable for outdoor operation without direct sunlight. The Wattpilot is suitable for operation in a well-ventilated indoor area. Do not operate the Wattpilot in areas with increased danger as a res- ult of ammonia gases.
  • Page 32 Do not install the Wattpilot horizontally. Do not install the Wattpilot on a sloping surface. Do not install the Wattpilot on a sloping surface with the connection facing down. CAUTION! Danger due to heat generation on the device! The build-up of heat can lead to lasting damage and even fire. ▶...
  • Page 33: Wall Mounting

    Wall mounting Mounting the When mounting the mounting bracket, ensure that it is not warped or deformed. The fol- Wattpilot on the lowing illustrations may differ slightly from the actual product; the Wattpilot Home 11 J wall does not have a mains plug.
  • Page 34: Connecting The Wattpilot

    Connecting the Wattpilot General informa- CAUTION! tion Installation and commissioning may only be performed by a qualified electrician. Requirements for the qualification of electricians - knowledge and observation of the 5 safety rules for working on electrical systems. ▶ Disconnect. ▶...
  • Page 35: Backup Power Mode

    If the charging current per phase cannot be covered by the backup power, the Wattpilot must be connected outside the backup power loads. A Fronius inverter is required for backup power mode. If the Wattpilot is connected in the backup power circuit of a photovoltaic system and the total current of one phase is exceeded as a result, the inverter switches off the backup power.
  • Page 36: Stopping Charging

    Fronius inverter tion with the to which a primary Fronius Smart Meter is connected. As soon as an inverter is in the inverter network, the Wattpilot automatically connects once with the first inverter that is found.
  • Page 37: Fronius Solar.wattpilot App

    Fronius Solar.wattpilot app...
  • Page 39: Overview

    Overview General The Fronius Solar.wattpilot app can be used to start up, configure, operate, visualise and update the Wattpilot. The app is available for Android™ (Android is a trademark of ® Google LLC) and iOS The app enables the Wattpilot to be accessed directly (see...
  • Page 40: Connecting Via Wlan

    Connecting via WLAN Launching the Open the Fronius Solar.wattpilot app on the end device and follow the Setup wizard. Read and accept the terms of use. Click on "Connect". Setting up a hot The Wattpilot permanently opens a hot spot.
  • Page 41: Charging

    Charging Homepage The figure below shows the "Charging" homepage of the Fronius Solar.wattpilot app. The "Select Wattpilot" page can be accessed by tapping the app icon. A new Wattpilot can be added by pressing the "+" icon. The following views can be dis- played in the main window: "Power"...
  • Page 42 up via "Energy per user". By entering "Total", the list can be downloaded as a .csv file. The following data is displayed in the file: Number: Sequential number of the session. A session is the period of time between connecting and disconnecting the charging cable.
  • Page 43: Settings

    Settings Current level Five different current levels can be set. The current levels are selected from Level 1 (gentle) to Level 5 (rapid) by pressing the pushbutton on the Wattpilot. Adjust the desired levels by clicking in the respective field. Absolute maximum This setting is used to adjust the maximum charging current of the Wattpilot.
  • Page 44 The SOC of the battery may still slowly increase. Ohmpilot threshold If a Fronius Ohmpilot is installed in the photovoltaic system, a limit value for the temper- ature can be set here. Below the set value, the available energy is prioritised for heating.
  • Page 45: Charging Timer

    NOTE! The electric vehicle is not listed - select standard charging behaviour. If the electric vehicle to be charged is not listed, no specific charging behaviour is known. All defaults can be customised. ▶ Select the standard charging behaviour. Choose car: The optimised standard settings of different car models can be activ- ated under "Select car".
  • Page 46: Access Management

    (e.g. Norway) where earthing cannot be detec- ted. ID chips Up to 10 ID chips can be used. The ID chip is used for authentication and for recording user-specific charging amounts. NOTE! One ID chip can be taught in for several Fronius Wattpilots.
  • Page 47: Password

    Learn ID chip Place the ID chip on the card reader of the Wattpilot. Click on "Teach in ID chip" in the app. Renaming an ID chip Tap the corresponding entry. Enter the desired name and tap "Save". NOTE! The ID chips and the charging amount remain stored in the event of a reset. Password The password protects against unauthorised access to the Wattpilot.
  • Page 48: Internet

    Firmware update Click on "Update available". Click on "Update". NOTE! After a firmware update, check whether the Fronius Solar.wattpilot app also needs to be updated. The Fronius Solar.wattpilot app can be updated via the respective platform (Google Play, App Store).
  • Page 49: Appendix

    Appendix...
  • Page 51: Technical Data

    Technical data Technical data Fronius Wattpilot Go 11 J Go 22 J Home 11 J Max. charging power 11 kW 22 kW 11 kW Mains supply types TT / TN / IT Mains connection CEE plug, red, CEE plug, red, 5‑pin cable without...
  • Page 52: Residual Current Detection

    Fronius Wattpilot Go 11 J Go 22 J Home 11 J Humidity 5 - 95% Height above sea level 0 - 2,000 m Residual current The tripping characteristics of the residual current detection are as follows. detection Spare parts Miniature fuse, ceramic with sand filling, 5 x 20 mm.
  • Page 53: Standard Settings

    Standard settings The Wattpilot works with the following standard settings during start-up, without making any further settings in the Fronius Solar.wattpilot app. The standard settings can be restored with the reset card. Wattpilot Go 11 J Go 22 J Home 11 J...
  • Page 54 Wattpilot Go 11 J Go 22 J Home 11 J Select phase switching Automatic 3‑phase power level 0.00 kW Forced charging interval 0 min. Simulate disconnection Charging timer Charging timer deactivated Brightness Brightness Max. Switch off LEDs after 10 s in standby LED colours Ready R = 0, G = 0, B = 255...
  • Page 55: Status Codes And Remedy

    Status codes and remedy Status Codes Due to phase, voltage and switching function checks of the Fronius Wattpilot, a charging operation may be rejected. The status codes are displayed via the LED status indicator (see LED status indicator) directly on the Wattpilot and in the app under "Status".
  • Page 56 101 - Temperature too high (the LEDs light up yellow, the LEDs at the top flash red) Cause: Continuous load. Incorrectly installed cables. Remedy: Disconnect device and allow to cool down. 105 - No data available on the flexible electricity tariff (first or second LED - Eco Mode or Next Trip Mode - flashes red) Cause: Flexible electricity tariff cannot be called up.
  • Page 57 Use original miniature fuses only. Cause: The brightness of the LEDs has been set to 0. Remedy: Increase the brightness of the LEDs in the Fronius Solar.wattpilot app. Cause: "Switch off LEDs after 10 s in standby" has been enabled. Remedy: Deactivate "Switch off LEDs after 10 s in standby"...
  • Page 58: Warranty Terms And Conditions, And Disposal

    Detailed, country-specific warranty conditions are available on the internet turer's warranty www.fronius.com/solar/garantie Disposal The manufacturer, Fronius International GmbH, will take back the old device and arrange for it to be recycled in an appropriate manner. Observe the national regulations for the disposal of electronic equipment.
  • Page 60 FRONIUS INTERNATIONAL GMBH Froniusstraße 1 A-4643 Pettenbach AUSTRIA contact@fronius.com www.fronius.com Under www.fronius.com/contact you will find the addresses of all Fronius Sales & Service Partners and locations...

This manual is also suitable for:

Wattpilot go 22 jWattpilot home 11 j

Table of Contents