Table of Contents
Advertisement
Quick Links
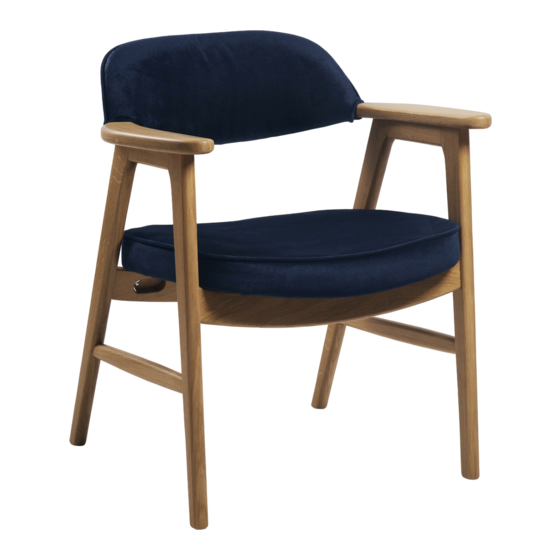
9476 • Assembly Instructions for the 9476 Side Chair
ASSEMBLY ONLY REQUIRES AT LEAST 1 PERSON & INCLUDED HARDWARE
HARDWARE:
A: 2x Small Bolts
E: 1x Assembly Key
PARTS:
F: 2x Legs
*Please note that one slat is shorter than the other. Ensure that the shorter slat gets inserted into the more angled side of
the leg with holes facing inwards.
IMPORTANT NOTICE:
• Place all wooden parts on a clean and smooth surface such as a rug or carpet to avoid scratching them.
• Check to be sure that you have all parts and hardware.
• Remove all wrapping materials, including staples & packing straps before you start to assemble.
• DO NOT tighten all screws/bolts until completely assembled.
• Keep all hardware parts out of reach of children.
Any problems or questions? Call Regency at 1-866-816-9822 or email customerservice@regencyof.com
B: 4x Large Bolts
G: 1x Seat
C: 4x Large Screws
H: 1x Seat Back
D: 4x Bracket
*I: 2x Slats
Advertisement
Table of Contents

Related Manuals for Regency 9476


Summary of Contents for Regency 9476
- Page 1 • Remove all wrapping materials, including staples & packing straps before you start to assemble. • DO NOT tighten all screws/bolts until completely assembled. • Keep all hardware parts out of reach of children. Any problems or questions? Call Regency at 1-866-816-9822 or email customerservice@regencyof.com...
- Page 2 Assembly Key (E). Repeat STEP 5 & 6 for each one of the 4 total with open edge facing inwards cutouts on the Slats (I) to secure the assembly. Any problems or questions? Call Regency at 1-866-816-9822 or email customerservice@regencyof.com...
- Page 3 STEP 9: Insert Screws (C) into predrilled holes in The completed assembly should look like this. bottom of each Slat (I) and tighten. (Colors may vary based on purchased finsh) Any problems or questions? Call Regency at 1-866-816-9822 or email customerservice@regencyof.com...
Need help?
Do you have a question about the 9476 and is the answer not in the manual?
Questions and answers