Table of Contents
Advertisement
Available languages
Available languages
Quick Links
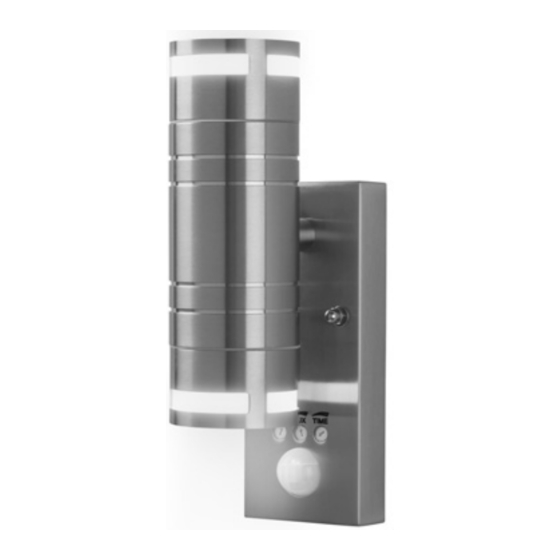
LED-AUSSENWANDLEUCHTE / LED OUTDOOR
WALL LIGHT / APPLIQUE MURALE LED D'EXTÉRIEUR
LED-AUSSENWANDLEUCHTE
Montage-, Bedienungs- und Sicherheitshinweise
APPLIQUE MURALE LED D'EXTÉRIEUR
Instructions de montage, d'utilisation et consignes de sécurité
ŚCIENNA LAMPA ZEWNĘTRZNA LED
Wskazówki montażu, obsługi i bezpieczeństwa
LED VONKAJŠIE NÁSTENNÉ SVIETIDLO
Pokyny pre montáž, obsluhu a bezpečnostné pokyny
IAN 307577_1904
LED OUTDOOR WALL LIGHT
Assembly, operating and safety instructions
LED-BUITENMUURLAMP
Montage-, bedienings- en veiligheidsinstructies
LED VENKOVNÍ NÁSTĚNNÉ
SVÍTIDLO
Pokyny k montáži, obsluze a bezpečnostní pokyny
Advertisement
Chapters
Table of Contents

Subscribe to Our Youtube Channel
Related Manuals for LIVARNO LUX 307577 1904


Summary of Contents for LIVARNO LUX 307577 1904
- Page 1 LED-AUSSENWANDLEUCHTE / LED OUTDOOR WALL LIGHT / APPLIQUE MURALE LED D’EXTÉRIEUR LED-AUSSENWANDLEUCHTE LED OUTDOOR WALL LIGHT Montage-, Bedienungs- und Sicherheitshinweise Assembly, operating and safety instructions APPLIQUE MURALE LED D’EXTÉRIEUR LED-BUITENMUURLAMP Instructions de montage, d‘utilisation et consignes de sécurité Montage-, bedienings- en veiligheidsinstructies ŚCIENNA LAMPA ZEWNĘTRZNA LED LED VENKOVNÍ...
- Page 2 DE / AT / CH Montage-, Bedienungs- und Sicherheitshinweise Seite GB / IE Assembly, operating and safety instructions Page FR / BE Instructions de montage, d‘utilisation et consignes de sécurité Page NL / BE Montage-, bedienings- en veiligheidsinstructies Pagina 32 Wskazówki montażu, obsługi i bezpieczeństwa Strona Pokyny k montáži, obsluze a bezpečnostní...
- Page 3 HG05862A...
-
Page 5: Table Of Contents
Legende der verwendeten Piktogramme ....Seite Einleitung ....................Seite Bestimmungsgemäße Verwendung ............. Seite Teilebeschreibung ..................Seite Technische Daten ..................Seite Lieferumfang ....................Seite Allgemeine Sicherheitshinweise ........... Seite Vor der Montage ................Seite Montage ....................Seite Leuchtmittel wechseln ................... Seite 10 Bewegungssensor einstellen ................ -
Page 6: Legende Der Verwendeten Piktogramme
Legende der verwendeten Piktogramme Erfassungsbereich des spritzwassergeschützt Bewegungssensors: ca. 8 m (IP44) Erfassungswinkel des Wechselstrom Bewegungssensors: ca. 90 ° LED-Außenwandleuchte Einleitung Wir beglückwünschen Sie zum Kauf Ihres neuen Produkts. Sie haben sich damit für ein hochwertiges Produkt entschieden. Die Bedienungsanleitung ist Teil dieses Produkts. Sie enthält wichtige Hinweise für Sicherheit, Gebrauch und Entsorgung. -
Page 7: Technische Daten
Technische Daten Betriebsspannung: 230 V∼ 50 Hz LED-Leuchtmittel: 230 V, GU10, 5,3 W Nennleistung max: 2 x 5,3 W Dämmerungsschalter: einstellbar zwischen 10 lx – 20.000 lx Beleuchtungsdauer: einstellbar zwischen ca. 10 s +/- 5 s – 5 min +/- 1 min Erfassungswinkel Bewegungssensor: ca. - Page 8 ERSTICKUNGSGEFAHR! Kinder können mitgelieferte Kleinteile (z. B. Schrauben) verschlucken und daran ersticken. Halten Sie Kinder während der Montage vom Arbeitsbereich fern. Lebensgefahr durch elektrischen Schlag Überprüfen Sie vor jedem Netzanschluss das Produkt auf etwaige Beschädigungen. Benutzen Sie das Produkt niemals, wenn Sie irgendwelche Beschädigungen feststellen.
-
Page 9: Vor Der Montage
Vor der Montage Hinweis: Entfernen Sie sämtliches Verpackungsmaterial vom Produkt. Wichtig: Der elektrische Anschluss muss durch einen ausgebildeten Elektriker oder eine für Elektroinstallationen eingewiesene Person erfolgen. Diese muss Kenntnis über die Eigenschaften des Produkts und Anschlussbestimmungen haben. S tellen Sie vor der Installation sicher, dass an der Leitung, an der das Produkt angeschlossen werden soll, keine Spannung vorliegt. -
Page 10: Leuchtmittel Wechseln
B ohren Sie nun die Befestigungslöcher (Ø ca. 6 mm, Tiefe ca. 40 mm). Beschä- digen Sie hierbei keine Stromkabel in der Wand (siehe Abb. D). Stecken Sie nun die Dübel in die Bohrlöcher. Schieben Sie das Netzkabel durch die Membran B efestigen Sie das Anschlussgehäuse mit den beiliegenden Befestigungs- schrauben (siehe Abb. -
Page 11: Bewegungssensor Einstellen
S etzen Sie den Leuchtenschirm auf den Lampenkörper und drehen Sie diesen fest. Vergewissern Sie sich, dass der Dichtungsring am Leuchtenschirm richtig sitzt. S etzen Sie die Sicherung ein oder schalten Sie den Leitungsschutzschalter im Sicherungskasten ein. Bewegungssensor einstellen Je nach den Voreinstellungen des Bewegungssensors schaltet sich der Spot für eine gewisse Zeit ein, sobald der Bewegungssensor eine Bewegung erfasst. -
Page 12: Entsorgung
S etzen Sie die Sicherung für diesen Stromkreis wieder ein oder schalten Sie den Stromkreisunterbrecher im Sicherungskasten ein. Entsorgung Die Verpackung besteht aus umweltfreundlichen Materialien, die Sie über die örtlichen Recyclingstellen entsorgen können. Beachten Sie die Kennzeichnung der Verpackungsmaterialien bei der Abfalltrennung, diese sind gekennzeichnet mit Abkürzungen (a) und Nummern (b) mit folgender Bedeutung: 1–7: Kunststoffe / 20–22: Papier und Pappe / 80–98: Verbundstoffe. -
Page 13: Abwicklung Im Garantiefall
Die Garantieleistung gilt für Material- oder Fabrikationsfehler. Diese Garantie erstreckt sich nicht auf Produktteile, die normaler Abnutzung ausgesetzt sind (z. B. Batterien) und daher als Verschleißteile angesehen werden können, oder für Beschädigungen an zerbrechlichen Teilen, z. B. Schalter, Akkus oder die aus Glas gefertigt sind. Abwicklung im Garantiefall Um eine schnelle Bearbeitung Ihres Anliegens zu gewährleisten, folgen Sie bitte den folgenden Hinweisen:... - Page 14 List of pictograms used ..............Page 15 Introduction .................... Page 15 Intended use ....................Page 15 Parts description ................... Page 15 Technical data ....................Page 16 Scope of delivery ..................Page 16 General safety instructions ............Page 16 Before installation ................
-
Page 15: List Of Pictograms Used
List of pictograms used Motion sensor range: Splash-proof (IP44) approx. 8 m Detection angle of motion Alternating current sensor: approx. 90 ° LED Outdoor Wall Light Introduction We congratulate you on the purchase of your new product. You have chosen a high quality product. -
Page 16: Technical Data
Technical data Operating voltage: 230 V∼ 50 Hz LED bulb: 230 V, GU10, 5.3 W Rated power max: 2 x 5.3 W Twilight-switch: adjustable between 10 lx – 20,000 lx Lighting duration: adjustable between approx. 10 s +/- 5s – 5 min +/- 1 min Motion sensor detection angle: approx. -
Page 17: Before Installation
DANGER OF SUFFOCATION! Children could swallow and choke on small included parts (e.g. screws). Keep children away from the work area during assembly. Danger to life by electric shock Always check the product for damage before connecting it to the mains. Never use the product if it shows any signs of damage. -
Page 18: Installation
The included mounting material is suitable for ordinary solid concrete or masonry construction. Check which mounting material is suitable for your chosen mount- ing surface. If necessary, seek expert advice. Installation Make sure you will not be drilling into electrical, gas or water lines inside the wall. Use a power drill to drill the holes into the brick wall. -
Page 19: Replacing A Led Bulb
nection housing , attach the silicon washers , flat washers secure with the two nuts Check for correct fitting. Insert the LED bulb into the socket carefully with a cloth and tighten it with a ¼ turn in a clockwise direction (see fig. G). Place the lamp shade on the lamp body and tighten it. -
Page 20: Adjusting The Sensitivity Of The Sensor
Adjusting the sensitivity of the sensor Turn the rotary control SENS clockwise to increase the sensitivity of the sensor. Note: The motion sensor responds to heat radiation. When outdoor tempera- tures are low, it is more sensitive to body heat than when outdoor temperatures are warm. -
Page 21: Warranty
Warranty The product has been manufactured to strict quality guidelines and meticulously ex- amined before delivery. In the event of product defects you have legal rights against the retailer of this product. Your legal rights are not limited in any way by our war- ranty detailed below. -
Page 22: Service
Service Service Great Britain Tel.: 0800 404 7657 E-Mail: owim@lidl.co.uk Service Ireland Tel.: 1890 930 034 (0,08 EUR / Min., (peak)) (0,06 EUR / Min., (off peak)) E-Mail: owim@lidl.ie 22 GB/IE... - Page 23 Légende des pictogrammes utilisés ........Page 24 Introduction .................... Page 24 Utilisation conforme ..................Page 24 Descriptif des pièces ..................Page 24 Données techniques ..................Page 25 Contenu de la livraison ................Page 25 Instructions générales de sécurité ........Page 25 Avant le montage ................
-
Page 24: Légende Des Pictogrammes Utilisés
Légende des pictogrammes utilisés Zone de détection du protégé contre les détecteur de mouvement : projections d'eau (IP44) env. 8 m Angle de détection du détecteur de mouvement : Courant alternatif env. 90 ° Applique murale LED d’extérieur Introduction Nous vous félicitons pour l‘achat de votre nouveau produit. Vous avez opté pour un produit de grande qualité. -
Page 25: Données Techniques
Données techniques Tension de service : 230 V ∼ 50 Hz Ampoules LED : 230 V, GU10, 5,3 W Puissance nominale max. : 2 x 5,3 W Interrupteur crépusculaire : réglable entre 10 lx –20.000 lx Durée d‘éclairage : réglable entre env. 10 s +/- 5 s – 5 min +/- 1 min Angle de détection Détecteur de mouvement : env. - Page 26 utilisation. Les enfants ne doivent pas jouer avec le produit. Le nettoyage et l‘entretien du produit ne doivent pas être effectués par des enfants laissés sans surveillance. RISQUE D‘ASPHYXIE ! Les enfants peuvent ingérer les éléments de petite taille fournis (par ex. les vis) et s‘étouffer avec. Toujours tenir les enfants à l‘écart de la zone de travail lors du montage.
-
Page 27: Avant Le Montage
Avant le montage Remarque : Veuillez retirer l‘ensemble des matériaux composant l‘emballage du produit. Important : L‘installation électrique doit être effectuée par un électricien ou par une personne dûment formée à cet effet. Cette personne doit connaître les caractéristiques du produit et des conditions de raccordement. A vant l‘installation, assurez-vous que le câble sur lequel le produit doit être bran- ché... -
Page 28: Remplacement De L'ampoule
P ercez à présent les trous de fixation (Ø env. 6 mm, profondeur env. 40 mm). Veillez à ne pas endommager les câbles électriques dans le mur (voir Fig. D). Enfoncez les chevilles dans les trous. Faites glisser le câble d‘alimentation à... -
Page 29: Réglage Du Détecteur De Mouvement
P ositionnez le diffuseur sur le corps de la lampe et fixez-le en le tournant. Assurez-vous que la bague d‘étanchéité sur le diffuseur est insérée en toute sécurité. M ettez le fusible en place ou mettez en route le disjoncteur dans le boîtier à... -
Page 30: Mise Au Rebut
R emettez le fusible de ce circuit électrique en place, ou remettez en route le coupe-circuit dans le boîtier à fusibles. Mise au rebut L’emballage se compose de matières recyclables pouvant être mises au rebut dans les déchetteries locales. Veuillez respecter l‘identification des matériaux d‘emballage pour le tri sélectif, ils sont identifiés avec des abbréviations (a) et des chiffres (b) ayant la signification suivante : 1–7 : plastiques / 20–22 : papiers et cartons / 80–98 : matériaux composite. -
Page 31: Faire Valoir Sa Garantie
remplacement du produit sans frais supplémentaires. La garantie prend fin si le pro- duit est endommagé suite à une utilisation inappropriée ou à un entretien défail- lant. La garantie couvre les vices matériels et de fabrication. Cette garantie ne s’étend ni aux pièces du produit soumises à... - Page 32 Legenda van de gebruikte pictogrammen ....Pagina 33 Inleiding ....................Pagina 33 Correct gebruik ..................Pagina 33 Beschrijving van de onderdelen ...............Pagina 33 Technische gegevens ................Pagina 34 Omvang van de levering ................Pagina 34 Algemene veiligheidsinstructies ........Pagina 34 Voor de montage ................Pagina 35 Montage ....................Pagina 36 Verlichtingsmiddel vervangen ..............Pagina 37 Bewegingssensor instellen ................Pagina 37...
-
Page 33: Legenda Van De Gebruikte Pictogrammen
Legenda van de gebruikte pictogrammen Detectiebereik van de spatwaterdicht (IP44) bewegingssensor: ca. 8 m Detectiehoek van de Wisselstroom bewegingssensor: ca. 90 ° LED-buitenmuurlamp Inleiding Hartelijk gefeliciteerd met de aankoop van uw nieuwe product. U heeft voor een hoogwaardig product gekozen. De gebruiksaanwijzing is een deel van het product. Deze bevat belangrijke aanwijzingen voor veiligheid, gebruik en verwijdering. -
Page 34: Technische Gegevens
Technische gegevens Voedingsspanning: 230 V∼ 50 Hz Led-verlichtingsmiddel: 230 V, GU10, 5,3 W Nominale spanning max: 2 x 5,3 W Schemerschakelaar: instelbaar tussen 10 lx–20.000 lx Verlichtingsduur: instelbaar tussen ca. 10 s +/- 5 s – 5 min +/- 1 min Detectiehoek Bewegingssensor: ca. -
Page 35: Voor De Montage
VERSTIKKINGSGEVAAR! Kinderen kunnen meegeleverde kleine onderdelen (bijv. schroeven) inslikken en hierin stikken. Houd kinderen tijdens de montage bij het werkbereik vandaan. Levensgevaar door elektrische schok Controleer het product altijd op eventuele beschadigingen voordat u het aan de stroom aansluit. Gebruik het product nooit wanneer u een beschadiging heeft geconstateerd. -
Page 36: Montage
C ontroleer voor de installatie of op de leiding waarop het product wordt aan- gesloten geen spanning staat. Verwijder hiervoor de zekering of schakel het betreffende stroomcircuit in de zekeringskast uit (0-stand) (zie afb. A). C ontroleer hiervoor de spanningsvrijheid met een spanningzoeker. H et meegeleverde montagemateriaal is geschikt voor normaal stevig muurwerk. -
Page 37: Verlichtingsmiddel Vervangen
L et ook op de kleurcombinatie vaan de aangesloten draden (L = zwart of bruin, N = blauw of wit). V erbind nu de aarde (groen-geel) met de aardingsklem (zie afb. F). Let erop dat de afdichting juist is bevestigd aan de aansluitbehuizing voordat u de wandplaat bevestigt. -
Page 38: Verlichtingsduur Instellen
Verlichtingsduur instellen D raai de draairegelaar TIME rechtsom, om de verlichtingsduur te verhogen. De verlichtingsduur kunt u in een tijdvenster van ca. 10 seconden tot 5 minuten instellen. Gevoeligheid van de sensor instellen D raai de draairegelaar SENS rechtsom, om de gevoeligheid van de sensor te verhogen. -
Page 39: Garantie
Het product en de verpakkingsmaterialen zijn recyclebaar; verwijder deze afzonderlijk voor een betere afvalbehandeling. Het Triman-logo geldt alleen voor Frankrijk. Informatie over de mogelijkheden om het uitgediende product na gebruik te verwijderen, verstrekt uw gemeentelijke overheid. Gooi het afgedankte product omwille van het milieu niet weg via het huisvuil, maar geef het af bij het daarvoor bestemde depot of het ge- meentelijke milieupark. -
Page 40: Service
Het artikelnummer vindt u op de typeplaat, ingegraveerd, op het titelblad van uw handleiding (linksonder) of als sticker op de achter- of onderzijde. Wanneer er storingen in de werking of andere gebreken optreden, dient u eerst te- lefonisch of per e-mail contact met de onderstaande service-afdeling op te nemen. Een als defect geregistreerd product kunt u dan samen met uw aankoopbewijs (kassabon) en vermelding van de concrete schade alsmede het tijdstip van optre- den voor u franco aan het u meegedeelde servicepunt verzenden. - Page 41 Legenda zastosowanych piktogramów ....Strona 42 Instrukcja ....................Strona 42 Zastosowanie zgodne z przeznaczeniem ..........Strona 42 Opis części ....................Strona 42 Dane techniczne ..................Strona 43 Zawartość ....................Strona 43 Ogólne wskazówki bezpieczeństwa ......Strona 43 Przed montażem ................Strona 44 Montaż...
-
Page 42: Legenda Zastosowanych Piktogramów
Legenda zastosowanych piktogramów Zakres wykrywania ochrona przed pryska- czujnika ruchu: ok. 8 m jącą wodą (IP44) Kąt wykrywania czujnika Prąd zmienny ruchu: ok. 90 ° Ścienna lampa zewnętrzna LED Instrukcja Gratulujemy Państwu zakupu nowego produktu. Zdecydowali się Państwo na zakup produktu najwyższej jakości. -
Page 43: Dane Techniczne
Dane techniczne Napięcie robocze: 230 V∼ 50 Hz Żarówka LED: 230 V, GU10, 5,3 W Moc znamionowa maks.: 2 x 5,3 W Przełącznik zmierzchowy: regulowany pomiędzy 10 lx – 20 000 lx Czas oświetlenia: możliwość ustawienia pomiędzy ok. 10 s +/- 5 s –... -
Page 44: Przed Montażem
NIEBEZPIECZEŃSTWO UDUSZENIA SIĘ! Dzieci mogą połknąć załączone małe elementy (np. śruby) i zadławić się. Podczas montażu należy pilnować, aby w pobliżu miejsca pracy nie było dzieci. Zagrożenie życia przez porażenie prądem elektrycznym Przed każdym podłączeniem produktu do sieci upewnić się, że nie został on w jakikolwiek sposób uszkodzony. - Page 45 elektrycznych. Osoba ta musi posiadać wiedzę na temat właściwości produktu i przepisów dotyczących podłączania. P rzed instalacją należy upewnić się, że przewód, do którego ma być podłączony produkt, nie znajduje się pod napięciem. W tym celu należy wyjąć bezpiecz- nik lub wyłączyć wyłącznik nadmiarowo-prądowy w skrzynce bezpiecznikowej (położenie 0) (patrz rys.
-
Page 46: Wymiana Żarówki
Przeprowadzić kabel sieciowy przez membranę Przymocować obudowę przyłączeniową przy pomocy dołączonych śrub (patrz rys. E). P ołączyć kabel produktu za pomocą złączki zaciskowej z kablem sieciowym (patrz rys. F). N ależy zwrócić uwagę na kolorowe łączenie podłączonych przewodów (prze- wód przewodzący prąd, L = czarny lub brązowy, N = niebieski lub biały). P ołączyć... -
Page 47: Ustawianie Czujnika Ruchu
N ałożyć abażur na korpus lampy i przykręcić go. Upewnić się, że pierścień uszczelniający na abażurze jest właściwie położony. P onownie włożyć bezpiecznik lub włączyć wyłącznik nadmiarowo-prądowy na skrzynce bezpiecznikowej. Ustawianie czujnika ruchu W zależności od wstępnych ustawień czujnika ruchu spot włącza się... -
Page 48: Utylizacja
Utylizacja Opakowanie wykonane jest z materiałów przyjaznych dla środowiska, które można przekazać do utylizacji w lokalnym punkcie przetwarzania surowców wtórnych. Przy segregowaniu odpadów prosimy zwrócić uwagę na oznakowanie materiałów opakowaniowych, oznaczone są one skrótami (a) i numerami (b) o następującym znaczeniu: 1–7: Tworzywa sztuczne / 20–22: Papier i tektura / 80–98: Materiały kompozytowe. -
Page 49: Sposób Postępowania W Przypadku Naprawy Gwarancyjnej
Zgodnie z Kodeksem Cywilnym art. 581 §1 wraz z wymianą urządzenia lub ważnej części czas gwarancji rozpoczyna się na nowo. Sposób postępowania w przypadku naprawy gwarancyjnej Aby zapewnić szybkie rozpatrzenie Państwa wniosku, prosimy stosować się do następujących wskazówek: Przed skontaktowaniem się z działem serwisowym należy przygotować paragon i numer artykułu (np. - Page 50 Legenda použitých piktogramů ........Strana 51 Úvod ......................Strana 51 Použití ke stanovenému účelu..............Strana 51 Popis dílů ....................Strana 51 Technické údaje ..................Strana 52 Obsah dodávky ..................Strana 52 Všeobecná bezpečnostní upozornění ......Strana 52 Před montáží ..................Strana 53 Montáž...
-
Page 51: Legenda Použitých Piktogramů
Legenda použitých piktogramů Dosah snímání pohybového Ochrana před stříkající senzoru: cca 8 m vodou (IP44) Úhel snímání pohybového Střídavý proud senzoru: cca 90 ° LED venkovní nástěnné svítidlo Úvod Blahopřejeme Vám ke koupi nového výrobku. Rozhodli jste se pro kvalitní produkt. Návod k obsluze je součástí... -
Page 52: Technické Údaje
Technické údaje Provozní napětí: 230 V∼ 50 Hz Žárovka LED: 230 V, GU10, 5,3 W Jmenovitý příkon max.: 2 x 5,3 W Soumrakový spínač: nastavitelný v rozsahu 10 lx–20.000 lx Doba svícení: nastavitelná v rozsahu cca 10 s +/- 5 s – 5 min +/- 1 min Úhel dosahu Pohybový... -
Page 53: Před Montáží
Nebezpečí ohrožení života úrazem elektrickým proudem Před každým připojením na rozvod elektrického proudu zkontrolujte výrobek jestli není poškozený. Nepoužívejte výrobek pokud jste zjistili že je poškozený. Před montáží se ujistěte, že se místní síťové napětí shoduje s provozním napětím výrobku (230 V∼ 50 Hz). Neinstalujte výrobek, jestliže se napětí neshodují. NEBEZPEČÍ... -
Page 54: Montáž
Montáž Ujistěte se, že při vrtání do stěny nenarazíte na vodiče proudu, plynové nebo vodo- vodní potrubí. Použijte k tomu návod k obsluze vrtačky a řiďte se všemi bezpečnost- ními pokyny. V opačném případě hrozí nebezpečí usmrcení nebo úrazu zásahem elektrického proudu. Při výběru místa k montáži pamatujte: Z ajistěte, aby výrobek osvětloval požadovaný... -
Page 55: Výměna Žárovky
N asaďte stínidlo na těleso svítidla a pevně ho utáhněte. Ujistěte se, že je těsnicí kroužek správně instalován na tělese svítidla a na stínidle (viz obr. H). Nasaďte opět pojistku nebo zapněte jistič v pojistkové skříňce (viz obr. J). Nyní je výrobek připraven k použití. -
Page 56: Nastavení Hladiny Denního Světla
Nastavení hladiny denního světla O točte regulátorem LUX ve směru hodinových ručiček ke zvýšení citlivosti na intenzitu denního světla: v poloze reaguje pohybový senzor pouze v noci (při cca 10 lx). V poloze reaguje pohybový senzor také při denním světle, dokud není překročena hodnota cca 20.000 lx. Čistění... -
Page 57: Záruka
Záruka Výrobek byl vyroben s nejvyšší pečlivostí podle přísných kvalitativních směrnic a před odesláním prošel výstupní kontrolou. V případě závad máte možnost uplatnění zákon- ných práv vůči prodejci. Vaše práva ze zákona nejsou omezena naší níže uvedenou zárukou. Na tento artikl platí 3 záruka od data zakoupení. Záruční lhůta začíná od data zakoupení. - Page 58 Legenda použitých piktogramov ........Strana 59 Úvod ......................Strana 59 Používanie v súlade s určeným účelom ........... Strana 59 Popis častí ....................Strana 59 Technické údaje ..................Strana 60 Obsah dodávky ..................Strana 60 Všeobecné bezpečnostné upozornenia ...... Strana 60 Pred montážou .................
-
Page 59: Legenda Použitých Piktogramov
Legenda použitých piktogramov Dosah senzora pohybu: s ochranou proti strieka- cca. 8 m júcej vode (IP44) Uhol snímania senzora Striedavý prúd pohybu: cca. 90° LED vonkajšie nástenné svietidlo Úvod Blahoželáme Vám ku kúpe Vášho nového výrobku. Rozhodli ste sa tým pre vyso- kokvalitný... -
Page 60: Technické Údaje
Technické údaje Prevádzkové napätie: 230 V∼ 50 Hz LED osvetľovací prostriedok: 230 V, GU10, 5,3 W Menovitý výkon max.: 2 x 5,3 W Súmrakový spínač: nastaviteľný medzi 10 lx – 20.000 lx Doba svietenia: nastaviteľná medzi cca. 10 s +/- 5 s – 5 min +/- 1 min Uhol dosahu senzora pohybu: cca. -
Page 61: Pred Montážou
NEBEZPEČENSTVO ZADUSENIA! Deti by mohli prehltnúť priložené drobné časti (napr. skrutky) a zadusiť sa nimi. Počas montáže zabráňte prístupu detí do pracovnej oblasti. Nebezpečenstvo ohrozenia života zásahom elektrickým prúdom Pred každým zapojením do siete skontrolujte prípadné poškodenia výrobku. Ak zistíte akékoľvek poškodenie výrobku, nikdy ho nepoužívajte. Pred montážou sa uistite, že sa prítomné... -
Page 62: Montáž
P red inštaláciou zabezpečte, aby bolo vedenie, na ktoré bude výrobok pripo- jený, bez napätia. Odstráňte preto poistku alebo vypnite istič vedenia v skrinke s poistkami (poloha 0) (pozri obr. A). B eznapäťový stav prekontrolujte pomocou skúšačky napätia. Priložený montážny materiál je vhodný pre bežné pevné murivo. Informujte sa i o tom, ktorý... -
Page 63: Výmena Osvetľovacieho Prostriedku
Teraz spojte uzemňovací vodič (zeleno-žltý) s ukostrovacou svorkou (pozri obr. F). Dbajte na to, aby bolo tesnenie správne prilepené na pripojovacej schránke predtým, ako upevníte nástenný štítok . Teraz opatrne nasaďte nástenný štítok na pripojovaciu schránku . Opäť nasaďte silikónové krúžky ploché... -
Page 64: Nastavenie Doby Svietenia
Nastavenie doby svietenia O táčajte otočným regulátorom TIME v smere hodinových ručičiek, aby sa doba svietenia zvýšila. Dobu svietenia môžete nastavovať v časovom okne od cca. 10 sekúnd do 5 minút. Nastavenie citlivosti senzora O táčajte otočný regulátor SENS v smere hodinových ručičiek, aby ste citli- vosť... -
Page 65: Záruka
Výrobok a obalové materiály sú recyklovateľné, zlikvidujte ich oddelene pre lepšie spracovanie odpadu. Triman-Logo platí iba pre Francúzsko. O možnostiach likvidácie opotrebovaného výrobku sa môžete informo- vať na Vašej obecnej alebo mestskej správe. Ak výrobok doslúžil, v záujme ochrany životného prostredia ho neod- hoďte do domového odpadu, ale odovzdajte na odbornú... -
Page 66: Servis
Číslo výrobku nájdete na typovom štítku, gravúre, na prednej strane Vášho návodu (dole vľavo) alebo ako nálepku na zadnej alebo spodnej strane. Ak sa vyskytnú funkčné poruchy alebo iné nedostatky, najskôr telefonicky alebo e-mailom kontaktujte následne uvedené servisné oddelenie. Produkt označený ako defektný potom môžete s priloženým dokladom o kúpe (pokladničný... - Page 67 HG05862B...
- Page 69 OWIM GmbH & Co. KG Stiftsbergstraße 1 74167 Neckarsulm GERMANY Model-No.: HG05862A / HG05862B Version: 10 / 2019 Stand der Informationen · Last Information Update Version des informations · Stand van de informatie Stan informacji · Stav informací · Stav informácií: 09 / 2019 Ident.-No.: HG05862A / HG05862B092019-8 IAN 307577_1904...
Need help?
Do you have a question about the 307577 1904 and is the answer not in the manual?
Questions and answers