Table of Contents
Advertisement
Quick Links
INSTALLATION
INSTRUCTIONS
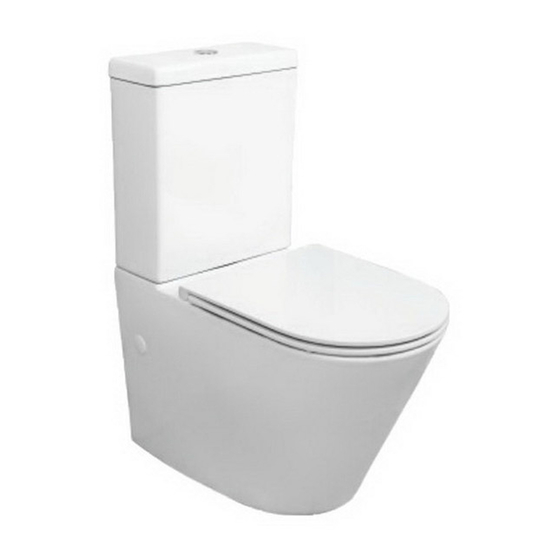
TOILET
With an Englefield toilet suite
you can be sure of having
excellence, comfort, durability
and style.
It's the details that Englefield
cares about - from pioneering
the latest technology, to
innovative design.
1265059-A2-D
Nov 2020
1294931-A2-D
EVORA
TM
Back-to-Wall
NOTE: The Evora Back-to-Wall toilet suite is suitable for both
a rear & side entry water inlet.
June 2016
TM
1
Advertisement
Table of Contents

Related Manuals for Kohler Englefield EVORA Back-to-Wall


Summary of Contents for Kohler Englefield EVORA Back-to-Wall
- Page 1 INSTALLATION INSTRUCTIONS EVORA TOILET Back-to-Wall With an Englefield toilet suite you can be sure of having excellence, comfort, durability and style. It’s the details that Englefield cares about - from pioneering the latest technology, to innovative design. NOTE: The Evora Back-to-Wall toilet suite is suitable for both a rear &...
-
Page 2: Before You Begin
EVORA INSTALLATION INSTRUCTIONS Back-to-Wall Toilet Suite BEFORE YOU BEGIN Before proceeding with installation, please read these instructions carefully to familiarise yourself with the required tools, materials and installation sequences. Please leave these instructions for the consumer after installation. Prior to installation, inspect the toilet to ensure that no damage has occurred in transit. -
Page 3: Tools And Materials Required
EVORA INSTALLATION INSTRUCTIONS Back-to-Wall Toilet Suite TOOLS AND MATERIALS REQUIRED Adjustable Tape Measure Level Pipe Wrench Spanner Tube Cutter Safety Glasses Drill & Bits Adjustable Pliers Metal File 1/2” Socket Hacksaw Silicone Sealant Sponge Screwdriver Caulking Gun Pencil PARTS IDENTIFICATION Side Entry Capping Plug Shut-off Valve... -
Page 4: Preparing To Install
EVORA INSTALLATION INSTRUCTIONS Back-to-Wall Toilet Suite PREPARING TO INSTALL Remove the existing toilet: Turn off the water supply and flush the toilet, then sponge out all remaining water from the cistern. Disconnect the supply hose from the shut-off valve and remove the old pan and cistern. CAUTION: Risk of hazardous gases. - Page 5 EVORA INSTALLATION INSTRUCTIONS Back-to-Wall Toilet Suite Skip this page if installing a CISTERN INSTALLATION - BOTTOM INLET Top Rear Entry cistern configuration. Remove the Side Inlet valve and 250mm hose. Install the Bottom Inlet valve to the cistern. Discard the bung. Place the washers over the fixing screws and locate in cistern fixing holes.
- Page 6 EVORA INSTALLATION INSTRUCTIONS Back-to-Wall Toilet Suite PAN INSTALLATION The pan can be installed as P-Trap or S-Trap. For S-Trap installations please use the supplied Vario Pan Connector, and follow the included instructions. For P-Trap installations the straight pan connector is not supplied. S-Trap P-Trap Finished...
- Page 7 EVORA INSTALLATION INSTRUCTIONS Back-to-Wall Toilet Suite Drill fixing holes at the marked locations on the floor and insert the anchors where required. Hexagon Lag Screw Bracket Hole Anchor Washer Anchor Sleeve Screw Place a washer onto each of the hexagon screws and fix the brackets to the floor.
- Page 8 EVORA INSTALLATION INSTRUCTIONS Back-to-Wall Toilet Suite Skip this page if installing a CISTERN INSTALLATION - TOP REAR ENTRY bottom inlet cistern configuration. Securely install the bung into the bottom inlet of the cistern. Place the washers over the fixing screws and locate in cistern fixing holes. Fixing Screw Bung Washer...
-
Page 9: Push Button Installation
EVORA INSTALLATION INSTRUCTIONS Back-to-Wall Toilet Suite PUSH BUTTON INSTALLATION Disassemble the push rods. Using the push rod, measure the distance between the flush valve and the top of the cistern lid. Mark this length and cut the push rod to length. Reassemble the push rods. - Page 10 EVORA INSTALLATION INSTRUCTIONS Back-to-Wall Toilet Suite FLUSH VALVE REMOVAL AND INSTALLATION Flush Valve A Release flush valve by turning Assemble flush valve by pushing anti-clockwise and pulling straight straight down into the canister up on the canister. and turning clockwise. Flush Valve B Assemble flush valve by Release flush valve by...
- Page 11 EVORA INSTALLATION INSTRUCTIONS Back-to-Wall Toilet Suite FINALISING INSTALLATION Install the seat as per the supplied seat instructions. Make final connection of water supply hose to shut-off valve. Test the system for leaks. Apply a suitable sealant between the pan and adjacent surfaces. Your toilet suite is now installed.
-
Page 12: Contact And Warranty Information
INSTALLATION INSTRUCTIONS EVORA Back-to-Wall Toilet Suite CONTACT AND WARRANTY INFORMATION NEW ZEALAND AUSTRALIA KOHLER NZ LTD KOHLER Australia Free Ph: 0800 100 382 Free Ph: 1 800 ENGLEFIELD Free Fax: 0800 664 488 (1 800 364 533) www.englefield.co.nz www.englefield.com For warranty information, please visit our website...
Need help?
Do you have a question about the Englefield EVORA Back-to-Wall and is the answer not in the manual?
Questions and answers