Table of Contents
Advertisement
Quick Links
Advertisement
Table of Contents

Summary of Contents for Electrolux EQTP4520IK
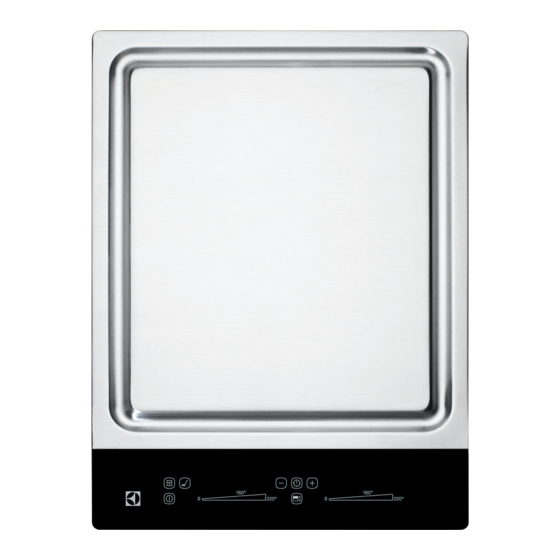
- Page 1 Electrolux Cooking Teppan yaki grill plate EQTP4520IK...
-
Page 2: Table Of Contents
10. GREAT BRITAIN & IRELAND - CUSTOMER CARE AND SERVICE ....18 WE’RE THINKING OF YOU Thank you for purchasing an Electrolux appliance. You’ve chosen a product that brings with it decades of professional experience and innovation. Ingenious and stylish, it has been designed with you in mind. -
Page 3: Safety Information
ENGLISH 1. SAFETY INFORMATION Before the installation and use of the appliance, carefully read the supplied instructions. The manufacturer is not responsible if an incorrect installation and use causes in- juries and damages. Always keep the instructions with the appliance for future reference. 1.1 Children and vulnerable people safety WARNING! Risk of suffocation, injury or permanent disability. -
Page 4: Safety Instructions
• Never try to extinguish a fire with water, but switch off the appliance and then cover flame e.g. with a lid or a fire blanket. • Do not store items on the cooking surfaces. • Do not use a steam cleaner to clean the appliance. - Page 5 ENGLISH • The appliance must be earthed. • Do not put cutlery or saucepan lids on the cooking zones. They can become • Before carrying out any operation make hot. sure that the appliance is disconnected from the power supply. •...
-
Page 6: Product Description
• Clean the appliance with a moist soft Teppan Yaki Grill cloth. Only use neutral detergents. Do • Noises during the operation of the ap- not use abrasive products, abrasive pliance are normal. They are not an in- cleaning pads, solvents or metal ob- dication of malfunction. - Page 7 ENGLISH Roasting zone 1400 W Roasting zone 1400 W Control panel 3.2 Control panel layout Use the sensor fields to operate the appliance. The displays, indicators and sounds tell which functions operate. Sensor field Function To activate and deactivate the appliance. To lock / unlock the control panel.
-
Page 8: Daily Use
3.3 Heat setting displays Display Description The roasting zone is off. The roasting zone operates. There is a malfunction. + digit 3 step residual heat indicator: continue cooking / keep warm / residual heat. The Lock / The Child Safety Device operates. - Page 9 ENGLISH 4.4 The Timer When this function is activated, comes on. • To activate the Count up timer: The Count Down Timer. Touch Use the Count Down Timer to set how The symbol goes out and comes long the cooking zone operates for only this one time.
-
Page 10: Helpful Hints And Tips
10 www.electrolux.com Starting the Child Safety Device Touch for 3 seconds. The displays • Start the hob with come on and go out. Touch for 3 sec- .Do not set the heat setting. onds. comes on, the sound is on. - Page 11 ENGLISH When the temperature is too high, the fat begins to produce smoke. This tempera- ture is called the smoke point. Fats/Oils Max. temperature (°C) Smoke point (°C) Butter Pork fat Beef fat Olive oil Sunflower oil Groundnut oil Coconut oil Always preheat the appliance.
- Page 12 12 www.electrolux.com Food to be cooked Temperature (°C) Time / Tips Beef steak blutig, rare 6 minutes, turn after 3 mi- nutes. Beef steak rosa, medium 8 minutes, turn after 2 mi- nutes. Beef steak durch, well 8 minutes, turn after 4 mi- done nutes.
-
Page 13: Care And Cleaning
ENGLISH Food to be cooked Temperature (°C) Time / Tips Fried egg Preheat the appliance. Crepes/Omelettes 140-160 Preheat the appliance. Fruits 140-160 Preheat the appliance. Vegetables 140-160 10 – 20 minutes, turn several times. Vegetables 140-160 10 - 15 minutes, under a cooking lid (turn halfway through). -
Page 14: Troubleshooting
14 www.electrolux.com 7. TROUBLESHOOTING Problem Possible cause Remedy You cannot activate the The appliance is not con- Check if the appliance is appliance or operate it. nected to an electrical correctly connected to supply or it is connected the electrical supply (refer incorrectly. -
Page 15: Installation
ENGLISH digit-letter code for the glass ceramic (it is nician or dealer will not be free of charge, in the corner of the cooking surface) and even during the warranty period. The in- an error message that comes on. structions about the customer service and If you operated the appliance incorrectly, conditions of guarantee are in the guaran- the servicing by a customer service tech-... - Page 16 16 www.electrolux.com R 5mm 55mm min. 12 mm min. 2 mm min. 38 mm min. 2 mm • Seal the gap between the worktop and • Pull off the excess silicone with the glass ceramic with silicone. scraper. • Put some soapy water on the silicone.
- Page 17 ENGLISH 8.5 The installation of more than one appliance Added parts:connection bar(s), heat re- Only use special a heat - resistant sistant silicon, rubber shape, sealing silicon. strap. The worktop cut out 580 mm 360 mm 20 mm 920 mm Distance from the wall : minimum 50 mm Depth : 490 mm Width : sum widths of all the appliances...
-
Page 18: Technical Information
Exclusions.To see our guarantee condi- lation of your product, including electrical tions and exclusions please visit connections and water connections www.electrolux.co.uk or contact our Cus- should be carried out by a suitably quali- tomer Care Department. fied engineer. In the user manual and on Service &... - Page 19 Service please contact us at the follow- uct: www.RegisterElectrolux.com ing address, Electrolux Group(Ir) Ltd, Long Mile Rd, Dublin 12, Republic of Ire- 11. ENVIRONMENT CONCERNS Recycle the materials with the symbol and electronic appliances.
- Page 20 User manual: English 892965112-A-362013...


Need help?
Do you have a question about the EQTP4520IK and is the answer not in the manual?
Questions and answers