Advertisement
Quick Links
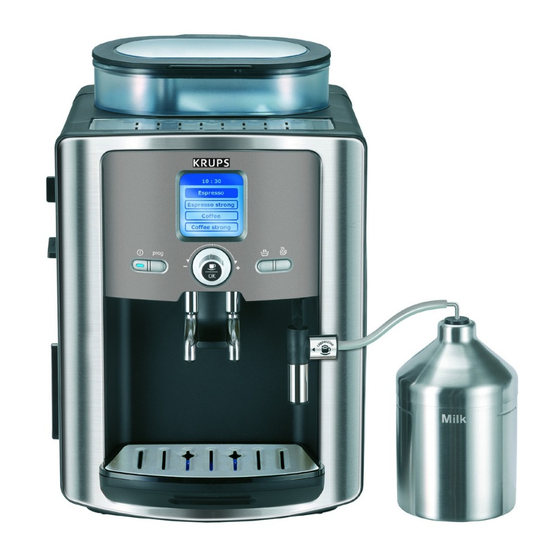
RANGE
Pictographic model: XP7200
Graphic model: XP7220
Graphic model: XP7240
COMPONENTS
The appliance is made up of:
•
1 1.3-L removable water tank
•
1 flowmeter to proportion the volume of water
•
1 15-bar pump + 16-bar relief valve
•
1 motorized hydraulic distributor
•
1 1300-W thermoblock system with:
- 1 coffee water circuit and 1 steam circuit
- 1 integrated percolation chamber
- 1 NTC for electronic temperature regulation and two 216°C thermal fuses
- 1 system for discharging the ground coffee by means of an ejection ram and scraper
•
1 hydraulic plunger for closing the percolation head
•
1 grinder
•
2 electronic boards for:
thermoblock temperature regulation
o
mesuring the waterflow volume by counting flowmeter pulses.
o
1-cup, 2-cup, hot water (graphic model), steam, cleaning and scale removal cycle
o
operations
current function display via indicator light (pictographic models)
o
after service information (number of cycles per function, failure code....)
o
OPERATION
NTC electronic temperature regulation:
Coffee: 108°C (position 1), 111°C (position 2), 113.5°C (position 3)
Steam: 140°C in preheating, 132°C in steam production
Safety cut-off: 190°C
1-cup cycle:
See cycle description with hydraulic diagram.
2-cup cycle:
2-cycles of 2-half-cups sequencing.
Cleaning cycle: only applied to the coffee circuit.
Succession of cycles pumping 50ml of water / 2-minute pauses.
Scale removal cycle: applied to coffee and steam circuit.
Succession of cycles pumping 50ml of water / 1-minute pauses.
Automatic priming function:
Priming is automatic if there is no flow during actuator down phase
nozzle.
EXPRESSERIA COFFEE-MAKER
SERVICING MANUAL
black facing
silver panel
black facing
silver panel
titanium facing stainless steel panel
Claris Filter (France)
Claris Filter
Claris Filter +Auto-cappuccino
pumping via steam
1
Advertisement

Subscribe to Our Youtube Channel
Related Manuals for Krups XP7200


Summary of Contents for Krups XP7200
- Page 1 EXPRESSERIA COFFEE-MAKER SERVICING MANUAL RANGE Pictographic model: XP7200 black facing silver panel Claris Filter (France) Graphic model: XP7220 black facing silver panel Claris Filter Graphic model: XP7240 titanium facing stainless steel panel Claris Filter +Auto-cappuccino COMPONENTS The appliance is made up of: •...
- Page 2 PERFORMANCES Coffee temperature (50cc): First coffee: 75°C Subsequent coffees: 77°C Coffee temperature adjustment: +/- 2°C in position 1 or 3 Steam (125cc of water at 15°C, 1 min): 77 +/- 5°C Hot water (125cc): 85 +/- 5°C TOOLING AND EQUIPMENT REQUIRED FOR DISASSEMBLY & RE-ASSEMBLY - Tamper Torx TX - 10H magnetized screwdriver (cover) - Small Pozidriv No.1 screwdriver (control electronics protective cover) - Gripping pliers (high-pressure tube clamps).
- Page 3 High-pressure hoses: Unclip the clamp using a small flat-tip screwdriver (without removing it from the hose). Disconnect the hose and bend it to prevent the braid slipping onto the silicone tube (do not pull straight): Pump + Relief valve No particular instructions (to be confirmed with the new dampers). Tamping head Can be disassembled without removing the technical mount: be careful not to offset the tamping head mount when unscrewing.
- Page 4 Coffee nozzle Unclip the coffee pipe. Remove the nozzle clip by means of a rule or a screwdriver placed between the clip and the facing mount: Clip Technical mount: (provides access to the distributor and thermoblock/actuator sub-assembly) Unclip and remove the coffee inlet pipe and disconnect the hose on the tamping head. Remove the window.
- Page 5 Steam nozzle Remove the panel and the facing (2 screws + 4 clips). The nozzle is fixed in the facing mount by 3 clips (inaccessible from the front) and is unclipped by pulling on the nozzle. Lead No specific instructions. Removable tank The valve gasket is difficult to replace.
- Page 6 Pictographic model Consult the grinding time programmed in the coffee-maker: see grinder setting 0, 2, 4, 6 or 8 in the small display in line 22 of the 1st-level After- Sales (A-S) mode. GRINDER 1 (applied until 13/02/2006) Access to V16 setting mode (self-test procedure at the end of the assembly line) With cake tray, draw and tank removed Press "steam"...
- Page 7 Graphic model GRINDER 1 (applied to 14/02/2006) (V12 to V16 power boards and V6.8 to V8.6 Visu boards) Access to consultation / setting mode (self-test procedure at the end of the assembly line): With cake tray, draw and tank removed Press "prog"...
- Page 8 Pump Respect the direction of the clamp closing device on the pump outlet (risk that this might get in the way of the cake tray housing). Flowmeter Respect the connections: pump tube on the flowmeter lid tank tube on the flowmeter casing. Hoses must not be twisted or bent.
- Page 9 Distributor drain casing Be careful to centre the spring properly on the bushing at the bottom of the drain body (risk that it might catch on the notches). The drain plunger must be mounted in the body of the drain with food grade grease. Ensure that the drain body is firmly locked down on the distributor (tighten counterclockwise).
- Page 10 SERVICING AFTER CLOGGING-UP OF GROUND COFFEE Remove the cleaning inlet and the drawer. Scrape and suck up the ground coffee in and around the thermoblock tank using a vacuum cleaner with a small end piece (flexible hose with ~10 ext. diameter). Carry out a cleaning cycle: If the ejection ram works properly in the tank If it sticks, activate manually with a rod inserted through the base:...
- Page 11 PRE-LISTED FAULTS If the appliance is blocked because of a fault situation, identify the fault with the number displayed: Pictographic model display mode: • numbers from 1 to 9: fixed display • number > 9: display of a dash and successively all the numbers. Dash 1st number 2nd number...
- Page 12 Pump priming During the first seconds of pump start-up, Flowmeter fault (wires reversed, volume is zero connector offset, …) Drop of water on the flowmeter connector Pump fault Water flow blocked: hose caught, strainer missing (tank valve not actuated), tank badly connected Unpriming of pump in actuator down phase (remove tank)
- Page 13 TROUBLESHOOTING DIAGNOSIS & CORRECTIVE ACTIONS Diagnosing leakages may be facilitated by using cut-outs which can be helpful in supporting the tank and the cake tray. DIAGNOSIS CAUSE SERVICING PARTS TO BE CHANGED Does not heat Fuse blown Identify the cause which - Fuse led to the fuse blowing - Thermoblock (due to...
- Page 14 Vaporizes during Temperature setting too high Reduce temperature coffee function setting Coffe-maker used at altitude NTC not compliant or poor Replace thermoblock bonding Large volume of coffee Change in coffee or grinder (220cc) made with grinding to be adjusted to coarse which raises pressure grinding Any problem leading to a...
- Page 15 Ground coffee Grinder not compliant Measure the cake Grinder clogged up in the Too much ground coffee: thickness: chamber cakes >17mm 12 to 15 mm (11 to 13 mm Not enough ground coffee < if grinder new) Bad electronics grinding time Adjust electronics setting with regards to grinder specifications...
- Page 16 Impossible to set the Fault in the facing visu electronic Validate the date when the If the customer is date after board filter was first fitted. demanding, change the unplugging or cut-off Consequence: there will no visu board. in current longer be any warning Visu boards concerned by Display returns to...
- Page 17 Function (pictographic model) Unit 1 "Coffee" cycle number unit 2 "Steam" function number unit 3 Cleaning number unit 4 Scale removal number unit 5 Cleaning & Scale removal warning overrides: unit Total of number of cycles (coffee or steam) carried out after Cleaning or Scale removal light has come on No zero reset 6 Writing index of the last fault (0,1,2,3):...
- Page 18 Graphic model From "Product Information" (Prog + "Product Information" selection + Prog) access to A-S 1 mode via combination of Prog + Water keys. Function (graphic model) Unit 1 Total coffee number 2 Espresso number 3 Strong espresso number 4 Coffee number 5 Strong coffee number 6 Double espresso number 7 Strong double espresso number...
- Page 20 2nd level A-S mode This 2nd level after-sales mode enables control and testing of power items. Pictographic model (not available) Graphic model Access to A-S 2 via OK key + coffee grounds collector removed + mains connection. Access to Controls and Actions by menus and sub-menus in the display Exit from sub-menus via 0/1 key.
Need help?
Do you have a question about the XP7200 and is the answer not in the manual?
Questions and answers