Table of Contents
Advertisement
Advertisement
Table of Contents

Subscribe to Our Youtube Channel
Related Manuals for Landice R9


Summary of Contents for Landice R9
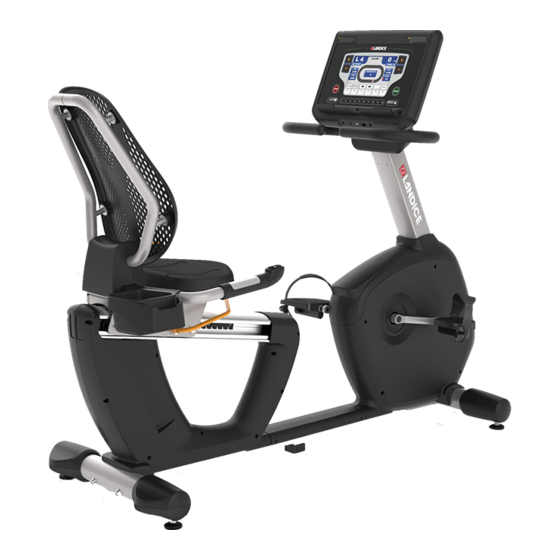
- Page 1 Upright Bike Recumbent Bike Owner’s Manual Part Number 50011...
- Page 2 IMPORTANT SAFETY INSTRUCTIONS WARNING: Failure to observe the following operating instructions can result in serious injury! Do not use this product without consulting your doctor first if you are suffering from any illness, condition or disability which affects your ability to exercise. Do not use this product without supervision present if you are suffering from any illness, condition or disability.
-
Page 3: Table Of Contents
Table of Contents Basics Introduction ............................... Upright Assembly Instructions .......................... Recumbent Assembly Instructions ........................Console Functions Console Functions and Features ..........................Manual Mode..............................Programs................................Built-In Programs............................... User Programs ..............................Heart Rate Heart Rate Monitoring ............................Heart Rate Monitors ............................Heart Rate Programs ............................Maintenance Maintenance .............................. -
Page 4: Introduction
WARRANTY INFORMATION Complete your registration at www.landice.com/support/product-registration. Landice backs your bike with a strong warranty. For the factory to respond to any problems you may have, we need your warranty information on file. Please register your bike within 30 days of purchase. -
Page 5: Upright Assembly Instructions
Upright Assembly Instructions STEP 1: STEP 3: STEP 4: STEP 2: Carefully make the Lower the accessory rack Push the harness Secure the upright tower harness connection at the into place and secure with connection into the upright with 4 Allen screws and 4 base of the upright tower 2 Philips head screws. -
Page 6: Recumbent Assembly Instructions
Recumbent Assembly Instructions STEP 1: STEP 2: STEP 3: STEP 4: Carefully make the Push the harness Place tower base cover in Use a 5/8” socket wrench harness connection at the connection into the tower position. to secure 4 bolts and 4 lock base of the recumbent to avoid any pinching tower to the frame. -
Page 7: Console Functions And Features
Console Functions and Features Heart Rate Display Zone Meter Mode Buttons DOT MATRIX DISPLAY Alphanumeric Display Speed Time Button Button VIEWABLE STATISTICS One of the main displays of the Console is the alphanumeric (AN) display. Aside from displaying program instructions, the AN display shows 5 current statistics at a time, which can be changed using the Time and Speed buttons and the Display Shift button. - Page 8 Console Functions and Features DOT MATRIX Another main display is the 8 x 16 Dot Matrix. In Manual Mode the Dot Matrix has 2 displays: Resistance Table and Track. You can toggle between views by pressing ENTER. RESISTANCE TABLE The Resistance Table is a display of your effort level history per minute. At start up, only the bottom left LED will light representing Effort Level 1 and 1st minute.
- Page 9 Console Functions and Features HEART RATE DISPLAY Your heart rate is visible, at any time, by holding the Contact Heart Rate Grips. Shortly after you make contact with the grips your current pulse will be displayed in the Heart Rate display field to the right of the Dot Matrix display.
- Page 10 Console Functions and Features FAN CONTROL This product comes equipped with a personal fan located at the top of the console (fan is not shown in the image on page 4). The fan has one button control (located below the Display Shift button on the console) with the image of a four-bladed fan.
-
Page 11: Manual Mode
Manual Mode MANUAL MODE Upon start up, the bike defaults to Manual Mode and the LED will be lit next to the MANUAL button on the upper left side of the console. In Manual Mode you can change the resistance of the pedals and have full manual control. You can switch the Dot Matrix between the Resistance Table and Track screen by pressing ENTER. -
Page 12: Programs
Programs PROGRAM SET-UP Program Set-Up will prompt you with questions which will affect the program. You can use the center “+ / -“ and ENTER keys to adjust and confirm all requested values during set-up. Once Program Set-Up is complete press ENTER to begin your program following a 3-2-1 countdown on the Dot Matrix display. -
Page 13: Built-In Programs
Built-In Programs FAT BURN This is a time and resistance based program where your time can vary between 5 - 99 minutes and your maximum effort level can vary between 5 and 20. The lowest value you can set for your maximum effort level is 5. -
Page 14: User Programs
User Programs USER PROGRAMS User Programs are 16-segment programs that are time-based, user-defined and fully-customizable. You will enter your time from 5 - 99 minutes. You will be prompted to select your effort level for all 16 segments. Use the resistance arrows to adjust effort levels. -
Page 15: Heart Rate Monitoring
Heart Rate Monitoring In this section we will look at a few basic concepts of Heart Rate Monitoring so you can better understand how it works and how to maximize its use to allow you to reach the fitness level you desire. What is Exercise Intensity? Exercise intensity is simply a measure of how hard you are working at a given time during exercise. -
Page 16: Heart Rate Monitors
(breasts) as possible. Tighten the strap so the belt is as tight as possible without being uncomfortable. 2. A tube of Landice Cardio Gel was shipped with the Wireless Chest Strap. Apply Cardio Gel to the electrodes by pulling the belt away from your chest and applying a small dab to each electrode. This will ensure a strong electrical contact between the transmitter and your chest. -
Page 17: Heart Rate Programs
Heart Rate Programs HEART RATE CONTROL (HRC) PROGRAMS HRC programs are time based programs where time can vary between 5 - 99 minutes. You can select your target heart rate and modify by using the center “+ / -” buttons. HRC programs require the use of the Contact Heart Rate Grips or the Wireless Heart Rate Chest Strap (optional). -
Page 18: Maintenance
Maintenance MAINTENANCE 1) It is recommended that you vacuum around and underneath your bike on a monthly basis. Your bike will last longer and look better if you wipe the sweat off the unit after each workout. 2) Be sure to check the pedals before each workout and tighten them if necessary. The pedals can become loose after workouts and should be observed regularly to avoid injury. - Page 19 Welcome to Landice Landice, Inc. TREADMILLS | BIKES | ELLIPTICALS, engineered in the USA since 1967...
Need help?
Do you have a question about the R9 and is the answer not in the manual?
Questions and answers