Advertisement
ATTACH YOUR RECEIPT HERE
Serial Number
Questions, problems, missing parts? Before returning to your retailer, call our customer
service department at 1-866-439-9800, 8 a.m. - 8 p.m., EST, Monday - Friday.
XXXXXX
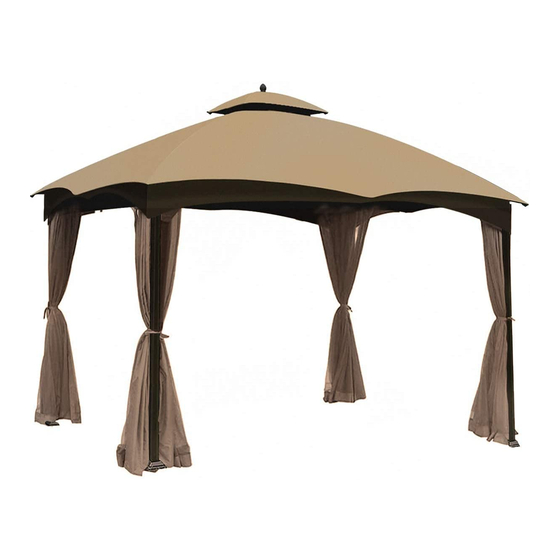
12 FT x 10 FT GAZEBO
Purchase Date
1
ITEM #0355094
MODEL #GF-12S004B
Lowes.com/allenandroth
13
25
Advertisement
Table of Contents

Related Manuals for Allen + Roth GF-12S004B


Summary of Contents for Allen + Roth GF-12S004B
- Page 1 ITEM #0355094 12 FT x 10 FT GAZEBO MODEL #GF-12S004B ATTACH YOUR RECEIPT HERE Serial Number Purchase Date Questions, problems, missing parts? Before returning to your retailer, call our customer service department at 1-866-439-9800, 8 a.m. - 8 p.m., EST, Monday - Friday.
-
Page 2: Table Of Contents
TABLE OF CONTENTS Package Contents ..........................3 Hardware Contents ..........................4 Safety Information ..........................5 Preparation ............................5 Assembly Instructions ........................6 Operating Instructions ........................12 Care and Maintenance ........................12 Warranty ............................12 Replacement Parts List ........................12 Lowes.com/allenandroth... -
Page 3: Package Contents
PACKAGE CONTENTS PART PART DESCRIPTION DESCRIPTION QUANTITY QUANTITY Supporting Post Canopy Roof Pole 3 Post Bottom Plate Canopy Roof Pole 4 Post Plate Cover Finial Left Crossbar 1 Fabric Cover Right Crossbar 1 Air Vent Cover Left Crossbar 2 Stake Right Crossbar 2 Side Wall Roof Connector... -
Page 4: Hardware Contents
HARDWARE CONTENTS (shown actual size) Bolt Nut M6 x 15 Qty. 16 Short Bolt Qty. 8 M6 x 35 Medium Bolt M6 x 50 Qty. 24 Long Bolt Wrench Qty. 1 Qty. 8 (Not show actual size) Hex Wrench Qty. 1 Lowes.com/allenandroth... -
Page 5: Safety Information
SAFETY INFORMATION Please read and understand this entire manual before attempting to assemble, operate or install the product. Two to four people are needed for assembly. Load of the hook on the roof: 50 lbs. (max) WARNING KEEP ALL FLAME AND HEAT SOURCES AWAY FROM TENT FABRIC. This tent meets the flammability requirements of CPAI-84. -
Page 6: Assembly Instructions
ASSEMBLY INSTRUCTIONS 1. Insert post plate cover (C) into supporting post (A), then fit post bottom plate (B) underneath supporting post (A). Insert short bolt (AA) through supporting post (A) and secure the post bottom plate (B) using hex wrench (EE). Slide down post plate cover (C) into place as shown. - Page 7 ASSEMBLY INSTRUCTIONS 3. Insert right crossbar 2 (G) into left crossbar 2 (F). Attach using, in order, long bolts (BB) on both sides of connection and bolt nuts (DD). Tighten using hex wrench (EE) and wrench (FF). Hardware Used Long Bolt Bolt Nut Hex Wrench Wrench...
- Page 8 ASSEMBLY INSTRUCTIONS 5. Place supporting posts as depicted in the illustration. Insert medium bolt (CC) through supporting post (A). Secure onto crossbars using hex wrench (EE). Hardware Used Medium Bolt Hex wrench 6. Insert canopy roof pole 1 (I) into roof connector (H).
- Page 9 ASSEMBLY INSTRUCTIONS 7. Insert canopy roof pole (L, K) into roof connector (H), then secure canopy roof pole (L, K) onto crossbar by using medium bolts (CC), bolts nuts (DD) and hex wrench (EE). Hardware Used Medium Bolt Bolt Nut Hex Wrench 8.
- Page 10 ASSEMBLY INSTRUCTIONS 9. Place fabric cover (N) on top but do not tighten. Place air vent cover (O) on top, then secure finial (M). Tighten fabric cover (N) and hang the mosquito net (R) and side wall (Q). If you notice there is a lack of length or material while assembling the mosquito net and side wall, the 10-foot side and 12-foot side may have been reversed.
- Page 11 CANOPY REMOVAL INSTRUCTIONS Fig. 1: Detach the fabric cover (N) from the canopy roof pole on the corner of the top. Fig. 2: Open the hook and loop connectors on the center of the side. Fig. 3: Detach the air vent (O) from the canopy roof pole (I).
-
Page 12: Operating Instructions
For replacement parts, call our customer service department at 1-866-439-9800, 8 a.m. - 8 p.m., EST, Monday - Friday. PART DESCRIPTION PART # Short Bolt Long Bolt Medium Bolt Bolt Nut Hex Wrench Wrench Printed in China allen + roth ® is a registered trademark of LF, LLC. All rights reserved. Lowes.com/allenandroth...
Need help?
Do you have a question about the GF-12S004B and is the answer not in the manual?
Questions and answers
I need to replace the Entire Top Frame, Snow fall broke it
To replace the entire top frame for the Allen + Roth GF-12S004B due to snowfall damage, follow these steps:
1. Disassemble the Existing Frame:
- Remove the canopy to prevent further damage.
- Unscrew and detach the damaged roof poles and connectors using a hex wrench (EE) and wrench (FF).
2. Install the New Frame:
- Place and secure the crossbar sets as shown in the assembly instructions using bolts (BB, CC) and nuts (DD).
- Attach the supporting posts (A) and secure them with medium bolts (CC).
3. Attach the Roof Components:
- Insert canopy roof pole 1 (I) into roof connector (H).
- Attach canopy roof pole 2 (J) to pole 1 (I) and secure both to the supporting posts (A) using medium bolts (CC) and bolt nuts (DD).
4. Final Adjustments:
- Ensure all bolts and connections are tightened properly.
- Reinstall the canopy and check for a secure fit.
For durability, avoid leaving the structure outside during heavy snow or high winds.
This answer is automatically generated