Table of Contents
Advertisement
Quick Links
Advertisement
Table of Contents

Related Manuals for Yaesu ZCUT-3EX


Summary of Contents for Yaesu ZCUT-3EX
- Page 1 INSTRUCTION MANUAL...
-
Page 2: Read Before Use
Read Before Use Thank you very much for buying our tape dispenser ZCUT-3EX. Please read this Instruction Manual carefully. For your safety, please always keep this Instruction Manual for reference and retraining. Contents Safety Instructions P 3-5 Definition of Warning and Caution Symbols... -
Page 3: Safety Instructions
Safety Instructions The safety guidelines in this Instruction Manual must be observed in order to prevent damage to the machine or injury to the operator or other persons. The safety guidelines presciribed "Warning " and "Caution" describe possible injury or damage that may be suffered from operating or maintaining the machine in a manner other than as described in this Instruction Manual. - Page 4 WARNING Do not plug in, unplug the cord, or operate the machine with wet hands. Failure to observe this may result in injury due to electric shock. Never insert your finger, or any other body part, or any foreign object into the machine.
- Page 5 CAUTION Do not insert any foreign material from the tape outlet. This can cause failure of the machine. An operator’s presence is required whenever the machine is in operation. Turn the machine off and unplug the cord when the operator is not present. Failure to observe this can result in injury.
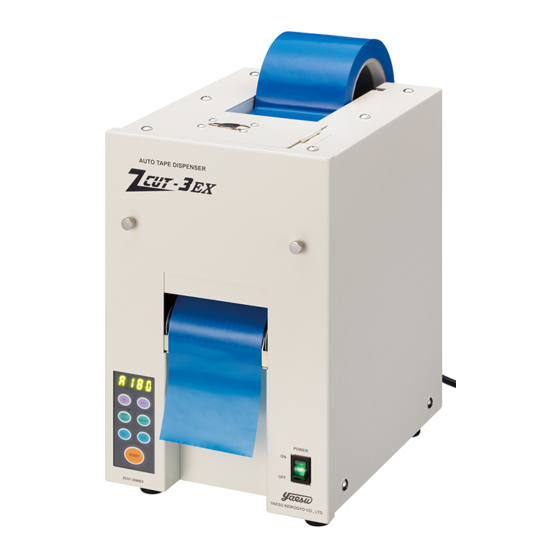
- Page 6 Identification TAPE FEED ROLLER BOBBIN SILICON SPONGE ROLLER BLADE HOLDER SAFETY COVER WARNING. HAZARDOUS SAFETY COVER MOVING PARTS. KEEP HOOK FINGERS AND OTHER BODY PARTS AWAY. BLADE CONTROL PANEL FRONT PANEL START SWITCH AC CORD INLET SAFETY SWITCH POWER SWITCH SPARE FUSE IDENTIFICATION OF CONTROL PANEL SCREW...
-
Page 7: Socket-Outlet
Loa d i n g t h e Ta p e ■The SOCKET-OUTLET shall be installed near the eq uipment and shall be AC CORD easily accessible. INLET ■Set the machine only in the upright position. ■Plug in AC CORD to the AC CORD INLET. ■Make sure the POWER SWITCH is off then plug into an appropriate SOCKET-OUTLET. -
Page 8: Setting The Mode
Setting the Tape Length ■Make sure that cutting length is displayed. INDICATE CUTTING LENGTH ・ The cutting length will be displayed as A, b, C, d, E, F with 3 digits, or 4 digit number. ・ If cutting length is not displayed, press SELECT BUTTON more than few seconds to display cutting length. - Page 9 P-MODE (Preset Mode) P-MODE The machine is able to be programmed. INDICATE CUTTING LENGTH A signal will be shown based on your selected quantity of pieces and it will all cut out. (Maximum 999 pieces.) SELECT A buzzer will has sound when the program is finished. You can use the mode either MANUAL or AUTO.
-
Page 10: Memo Function
Memo function Present cutting quantity can be memorized. ■Press AUTO/MANUAL BUTTON more than few seconds to display present DISPLAY PRESENT CUTTING QUANTITY ( PRESS MORE THAN FEW SECONDS ) cutting quantity. ■Press +BUTTON. ・ Present cutting quantity will be forwarded and memorized. ・... -
Page 11: Error Messages
Error Messages The buzzer will sound and the message will flash on the display. E-02 BLADE IS OUT OF POSITION POWER SWITCH is off A signal shows that the blade is not installed correctly or the tape is jammed. ・ Turn the POWER SWITCH off. Open the FRONT PANEL and ・... -
Page 12: Warranty
Warranty We warrant to the original purchaser of the product that will be free form defects in material or workmanship for as long as the original purchaser owns the product, when given normal wear and proper usage. The limited warranty for the machine shall be for a period of 180 days form the date of purchase.
Need help?
Do you have a question about the ZCUT-3EX and is the answer not in the manual?
Questions and answers