LG LW1216HR Owner's Manual
Hide thumbs
Also See for LW1216HR:
- Owner's manual (48 pages) ,
- Service manual (29 pages) ,
- Owner's manual (48 pages)
Table of Contents
Advertisement
Available languages
Available languages
OWNER'S MANUAL
AIR CONDITIONER
Read this owner's manual thoroughly before operating the
appliance and keep it handy for reference at all times.
TYPE : WINDOW
EN ENGLISH
SP ESPAÑOL
LW1216HR
LW1221HRSM
*MFL70559722*
MFL70559722
Rev.01_082820
Copyright © 2020 LG Electronics Inc. All Rights Reserved.
www.lg.com
Advertisement
Chapters
Table of Contents

Related Manuals for LG LW1216HR


Summary of Contents for LG LW1216HR
- Page 1 Read this owner’s manual thoroughly before operating the appliance and keep it handy for reference at all times. TYPE : WINDOW EN ENGLISH SP ESPAÑOL LW1216HR LW1221HRSM *MFL70559722* www.lg.com MFL70559722 Copyright © 2020 LG Electronics Inc. All Rights Reserved. Rev.01_082820...
-
Page 2: Table Of Contents
TABLE OF CONTENTS TABLE OF CONTENTS 3 SAFETY INSTRUCTIONS 18 SMART FUNCTIONS IMPORTANT SAFETY INSTRUCTIONS LG ThinQ Application 7 PRODUCT OVERVIEW 21 MAINTENANCE Exterior Parts Air Filter Interior Parts 22 TROUBLESHOOTING 8 INSTALLATION Before Calling for Service Electrical Data Normal Sounds You May Hear... -
Page 3: Safety Instructions
SAFETY INSTRUCTIONS 3 EN SAFETY INSTRUCTIONS READ ALL INSTRUCTIONS BEFORE USE Your safety and the safety of others are very important. We have provided many important safety messages in this manual and on your appliance. Always read and follow all safety messages. This is the safety alert symbol. - Page 4 ● If you detect a strange sound, a chemical or burning smell, or smoke coming from the appliance, unplug it immediately, and contact an LG Electronics Customer Information Center. ● Never unplug the appliance by pulling on the power cord. Always grip the plug firmly and pull straight out from the outlet.
- Page 5 ● If water enters the product, turn off the power at the main circuit, then unplug the product and call for service. ● If the product has been submerged, contact an LG Electronics Customer Information Center for instructions before resuming use.
- Page 6 SAFETY INSTRUCTIONS CAUTION To reduce the risk of minor or moderate injury to persons, malfunction, or damage to the product or property when using this product, follow basic precautions, including the following: INSTALLATION ● Take care when installing the product that exhaust or condensation does not damage nearby property.
-
Page 7: Product Overview
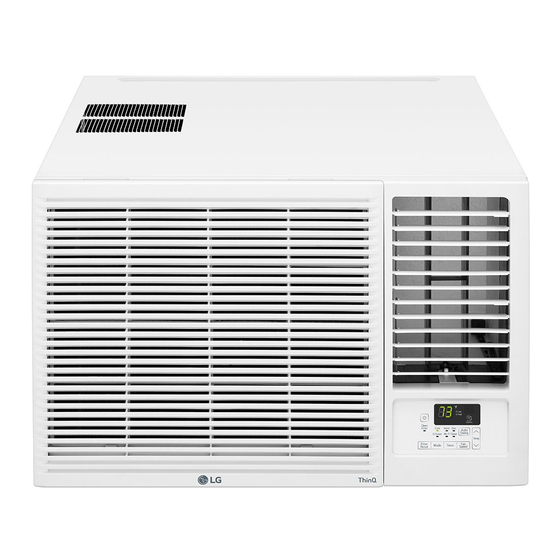
PRODUCT OVERVIEW 7 EN PRODUCT OVERVIEW Exterior Parts Interior Parts Control Panel Evaporator Remote Control Air Guide Air Filter Brace Compressor Vertical Air Deflector (Horizontal Louver) Horizontal Air Deflector (Vertical Louver) Condenser Front Grille Base Pan Air Outlet Power Cord Cabinet Electric Heater... -
Page 8: Installation
INSTALLATION INSTALLATION WARNING Electrical Data ● This appliance should be installed in Power cord may include a current interrupter accordance with the National Electrical device. TEST and RESET buttons are provided Code. on the plug case. The device should be tested on ●... -
Page 9: Parts Included
INSTALLATION Parts Included (Appearance May Vary) Drain Pipe Foam-PE (2) (Adhesive backed) Foam strip Right curtain panel Lower panel guide (2) Window locking bracket Left curtain panel Sill support (2) Type 'A' Screws Type 'B' Screws Type 'C' Screws Bolts (13) Lock Nuts Tools Needed... -
Page 10: How To Install The Unit
INSTALLATION How to Install the Unit NOTE ● All supporting parts should be secured to firm To prevent vibration and noise, make sure wood, masonry, vinyl, fiberglass, or metal. the unit is installed securely and firmly. ● This product is a window air conditioner. Install the unit out of direct sunlight. -
Page 11: Preparation Of Cabinet
INSTALLATION 11 EN Insert the hooks on the lower panel guides Preparation of Cabinet into the slots on the bottom of the cabinet. Make sure that the flanges on the lower Remove 4 screws which fasten the cabinet panel guides will face toward the inside of at both sides and at the back. -
Page 12: Cabinet Installation
INSTALLATION Cabinet Installation Loosely assemble each sill support. Inside Sill Sill Support Center Line Bolt Outside Sill NOTE ● If the distance to the outer window sill is not that deep, you may not need the bolt and nut. Open the window. Mark a line on the center of the inside sill. -
Page 13: Unit Installation
INSTALLATION 13 EN Mount the cabinet to the window sill using CAUTION 3 type B screws in the holes on the front angle. ● The unit is heavy. Use an assistant to help lift the unit and set it in place. Lifting and maneuvering the unit by yourself could result in injury. - Page 14 INSTALLATION Before installing the front grille, fold out the vent control lever located above the control panel, as shown below. Attach the front grille to the cabinet by inserting the tabs on the grille into the slots on the front top of the cabinet. Push the grille in until it snaps into place.
-
Page 15: Operation
OPERATION 15 EN OPERATION Control Panel and Remote Control Remote Control NOTE ● The feature may be changed according to the type of model. Power Energy Saver - In this mode the compressor and fan turn off when the set Press to turn the air conditioner ON or OFF. -
Page 16: Wireless Remote Control
OPERATION Wireless Remote Control Filter Reset The Clean Filter LED lights up to notify you Inserting Battery Filter Reset on the control panel to turn off the Clean Filter light. Push out the cover on the back of the remote control with your thumb. NOTE ●... -
Page 17: Ventilation
OPERATION 17 EN Ventilation Additional Features Push the ventilation lever in to the closed position Slinger Fan to maintain the best cooling performance. Pull the ventilation lever out to open the vent and This air conditioner is equipped with a slinger draw fresh air into the room. -
Page 18: Smart Functions
Smart Diagnosis manual. If you experience a problem while using the • LG ThinQ is not responsible for any network appliance,this smart diagnosis feature will help connection problems or any faults, you diagnose the problem. - Page 19 Google Play Store or Apple App Store on a equipped appliance, it can transmit troubleshooting smartphone. Follow instructions to download data to a smartphone using the LG ThinQ and install the application. application. Launch the LG ThinQ application and select ●...
- Page 20 SMART FUNCTIONS FCC Notice FCC RF Radiation Exposure Statement This following notice cover the transmitter This equipment complies with FCC radiation module contained in this product. exposure limits set forth for an uncontrolled This equipment has been tested and found environment.
-
Page 21: Maintenance
MAINTENANCE 21 EN MAINTENANCE Cleaning the Air Conditioner ● Wipe the front grille and inlet grille with a cloth dampened in a mild detergent solution. WARNING ● Wash the cabinet with mild soap or detergent and lukewarm water, then polish using liquid Before cleaning or performing maintenance, appliance wax. -
Page 22: Troubleshooting
TROUBLESHOOTING TROUBLESHOOTING Before Calling for Service The appliance is equipped with an automatic error-monitoring system to detect and diagnose problems at an early stage. If the appliance does not function properly or does not function at all, check the following before you call for service. Normal Sounds You May Hear High Pitched Chatter Sound of Rushing Air... - Page 23 TROUBLESHOOTING 23 EN Problem Possible Cause Solutions Make sure the air conditioner plug The air conditioner is unplugged. is pushed completely into the outlet. Check the house fuse/circuit The fuse is blown/circuit breaker breaker box and replace the fuse or is tripped.
- Page 24 Set temperature too low. Increase set temperature. Air conditioner is turned off. Turn the air conditioner on. Can't connect the LG ThinQ App. to the air conditioner. Wireless router is turned off. Turn the router on. Move the router closer to the air...
- Page 25 TROUBLESHOOTING 25 EN Wi-Fi Problem Possible Cause Solutions Delete your home Wi-Fi network The password for the Wi-Fi and begin the registration process network was entered incorrectly. again. Turn off the Mobile data on your Mobile data for your smartphone smartphone before registering the is turned on.
-
Page 26: Warranty
If during in-home service repair cannot be completed, it may be necessary to remove, repair and return the product. If in-home service is unavailable, LG may elect, at our option, to provide for transportation of our choice to and from a LG authorized service center. - Page 27 HOW TO OBTAIN WARRANTY SERVICE & ADDITIONAL INFORMATION: Call 1-800-243-0000 or visit our website at www.lg.com. Mail to: LG Customer Information Center (ATTN: CIC) 201 James Record Road, Huntsville, AL 35824...
- Page 28 Notice of Dispute. In the event you intend to commence an arbitration proceeding, you must first notify LG in writing at least 30 days in advance of initiating the arbitration by sending a letter to LG at LG Electronics, USA, Inc. Attn: Legal Department- Arbitration 111 Sylvan Avenue, Englewood Cliffs, NJ 07632.
- Page 29 You may opt out of this dispute resolution procedure. If you opt out, neither you nor LG can require the other to participate in an arbitration proceeding. To opt out, you must send notice to LG no later than 30 calendar days from the date of the first consumer purchaser’s purchase of the product by either: (i) sending an e-mail to optout@lge.com, with the subject line: “Arbitration Opt Out”...
- Page 30 Memo...
- Page 31 ACONDICIONADO Lea detenidamente el manual del propietario antes de poner el electrodoméstico en funcionamiento y consérvelo a mano en todo momento para su referencia. TIPO : VENTANA LW1216HR LW1221HRSM www.lg.com Copyright © 2020 LG Electronics Inc. Todos los Derechos Reservados.
- Page 32 TABLA DE CONTENIDOS TABLA DE CONTENIDOS INSTRUCCIONES DE 18 FUNCIONES INTELIGENTES SEGURIDAD Aplicación LG ThinQ INSTRUCCIONES IMPORTANTES DE SEGURIDAD 21 MANTENIMIENTO DESCRIPCIÓN GENERAL Filtro de aire DEL PRODUCTO 22 SOLUCIÓN DE PROBLEMAS Piezas exteriores Piezas interiores 22 Antes de llamar al servicio técnico 22 Sonidos Normales Que Puede Escuchar INSTALACIÓN...
-
Page 33: Instrucciones De Seguridad
INSTRUCCIONES DE SEGURIDAD INSTRUCCIONES DE SEGURIDAD LEA TODAS LAS INSTRUCCIONES ANTES DE UTILIZAR Su seguridad y la de los demás son muy importantes. Tanto en este manual como en el equipo, hemos proporcionado muchos mensajes de seguridad importantes. Siempre debe leer y respetar todos los mensajes de seguridad. Este es el símbolo de alerta de seguridad. - Page 34 ● Si detecta un sonido extraño, olor a quemado o a químico, o humo provenientes del artefacto, desconéctelo de inmediato y contáctese con un Centro de Información al Cliente de LG Electronics. ● Nunca desconecte el artefacto tirando del cable de alimentación. Sujete siempre con firmeza el enchufe y tire derecho para extraerlo del tomacorriente.
- Page 35 ● Si el producto se ha mojado accidentalmente, comuníquese con el Centro de Información al Cliente de LG Electronics para que le den instrucciones antes de reanudar el uso. ● Desenchufe el producto cuando vaya a estar largos períodos sin utilizarse.
- Page 36 INSTRUCCIONES DE SEGURIDAD PRECAUCIÓN Para reducir el riesgo de lesiones leves o moderadas a personas, el mal funcionamiento o daño al producto o propiedad cuando use este producto, siga las precauciones básicas, incluido lo siguiente: INSTALACIÓN ● Al instalar el producto, tenga cuidado de que los gases de escape o la condensación no produzcan daños materiales a su alrededor.
-
Page 37: Descripción General Del Producto
7 SP DESCRIPCIÓN GENERAL DEL PRODUCTO DESCRIPCIÓN GENERAL DEL PRODUCTO Piezas exteriores Piezas interiores Panel de control Evaporador Mando a distancia Guía de aire Filtro de aire Abrazadera Compresor (Lamas horizontales) Condensador (Lamas verticales) Bandeja base Rejilla delantera Cable de alimentación Salida de aire Calentador eléctrico Carcasa... -
Page 38: Instalación
INSTALACIÓN INSTALACIÓN ADVERTENCIA Datos eléctricos ● Este aparato debe instalarse de acuerdo con el El cable de alimentación puede incluir un interruptor estándar estadounidense NEC. de corriente. En la carcasa del enchufe hay un botón ● El uso de alargadores eléctricos puede de TEST (prueba) y otro de RESET (restablecer). -
Page 39: Partes Incluidas
INSTALACIÓN 9 SP Partes incluidas (Apariencia puede variar) Caño de drenaje Espuma de PE (2) (cara adhesiva) Tira de espuma Panel de cortina (no adhesiva) derecho Guía de los panels inferiore (2) Soporte para la ventana Panel de cortina izquierda Soporte de umbral (2) Tornillos de tipo “A”... -
Page 40: 10 Cómo Instalar La Unidad
INSTALACIÓN Cómo instalar la unidad NOTA ● Todos los soportes deben fijarse a mandera, obra Para prevenir la vibración y el ruido, asegúrese que de fábrica, vinilo, fibra de vidrio o metal firmes. la unidad esté instalada con seguridad y firmeza. ●... -
Page 41: Preparación De La Carcasa
INSTALACIÓN 11 SP Preparación de la carcasa Inserte los ganchos en las guías del panel inferior en las ranuras en la parte inferior del gabinete. Asegúrese de que las bridas de las Quite los 4 tornillos que sujetan la carcasa en guías del panel inferior estén orientadas hacia ambos lados y en la parte posterior. -
Page 42: Instalación De La Carcasa
INSTALACIÓN Instalación de la carcasa Coloque los soportes del umbral holgadamente. Umbral interno Linea central Soporte del umbral Tuerco Tornillo Umbral externo NOTA ● Si la distancia hacia el umbral externo de la ventana no es tan profunda, quizá no Abra la ventana. -
Page 43: Instalación De La Unidad
INSTALACIÓN 13 SP Monte el gabinete en el alféizar de la ventana PRECAUCIÓN con 3 tornillos tipo B en los agujeros en el ángulo frontal. ● La unidad es pesada. Pida ayuda a otra persona para levantarla y colocarla en su sitio. Si levanta y mueve la unidad sin ayuda, puede Carril de la lesionarse. - Page 44 INSTALACIÓN Antes de instalar la rejilla frontal, despliegue la palanca de control de ventilación ubicada en la parte superior del panel de control como se muestra a continuación. Fije la rejilla frontal al gabinete insertando las pestañas de la rejilla en las ranuras en la parte superior delantera del gabinete.
-
Page 45: Funcionamiento
FUNCIONAMIENTO 15 SP FUNCIONAMIENTO Panel de control y control remoto Remote Control NOTA ● La función puede cambiar según el tipo de modelo. Energy Saver (Ahorro de energía) - en Power ( ) (Alimentación) este modo, el compresor y el ventilador se Pulse este botón para encender o apagar el desactivan cuando se alcanza la temperatura acondicionador de aire. -
Page 46: Control Remoto Inalámbrico
FUNCIONAMIENTO Control remoto inalámbrico Filter Reset (Reinicio del Filtro) Inserción de las batería pulse Reinicio del Filtro al mismo tiempo en el panel de control para apagar la luz Empuje hacia afuere con su pulgar la cubierta Clean Filter (limpiar filtro). en la parte posterior del control remoto. -
Page 47: Ventilación
FUNCIONAMIENTO 17 SP Ventilación Funciones adicionales Empuje la palanca de ventilación hacia la posición Ventilador Slinger de cierre para mantener el mejor rendimiento del enfriamiento. Tire de la palanca de ventilación para Este acondicionador de aire está equipado con un ventilador Slinger. -
Page 48: Funciones Inteligentes
Aplicación LG ThinQ Esta característica solo está disponible en el modelo o ThinQ. con el logo La aplicación LG ThinQ le permite comunicarse con el electrodoméstico usando un teléfono inteligente. NOTA • Para verificar la conexión Wi-Fi, revise que el ícono Funciones de la aplicación LG ThinQ... - Page 49 Uso de LG ThinQ para diagnosticar ThinQ problemas Busque la aplicación LG ThinQ en la tienda Google Si experimenta un problema con su electrodoméstico Play o App Store desde su teléfono inteligente. Siga las equipado con Wi-Fi, este puede transmitir datos sobre instrucciones para descargar e instalar la aplicación.
- Page 50 FUNCIONES INTELIGENTES Aviso de la FCC Declaración sobre exposición a la radiación de RF de la FCC El siguiente aviso cubre el módulo transmisor Este equipo cumple con los límites de exposición a contenido en este producto. la radiación de la FCC establecidos para entornos Este equipo fue probado y se determinó...
-
Page 51: Mantenimiento
MANTENIMIENTO 21 SP MANTENIMIENTO Limpieza del acondicionador de aire ● Limpie la rejilla delantera y la rejilla de entrada ADVERTENCIA con un paño humedecido en una solución de detergente suave. ● Lave la carcasa con jabón o detergente suaves y Antes de limpiar o realizar el mantenimiento, agua tibia y, a continuación, púlala utilizando cera desconecte el suministro de electricidad y espere... -
Page 52: Solución De Problemas
SOLUCIÓN DE PROBLEMAS SOLUCIÓN DE PROBLEMAS Antes de llamar al servicio técnico El artefacto está equipado con un sistema automático de monitoreo de errores para detectar y diagnosticar problemas en una etapa temprana. Si el artefacto no funciona adecuadamente o si no funciona en absoluto, Sonidos Normales Que Puede Escuchar Sonidos agudos s agudos durante el ciclo de... - Page 53 SOLUCIÓN DE PROBLEMAS 23 SP Problema Causa posible Soluciones Asegúrese de que el enchufe El aire acondicionado está del acondicionador de aire esté desenchufado. completamente introducido en la toma. Revise la caja de fusibles o de El fusible se ha fundido o el disyuntores de la casa y sustituya el disyuntor se ha activado.
- Page 54 Aumente la temperatura establecida. demasiado fría. demasiado baja. El acondicionador de aire está No puedo conectar Encienda el aire acondicionado. apagado. la aplicación LG ThinQ al acondicionador de El router inalámbrico está apagado. Encienda el router. aire. Acerque el router al acondicionador de El router Wi-Fi está...
- Page 55 SOLUCIÓN DE PROBLEMAS 25 SP Wi-Fi Problema Causa posible Soluciones La contraseña de la red Wi-Fi fue Borre su red Wi-Fi doméstica e inicie ingresada incorrectamente. el proceso de registro de nuevo. Desactive los Datos Móviles en su Los Datos Móviles para su teléfono teléfono inteligente previo a registrar inteligente están activados.
-
Page 56: Garantía
LG y se utiliza en los Estados Unidos ("EE UU") o en cualquiera de sus territorios. - Page 57 LG en el plazo de siete días naturales (7) a partir de la fecha de entrega. ● Daños o artículos faltantes a productos reacondicionados, comprados con descuento, con la caja abierta o que hayan estado en exhibición.
- Page 58 Aviso de disputa. En caso de que usted desee iniciar un procedimiento de arbitraje, primero debe notificar a LG por escrito al menos 30 días antes de iniciar el arbitraje enviando una carta a LG a LG Electronics, USA, Inc. Atención: Legal Department- Arbitration 111 Sylvan Avenue, Englewood Cliffs, NJ 07632.
- Page 59 LG pueden solicitar al otro que participe en un procedimiento de arbitraje. Para excluirse usted debe enviar una notificación a LG, en un lapso de hasta 30 días continuos, contados a partir de la fecha de la primera compra del consumidor del producto, ya sea por: (i) el envío de un correo electrónico a optout@lge.com con el siguiente Asunto: "Exclusión del arbitraje"...
- Page 60 LG Customer Information Center 1-800-243-0000 Register your product Online! LG Electronics Inc. www.lg.com 111 Sylvan Avenue, Englewood Cliffs, NJ 07632.
Need help?
Do you have a question about the LW1216HR and is the answer not in the manual?
Questions and answers
The unit cools well but is making an awful racket. I removed it from the cabinet and found that the exhaust fan blade was totally loose. If there is a retaining lock screw/set screw it is gone. I cannot get in to see if that is the case. I do not see a way to remove the fan blade. \On another issue, the heat strip does not work. I am wondering if there is a fuse in the system that could be tripped.