LG LW1217ERSM Owner's Manual
Hide thumbs
Also See for LW1217ERSM:
- Owner's manual (64 pages) ,
- Owner's manual (64 pages) ,
- Owner's manual (31 pages)

Related Manuals for LG LW1217ERSM


Summary of Contents for LG LW1217ERSM
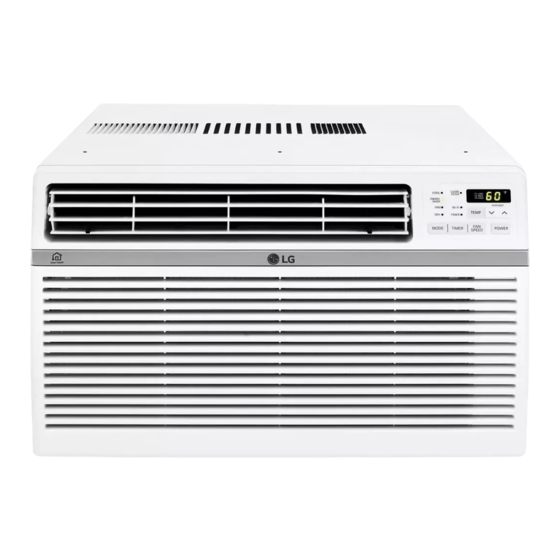
- Page 1 OWNER’S MANUAL CONDITIONER Please read this manual carefully before operating your set and retain it for future reference. WINDOW TYPE : MODELS LW1017ERSM LW1217ERSM www.lg.com P/NO : MFL69365407...
- Page 2 Safety Precautions Before Operation Introduction Safety Installation Operating Instructions Maintenance and Service...
- Page 3 Do not store flammables like gasoline benzene thinner etc. near the air conditioner.
- Page 4 Unplug the unit when not No correlation between fan using it for a long time. usage and oxygen depletion.
- Page 5 Never touch the metal parts Hold the plug by the head When gas leaks, open the of the unit when removing window for ventilation before (not the cable) when taking the filter. it out. operating the unit. For inner cleaning, contact an Authorized Service Center or a dealer. Do not use harsh detergent that causes corrosion or damage on the unit.
- Page 6 Do not use this appliance for special purposes such as cooling pets foods, precision , machinery, or objects of art Instead of running air conditioning constantly ,open a window for fresh air occasionally. You will feel better. If the liquid from the battery gets onto your skin If you eat the liquid from the battery,brush or clothers,...
- Page 7 2. No correlation between fan usage and oxygen depletion.
-
Page 9: Use Of Extension Cords
RESET TEST should USE OF EXTENSION CORDS RISK OF FIRE could cause serious injury or death DO NOT use an extension cord with this window air conditioner DO NOT use surge protectors or multi-outlet adapters with this window air conditioner Avoid shock hazard. - Page 10 WARNING 1.Do not use means to accelerate the defrosting process or to clean, other than those recommended by the manufacturer 2.The appliance shall be stored in a room without continuously operating ignition sources (for example: open flames, an operating gas appliance or an operating electric heater) 3.Do not pierce or burn.
-
Page 11: Phillips Head Screwdriver
14 EA 2 EA 3 EA 5 EA 2 EA 2 EA 2 EA Left Guide Panel Right Guide Panel (Not adhesive backed) 1 EA 1 EA Curtain FOAM-HEATPROOF ( Adhesive backed) 2 EA 1 EA Phillips head screwdriver Scissors or knife Adjustable Wrench... -
Page 12: Preparation Of Chassis
slightly tilted between Preparation Of Chassis Remove 4 screws which fasten the cabinet at both sides and at the back. (Keep the screws for later use.) - Page 13 the base pan (Adhesive backed) and bottom of window frame. ) (Adhesive backed Upper guide Right Guide Panel Left Guide panel Screws (Type A) Frame guide hole upper Center hole guide frame curtain sill support.
- Page 14 frame guides sill support sill support frame curtain frame curtain (removed from the cabinet) at See page 12. (Not adhesive backed) Foam-Strip (Not adhesive backed)
- Page 15 Before installing the front grille, pull out the vent control lever located above the unit control knobs, as shown. Foam-Heatproof Cut the adhesive-backed Foam-Heatproofs to the Guide Panel size. Remove the backing from the Foam- Heatproofs and attach he Foam-Heatproofs to Guide Panel.
- Page 17 WiFI Enables connection of the air conditioner to the home WiFi.
-
Page 18: Adjusting Vertical Air Flow Direction
The horizontal direction is adjusted Touch the horizontal louvers to adjust by moving the lever to the left or right. the air airflow up or down. Adjusting horizontal air flow direction Adjusting vertical air flow direction NOTICE When the unit operates in extremely hot weather, it turns off automatically to protect compressor. - Page 19 base pan drain base pan Slinger Fan...
- Page 20 1. Remove the air filter from the front grille by pulling forward the air filter and then up slightly. 2. Wash the filter using lukewarm water below 40 3.Gently shake the excess water from the filter and replace.
- Page 21 call 1-800-243-0000. an outlet of the proper voltage and amperage. Water drip from the rear of the unit Normal Sound High pitched Chatter Sound of Rushing Air At the front of the unit, you Today’s high efficiency compressors may hear the sound of rushing may have a high pitched chatter air being moved by the fan.
- Page 22 The air conditioner is Make sure the air conditioner plug is pushed completely into the outlet. unplugged. conditioner does not The fuse is blown/circuit Check the house fuse/circuit breaker box and start breaker is tripped. replace the fuse or reset the breaker. If power failure occurs, turn the mode control Power failure.
- Page 25 Precauciones de Seguridad.....26 Antes de poner el equipo en funcionamiento......30 Introduccion ........31 Seguridad.........32 Instalacion........34 Instrucciones de Funcionamiento .......39 Mantenimiento y Servicio ....43...
- Page 28 No opere ni detenga la No dane ni use un enchufe No toque el producto con unidad insertando o de alimentaci on no las manos mojadas o en estirando de enchufe. especificado. un ambiente h umedo. Sostenga el enchufe por el cuerpo(no del cable)...
- Page 29 Contiene elementos de contención y hacer que se enferme Si el l quido de las pilas alcanzara su boca, Si entra l quido de las pilas en contacto con la piel o cepille sus dientes y consulte a un medico。No la ropa,lavela inmediatamente con agua.No utilice utilice el mando a distancia si las pilas han el control remoto si las pilas tienen fugas.
- Page 30 El funcionamiento del ventilador no afectará a la reducción de oxígeno.
-
Page 32: Datos Electricos
Seguraida Seguraida Datos Electricos 115 V~ El cable de alimentación puede incluir un dispositivo interruptor de corriente. La carcasa del enchufe cuenta con un botón de prueba y otro de reinicio. El dispositivo debe RESET comprobarse periódicamente presionando TEST primero el botón TEST y después RESET Si el botón TEST no se desconecta o si el botón RESET... - Page 33 Seguraida Seguraida ADVERTENCIA IMPORTANTE (FAVORLEA CON ATENCIÓN) 1.No use medios que no sean los recomendados por el fabricante para acelerar el proceso de POR LA SEGURIDAD PERSONAL DEL USUARIO, ESTE descongelación ni para limpiar el producto. APARATO DEBE SER DEBÍDAMENTE NEUTRALIZADO. 2.
- Page 34 TORNILLO (TIPO A) TORNILLO (TIPO B) TORNILLO (TIPO C) DINTEL DE SOPORTE 14 EA 2 EA 3 EA 5 EA TUERCA MARCO DE LA CORTINA PERNO 2 EA 2 EA 2 EA Grupo Guía de la izquierda Grupo Guía de derecho BURLETE DE ESPUMA CANO DE DRENAJE (No adhesivo respaldado)
- Page 35 Preparcion del chasis Tornillos de fijacion Quite los tornillos que unen el gabinete a ambos lados y a la parte posterior. (Mantener los tornillos para su uso posterior.)
- Page 36 (Adhesivo respaldado) BURLETE DE ESPUMA-PE (con adhesivo en la parte trasera ) Guia superior Grupo Guía Grupo Guía de de derecho la izquierda Tornillos (Tipo A) Guia del marco...
- Page 37 Tipo C Tipo C Tipo C Tipo C Tornillo Tornillo (No adhesivo respaldado) BURLETE DE ESPUMA (No adhesivo respaldado)
- Page 38 Antes de instalar la parrilla frontal tire hacia afuera de la control de ventilacion localizada encima de los botones de control de la unidad, como se muestra. Corte el aislamiento de espuma con adhesivo Aislamiento de espuma en la parte trasera del tamaño del panel guía.
- Page 40 WiFI WiFi Connect le permite la conexión delacondicionador de aire al WiFi del hogar.
- Page 41 El control de ventilacion esta localizado encima de los paneles de control. Cuando esta ajustado en CLOSE(CERRADO),solamente el aire en el interior de la habitacion circulara y se acondicionara Cuando esta ajustado en open (ABIERTO),un poco del aire interno es expelido hacia afuera. FERMER AERER OUVRIR...
- Page 42 Ventilador de extracción...
- Page 43 1.Quite el filtro de aire de la rejilla frontal tirando de él hacia delante y hacia arriba ligeramente.
-
Page 44: Sonidos Normales
1-800-243-0000. Sonidos normales Traqueteo agudo Sonido de ráfagas de aire Los compresores modernos de alto Delante de la unidad, puede oír rendimiento pueden presentar un el sonido de ráfagas de aire que traqueteo agudo durante el ciclo son movidas por el ventilador. de enfriado. - Page 45 El aire acondicionado esta Asegurese que ei aire acondicionado esta conectado El aire completamente a la fuente de energia. acondiciona do desconectado. no enciende El fusible esta quemado/el interruptor Cheque los fusibles/interruptor de la casa y reemplace de energia se habloqueado. los fuslbles o reestablezca el interruptor de energia.
-
Page 46: Warranty Period
(90) days, whichever is longer. Please retain dated receipt or delivery ticket as evidence of the Date of Purchase for proof of warranty (you may be required to submit a copy to LG or authorized representative). - Page 47 únicamente cuando el producto se compra a través de un distribuidor autorizado de LG y se utiliza en los Estados Unidos ("EE UU") o en cualquiera de sus territorios.
-
Page 48: Register Your Product Online
LG Customer Information Center 1-800-243-0000 Register your product Online! LG ELECTRONICS,INC. www.lg.com 1000 Sylvan Ave.,Englewood Cliffs,NJ 07632...
Need help?
Do you have a question about the LW1217ERSM and is the answer not in the manual?
Questions and answers