Advertisement
Quick Links
Advertisement

Related Manuals for Comelit Maxi Manager


Summary of Contents for Comelit Maxi Manager
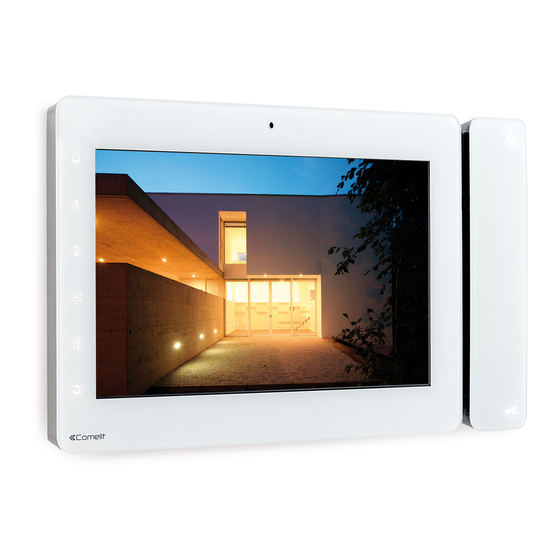
- Page 1 OPERATING MANUAL Maxi Manager art. 20003320W...
- Page 2 • for the systems, by qualified technical personnel. • Comelit Group S.p.A. accepts no liability for any purpose other than the intended use, or failure to observe the indications and warnings contained in this manual. • Comelit Group S.p.A. reserves the right to change the information provided in this manual at any time and without prior notice.
- Page 3 Switching On/Off ................... 24 ALARM ........................ 6 Change icon/name ................24 MAIN SCREEN ..................... LOADS ......................24 USING MAXI MANAGER IN ALARM SYSTEMS WITH VEDO CONTROL CONSUMPTION ....................25 PANEL......................... 6 Show power consumption graph ............25 SCREEN SAVER ..................
- Page 4 DESCRIPTION 7" touch screen Microphone Front camera Function keys Soft-touch keys RFID key sensor Temperature/humidity sensor Micro SD card slot FUNCTION KEYS Audio Doors open key Activates/deactivates conversation with the external unit. Offers direct access to the Doors open section. STEADY LED: signals the opening of one or more of the Lock-release doors listed in the directory.
- Page 5 FUNCTIONS PAGE „ Touch the display to see the last screen viewed. Available functions vary depending on the type of system loaded on the Comelit Hub using SimpleProg software, as well as the elements enabled manually in the menus. 10/04...
- Page 6 Using Maxi Manager in alarm Advanced info not enabled systems with Vedo control Advanced info enabled panel. In the example: 5 elements active / 30 30 elements available Advanced info enabled • Compatible Vedo control panels: Vedo 10, Vedo 34, Vedo 68,...
- Page 7 System areas and alarm status Full activation in individual areas ______________________________________________________________ OPTION A Garage 1 Front garden „ On the main screen, select the alarm area for which you want to arm the burglar alarm. Back garden Full Garage 2 activation Full Basement...
- Page 8 Part activation in individual areas ______________________________________________________________ DEACTIVATING THE BURGLAR ALARM Part activation is used to activate the alarm system in several zones within the desired area. The procedure requires the user password for the alarm control panel! ______________________________________________________________ OPTION A Full deactivation On the main screen, select the alarm area for which you want to „...
- Page 9 ______________________________________________________________ The Alarms memory menu keeps track of the alarm in BURGLAR ALARM progress. Paragraph Alarm-Settings-Event log √ Alarm in progress ______________________________________________________________ 2 5/01/2020 17:49:41 RESET ALARMS Burglar zone alarm Al l ar me z on e f u r t o The alarm system can be reset in any of the following 3 ways: Area : Can t in a Area: Cellar...
- Page 10 Zone status Inserire nuovo PIN Alarm_Alarm menu_Zone status The function is used to check the status of the various zones / areas in Ripetere nuovo PIN the system configuration. Tutte Open Aperte Sabotaged/Faulty Sabotate/Guasto Isolate Isolated Escluse Excluded Day zone: patio door Zona giorno: porta terrazza „...
- Page 11 Cameras Phone Alarm-Alarm menu-Cameras Name: Mario Rossi The directory lists the available cameras and can be used to start live viewing. E-mail: mario.rossi@example.com Phone : 0123 456789 Phone Cam 1 Cam 2 „ Press the icon to change the value of the corresponding Name: Mario Rossi Cam 3 entry.
- Page 12 Area 1: Front garden DISARMED Output 1 Uscita 1 Area 2: Back garden DISARMED Output 2 Uscita 2 Area 3: Garage 1 DISARMED Area 4: Garage 2 DISARMED Area 5: Day zone DISARMED Area 6: Night zone DISARMED „ Select the desired output. Select/deselect the corresponding box to enable/disable the „...
- Page 13 Voice menu Menu vocale Disinserito Comando inserimenti Comandi rapidi Disarmed Activation control Installer Installatore Giardino Garage 1 Garage 1 Front garden ingresso Tones Toni Garage 2 Giardino Garage 2 Back Timer Timer retro garden Full Inserimento activation totale Auto activation Auto inserimenti Taverna Zona giorno...
- Page 14 Auto activation This menu allows you to enable/disable auto activations created Voice menu Menu vocale using the activations option of the Safe Manager software. Installer Installatore Tones Toni Front garden Giardino ingresso Timer Timer Back garden Giardino retro Auto activation Auto inserimenti Basement room Taverna...
- Page 15 DOOR ENTRY SYSTEM The available menus vary depending on the device mode (master/ slave), the configurations set using ViP Manager software and the functions enabled manually in local menus. „ Press the icon to access the menu. INTERCOM CALL: 005 Videofonia Waiting for an answer..
- Page 16 ______________________________________________________________ This menu allows you to manage the video memory function parameters on the device. ACTUATORS Door entry system-Actuators „ Press the icon to access the menu. The menu can be used to view and control the actuators connected to the ViP system. External calls video memory „...
- Page 17 Message not yet viewed „ Tick the desired device to activate the function in Message already viewed combination with its previously configured address. 10/04 16:35 Sender ViP address Message title Date and time info „ Press briefly on the title to open the message. „...
- Page 18 OTHER, ROLLER BLINDS, FUNCTION SCHEDULING LIGHTS, IRRIGATION, You can set automatic execution, on a daily basis, of the commands relating to the room or to an individual output. AUTOMATION „ Press and hold the desired room or output to access the advanced functions.
- Page 19 From °T 00:00 24:00 18° Find the day you want to copy and press the “Copy schedule” icon Select the days to which you want to apply the programming Time Status » The days being programmed are highlighted in red. Confirm 00:00 00:00...
- Page 20 DIMMABLE LIGHTS „ Press and hold the desired room or output to access the advanced functions. „ Select "Scheduling". room 1 room 2 room 3 Ceiling light 100% Time Status Level 100% Mirror light 21:00 23:30 23:30 Right bedside lamp Left bedside lamp List of lights available in the selected room „...
- Page 21 Light control with presence sensor „ The screen shows the R-G-B component composition of the selected colour. „ Briefly press the desired output to view the menu. Scheduling You can set automatic execution, on a daily basis, of the commands relating to the room or to an individual output.
- Page 22 CLIMATE » Available if the device has thermostat/humidistat functions enabled „ Swipe to move from one menu to another. From the climate section you can monitor, set and program the Select the desired season (Winter/Summer) displayed devices. (WINTER): Heating „ Press the icon to access the menu. Clima (SUMMER): Cooling »...
- Page 23 17,5° 20° ______________________________________________________________ MANUAL MODE „ Press the icon to access the Scheduling menu. In this mode the current settings remain active until the next 5° 30° time they are changed manually by the user. From °T Thermostat 1 Thermostat 2 Thermostat 3 00:00 24:00...
- Page 24 LOADS Forcing Automatic/manual mode can be paused for a specific period of time by selecting a different setpoint and a timer from the Forcing menu. The system, in conjunction with the module managing loads and consumption, constantly checks the power absorbed by the system. „...
- Page 25 CONSUMPTION „ Select the relevant module from the list to view the corresponding graph. This menu can be used to monitor consumption for the managed modules by means of icons and graphs. Show power consumption graph „ Press the icon to access the menu. 2020-03-02 Consumi 9.
- Page 26 SCENARIOS Conditioned The conditioned scenario is executed automatically by the system once the set conditions have arisen. The scenario function allows the triggering of automations through manual activation, or via scheduling, or when certain specified The menu shows the list of saved scenarios. conditions arise.
- Page 27 AUDIO Switch player off/on Album cover Audio volume adjustment The Audio function allows you to play music and audio files in the Shuffle play various rooms connected to the home automation manager. » Each key corresponds to a different function status. SHUFFLE PLAY „...
- Page 28 RULES Player_1 Rules configured previously on Comelit Hub can be enabled/disabled. In riproduzione Brani Libreria Playback Songs Library „ Press the icon to access the menu. 1. Song_1 2. Song_2 3. Song_3 4. Song_4 Rule 1 „ Press the icon to switch from one library to Rule 2 another.
- Page 29 SETUP Volume adjustment This menu allows you to manage and adjust the audio volumes associated with the various device functions. „ Press the icon to access the menu. Audio Audio USER SETUP MENU Suoneria ______________________________ Ringtone Tasti Keys Language Setup_User setup menu_Language Tono di ingresso antifurto Entry tone alarm Tono di uscita antifurto...
- Page 30 External call Intercom call Keypad locked Blocco tasti attivato Floor door call Alarms » After 60 seconds, the device is unlocked automatically. „ Select the desired function. ______________________________ Audio/video answering service Melody 1 Setup_User setup menu_Audio/video answering service Melody 2 Melody 3 Record always Melody 4...
- Page 31 Update product Display brightness Luminosità schermo Setup_User setup menu_Update product When firmware updates are available in the Comelit Cloud, the device will update automatically. The Update product menu can be used to manually force a search for updates. „ Select Enable screensaver √...
- Page 32 From the menu you can create, rename, edit, move or delete one or more scenarios in one of the three available categories. Lights The scenarios created using SimpleProg and via system managers other than Maxi Manager cannot be edited! Irrigation Automation Instant „...
- Page 33 Press to make the scenario available only on the device. Cancel the procedure. ambiente 4 » The icon has changed colour. • ADVANCED FUNCTIONS The scenarios created using Comelit Hub and via system „ Set the desired status, then confirm. managers other than Maxi Manager cannot be edited! CONTENTS...
- Page 34 „ Proceed as in paragraph “New scenario" on page 32 Delete scenario „ Press to delete the scenario. Blinds open Blinds close Switch on all lights Confirm? Confermare? „ Press and hold a scenario to open the advanced functions menu. Confermare? Confermare? „...
- Page 35 Daily programming should cover a full 24-hour period. Any hours not programmed by the user will be set by the system automatically! Condizione 1 „ Set the unit cost. Condizione 1 EXAMPLE: set the cost of 1 kWh to a value of 53.10 cents € per unit. 53.10 cents/Euro = 0.531000 €...
- Page 36 Unit of meas. Set the unit of measure for the value „ Choose which of the available meters to display. measured by the module Pulses Enter the number of pulses required by the input to obtain an increment „ Press to exit. Increment Enter the value of the increment.
- Page 37 The menu allows you to manage the proximity keys and their associated functions. CHRIS If there are already keys registered with the VEDO control CHIAVETTA panel, the system requires you to enter the ALARM Edit PASSWORD! Chiave 1 Delete Chiave 2 Rename Chiave 3 Alarm...
- Page 38 PASSWORD Rename key PASSWORD 1111 Setup-Key-Advanced functions-Rename 1111 „ Press to rename the key. Alarm PASSWORD Setup-Key-Advanced functions-Alarm • This function allows you to register the key on the VEDO 1111 alarm control panel. • Once registered, the key can be used to execute scenarios that contain commands addressed to the VEDO control panel.
- Page 39 SETUP Description „ Press the icon to access the menu. ViP address Door entry monitor INSTALLER SETUP MENU Switchboard To edit, see paragraph “Delete/edit an element saved in the directory" User setup menu on page 40 Installer setup menu Actuators Setup_Installer setup menu_Directories_Actuators This function allows you to add and manage actuators connected to the ViP system.
- Page 40 ______________________________ To edit, see paragraph “Delete/edit an element saved in the directory" on page 40 Delete/edit an element saved in the directory „ In the directory, press and hold the name to show the editing window. Doors Setup_Installer setup menu_Directories_Doors This function is used to add the addresses of external units (doors and CHIAVETTA entrances) connected to the door entry system to receive an alert if a...
- Page 41 Reset di fabbrica External unit call Chiamata esterna Confirm user and system configuration reset? Intercom call Chiamata intercom. Floor door call Chiamata fuori porta „ Confirm the procedure. „ Set the desired value by pressing the icons "+" and "-". ______________________________ ______________________________ Addresses...
- Page 42 Enter the ViP address assigned to the Comelit Hub Enter the user name assigned to the Comelit Hub Enter the password assigned to the Comelit Hub Enable to allow communication between Maxi Manager and the Comelit Hub Press to restore the factory settings for the menu parameters...
- Page 43 CERTIFIED MANAGEMENT SYSTEMS w w w . c o m e l i t g r o u p . c o m Via Don Arrigoni, 5 - 24020 Rovetta (BG) - Italy...
Need help?
Do you have a question about the Maxi Manager and is the answer not in the manual?
Questions and answers