Table of Contents
Advertisement
Quick Links
Advertisement
Table of Contents

Related Manuals for Parker ParflangeF37


Summary of Contents for Parker ParflangeF37
- Page 1 Installation guide Parflange F37 system ® Flare Flanges...
- Page 2 Under certain circumstances, tube fittings can be subjected to extreme loadings such as vibration and uncontrolled pressure peaks. Only by using genuine Parker components and following Parker assembly instructions can you be assured of the reliability and safety of the products and their conformity to the applicable standards.
-
Page 3: Table Of Contents
Table of contents • Introduction page 4 • F37 Flange assembly instructions........................- Tube selection..............................- Tube and pipe specification..........................- Material specifications............................- Tube preparation............................... - Chart distance C..............................- Tube flaring with Parflange 170........................- Checking of flare..............................- Tube cleaning and transportation preparation..................... -
Page 4: Introduction
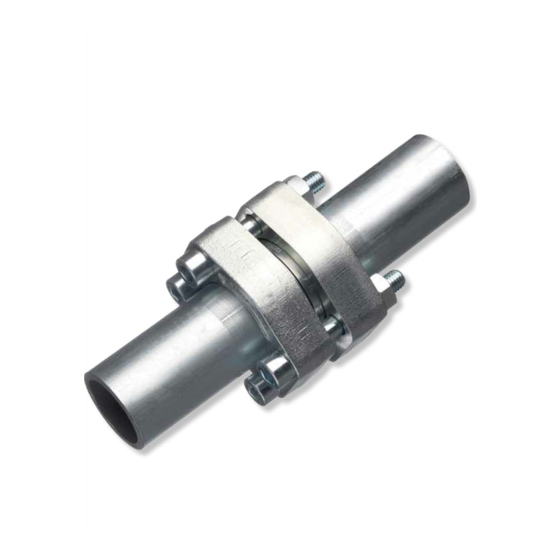
Parker Hannifin is able to provide training and instruction as well as installation supervision if required. - Page 5 Introduction Connection technology The Parflange® F37 Programme consists of two flange connection technologies: The 37° Flare Flange Connection and the Retaining Ring Connection. F37 Seal Flange O-Ring Insert TFV Insert TF O-Ring Bolt Parflange® F37 Flare Flanges – In this configuration, the deburred tube end is flared orbitally to 37° by Parflange® technology.
- Page 6 Introduction Connection methods F37 – Flared tube Bolt Bolt Flange Flange Sleeve Insert O-Ring Insert O-Ring F37 Seal F37 Seal Flange to Port – the flanged tube is connected by the Flange to Port – the standard F37 Flanges can be used flange, insert and F37 seal to a port.
-
Page 7: F37 Flange Assembly Instructions
Recommended carbon steel tubes and pipes Welded tubes and pipes Tubes and pipes acc. to above specification but welded Parker recommends the use of cold drawn seamless and cold redrawn instead of seamless drawn are suitable. hydraulic tubes and pipes acc. to DIN EN 10305-4. -
Page 8: Material Specifications
F37 Flange assembly instructions Material specifications Material Data Source Yield/Tensile Permissible stress E235N (St37.4) DIN EN 10305-4 min. 235/340 N/mm 126 N/mm (tensile strength / 2.7) Tube certification min. 235/390 N/mm 130.5 N/mm (yield strength / 1.8) E355N (St52.4) DIN EN 10305-4 min. -
Page 9: Tube Preparation
3 1/2 • Minimum straight length L1 before bend All dimensions valid with Parker Parflange® 170 • All dimensions are recommendations only and must be checked with the specific tube used in the application • Cut and deburr... -
Page 10: Chart Distance C
F37 Flange assembly instructions Chart distance C – SAE 1000/ISO 6162-1 after flaring before TFV / TF – Flare flange connection TT – Flare flange connection Flange incl. Insert Flange incl. Size F37 Seal + O-Ring Size Insert + 2 x O-Ring Inch Tube Order code... - Page 11 F37 Flange assembly instructions Chart distance C – SAE 3000/ISO 6162-1 after flaring before TFV / TF – Flare flange connection TT – Flare flange connection Size Size 2 Flanges incl. Insert + Flange incl. Insert + 2 x O-Ring (+ 2 x Sleeve) F37 Seal + O-Ring (Sleeve) Order code Order code...
- Page 12 F37 Flange assembly instructions Chart distance C – SAE 3000/ISO 6162-1 continued after flaring before TFV / TF – Flare flange connection TT – Flare flange connection Size Size Flange incl. Insert + 2 Flanges incl. Insert + F37 Seal + O-Ring (Sleeve) 2 x O-Ring (+ 2 x Sleeve) Order code Order code...
- Page 13 F37 Flange assembly instructions Chart distance C – SAE 6000/ISO 6162-2 after flaring before TFV / TF – Flare flange connection TT – Flare flange connection Size Size 2 x Flanges incl. Insert + Flange incl. Insert + F37 Seal + O-Ring 2 x O-Ring (+ 2 x Sleeve) (+ Sleeve) Order code Order code...
- Page 14 F37 Flange assembly instructions Chart distance C – SAE 6000/ISO 6162-2 continued after flaring before TFV / TF – Flare flange connection TT – Flare flange connection Size Size 2 x Flanges incl. Insert + Flange incl. Insert + F37 Seal + O-Ring 2 x O-Ring (+ 2 x Sleeve) (+ Sleeve) Order code Order code...
- Page 15 F37 Flange assembly instructions Chart distance C – Parflange F37 − ISO 6164 ® after flaring before TFV / TF – Flare flange connection TT – Flare flange connection Size Size Flange incl. Insert + F37 Seal + 2 Flange incl. Insert + O-Ring (+ Sleeve) 2 x O-Ring (2 x Sleeve) Inch...
- Page 16 • Tools must be checked regularly, at least after 50 assemblies • Worn tools must be replaced • Use only genuine Parker Parts • Tools must always be kept clean and lubricated • Clean pin for checking •...
- Page 17 F37 Flange assembly instructions Checking instructions for Parflange tools ® Clamping die frame Clamping die set “MF“ Extended clamping die set “MF“ Flanging pin “BF“ small/large for large tube wall thickness Tube O.D. Order code Order code Order code Order code Clamping die frame Clamping die set Extended clamping die set...
-
Page 18: Tube Flaring With Parflange 170
F37 Flange assembly instructions Tube flaring with Parflange ® • Reliable forming method • Drive must be switched • Safety cover must be off for machine setup open • Follow all safety • Main spindle in rear instructions position • Open clamping bar •... - Page 19 F37 Flange assembly instructions Tube flaring with Parflange ® • Select suitable clamping die set according to tube dimension • Grip surface must be clean and free of wear • Install matching clamping die frame • Insert clamping die set with 37° side pointing towards main spindle •...
- Page 20 • Make sure tube end touches tube stop • Swing out tube stop bar • Lubricate flanging pin • Use Parker LUBSS lubricant Other lubricants can cause rapid tool wear and result in surface welding Worn or dirty tools can cause flaring failures •...
- Page 21 F37 Flange assembly instructions Tube and spindle stop Tube [mm] Spindle stop [mm] Flanging pressure [bar] Tube stop [mm] 16X2.0 18X2.0 20X2.0 20X2.5 25X2.5 25X3.0 30X3.0 14.0 30X4.0 12.5 32.9X3.5 17.0 33.4X4.6 16.0 38X2.5 38X3.0 38X4.0 38X5.0 42X3.0 42X4.0 48.3X3.7 12.5 50x3.0 14.5...
-
Page 22: Checking Of Flare
F37 Flange assembly instructions Checking of flare • Clean flare for inspection Check sealing surface for cracks, burrs, scratches and pitting • Flare must be at right angle and concentric with tube • Flaring will cause a • A lip inside the flare reduction of wallthick- indicates overflare ness in the flare section... - Page 23 F37 Flange assembly instructions Checking of flare Ø D flare Tube O.D. [mm] Ø D ± 1mm [mm] 16X2.0 20.0 18X2.0 22.5 20X2.0 24.5 20X2.5 24.5 25X2.5 29.0 25X3.0 29.0 30X3.0 36.5 30X4.0 36.5 32.9X3.5 40.0 33.4X4.6 38.0 38X2.5 44.0 38X3.0 44.0 38X4.0...
-
Page 24: Tube Cleaning And Transportation Preparation
F37 Flange assembly instructions Tube cleaning and transportation preparation Recommended final cleaning procedure: • Place the hose, tube or pipe firmly against the nozzle to make an airtight seal. • Depress the trigger to fire the projectile. • Release the trigger when the projectile has exit the pipe •... -
Page 25: Installation Of F37 Flange System
Installation of Flare Flanges Installation of Flare Flanges • Flared pipe must be clean • Flared pipe must be clean • Use plastic hammer to fix • If necessary the sealing insert if neccessary could be lubricated for • Avoid damage of sealing easier assembly surfaces •... - Page 26 Installation of F37 Flange system Installation of Flare Flanges Parker recommends to use only calibrated manuall or hydraulic torque tools! • The friction coefficient is strongly affected by proper lubrication. Using unsuitable lubrication can lead to undertigh- tend flange connections...
- Page 27 • Parker recommends to • The tubes / flanges have to be parallel and axial aligned tighten the tube connec- bevor tightening the bolts. Parker does not recommend tion at first. After that to straighten the tube by tightening the bolts of the...
- Page 28 Installation of F37 Flange system Installation of Flare Flanges: Use of 1 tool • Torque bolts in opposite positions in small increments • It is recommended to tighten this flange types with to the appropriate torque level on page 32-35 minimum two tools.
- Page 29 Installation of F37 Flange system Installation of Flare Flanges: Use of 2 tools • Torque bolts in opposite positions in small increments to the appropriate torque level on page 32-35 1: Light tightening with socket screw wrench by hand 2: Apply 30% of specified torque acc. to picture above. 3: Apply 60% of specified torque acc.
- Page 30 Installation of F37 Flange system Installation of Flare Flanges: Use of 4 tools • Torque bolts in opposite positions in small increments to the appropriate torque level on page 32-35 1: Light tightening with socket screw wrench by hand 2: Apply 100% of specified torque acc. to picture above. 3: Apply 100% of specified torque in circular pattern (clockwise) •...
- Page 31 Installation of F37 Flange system Installation of Flare Flanges: Important after bolt tightening • Parker recommends to take mounting documentation for every flange connection Reassembly: • Mark the component positions before disconnecting. • Check seals for damage and deformation and replace if required •...
-
Page 32: Appropriate Torque Level
Installation of F37 Flange system Appropriate torque level - SAE 1000/ISO 6162-1 footprint SAE 1000 Flaring, working pressure: 50 bar to 70 bar Soft Seal / Flat Face Recommended torques* Flange Type Black phosphated Bolts Tube to Port Bolts Tube to Tube ELZ (8.8) HDG (8.8) A4-80 (10.9) - Page 33 Installation of F37 Flange system Appropriate torque level - SAE 3000/ISO 6162-1 footprint SAE 3000 Flaring, working pressure 210 bar to 350 bar Soft Seal / Flat Face / Bonded Seal Recommended torques* Flange Type Black phosphated Bolts Tube to Port Bolts Tube to Tube ELZ (8.8) HDG (8.8)
- Page 34 Installation of F37 Flange system Appropriate torque level - SAE 6000/ISO 6162-2 footprint SAE 6000 Flaring, working pressure 210 bar to 350 bar F37 Seal / Flat Face / Bonded Seal Recommended torques* Flange Type Black phosphated Bolts Tube to Port Bolts Tube to Tube ELZ (8.8) HDG (8.8)
- Page 35 Installation of F37 Flange system Appropriate torque level - ISO 6164 footprint ISO 6164 Flaring, working pressure 350 bar to 400 bar F37 Seal / Flat Face / Bonded Seal Recommended torques* Flange Type Black phosphated Bolts Tube to Port Bolts Tube to Tube ELZ (8.8) HDG (8.8)
-
Page 36: Ready For Operation
• Loosen bolts similar to assembly. During disassembling make sure that there is no pressure left in the system • Parker recommends that all sealings, nuts and bolts are replaced before reassembling • For reassembling follow the installation instructions above... -
Page 37: Tube Line Fabrication Guide For Leak-Free Systems
Installation of F37 Flange system Tube line fabrication guide for leak-free systems • Tube lines have to be supported in certain distances • Use sufficient tube clamps to support weight • Use sufficient tube clamps to protect joints from vibration •... - Page 38 GR – Greece, Athens Tel: +44 (0)1926 317 878 Tel: +30 210 933 6450 parker.uk@parker.com parker.greece@parker.com © 2014 Parker Hannifin Corporation. All rights reserved. 08/2014/BUL/4176-7/FF/UK k-konzept EMEA Product Information Centre Free phone: 00 800 27 27 5374 (from AT, BE, CH, CZ, DE, DK, EE, ES, FI, FR, IE, IL,...
Need help?
Do you have a question about the ParflangeF37 and is the answer not in the manual?
Questions and answers