Table of Contents
Advertisement
Advertisement
Table of Contents

Related Manuals for Data Aire idap

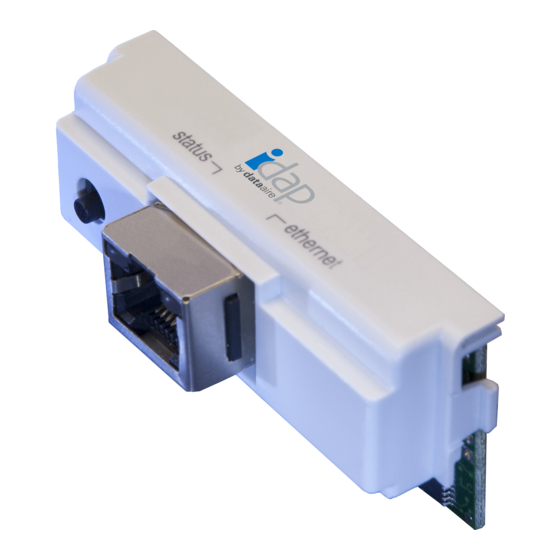
Summary of Contents for Data Aire idap
- Page 2 Data Aire, Inc. reserves the right to make design changes for the purpose of product improvement or to withdraw any design without notice.
-
Page 3: Table Of Contents
II. Installation and Setup Procedures ..................4 Installation ......................4 Set-up IP Address In idap Card for Ethernet Connection ........4 Program IP Address on idap Card Using Display Panel Keypad ......7 III. Configure idap Card on Start-up ..................8 Program Location, Unit name, Model and Cooling Type........8 Configure a New IP address (If necessary). -
Page 4: Introduction
1. After installing the idap card into the dap4 controller, turn the dap4 back ON, go to Menu G- Network Config and program BMS PORT 1 to “BACnet TCP/IP” protocol, BMS PORT 2 must be set to N/A (default setting). 2. To set-up the idap card you will need a laptop or PC with Windows XP or Windows 7 operat- ing system and a CAT-5 crossover cable between the PC and the dap4 are required. Con- nect to the idap card and configure the card IP address. See detailed steps below. - Page 5 3. All idap cards are set up for a DHCP server as default. Follow step 4 to step 12 to enter a static IP address if it requires. 4. Perform a factory reboot of the card by shutting OFF the power to the dap4 controller.
- Page 6 9. Click the “Configuration: tab on the left. Then click on the “Network” tab across the top of the screen. The IP address page will appear. 10. You may now enter or change the IP address (if applicable) by entering the IP under Eth0 IP address Main box and NetMask main box. The default setting is DHCP 11. Click Submit after entering the IP address. 12. It will take approximately 5 minutes for the IP address change to take effect. The idap card may have to be manually rebooted by cycling the dap4 power ON and OFF if the reboot com- mand does not respond. Wait for one minute after the card has been restarted then access...
-
Page 7: Program Ip Address On Idap Card Using Display Panel Keypad
IP address. Ping the idap card IP ad- dress to verify the connection. C. Program IP Address on idap Card Using dap4 Display Panel Keypad Note: This procedure applies to dap4 controller with BIOS version 5.18 or later and idap card with firmware version A1.5.0 B1.2.4 or later. dap4 BIOS version number can be viewed on... -
Page 8: Configure Idap Card On Start-Up
9. Restart the dap4 to reboot the idap card and wait for about one minute for the dap4 and idap card to complete their reboot process. 10. Connect to idap card using the new IP address. Ping the idap card IP address to verify the connection. III. Configure idap Card on Start-up After establishing the Ethernet connection to the card, open a web browser such as Internet Ex- plorer (Version 10 or newer), Mozilla Firefox or Google Chrome to browse the card. Click on “Go to... -
Page 9: Configure A New Ip Address (If Necessary)
Enter unit location, unit name that you want to the card to display on the location and unit name on the left hand of the main system status page. Next select the floor or ceiling model on model type check box then select cooling type: DX is for compressor only unit, CW is chilled water cooling only unit and ES is for DX and CW combination unit. These selections will alter the data that displays on the main System status page. -
Page 10: Configure Email On Alarm Notification
C. Configure Email on Alarm Notification To configure the idap card to automatically send out emails on an alarm event, click on “Events and Email” menu bar on the left hand side of the main System status page. The following screen will appear: The default settings for sending out emails on alarm are shown above. If you do not want a email sent out on a particular alarm merely uncheck (clicking on the check mark box) the event and send email boxes in the same row as the alarm description. Email subject and message are easily modi- fied by simply clicking in the box and typing your message. To enter/modify email recipients’, click... - Page 11 Enter recipient’s name and email address/account in the appropriate box. Suggest entering the unit name in sender’s name box. If required by the email server there are fields for user name and pass- word. Finally enter the recipient’s email address and SMTP server address then click on the “Store the E-mail configuration” box. Test email notifications Available on idap software version 1.2.0 or later Turn e-mail service to debug mode to monitor the mail traffic: The following page will open: And the log displayed:...
- Page 12 Send all notification messages whether the corresponding events occur or not Check the email logs: Example #1: with no errors Example #2: with error – no emails will be sent Restart: idap must be reboot when finished monitoring the traffic to server.
-
Page 13: Set Date And Time
D. Set Date and Time The idap card does not have a built-in time clock, its date and time are synchronized with the dap4 controller. The default idap card has been programmed to synchronize with the dap4 controller time clock every minute. Do not try to change the time clock synchronizer settings. Changing time clock synchronization settings will cause time clock and event logging errors. To change the date and time, go to dap4 menu C - Clock and Scheduler. To view the clock synchronizer setting, click on “Data and Graphs” the click on “Clock” tab. The following screen will appear: E. Changing User Name and Password To change user name and password, click on “Password” in the “Configuration” page then click on... -
Page 14: System Monitoring And Control
IV. System Monitoring and Control A. View System Status To view system status, open a web browser such as Internet Explorer (Version 10 or newer), Mozilla Firefox or Google Chrome; then enter the IP address of the idap card you want to monitor into the web page address box and press Enter. If the address is correct the following page will appear: Enter the user name and password then click “Log In.” The factory default user name is admin and factory default password is fadmin. If the correct user name and password are entered, this... -
Page 15: View Alarm Message
System status will display: • Current temperature and humidity setpoint • Current temperature and humidity deadband • Current return air temperature and humidity • Alarm status • System ON/OFF current operation: fan, cooling stages (DX unit only), heating, humidifica- tion, dehumidification, chilled water valve opening (Chilled water unit only), EC fan running speed percentage (gForce unit only). • Equipment runtimes • Optional discharge temperature and optional chilled water temperature Discharge temperature and chilled water temperature will not show if an optional discharge tem- perature or optional chilled water temperature sensor is not installed. Tip: If you monitor several units, you can bookmark units and assign the names to them on the web browser for a quick access. -
Page 16: View Logs, Graphs And Download Log Files
An alarm table will display. Active alarms will be indicated by a red button in front of the alarm message. C. View Logs, Graphs and Download Log Files To view the return air temperature and humidity graphs for the past 24 hrs, click on “Data and Graphs” menu tab on the left hand of the main system status. The following screen will appear: Click on Graphs then select “View the latest graph” to display the latest graph with the data that is logged by the idap card for the previous day. - Page 17 The idap card continuously logs and save data in a CSV files format in 30 seconds increments. New log file start at midnight. The date when the log occurs is used for the log file name. These files are stored in the memory of the idap card until the memory is full. When memory of the card is full, the card automatically deletes the oldest log file to make room for latest log file. These files can also be downloaded and saved. To download a log file, click on “Download all the csv files and graphs” or “Download the latest csv file”, in the “Data and Graphs”section. If you select “Download the latest csv file” only the latest 24 hours data. If you select “Download all the csv files and graphs” then the following screen will appear and show all the log files stored in the card’s memory for downloading: The log file and the graph have no data to show when card is first installed and started up. To get the log file and graph to collect data and show most updated data immediately, click “Update files to this very moment.” The first selection on the screen shot above.
-
Page 18: View Available Memory Of The Card
An update completed message window will appear when the data update finishes. Wait for a minute for the card to upload the latest log file then click “View the latest graph” or “Download the latest csv file.” D. View Available Memory of the Card To view the free memory of the idap card, from the main system status page click the “Configura- tion” tab on the left hand side then click “General” tab and select the “View Used/ Free disk space,” this message will appear to show the used and free disk space: E. View Network IP Address of the Card To view the IP address of the idap card, from the main System status page click the “Configura- tion” tab on the left hand side then click “General” tab and select the View Network Configuration, this message will appear to show the current IP address of the Card:... -
Page 19: Idap Software Version
F. idap Software Version To find the idap card software and firmware version, simply click “Configuration” tab from the menu on the left, then click on the “Utilities” tab from the menu across the top of the page. Consult with factory if software or firmware upgrade are needed. G. Change Setpoints and Deadbands To modify the system temperature, humidity setpoint and deadband, simply click on the “Change” button next to the Relative humidity setpoint and deadband on the system status page. The fol- lowing window will appear, enter new setpoint or deadband then click “Submit.”... -
Page 20: System On/Off Control
Important Note: The system ON is the default setting, to turn the system OFF, the web browser must be always active during the OFF mode control period and communicate with the idap card. In other words, idap web page must be active otherwise the system will revert to ON mode if the web page interface is inactive. - Page 21 To turn the system back ON , simply click the “Change” button again then select ON on the “Turn System ON/OFF” window then click “Submit.”...
-
Page 22: Troubleshooting
V. Troubleshooting Symptom Remedy Cannot connect to the idap • Check network connections such cable and network switch. card • If private network, check network permission. Contact net- work administrator. • Perform ping test to check connection. • Check the IP address that is assigned and programmed to the card. Use a laptop or dap4 display to check this pro- grammed IP address. See section II.B and II.C for details. • Reboot the card (restart dap4). • Perform Factory reboot and use a laptop to connect directly to the card via a cross-over cable to check the card. Again see section II.B for details.
Need help?
Do you have a question about the idap and is the answer not in the manual?
Questions and answers