Table of Contents
Advertisement
PREFACE
IBCC
R02 FEB15
No :
Thank you for selecting a Hero MotoCorp HF-Deluxe. We wish you many miles of continued
riding pleasure in the years ahead.
We, at Hero MotoCorp, are committed to demonstrate excellence in our environment
performance on a continual basis, as an intrinsic element of our corporate philosophy. To
achieve this we commit ourselves to continue product innovations to improve environment
compatibility and strengthen the green supply chain. We are also using non asbestos brake
shoes and engine gaskets which are environment friendly in nature.
This booklet is your guide to the basic operation and maintenance of your new Hero
MotoCorp HF-Deluxe Please take time to read it carefully. As with any fine machine, proper
care and maintenance are essential for trouble-free operation and optimum performance.
Authorised Distributor or the authorised dealer(s) of the Distributor ("Dealer") will be glad to
provide further information or assistance and to handle your future service needs.
Let us make this world a safer, healthier and more environment friendly place.
Advertisement
Table of Contents

Subscribe to Our Youtube Channel
Related Manuals for HERO HF-Deluxe


Summary of Contents for HERO HF-Deluxe
- Page 1 IBCC R02 FEB15 No : Thank you for selecting a Hero MotoCorp HF-Deluxe. We wish you many miles of continued riding pleasure in the years ahead. We, at Hero MotoCorp, are committed to demonstrate excellence in our environment performance on a continual basis, as an intrinsic element of our corporate philosophy. To achieve this we commit ourselves to continue product innovations to improve environment compatibility and strengthen the green supply chain.
- Page 2 Hero MotoCorp Ltd make changes in its contents at any time without notice and/or incurring any obligation, whatsoever. no one is allowed to reproduce any part of this publication without obtaining prior written permission from Hero MotoCorp Ltd.
-
Page 3: Table Of Contents
TYRES · Catalytic Converter PRE-RIDE INSPECTION · BASIC TROUBLESHOOTING STARTING THE ENGINE DELIVERY CERTIFICATES RIDING/BRAKING HERO GENUINE PARTS PARKING JOBS APPLICABLE TO PERIODIC SERVICES UTILITY BOX SERVICE RECORD SHEET TOOL KIT SERVICE ADVICE SHEET SAFETY PRECAUTIONS OWNERSHIP RECORD AND DATA... -
Page 5: Motorcycle Identification
XXXXEJ YYYYY Engine Year of Month of Assembly Plant Serial Number Description Manufacturing Manufacturing Model: HF-Deluxe Engine Variants Frame Kick Start/Drum/Spoke Wheel Kick Start/Drum/Cast Wheel Self/Drum/SpokeWheel Self/Drum/Cast Wheel Electric Start/Drum/Cast Wheel (Black Variant) VIN and Engine No. may be required: 1. -
Page 6: Product Specification
PRODUCT SPECIFICATION ITEM SPECIFICATIONS Dimensions Overall length 1965 mm Overall width 720 mm Overall height 1045 mm Wheelbase 1235 mm Saddle height 805 mm Ground clearance 165 mm Weight 107 kg (Kick start) Kerb weight 110 kg (Electric start) Capacities Engine oil 1.05 litres at disassembly and 0.85 litre at draining Fuel tank... - Page 7 PRODUCT SPECIFICATION ITEM SPECIFICATIONS Trail length 89 mm Front 2.75x18-4 PR/42P Tyre size Rear 2.75x18-6 PR/48P Front (Drum type) Dia. 130 mm Brakes Rear (Drum type) Dia. 110 mm Spoke Wheel and Cast Wheel (Optional) Front/Rear Wheel Transmission Primary reduction 3.722 (67/18) 3.143 (44/14) Final reduction...
-
Page 8: Safe Riding Tips
SAFE RIDING TIPS Do's: Don't 1. Always conduct simple pre-ride 1. Never use cell phone while riding the inspection (page 18). motorcycle. 2. Always wear a helmet with chinstrap 2. Avoid sudden acceleration, braking and securely fastened and insist on a helmet for turning of your motorcycle. -
Page 9: Accessories & Modifications
We strongly advise you not to remove any Modifying your motorcycle or using non- accessories can make your original equipment or modify your motorcycle Hero MotoCorp motorcycle unsafe. Before you consider in any way that would change its design or making any modifications or adding an operation. -
Page 10: Tips For Healthy Environment
Hero MotoCorp incompatible spares and accessories can upset or deteriorate your motorcycle’s running condition. 4. Genuine engine oil: Hero 4T Plus SAE 10W 30 SJ grade (JASO MA) engine oil recommended by and make sure you change it every 6000 kms. -
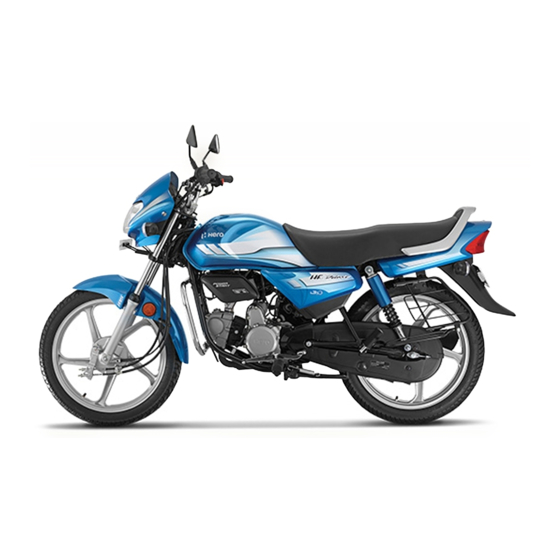
Page 11: Motorcycle Views
MOTORCYCLE VIEWS TOP VIEW 9 10 11 12 13 0 0 0 0 (1) Horn switch (11) Fuel gauge (2) Turn signal lamp switch (12) High beam indicator (3) Headlamp switch (13) Side stand indicator (4) Clutch lever (14) Front brake lever (5) Rear view mirror (15) Throttle grip (6) Headlamp dimmer switch... - Page 12 MOTORCYCLE VIEWS LEFT SIDE VIEW (1) Fuel valve (7) Side stand (12) Rear turn signal lamp (2) Carburetor (8) Left side cover (13) Reflex reflector (3) Gear shift pedal (9) Pillion foot rest (14) Tail/stop lamp (4) Rider foot rest (10) Women pillion step (15) Rear grip (5) Side stand switch...
- Page 13 MOTORCYCLE VIEWS RIGHT SIDE VIEW (1) Pillion foot rest (6) Rear brake pedal (11) Front cowl (2) Battery compartment (Inside) (7) Oil level dipstick (12) Fuel tank (3) Kick starter pedal (8) Utility box (13) Seat (4) Rider foot rest (9) Front suspension (14) Rear shock absorber (5) Starter motor...
-
Page 14: Parts Function
PARTS FUNCTIONS Instruments and Indicators The indicators are in the speedometer panel above the headlamp. The functions are as below. Sl. No. Description Function Speedometer Indicates driving speed Shows accumulated mileage Odometer Maximum operating speed in each gear Gear shifting Fuel gauge Indicates approximate fuel quantity High beam indicator... -
Page 15: Ignition Switch
IGNITION SWITCH “ON” Position “OFF” Position/Lock Open 1. Ignition switch 2. Ignition key 3. Steering lock position “LOCK” Position Key Position Key Removal Function The engine can be started, Turn signal “ON” Key cannot be removed indicators, Horn, Tail/Stop lamp and Fuel Gauge will be functional. -
Page 16: Left Handlebar Controls
LEFT HANDLEBAR CONTROLS 3. Turn signal lamp switch 1. Headlamp switch Shift the turn signal switch sideways for The switch has two position. Right/Left indications and leave it to come back to its normal position on its own. “ ” and “ ” marked by a white dot. IMPORTANT: To switch “OFF”... -
Page 17: Right Handlebar Controls/Starter Switch
RIGHT HANDLEBAR CONTROLS Starter switch (For electric start model) Ensure starter switch (1) is operated when the vehicle is in neutral gear. If the vehicle is engaged in gear press the clutch lever before operating the starter switch. Release starter switch after the engine has started. -
Page 18: Fuel Valve
“ON” (Ignition Switch “ON”), the switch enables the At “ON” fuel will flow from the tank to the side stand indicator lamp to glow on the carburetor. speedometer panel. (2) “ON” Position (1) Side stand switch “RES” FUEL VALVE At "RES" position (3), fuel will flow from The three way fuel valve is on the left side of the the reserve fuel supply to the carburetor. -
Page 19: Fuel Tank
ENGINE OIL Use only Hero Genuine Engine Oil. BRAND : Hero 4T plus GRADE : SAE 10W 30 SJ Grade (JASO MA). -
Page 20: Engine Oil Top Up Process
6. If required, add the specified oil up to the ENGINE OIL LEVEL CHECK upper level mark. Do not overfill. Check engine oil level each day before 7. Quantity of oil to be filled is 0.85 litre operating the motorcycle. (approx.) during oil change when right The oil level dipstick (1) is on the right crankcase cover is not removed. -
Page 21: Tyres
The recommended tyres size is : Front 2.75x18-4PR/42P Rear 2.75x18-6PR/48P Air Pressure Properly inflated tyres provide the best combination of handling, tread life, and riding comfort. Generally, under inflated tyres wear unevenly, adversely affect handling, and are more likely to fail from being overheated. - Page 22 The recommended “cold” tyre pressures are: Rider only Rider and Pillion Front 1.75 kgf/cm (25 psi) 1.75 kgf/cm (25 psi) Rear 2.00 kgf/cm (28 psi) 2.80 kgf/cm (40 psi) CAUTION Over inflation/Under inflation will affect the performance. Inspection Whenever you check the tyre pressure, you (1) Tread wear indicator (2) Arrow mark should also examine tyre treads &...
-
Page 23: Pre-Ride Inspection
PRE-RIDE INSPECTION You should conduct pre-ride inspection 6. Drive Chain-check condition and before riding the motorcycle to enhance riding slackness (page 32 & 34). Adjust and comfort and safety. lubricate if necessary. Clean your motorcycle regularly. It protects 7. Throttle-check for smooth opening the surface finish. -
Page 24: Starting The Engine
STARTING THE ENGINE 1. Turn the ignition switch 4. Pull the choke lever u p w a r d s t o “ O N ” “ON”. position as indicated (Use choke during cold conditions). 2. Turn the fuel valve “ON”. 5. -
Page 25: Riding/Braking
Flooded Engine 5. This sequence is repeated progressively to shift to 3 and 4 (top gear). If the engine fails to start after repeated attempts, it may be flooded with excess Recommended Shifting Speed fuel. To clear a flooded engine, turn the 0-20 km/hr ignition switch “OFF”... -
Page 26: Parking
Extreme braking may cause wheel locking · and reduce control over the motorcycle. Wherever possible, reduce speed or apply · brake before entering a turn, closing the throttle or braking in mid turn may cause wheel slip. Wheel slip will reduce control over the motorcycle. -
Page 27: Safety Precautions
Dealer knows your motorcycle best and is fully equipped to maintain and repair it. To ensure best quality and reliability, use only Genuine Parts for Hero MotoCorp repair and replacement. (1) Tool kit SAFETY PRECAUTION Make sure the engine is “OFF” before you ·... -
Page 28: Maintenance
MAINTENANCE MAINTENANCE SCHEDULE Dear Customer, We would strongly recommend the following schedule, to keep your motorcycle in perfect running condition and healthy environment. Motorcycle subjected to severe use or ridden in dusty area will require more frequent servicing. SERVICE ITEMS 1st 60 Next 90 Next 90 Next 90 Next 90 Next 90 Next 90 Next 90... - Page 29 SERVICE ITEMS 1st 60 Next 90 Next 90 Next 90 Next 90 Next 90 Next 90 Next 90 Next 90 Next 90 Next 90 DAYS 500- 3000- 6000- 9000- 12000- 15000- 18000- 21000- 24000- 27000- 30000- KMS. 3500 6500 9500 12500 15500 18500...
-
Page 30: Oil Screen Filter & Centrifugal Filter
OIL FILTER SCREEN & CENTRIFUGAL NOTE FILTER Clean filters as specified in the maintenance schedule. 1. Drain the engine oil thoroughly (page16 & 17). 2. Remove the kick starter pedal (1), muffler (2), disconnect the clutch cable (3) and rider foot rest (4). Remove the right crankcase cover (5). -
Page 31: Air Cleaner
For most riding conditions this spark plug heat 5. With the plug washer attached, thread the range number is satisfactory. However, if the spark plug in by hand to prevent cross- motorcycle is going to be operated for threading. extended periods at high speeds or near 6. - Page 32 (9) Air cleaner element (10) Element holder (5) Air cleaner cover screws(6) Air cleaner cover (11) Air nozzle (7) Air cleaner assembly(8) Mounting clamp Now blow the dust from the surface of the · paper element about 50 mm away from 4.
-
Page 33: Throttle Operation
take proper seat on the other side of the from the fully open to the fully closed position. mounting clamp. Check at full left and full right steering positions. Inspect the condition of the throttle cable from the throttle grip down to the carburetor. - Page 34 If they are tight, the valves are open, rotate the flywheel 360 anticlockwise and re- align the 'T' mark with the index mark. 3. Check the clearance by inserting the feeler gauge (5) between the adjusting screw (6) and valve stem. (1) Crankshaft hole cap (2) Timing hole cap (3) 'T' mark (4) Index mark...
-
Page 35: Carburetor
CARBURETOR (Idle speed) ignition timing as per the throttle operation and ensures optimum driving performance. The carburetor is factory preset in order to CLUTCH achieve optimum performance and meet emission standards. Clutch adjustment may be required if the However in case of specific requirement of motorcycle stalls when shifting into gear or tends tuning due to engine stalling in idle speed, please to creep or if the clutch slips, causing acceleration... -
Page 36: Drive Chain
The drive chain (1) should be checked and lubricated as part of the Pre-ride Inspection (page 19). Under severe usage or when the motorcycle is ridden in unusually dusty areas more frequent maintenance will be necessary. Inspection 1. Turn the engine “OFF”, park the motorcycle on its main stand and shift the transmission to neutral. - Page 37 Adjustment plate open end (5) is installed in the • Park the motorcycle on its main stand with opposite direction of the chain rotation. the transmission in neutral and the ignition 4. Inspect the sprocket teeth for wear or switch in “OFF” position. damage.
-
Page 38: Front Brake
FRONT BRAKE Adjustment 1. Park the motorcycle on its main stand. 2. Measure the distance, the front brake lever (1) moves before the brakes start to take hold. Free play (2) should be 10-20 mm at the tip of the brake lever. (2) Sleeve nut (3) Drive chain lock nut (4) Drive chain adjusting nut(5) Index mark... -
Page 39: Rear Brake
REAR BRAKE (A) Decrease free play (CW) Adjustment 1. Park the motorcycle on its main stand. 2. Measure the distance brake pedal (1) moves before the brake starts to take hole. Free play (2) should be 20-30 mm. (B) Increase free play (ACW) (1) Rear brake pedal (2) Free play 20-30 mm 3. -
Page 40: Brake Wear Indicators
Front Brake Wear Indication (A) Decrease free play (CW) (B) Increase free play (ACW) (3) Adjusting nut (4) Brake joint pin 4. Make sure that the cut-out on the adjusting nut is seated on the brake joint pin (4) after the final adjustment has been made. -
Page 41: Battery
It is not necessary to check the battery electrolyte level or add distilled water as the battery is a Maintenance-Free (sealed) type. If your battery seems weak and/or electrolyte is leaking (causing hard starting or other electrical troubles), contact your Authorised Distributor /Dealer. -
Page 42: Fuse Replacement
Battery installation Battery charging 1. Reinstall in the reverse order of removal. Always visit your Authorised Distributor Be sure to connect the positive (+) terminal Dealer if you see any symptom of battery first, then the negative (-) terminal. discharge as earliest as possible to get the battery charged. -
Page 43: Stop Lamp Switch
CAUTION pedal is depressed to the limit of its free play. • Do not attempt to start or ride the motorcycle without a charged battery, it can 3. Turn the adjusting nut in direction (A) to cause fusing of the bulbs and permanent advance switch timing or in direction (B) to damage to certain electrical components. -
Page 44: Headlamp Adjustment
(1) Adjusting bolt (2) Side stand indicator SUSPENSION CAUTION Inspection Ensure that adequate care should be taken • Check the front forks by locking the front brake while cleaning the side stand switch. and pumping the front fork up and down vigorously. -
Page 45: Front Wheel Removal
Rear Shock Absorber Adjustment (1) Pin spanner Rear shock absorber adjustment can be made according to the load/road conditions. • In direction A Stiffer • In direction B Softer NOTE Always adjust both the rear shock absorber to the same position. Use the rear shock absorber adjustment tool (1) (pin spanner) available in the tool kit. -
Page 46: Rear Wheel Removal
disconnect the brake rod (2) from the brake arm (3) by pushing down the brake pedal. (8) Lug (9) Slot 4. Tighten the axle nut. Axle nut torque: 5.4 Kgf-m (1) Rear brake adjusting nut (2) Rear brake 5. Adjust the brake (page 34 & 35). rod (3) Brake arm (4) Brake stopper arm 6 . -
Page 47: Washing The Motorcycle
Rub the soiled area gently rinsing it frequently with fresh water. 3. A fter cleaning spray water thoroughly. 4. Dry the motorcycle by wiping with dry soft cloth. NOTE • We at dealership take all above mentioned precautions like recommended detergents and usage of muffler caps/plugs during wash to ensure quality wash. -
Page 48: Basic Troubleshooting
BASIC TROUBLESHOOTING 1. STARTING TROUBLE - ENGINE DOES NOT START A. Fuel System Check fuel valve position Turn to “ON” position “OFF” “ON” Position Check fuel in Fuel Tank Refill No Fuel Rectify Check fuel Lines Leakage/Air Lock Consult Authorised Distributor/Dealer B. - Page 49 BASIC TROUBLESHOOTING 2. ENGINE STARTS BUT STALLS Check choke lever position Turn to “OFF” position “ON” “OFF” Position Check Air Cleaner Clean and Refit Dirty Consult Authorised Distributor/Dealer 3. POOR PICK UP Spark Plug Loose in Cylinder Head Tighten the Spark Plug Loose Check Air Cleaner Clean and Refit...
-
Page 50: Delivery Certificates
Hero MotoCorp Ltd. DELIVERY CERTIFICATE IBCC No.: HF-Deluxe I certify having taken delivery of one Hero MotoCorp Motorcycle bearing the following particulars:- Engine No. Colour/Model Key No. Allotment No. Date of Sale Customer’s Name I have been explained by the dealer about correct and safe driving habits, warranty terms and conditions, service schedules and maintenance tips. - Page 51 Hero MotoCorp Ltd. Alongwith the motorcycle I have also received the following:- 1. Owner’s Manual 2. 2 Nos. Keys 3. 1 Set of tools (for details see below) 4. Standard Accessories Make Sr. No. 5. Battery 6. Tyre Front Make Sr.
- Page 52 Hero MotoCorp Ltd. DELIVERY CERTIFICATE IBCC No.: HF-Deluxe I certify having taken delivery of one Hero MotoCorp Motorcycle bearing the following particulars:- Engine No. Colour/Model Key No. Allotment No. Date of Sale Customer’s Name I have been explained by the dealer about correct and safe driving habits, warranty terms and conditions, service schedules and maintenance tips.
- Page 53 Hero MotoCorp Ltd. Alongwith the motorcycle I have also received the following:- 1. Owner’s Manual 2. 2 Nos. Keys 3. 1 Set of tools (for details see below) 4. Standard Accessories Make Sr. No. 5. Battery 6. Tyre Front Make Sr.
- Page 54 WHAT ARE THE BENEFITS OF Hero MotoCorp GENUINE SPARE PARTS ? Assures long life Ensures economy for a long time Safety of vehicle and rider Peace of mind Value for money Assured quality CONSEQUENTIAL DAMAGES ON USING NON-GENUINE PARTS Material used is inferior...
- Page 55 CONSEQUENTIAL DAMAGES ON USING NON-GENUINE PARTS Improper air filtration resulting in premature engine failure Affects fuel efficiency Element Air Cleaner Poor engine performance Frequent stalling of engine Higher emission level Spark Plug Poor engine performance Affects fuel efficiency Poor braking efficiency Brake Pads/Shoes Rider safety-an issue Discs/Drum wear out, resulting in subsequent repair cost...
-
Page 56: Jobs Applicable To Periodic Services
Hero MotoCorp Ltd. JOBS APPLICABLE TO PERIODIC SERVICES » Wash the vehicle, blow dry with air at every service. » Fuel line inspection at every service. » Inspect throttle free play and operation at every service, adjust if necessary. » Clean carburetor at first service then every 6000 kms., adjust if necessary. -
Page 57: Service Record Sheet
SERVICE RECORD SHEET To be Filled in by Supervisor Authorised Engine Oil Free/Paid Job Card Km. Range Top-up/ Distributor/Dealer Date Reading Service Replace (Sig. & Stamp) 500 - 750 3000 - 3500 6000 - 6500 9000 - 9500 12000 - 12500 15000 - 15500 18000 - 18500 VIII... - Page 58 SERVICE RECORD SHEET To be Filled in by Supervisor Engine Oil Authorised Free/Paid Job Card Km. Range Top-up/ Distributor/Dealer Date Reading Service (Sig. & Stamp) Replace 51000 - 51500 XVIII 54000 - 54500 57000 - 57500 60000 - 60500 XXII 63000 - 63500 XXIII 66000 - 66500...
-
Page 59: Service Advice Sheet
SERVICE ADVICE SHEET Normal wear and tear components replacement advice Authorised Completion Dt. Distributor/Dealer Date Advice Job Card No. Job Card No. (Sig. & Stamp) -
Page 60: Ownership Record And Data
Hero MotoCorp Ltd. OWNERSHIP RECORD AND DATA AUTHORISED DISTRIBUTOR/DEALER NAME ADDRESS AUTHORISED DISTRIBUTOR/DEALER STAMP AND SIGNATURE...
Need help?
Do you have a question about the HF-Deluxe and is the answer not in the manual?
Questions and answers