
Related Manuals for Kett KB-230


Summary of Contents for Kett KB-230
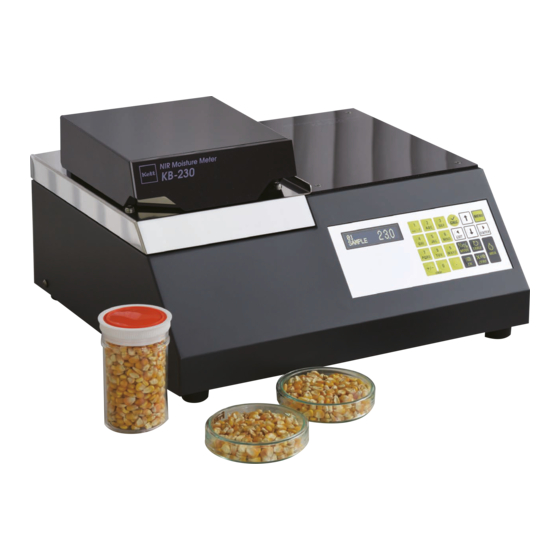
- Page 1 NIR Moisture Analyzer KB-230 Operating Manual Thank you for purchasing this product. Please read the operating manual carefully and use this product properly.
-
Page 3: Table Of Contents
Contents 1. For safety measurement ..............4 2. Features and part names ..............6 2-1. Features ....................... 2-2. Parts of main unit ....................2-3. Accessories ......................3. Specifications ..................8 4. Description of operation keys ............. 9 5. Preparing the main unit ............... 10 6. -
Page 4: For Safety Measurement
Read the precautions noted in the operating manual. The safety measure of the unit may be impaired if instructions are ignored during use. Do not use if broken. ■ If you suspect a problem or malfunction in the unit, contact the vendor, or the Kett Tokyo office sales division, a local branch or sales office. Meaning of warning symbols ■ In order to prevent damage resulting from erroneously operating the equipment, the following symbols are indi- cated in the operating manual and on the product. - Page 5 Caution Burn hazard Electric shock hazard ● Do not damage, heat, or place heavy object on the power cable or connectors. Otherwise, it may cause fire or electric shock, etc. ● When connecting with other devices, first, turn off the power of each unit. ● Do not connect/disconnect the power plug with wet hands. Otherwise, it may cause an electric shock, etc.
-
Page 6: Features And Part Names
2. Features and part names 2-1. Features This unit measures the near-infrared absorption of the measuring object, and converts the obtained data to the moisture. It uses the measurement principal totally different than drying method or Karl Fischer method. 2-2. Parts of main unit <Front>... -
Page 7: Accessories
2-3. Accessories Petri dish (90mm) Sample cell holder (Sample cell) (For petri dish, 90mm) Zero-adjustment plate Spare fuse Power cable Light shielding cover First guide Operating manual... -
Page 8: Specifications
3. Specifications Measurement method : Near-infrared reflection (filter spectroscopy) Light source : Tungsten lamp Measuring diameter : approximately ø25 mm Number of wavelength Channel number : 50 I/O connector : USB, Printer output Display format : Organic EL Display content : Channel number, Channel name, Moisture, Absorbance Operating temperature range : 5 to 35°C (no condensation) Power supply... -
Page 9: Description Of Operation Keys
4. Description of operation keys Operation key Description [MENU] key Used for setting up and making a calibration curve. [ENTER] key Used to determine the currently selected item. [MEA.] key Used for measurement. [TABLE] key Used to set ON/OFF of the rotation table. [ZERO] key Used for zero-adjustment. -
Page 10: Preparing The Main Unit
5. Preparing the main unit * Clean the measurement window. If it is not clean, measurement may not be performed correctly. * When closing/opening the light shielding cover, be careful not to pinch the fingers. ① Install the main unit. Install the unit in a place where direct sunlight is avoided and not be subjected to significant vibration. ② Attach the light shielding cover. Attach the light shielding cover by inserting the columns provided on the top surface of the unit into the mounting holes on the cover. -
Page 11: Specifying Measuring Conditions
6. Specifying measuring conditions 6-1. Selecting the sample cell (container) According to the form of the measuring sample, select a sample cell from four types listed in the following. * Make sure that the selected one fully covers the measurement window. Also, use the same one in making calibration curve and actual measurement. -
Page 12: Deciding Whether To Use The Light Shielding Cover
6-2. Deciding whether to use the light shielding cover The light shielding cover can avoid effects from external light. It is preferable to use the cover in order to avoid external light. * Perform measurement closing the light shield- * The cover may not be usable depending on the ing cover if possible. -
Page 13: Setting The Sampling Amount
6-4. Setting the sampling amount Put the sample in the sample cell selected in section 6-1 and determine the sampling amount. * If the sampling amount (sample height) is not consistent, it may affect the absorbance. * When not using the light shielding cover, determine the sampling amount under the same condition of ex- ternal light as measurement. -
Page 14: Making The Calibration Curve
7. Making the calibration curve ● Necessity of calibration curve The infrared moisture analyzer measures the near-infrared absorption of the meas- uring object, and converts the obtained data to the moisture. Therefore, a conver- sion formula that calculates actual moisture from near-infrared absorption is re- quired. -
Page 15: Preparing The Samples
7-3. Preparing the samples The sampling amount set in section 6-4 is represented as A . The sampling times set in section 7-2 is represented as B . At least the sampling amount of A x B per moisture is required. Prepare enough samples to be used in the measurement of standard moisture content (section 7-5) as well. -
Page 16: Optical Measurement (Entering The Calibration Data)
7-6. Optical measurement (entering the calibration data) ■ Set the main unit. ( ⇒ 5. Preparing the main unit (P.10)) ■ Perform measurement under the same condition in making calibration curve and regular measure- ment. Following the procedures below, enter the channel names and sample calibration data obtained in section 7-1 to 7-5. - Page 17 Step Display Operation ● 0 1 N 0 1 X 1 ◀ ▶ Input the absorbance. X 2 ◀ ▶ M E A The absorbance input screen will be displayed. To automatically obtain absorbance by optical measure- ment, set the sample on the measurement window, and press the [MEA.] key, ⑥...
-
Page 18: C Alculation Of Calibration Curve Coefficient
7-7. Calculating coefficient From the calibration data input from the optical measurement described in the section 7-6, calculate the regression of coefficient. Step Display Operation ● ▶ F L O U R Select the channel number and calculate the regression. × Perform (1) to (2) described in P.16. 扌... -
Page 19: Making Measurements
8. Making measurements Measure the sample in the same measurement condition as making calibration curve. ( ⇒ 6. Setting the measurement conditions (P.11)) ⇒ * It is recommended to perform zero-adjustment. ( 9. Zero-adjustment (P.20)) <Step 1> ● Select the channel number. In the initial screen, select the channel operating [CH.], [ 扌... -
Page 20: Zero Calibration
9. Zero calibration ● What is zero-adjustment? If errors occur in the measurement results, read the absorbance obtained from reflection on the zero-adjustment plate. The measurement result will be stabilized by setting the absorbance as zero. Make sure to perform this operation when making calibration curve or in the regular measurement as well. Also, the zero-adjustment is required after the power is turned on. -
Page 21: Setup
10. Setup Each setting can be checked or changed. ① Setting modes Press the [MENU] key. The unit will go into each setting mode. ② Pass code input At the time of shipment, "9999" is set. _ _ _ _ P A S S ? ③... - Page 22 Setting the channel parameter (Following six items can be set per channel) ■ 2. Smoothing of continuous measurement 1. Channel name (6 alphanumerics) 3. Measurement value display digits (0 to 5) A channel identification. It will It is set to minimize the variation The display range changes accord- be displayed when changing when observing the time variation in ing to the display digits setting.
- Page 23 6. Averaging times in normal measurement 4. Calibration curve coefficient 5. Correction parameter (Default: 1 time) A formula (coefficient) to calcu- Setting offset value and slope cor- The averaging times in normal meas- late moisture from absorbance. rection value will enable correction urement can be set. The default is "1 of measurement value.
- Page 24 Duplicating the channel ■ The channel can be duplicated. To cancel the setting during operation, press the [EXIT] key. Then, the previous screen will be restored. Step Display Operation ● ▶ 2 . C H D U P L I C A T E Select the channel duplication.
- Page 25 Setting the pass code ■ Setting the pass code will disable the setup operation, and alteration of data can be avoided. At the time of shipment, "9999" is set. Be careful not to forget the changed pass code. * To cancel the setting during operation, press the [EXIT] key. Then, the previous screen will be restored. Step Display Operation...
-
Page 26: Communication
The Printer VZ-800 is available as an option. The normal mode measurement data can be printed. <Printout example> ① Make sure that the power of KB-230 and the printer are turned off. ② Connect the printer cable VZC-54 (designated one) to the printer output port provided on the rear of the main unit of KB-230. -
Page 27: Maintenance
12-2. Consumable parts To use the unit in the best accuracy, it is recommended to replace consumable parts at an interval of two years. Do not replace the consumable parts yourself. Contact the vendor from which you purchased the unit or the Kett Tokyo sales office or a local Kett office or sales office for assistance. <Consumable parts> ○ Filter wheel motor ○ Light source lamp ○... -
Page 28: Error Display
● When zero-adjustment plate is set E-05 low, and the signal level is be- The lamp may have blown. Contact the vendor from low the requirement.) which you purchased the unit or the Kett Tokyo sales office or a local Kett office or sales office for assis- tance. E-06 Channel parameter not set Set an appropriate channel parameter. - Page 29 <Remarks> ● When the absorbance saturated sampling amount cannot be prepared Less than the absorbance saturated sampling amount While the near-infrared from the bottom passes through the sample, the displayed value will continue to fluctuate. Near-infrared Near-infrared Absorbance Sampling amount Sampling amount Sampling amount Sampling amount If the following is met, making calibration curve and measurement is possible. ①...
- Page 32 Notes ● Copying some or all of the contents of this user manual without prior written consent is strictly prohibited. ● The contents of this user manual may be changed at any time in the future without any prior notice. ● The appearance and/or representations of the products and parts depicted in this user manual may not appear exactly as their actual counterparts, but this does not affect their operation or functionality. ● This user manual was intended to be written as clearly and accurately as possible. However, if you are unclear about anything in this user manual or notice any missing information, please contact us directly. ● We cannot be held responsible for any actions or effects resulting from the execution of any opera- tions outlined in this user manual.
Need help?
Do you have a question about the KB-230 and is the answer not in the manual?
Questions and answers