
Related Manuals for Kett PM-650


Summary of Contents for Kett PM-650
- Page 1 Instant Moisture Meter for Grains, Seeds, Coffee and other small products PM-650 Operating Manual Thank you for purchasing this product. Please read the operating manual carefully and use this product properly.
-
Page 3: Table Of Contents
CONTENTS 1. Features ....................4 2. Specifications ..................5 3. Part Names ................... 6 4. Display/Keyboard ................. 7 5. Preparation and Configuration ............8 5-1. Battery Installation ................ 8 5-2. Product number viewing .............. 8 5-3. Product number selection ............9 5-4. -
Page 4: Features
[Note] The entered product versions may be different even among the same PM-650 models. The display may be different between examples in the Operating Manual and the real ones on the actual tester, but the usage is the same. -
Page 5: Specifications
2. Specifications Measuring principle : Capacitance(Dielectric) (50MHz) Applications : Grain, seeds, small objects Measurement range : 1 - 40% (sample dependent) Sample volume : 240 mL Operating temperature range : 0 - 40 °C Precision : <Moisture> Standard error of 0.5% or less versus drying method (all samples with moisture content of less than 20%) Correction function : <Mass>... -
Page 6: Part Names
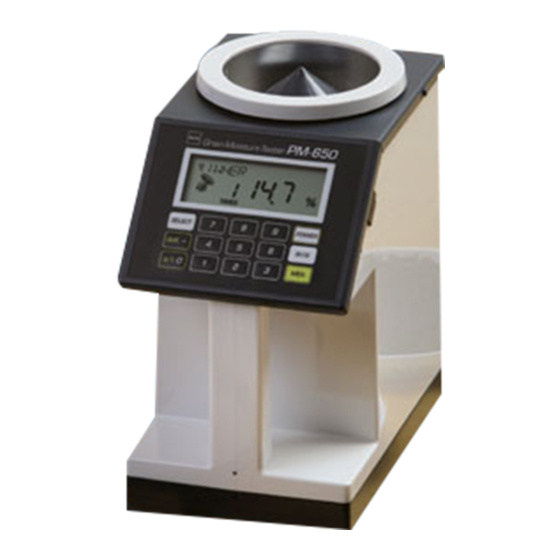
3. Part Names <Front> <Accessories> Measuring section (sample inlet) Inner cylinder Display Keyboard Funnel Manual hopper (Sample cup) Battery cover <Rear panel> Brush Batteries (1.5V “R6” or “AA” size, x4) RS-232C Connector Product list Operating manual... -
Page 7: Display/Keyboard
4. Display / Keyboard Product name Unit of volume weight Product number Battery level icon Sample in/out icon Number of Moisture value, measuring Value weight SELECT key POWER key Selection of products Power On/Off AVG. key Average value Volume weight key MEA. -
Page 8: Preparation And Configuration
5. Preparation and Configuration • This instrument is equipped with an integrated weighing scale. For optimal results, this instrument should be placed on a horizontal surface and used in locations where the wind is not strong and the instrument isn’t subject to vibration. -
Page 9: Product Number Selection
5-3. Product number selection Select a product number to be measured from the "Product List". [Note] The method of how to enter product numbers are different between "1 to 99" and "100 to 150 (A0 to F0)". ・ Selection of product number "1 to 99" → procedure below ・... - Page 10 • Select a product number "100 to 150 (A0 to F0) to be measured from the "Product List". (1) Press the key, and the product number that was measured last time blinks (in this case, 41). (2) Fo r exa mple, to now me a su re "112 ( B2) MUSK (muskmelon)".
-
Page 11: Sample Extraction
5-4. Sample extraction (1) Mount the funnel on the manual hopper, and load a sample into the funnel to one-third of the funnel depth. (2) Remove the funnel to eliminate surplus sample and to level off the sample. [Note] Never extract a sample directly with the manual hopper. -
Page 12: Measurement
5-5. Measurement [Note] When a volume weight is measured, "Be sure to follow the procedure in section 7-1. page 18 to 20 (to check the accuracy of the weighing scale) before going further". During blinking, do not move the instrument. (1) Make sure that there is no residual sample in the measuring section, and press the key. - Page 13 (3) After the decimal point blinks for approx. 5 seconds, the measuring count and moisture content are displayed. Display example : 41 WHEA 1TIMES 13.5% (Product number : 41 WHEAT, 1st measurement, moisture content 13.5%) The measuring count is displayed from 1 to 9. The 10th measuring count is displayed as 1.
- Page 14 [Note 1] For samples wit h high mois tu r e content , t he mois tu r e (example of below measurement range) content difference among individual grains is large. While t h e mo i s t u r e c o n t e n t c a n b e d i s p l aye d , m e a s u r e m e n t precision is not as good as lower moisture content samples.
- Page 15 [Note 5] Measurement of pine pulp, cashew nuts, etc. (Items to be measured vary with Instrument versions) For samples that are likely to be caught by the electrode such as pine pulp, break the samples into fine pieces before measurement or eliminate pieces that are likely to be caught before measuring.
-
Page 16: Other Functions
6. Other functions 6-1. Displaying the average moisture value When the measurement count is 2 to 9, the average value can be calculated (simple arithmetic mean). Pressing the key displays the average value of measurements from 1st to the current (up to 9). In th e exa mp l e at th e r i g ht, “... -
Page 17: Auto Power Off
6-2. Auto power off If no measurement or operation is performed for 3 minutes with the power on, the power is automatically turned off to avoid battery drain. A b u z ze r s o u n d s a n d t h e d i s p l aye d c o n te n t s disappear. -
Page 18: Options
7. Options A 200g standard weight (for checking the accuracy of weighing scale) and a printer (VZ-330) are optionally available. Follow the procedure below for usage. 7-1. 200g standard weight (for checking the accuracy of weighing scale) <Items to be prepared> •... - Page 19 (2) Press the key, and press the keys simultaneously while a buzzer sounds. Beep Simultaneous pressing during beep <Accuracy checking mode of weighing scale> "180" is displayed, and the displayed number starts counting down ("179", "178", and so on in steps of 1 second).
- Page 20 (3) After counting down, "0.00g" will be displayed for a few seconds, and then the decimal point starts blinking. When the internal weighing scale displays "0.0g" as the zero point, put the 200g standard weight gently on the sample cup covered on the inner cylinder. (4) The weight of the 200g standard weight is displayed.
-
Page 21: Printer (Vz-330)
7-2. Printer (VZ-330) <Printing example> Connecting the printer, V Z-330 (option), to the connector on the rear panel of the main unit with the cable supplied with the printer allows users VERSION : PM6501 DATA VER. NO. : 00006 to automatically print the measured results after PRODUCT No.41 measurement. -
Page 22: Error Display
8. Error Display The following error are displayed when this instrument or usage conditions are not normal. In such cases, please contact us because repair may be necessary. This is also true should other error messages be displayed. Error Display Description Error Display Description... - Page 23 Warning indication (measured value blinking) • The main unit temperature is above (or below) the operating temperature range. • The main unit board temperature is above (or below) the operating temperature range. • The sample temperature is above (or below) the operating temperature range.
-
Page 24: Instructions For Proper Use
9. Instructions for proper use (1) This tester is a precision instrument equipped with an integrated weighing scale. To avoid instrument failure, do not hit the instrument or drop it. (2) Do not directly touch the metal part of the measuring unit with your hand. Failure to observe this may generate static electricity which may lead to breakdown. - Page 28 Caution ● It is strictly prohibited to transfer part or all of this manual without permission. ● The contents of this manual are subject to change without notice. ● The appearances, screens, etc. of the product and accessories displayed on this manual may differ from the actual ones, however, operations and functions are not affected. ● All efforts have been made to ensure the contents of this manual are accurate. However, if you notice any part to be unclear, incorrect, omitted, or the like in this manual, please contact us. ● Be aware that we are not liable for the effects resulting from opera- tions according to this manual regardless of the items above. 060154-01...
Need help?
Do you have a question about the PM-650 and is the answer not in the manual?
Questions and answers
How to operate Bias adjustment on the Grain Moisture tester KETT PM-650
The bias (offset) adjustment on the Kett PM-650 grain moisture tester must be performed using software with a PC.
This answer is automatically generated