Advertisement
Quick Links
Advertisement

Related Manuals for Syba SY-ENC50122


Summary of Contents for Syba SY-ENC50122
-
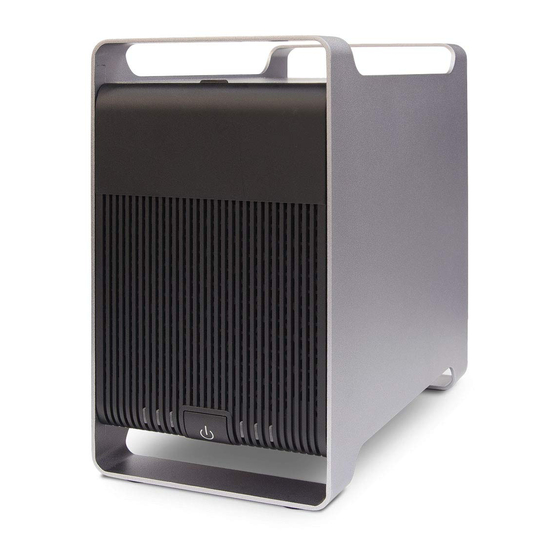
Page 2: Product Specifications
Product Specifications Support single HDD up to 16TB+, with a total of 5 RAID 0 set up of 80TB+ capacity Only work with provided external 12V8A power supply. Will have the following signal alerts once power is detected out of range: a Yellow light signals low voltage, it may be seen by pulling off the bottom HDD B Red light signals high voltage, it may be seen by pulling off the bottom HDD Support RAID0/1/3/5,JBOD, and Normal Clone... -
Page 3: Package Contents
Package Contents:... - Page 4 3. HDD Installation Instruction (Please do not connect the power supply while installing the hard drive.) 3.1 : 3.5-inch hard drive installation Touch the protruding position on the top of the panel with your fingers. Pull out the magnetic panel and place it properly.
- Page 5 Repeat the process with all the HDD trays. Check to see if all the trays are inserted and locked into place before positioning the magnetic front panel into place. 3.2 : 2.5-inch hard drive installation Remove the clasp on the right side of the extraction disk, and place the 2.5-inch hard disk in the position shown on the left.
-
Page 6: Product Description
4. Product Description Mobile Tray Face Panel :T HDD P OWER WILL STAY ON WHEN POWERED ON UNCTION AND WILL TURN OFF DURING SLEEP MODE :T HDD A CTIVITY ELLOW WILL BLINK DURING DESCRIPTION (READ ACTIVITY AND WRITE... - Page 7 Lower panel RAID1/3/5/10/Clone Modes ORMAL ODES When the HDD 1-5 LED lights up in red and the E/R POWER LED lights up in red, it means that the corresponding red light has an BLUE LED WILL error in the hard disk. Please replace the defective hard drive STAY ON WHEN THE with a new hard disk with a capacity not less than the old hard UNIT IS POWERED...
- Page 8 Locations Functions Power Switch: Power on: Push once to power on the unit. Shut down: Push and hold for 4 seconds to shut down. 12V power input interface (5.5*2.5): (new power supply voltage input protection) Connect the 12V 8A power adapter in the accessory box. RESET switch: When you need to change the RAID mode, you need to press this switch for a few second, and then create a new RAID configuration mode.
- Page 9 5.Hardware RAID setup 1. First set the initial state 2. Set RAID mode Attention : Before changing the RAID mode, please back up the data on the hard drive. Once the RAID mode is changed, all data on the hard drive will be erased.
- Page 10 RAID mode comparison table: ITEM S/W1 S/W2 S/W3 MODE RAID0 RAID1/RAID10 RAID3 RAID5 CLONE LARGE NORMAL Schematic diagrams of RAID setting by switches Note: RAID1+0 can only use 4 hard drives.
- Page 12 6.Software RAID setup • Insert the Software CD into your ROM drive. • In Windows explorer, locate the CD drive and open the windows folder. • Double click on the setup file to begin the installation 。 • After the program startup screen appears (see the figure below), click ‘Install’, and the program will begin to install.
- Page 13 • The following screen will appear after installation. Click "Start Application Now" and select "Finish" to run the program.
- Page 14 To Start the Application: After the program is installed, there is a small icon in the task bar at the lower right corner of Windows , which can be clicked to open; or when the product is connected to the computer, the management program will automatically pop out.
- Page 15 When the RAID Manager software is open, if the enclosure is disconnected or removed, the program will prompt the message as shown in the figure below.
- Page 16 Setting RAID Mode: You can configure the RAID mode easily through the management software. Click under "Basic Mode” When the icon enters the "Basic RAID Group Settings", the following screen will appear . The left side is to configure RAID. The program will automatically display the RAID mode that you can set according to the number of hard disks installed.
- Page 17 To set up RAID mode, select the mode you need, press the "Apply" program at the bottom right. A warning box will pop up. See the picture below. Please keep in mind, when you change the RAID mode, be sure to back up your data as all the information on the hard drive will be erased when the RAID mode is switched.
- Page 18 When the RAID manager automatically completes the RAID creation, the following screen will appear. The new mode is created.
- Page 19 Deleting RAID Mode: When you do not need the RAID mode and need to restore four independent hard disks, select “Delete All RAID Groups” and press “Apply”. The following warning box will appear. Press “Yes” to continue and all RAID groups will be deleted.
- Page 20 When a hard disk in the RAID is damaged, the RAID degraded will be displayed in the management interface. You can replace a new hard disk with a capacity no less than the damaged hard disk, and RAID will automatically restore data (only RAID1/3/5/10). You can see the progress of data reconstruction as shown below.
- Page 21 Note: You can only select either Hardware RAID or Software RAID setup. Please do not set both of them at the same time.
- Page 22 Frequently Asked Questions: Won’t power ON 1. Please check whether the power supply is the 12V8A power supply provided with the enclosure. Check if it is correctly inserted into the power interface and correctly connected to the enclosure. Check if the indicator light of the power supply is on. 2.
- Page 23 fails, replace the hard disk. Remember, you cannot pull out other undamaged hard drives in the RAID group at will. RAID rebuilding conditions and precautions: 1. RAID 3/5/10 mode cannot have more than two defective hard disks at the same time. RAID 1 only allows one to be defective.
Need help?
Do you have a question about the SY-ENC50122 and is the answer not in the manual?
Questions and answers