Table of Contents
Advertisement
Quick Links
Advertisement
Table of Contents

Subscribe to Our Youtube Channel
Related Manuals for Alesis ADAT


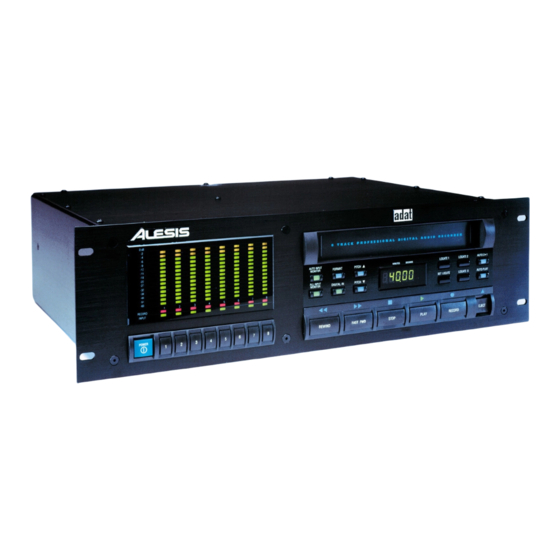
Summary of Contents for Alesis ADAT
- Page 1 ALESIS ADAT "BLACK FACE" Reference Manual...
-
Page 2: Table Of Contents
1.3C Punching...10 1.3D Autolocation...11 1.3E LED Indicators ...11 1.4 “ENGAGED” VS. “DISENGAGED” TAPES ...11 1.5 A WORD ON ADAT's S-VHS CASSETTE TAPE...12 1.6 OPERATING ENVIRONMENT ...13 1.6A Thermal Considerations in Rack Mounting ...13 1.6B Mounting on a Shelf or Non-Rack Enclosure...13 1.6C Avoiding Electromagnetic Interference ...13... - Page 3 5.1B ADAT ID (Identification) Numbers...42 5.1C How the Master and Slave Decks Interact...43 5.1D Achieving Lock ...44 5.1E Independent Slave Mode...44 5.2 FORMATTING WITH MULTIPLE ADAT SYSTEMS ...44 5.2A Master Format Enabled and Performing a Complete, Start-to-Finish Format...44 5.2B Master Format Enabled and Extending the Format...45...
- Page 4 CHAPTER 8: ADAT ADVANCED FEATURES 8.0 ABOUT THE ADVANCED FEATURES...59 8.1 ADVANCED FEATURES 59 8.1A Eject the tape in the Master ADAT of a Multi ADAT System ...60 8.1B Device Id...60 8.1C Auto Input Monitor Option Select ...60 8.1D Software Version...60 8.1E Tape Write Protect Status ...60...
-
Page 5: Chapter 1: Introduction
1.0 ABOUT ADAT Congratulations. You've just purchased an incredible piece of recording equipment. Here are a few of the features that make the ADAT Digital Recorder perhaps one of the most important advances in recording technology since the invention of multi- track. - Page 6 3 or four ADATS and the optional BRC Remote Control for a 24 or 32 track system, or you might even plan to build a large ADAT system of up to 16 ADATS and the BRC- that's 128 tracks of digital audio! Multiple ADATs, the BRC and other accessories (like the RMB Remote Meter Bridge) form what we call the ADAT System.
- Page 7 DAT recorders, CDs, hard disk recorders, synthesizers, and more. LRC Remote Control. Each ADAT is supplied with the LRC Remote. This handy device duplicates ADAT's front panel play, record, fast forward, rewind, stop and 3 point autolocate system.
-
Page 8: Important Note About This Manual
IMPORTANT NOTE ABOUT THIS MANUAL ADAT’s transparent user interface may tempt you to just plug in and start recording. We can certainly understand your excitement, but please at least do the following: Read section 1.4 on the difference between “engaged” and “disengaged”... -
Page 9: D Autolocation
If you press the Stop button twice, the ADAT mechanism will unthread the tape and pull it back into the S-VHS cassette. The STOP LED will blink to indicate that the tape is disengaged. -
Page 10: A Word On Adat's S-Vhs Cassette Tape
1.6A Thermal Considerations in Rack Mounting ADAT can be mounted in an equipment rack (taking up 3 rack spaces) or placed on a table or shelf. When you install it, keep in mind that heat is the major enemy of electronic equipment. -
Page 11: C Avoiding Electromagnetic Interference
1.6C Avoiding Electromagnetic Interference Like all tape machines, ADAT uses magnetic tape that can be sensitive to electromagnetic interference. Generally this is not a problem, but avoid mounting ADAT next to devices that generate strong magnetic fields such as... -
Page 12: Chapter 2: Hookup
POWER 2.0A The AC Cord ADAT works with any AC voltage from 90 to 250 volts, 50 or 60 Hz. ADAT comes with a line cord suitable for the destination to which ADAT is shipped. Your ADAT was supplied with the correct power cord for your country or local area,... -
Page 13: Audio Cable Tips
These should be low-capacitance shielded cables with a stranded (not solid) internal conductor and low-resistance shield. Although quality cables cost more, they do make a difference. Route cables to ADAT correctly by observing the following precautions. -
Page 14: Audio-Unbalanced Inputs
The vocals, bass, guitar, and keyboards could be taken direct and go to five ADAT tracks. The four drum mics can be mixed to stereo within your mixer sent to the submix outs, then go to two... -
Page 15: C Special Unbalanced Input Jack Wiring
2.2C Special Unbalanced Input Jack Wiring ADAT has a switched-jack wiring scheme that makes it possible to use an ADAT even with a 2-output mixer. Jacks 1, 3, 5, and 7 are normalled together, as are jacks 2, 4, 6, and 8. Anything plugged into input 1 also feeds inputs 3, 5, and 7;... -
Page 16: Sync
To sync together two or more ADATs, connect the Sync Out from the master to the next ADAT’s Sync In. Its Sync Out can in turn feed a third ADAT’s Sync In, etc. This requires a shielded dual male, 9-pin D connector cable available at your Alesis dealer. -
Page 17: Chapter 3: Getting Ready To Record
Insert the end with the hinged door first, label side up, until you encounter a slight bit of resistance. Push gently on the center of the cassette until ADAT draws the tape inward. Once ADAT has started to pull in the tape, do not keep pushing the tape in. -
Page 18: A To Format A New Tape, Or Reformat/Erase An Old Tape
For example, you may record only one song which ends four minutes into the ADAT tape. If you want to use the rest of the tape, you must perform a format extension. Play or fast forward the tape to just before the end of the previously formatted section, and enter Format mode. -
Page 19: A Additional Format Considerations
00:00), entering format mode will automatically rewind the tape to the beginning and start reformatting. While rewinding, the display shows “-FO-” and the rewind LED flashes. This indication is telling you that ADAT must "FORMAT OVER" from the LEAD or beginning portion of the tape. -
Page 20: B Record A "Benchmark" Tape
Mode 2: This mode monitors the input of record enabled tracks ONLY in Record mode. In Mode 2 all tracks monitor the taped signal until ADAT enters Record, at which point the record-enabled tracks monitor the input signal. This means the... -
Page 21: C All Input Monitor
DIGITAL IN can be turned on or off only when the ADAT is in STOP mode. When recording while DIGITAL IN is on, the ADAT's speed is slaved to the clock of the incoming digital signal. -
Page 22: Transport Control Operation
Signals above 0dB will be clipped and lead to digital distortion—an ugly, splattering sort of sound. As on most digital recorders, O dB on the ADAT meter is referenced to full scale, the maximum signal that can be recorded in 16 bits. Reference-level signals plugged into ADAT are recorded 15 dB below full scale. -
Page 23: B Rewind
3.4B Rewind Press to rewind the tape, as confirmed by the REW LED. When fully rewound, the REW LED turns off and the STOP LED lights. Pressing Rewind while recording punches out before rewinding. Engaged tapes rewind at about ten times normal speed. Disengaged tapes rewind at about twenty times normal speed. -
Page 24: E Play
LED while displaying "noFO". Tape transitions from a formatted to unformatted section while playing back. ADAT will detect the lack of a format and flash the Format LED while displaying "noFO". Tape transitions from a formatted to unformatted section while recording. -
Page 25: Footswitch-Controlled Punching
If you use a footswitch and its operation seems “reversed,” make sure it is firmly plugged into the jack, then turn off ADAT, wait a few seconds, and turn ADAT on again. It will recalibrate itself to work with the footswitch. -
Page 26: Chapter 4: Pitch, Autolocation, And Remote Controls
You can tell ADAT to find one of these three points at any time. ADAT will either rewind or fast forward, as indicated by the REW or FFW LED flashing, to find the specified point. -
Page 27: A Setting Locations
ADAT has to pass through the Locate 2 point before it will look for Locate 1. If Locate 2 is reached while ADAT is in record mode, ADAT will punch out before autolocating to the Locate 1 point. -
Page 28: D The Auto Play Function
If you use a footswitch and its operation seems “reversed,” make sure it is firmly plugged into the jack, then turn ADAT off, wait a few seconds, and turn it on again. It will recalibrate itself to work with the footswitch. -
Page 29: Using The Lrc Remote Control
See the next section. USING THE LRC REMOTE CONTROL To use the LRC, plug it into the Locate/Play/LRC jack. It can control a single ADAT or the master unit in a chain of ADATs. The LRC offers the following functions: Transport functions. -
Page 30: Chapter 5: Multiple Adat Operation
Easy creation of safeties and archives of parts. Example: Suppose your rhythm section is in four tracks of one ADAT. You can then do eight tracks worth of guitar, vocal, brass, or other overdubs in the other ADAT, and bounce the “keeper”... -
Page 31: B Adat Id (Identification) Numbers
1 Connect one end of the cable to the master ADAT’s Sync Out jack. Push the connection in firmly, then tighten the screws at each side of the connector. 2 Connect the other end of the cable to the slave ADAT’s Sync In jack and tighten it as above. -
Page 32: D Achieving Lock
Audio will not appear at the outputs of an ADAT until sample-lock sync is achieved. When an ADAT is in lock, the PLAY LED will light solid, and the center decimal point in the display will appear. To achieve the fastest chase-lock performance from a multi-ADAT system, use the Locate points whenever possible. -
Page 33: B Master Format Enabled And Extending The Format
If the slave format function is on, the slave rewinds to the start of the tape and does a complete format. Note that if any channels are record-enabled, they will start recording at time 00:00. 5.2B Master Format Enabled and Extending the Format If the master format is enabled, extending the format, and the slave tape is not formatted: The slave plays, but displays “noFO”... -
Page 34: Auto-Location/Looping With Multiple Adats
There are several fine points concerning auto-location and auto-looping in multiple ADAT systems. Once the master ADAT recognizes the slave ADAT(s), it transmits the master locate points, Auto Play, and Auto 2>1 settings to the slave(s). Any attempt to store any locate points on the slave machines will be ignored. -
Page 35: Chapter 6: Backup
The only thing that will be different between the copy and the original will be the ADAT time code. Such copies won't play back the same time code at the same point in the song as the original. Even so, such non-corresponding time code copies can still be synchronized to the original with sample accuracy by using the BRC and finding the proper offset. -
Page 36: A Normal Method
Connect the DIGITAL OUT of the slave to the DIGITAL IN of the master using the fiber optic cable that came with your ADAT. 2. Put the original tape to be copied into the slave ("id 2") ADAT, which will be the source. -
Page 37: B Optical-Only Method
2. Connect the other end of the fiber optic cable to the target ADAT’s optical input. 3. Insert the tape to be backed up in the source ADAT. 4. Insert a tape in the target ADAT (if it’s not formatted, see section 3.1, or section 5.2 for dual ADAT systems). -
Page 38: Backing Up Via Analog I/O
If you need to back up a tape and have misplaced the fiber optic cable, don’t panic. Hook up the eight analog outputs from the source ADAT to the eight analog inputs on the target ADAT, put the target ADAT into Record mode, and the source ADAT into Play mode. -
Page 39: Chapter 7: Applications
ADAT, as well as to other machines. LIVE RECORDING ADAT is excellent for live recording because of its compact size and easy operation. Eight tracks allow for recording audience sounds, ambience, and individual soloists as well as a stereo mix off the PA. -
Page 40: Video Location Recording
Stripe one ADAT track with SMPTE, and sync your sequencer to this SMPTE signal by whatever means you normally use. As you control ADAT’s tape motion with the transport controls, the sequencer will automatically follow along, letting you mix digital recording with any sequencer. -
Page 41: Chapter 8: Adat Advanced Features
CHAPTER 8: ADAT ADVANCED FEATURES ABOUT THE ADVANCED FEATURES There are some extra functions built into each ADAT that are not listed in the main text of your ADAT manual which we will discuss here. While holding the SET LOCATE switch and pressing certain specified switches, these extra functions can be accessed. -
Page 42: B Device Id
8.1B Device Id Hold SET LOCATE and press PLAY. This displays the ID number of each ADAT in a system and is supplied in case you need to quickly know which ADAT is where in the chain. 8.1C Auto Input Monitor Option Select Hold SET LOCATE and press AUTO INPUT. -
Page 43: G Crossfade Select
The ADAT powers up in normal ("diG") mode. The master ADAT must disable the external clock (i.e. must be set to "int") when it is receiving digital input from any of its slave units. (See Chapter 6) 8.1I Total Running Time of Drum Motor... -
Page 44: Chapter 9: Maintenance/Service
The expected headlife for each ADAT varies according to a number of factors. Given optimum conditions, tape quality, tape care, and operating environment head life for the average ADAT will always be better than if your ADAT is abused, placed in bad environmental conditions and used with badly maintained tapes. Properly cared... -
Page 45: Adat Head Maintenance
Unlike analog or even video tape recorders, the actual sound quality of an ADAT recording will not be affected until there is quite a bit of dirt on the drum and heads. When the Advanced Information Indicator (dot on the bottom... -
Page 46: Tape Maintenance - Safe Tape
(not a defective or worn tape), keep a "benchmark" tape from the first weeks of operation set aside in a safe place (See Section 3.1B). If the ADAT Advanced Information Indicator lights frequently when playing back this tape, it is likely that head cleaning is needed, particularly if several hundred drum-on hours have elapsed since the last cleaning. -
Page 47: Error Messages
At the end of every session you should rewind the tape all the way to the leader, stop, eject the tape, remove it from the ADAT and place it in its protective case. This cuts down on the amount of dust that can enter the transport and keeps wear on the tape at a minimum. -
Page 48: B Errors 1 To 9
The Advanced Information Indicator is a dot that is displayed in the bottom right hand corner of the ADAT display. This light, looking like a "period" at the end of the current tape time, indicates that the error correction circuitry of the ADAT is operating. - Page 49 BRC or AI-2 control, but the incoming timecode it was trying to synchronize to has too much jitter or dropout. It may also occur if the ADAT was not able to read timing information from the tape. It is normal to see Er 8 if the tape has reached the end.
-
Page 50: C Steps To Take Before Calling For Help
5 If it does, then try a different tape. Repeat steps 1 to 3. Does the problem recur? 6 Try a different ADAT. (If you are using a single ADAT system, see if you can visit your dealer.) It does not make sense to send your ADAT to service when there may be only a problem with, for example, some tapes you are using. -
Page 51: Chapter 10: Appendices
However, the signal recorded on tape is very different. Audio signals entering each channel of ADAT first pass through an analog-to-digital converter (ADC), a device that takes 48,000 “snapshots” of the signal level every second. -
Page 52: Appendix
S-VHS tape allows ADAT to use wider track width for more reliable digital recording. It's especially well suited to ADAT's 8 track format. -
Page 53: Digital-To-Analog Converter
(and sometimes time code). Digital I/O Input and output connections where signals passed from one stage to another remain in the digital domain. ADAT has a digital I/O connector that carries digital data for all eight tracks. Digital-to-Analog Converter The device responsible for converting digital signals back into an analog format so that humans can hear them. -
Page 54: Sampling Rate
Rotary Head A type of tape head, as used in ADAT, that spins at a high rate of speed in order to create the same effect as having the tape moving by at rates not physically possible with today’s tapes and transports. -
Page 55: Appendix
Balanced: Unbalanced: Digital Inputs/Outputs Connectors: Communications Protocol: ADAT (Alesis Digital Audio Tape) Rotary head digital recording using S-VHS cartridge 40 minutes typical per S-120 cartridge Approximately 20 times play speed unwrapped/ 10 times play speed wrapped Approximately 3 times play speed... - Page 56 5 1/4" x 19" x 14" (127mm x 483mm x 56mm), 3U IEC rack mounting 15 lbs (6.8 kg) 30 lbs (13.6 kg) LRC detachable 1/4" phone plug Remote Controller ADAT Digital Multitrack Recording System Video Alesis S-120 Master Recording Cassette Fiber Optic Cable IEC style AC power cord BRC Master Remote Controller...
-
Page 57: Appendix 4: Schematics
10.3 APPENDIX 4: SCHEMATICS Wiring Diagram for ELCO Pin out letters are referenced to the alphabetical designation on a standard 56-pin ELCO connector. Channel In 1 In 2 In 3 In 4 In 5 In 6 In 7 In 8 Out 1 Out 2 Out 3... - Page 58 If no tab exists, recording is prevented. However, once the tab is gone, it's gone. Now, you can tell ADAT to ignore the absence of a write-protect tab, and permit recording to take place anyway. Here’s how you do it: 1 Hold the [SET LOCATE] button and press RECORD ENABLE [2];...
- Page 59 AI-2 software version 1.06). This includes all transport commands (Play, FFwd, Rew, Stop, Rec,), even when initiated from the LRC. The timecode will be relative to the ID 1 ADAT’s time position. This makes it possible to synchronize other devices together using the ADAT as the master. Refer to the AI-2 Revision 1.06 Operational Addendum (8/17/94) for more information.
Need help?
Do you have a question about the ADAT and is the answer not in the manual?
Questions and answers