Table of Contents
Advertisement
Advertisement
Table of Contents

Related Manuals for Alesis ADAT-XT


Summary of Contents for Alesis ADAT-XT
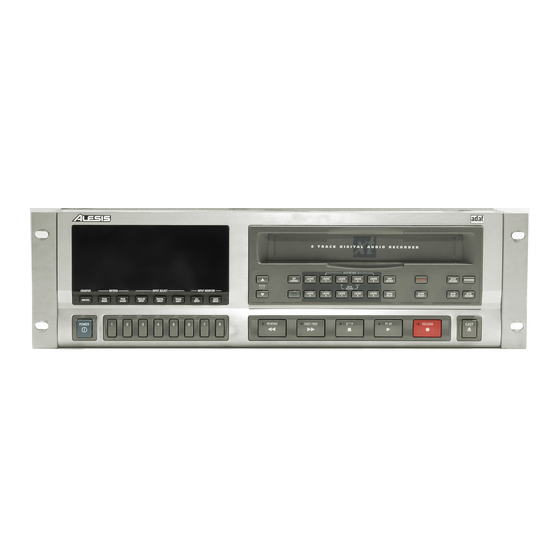
- Page 1 ALESIS ADAT-XT Reference Manual...
- Page 2 This chapter also discusses the difference between “threaded” and “unthreaded” tapes. Chapter 2: Your First Session with the ADAT-XT. This section provides a brief tour of the XT, shows you how to format a tape, record and playback, set locate points, auto punch-in and out, bounce tracks, and points out other various features.
- Page 3 ADAT XT Reference Manual...
- Page 4 This chapter also discusses the difference between ÒthreadedÓ and ÒunthreadedÓ tapes. Chapter 2: Your First Session with the ADAT-XT. This section provides a brief tour of the XT, shows you how to format a tape, record and playback, set locate points, auto punch-in and out, bounce tracks, and points out other various features.
- Page 5 ADAT XT Reference Manual...
-
Page 6: Table Of Contents
ONTENTS 1: S ETTING Unpacking and Inspection AC Power Avoiding Ground Loops 8 Line Conditioners and Protectors About Audio Cables Basic Audio Hookup Input Normaling ÒThreadedÓ vs. ÒUnthreadedÓ 11 A Word on ADATÕs S-VHS Cassette Tape Operating Environment 12 Thermal Considerations in Rack Mounting Mounting on a Shelf or Non-Rack Enclosure Avoiding Electromagnetic Interference 12 2: Y... - Page 7 4: B ASIC PERATIONS Tape Formatting Formatting Considerations Complete Format Recording While Formatting Format Extend 31 Write Protect Override 31 Reading The Display 32 Display Icons 33 TIME Counter & ABS/REL Button Locate 0 Basic Editing EDIT Value Button Buttons Entering Numeric Values Editing Individual Digits Input Select...
- Page 8 Looped Recording Rehearsal Tape Length Footswitch Controls Footswitch Controlled Punching Footswitch Controlled Autolocating Using the XT Remote 5: M ADAT-XT O ULTIPLE Overview Synchronizing Machines Master/Slave Interaction Achieving Lock 57 Independent Slave Mode Formatting Multiple Tapes Master Format Enabled, Complete Format...
- Page 9 Maintenance/Service Cleaning Maintenance Obtaining Repair Service C: E PPENDIX RROR Steps To Take Before Calling For Help 83 D: S PPENDIX PECIFICATIONS LOSSARY NDEX ADAT XT Reference Manual ODES Index...
-
Page 10: 1: Setting Up
Blank S-VHS ST-120 cassette • Alesis warranty card It is important to register your purchase; if you have not already filled out your warranty card and mailed it back to Alesis, please take the time to do so now. AC P OWER OOKUP With the XT off, plug the female end of the power cord into the XT’s [POWER INPUT]... - Page 11 Chapter 1: Setting Up buzzes, or sometimes radio reception and can occur if a piece of equipment “sees” two or more different paths to ground, as shown below. Device A One path goes from device A to ground via the ground terminal of the three- conductor AC power cord, but A also sees a path to ground through the shielded cable and AC ground of device B.
-
Page 12: Line Conditioners And Protectors
Never unplug a cable by pulling on the wire itself. Always unplug by firmly grasping the body of the plug and pulling directly outward. • Although Alesis does not endorse any specific product, chemicals such as Tweek and Cramolin, when applied to electrical connectors, are claimed to improve the electrical contact between connectors. -
Page 13: Basic Audio Hookup
Chapter 1: Setting Up ASIC UDIO OOKUP When connecting audio cables and/or turning power on and off, make sure that all devices in your system are turned off and the volume controls are turned down. The XT provides eight -10dBV analog outputs via phono connectors. These should be connected to your mixer’s tape or line inputs. -
Page 14: A Word On Adatõs S-Vhs Cassette Tape
4 minutes, the tape will automatically unthread itself to minimize tape wear. ADAT’ ORD ON Alesis recommends you use only premium quality, name brand S-VHS cassettes. We cannot overemphasize the importance of this. We recommend using AMPEX 489 DM Digital Mastering Audio Tape, or Alesis ADAT Mastering Audio Cassettes . Other acceptable brands include Maxell XR-S Black, JVC XZ , 3M Master Broadcast and ASD 40+, and TDK SP Super Pro. -
Page 15: Thermal Considerations In Rack Mounting
OUNTING ON A To mount the XT on a shelf or other flat surface, Alesis recommends using the attached screw-on feet to avoid scratching the shelf’s surface with the deck’s bottom. Please observe the general comments on thermal considerations given under “Thermal Considerations in Rack Mounting”... - Page 16 Push gently on the center of the tape cassette until the XT draws the tape inward; never force the tape into the cassette door. ADAT XT Reference Manual Your First Session With The ADAT XT: Chapter 2 HAPTER IRST ESSION ADAT-XT NSERTION Ad At n0 F0 -- -- -- --...
-
Page 17: 2: Your First Session With The Adat Xt
Chapter 2: Your First Session With The ADAT XT ORMATTING Formatting prepares a tape for 8 channels of audio, and adds a master timecode reference and sample rate information to the data section. Similar to formatting a floppy disk to use on a computer or sampler, formatting an XT tape time-stamps the tape to single-sample accuracy so that audio is referenced to an accurate time base. -
Page 18: Makinga Recording
AKING ECORDING Recording on the XT is very similar to most multitrack tape machines. The process involves formatting a tape (see previous tutorial), putting one or more tracks into record-ready, adjusting record levels on your mixer, setting the input monitor mode, locating to the start tape address and engaging record. -
Page 19: Transport Buttons
Chapter 2: Your First Session With The ADAT XT RANSPORT During recording and playback, the following transport buttons are used frequently. Get familiar with them by using them while watching the TIME counter. REWIND High speed reverse. Press with [PLAY] to initiate review mode. FAST FWD High speed forward. -
Page 20: Playback
LAYBACK There are several ways to quickly play back your recording. You’ll use the transport buttons first. To play back a recording: ¿ Press [REWIND] to locate back to a tape position before you engaged recording. The [REWIND] LED will light and the TIME counter will roll backward to indicate the current tape location status while the transport is in motion. -
Page 21: Locating
Chapter 2: Your First Session With The ADAT XT OCATING Up to 10 tape positions can be stored for easy recall. These are called Locate Points , and can be stored either “on the fly” while the transport is engaged, or when the transport is stopped. - Page 22 Your First Session With The ADAT XT: Chapter 2 ADAT XT Reference Manual...
-
Page 23: Creatinga Loop
Chapter 2: Your First Session With The ADAT XT REATING The Auto Return function causes the XT to automatically rewind back to a specified tape position (Locate 1) when playback or recording has reached a specified position (Locate 4). Both Locates 1 and 4 are assignable to any tape position using the methods described in the previous section. -
Page 24: Automated Recording
UTOMATED ECORDING So far, all of your recording has been done manually — you pressed the transport buttons when you wanted to start and stop recording. Auto recording stops and starts recording automatically at predetermined times. This is useful when you want to precisely punch in to a specific place on one or more tracks. -
Page 25: Pitch Control
Chapter 2: Your First Session With The ADAT XT ITCH ONTROL The Pitch function controls the speed of the tape, and thus the pitch of the audio recorded on tape. The XT’s Pitch control has a range of -300 to +100 cents when using a sample rate of 48kHz, and a range of -200 to +200 cents when using 44.1kHz. -
Page 26: Track Copy
RACK It is possible to copy the audio material from one track to another on the same tape within the XT without leaving the digital domain and without the need for any audio cables. In fact, you can copy up to 4 tracks at a time using the Track Copy feature. For more information on using the Track Copy function, see page 38. -
Page 27: Input Jack Characteristics
– U NALOG UDIO NPUT JACK CHARACTERISTICS The XT includes eight unbalanced , phono jack inputs. These are compatible with low- impedance, unbalanced, -10 dBV outputs typical of equipment such as mixers, synthesizers, samplers, direct boxes, etc. The unbalanced input jack wiring convention is as follows: YPICAL INPUT JACK HOOKUPS The input jacks are typically hooked up in one of three ways: •... - Page 28 Chapter 3: Connections – B NALOG UDIO The +4 dBu balanced line inputs and outputs use an ELCO ® multipin connector. The balanced in/out connector wiring scheme is as follows: Larger Key Notch Note: The larger of the two outer key notches is at the bottom. Both the unbalanced and balanced inputs and outputs may be used simultaneously.
-
Page 29: Analog Audio Ð Input Mode
– I NALOG UDIO NPUT The XT lets you choose one of three Input Modes for both the Unbalanced and Balanced inputs: 2-Input Mode 4-Input Mode 8-Input Mode The reason for these three modes is to take equal advantage of 2, 4 and 8 bus mixing consoles. -
Page 30: Sync In/Out
Chapter 3: Connections The two DB 9 connectors marked [SYNC IN] and [SYNC OUT] are used for synchronizing two or more XTs together, or a combination of XTs and ADATs. This requires a male-to-male, 9-pin D connector cable for each additional machine in the chain. -
Page 31: Digital Audio In/Out
IGITAL UDIO The Digital input and output carries all eight tracks on a single fiber optical cable. This allows you to bounce audio between multiple machines within the digital domain. This also lets you route digital audio between multiple XTs and ADATs, and to ADAT Compatible™... -
Page 32: Footswitches
Chapter 3: Connections OOTSWITCHES The XT provides two footswitch connectors using 1/4" mono (T/S) jacks. One, labeled [LOCATE/PLAY/LRC REMOTE], allows locate and play commands; the other, labeled [ PUNCH IN/OUT], is for punch in/out control. The two footswitch jack functions are designed to be used with any momentary single-pole/single-throw footswitch (either normally open or normally closed). -
Page 33: Asic Perations
ASIC This chapter is designed for operators who may not have experience working with digital audio. All functions of the XT (with the exception of synchronization and digital audio) are explained here in detail. If you are already familiar with multitrack recording concepts, you may not need to read this chapter. -
Page 34: Recording While Formatting
Chapter 4: Basic Operations Be sure the tape is completely rewound. ¡ Press the [FORMAT] button. If the tape was unformatted, the FORMAT icon will have been flashing prior to pressing it. Once pressed, the FORMAT icon will stop flashing and remain lit to indicate that formatting will begin if the XT enters record mode. -
Page 35: Write Protect Override
the last valid time-stamp it reads from tape. This insures continuous time-stamping when a tape plays from beginning to end. To extend the format on a partially formatted tape: ¿ Use [FAST FWD], [REWIND] and/or [PLAY] to locate to the section of tape just before where formatting was discontinued. -
Page 36: Reading The Display
Chapter 4: Basic Operations EADING ISPLAY The XT’s display serves many functions. It shows the current level of each of the eight audio tracks, it shows the current tape position numerically in hours, minutes, seconds, and 100ths of seconds, and shows the current modes of the many parameters available. -
Page 37: Display Icons
ISPLAY CONS The following icons appear in the display at different times. They indicate that the parameter for which they are named has been selected or turned on. These icons are: This icon lights whenever Absolute Time mode is selected (by pressing the [ABS/REL] button). - Page 38 Chapter 4: Basic Operations This icon indicates that you have the Track Delay function turned on. When in Edit Mode, this icon indicates that you are editing a tracks delay amount, which will appear in the TIME counter. A number (from 1 to 8) will appear next to the EDIT icon to indicate which track is being edited.
-
Page 39: Time Counter & Abs/Rel Button
TIME C OUNTER The TIME Counter (found at the top left section of the display) is used to indicate the current tape position. The [ABS/REL] button toggles the TIME counter between Absolute Time mode and Relative Time mode. The XT will indicate which Time mode is selected by either displaying ABS (for Absolute Time) or REL (for Relative Time) just to the left of the TIME counter. -
Page 40: Basic Editing
Chapter 4: Basic Operations ASIC DITING EDIT V ALUE The [EDIT VALUE] button is used to turn Edit mode on and off. When turned on, the EDIT icon will light indicating you are now in Edit mode. At this point, you can press any one of the [LOCATE 0] - [LOCATE 9], [TAPE OFFSET] or [TRACK DELAY] Function buttons to view and/or edit their respective parameter settings in the display. -
Page 41: Input Select
NPUT ELECT There are three buttons for input select options. These three buttons are labeled [ANALOG INPUT], [DIGITAL INPUT], and [TRACK COPY]. These determine what signals will be recorded on the XT. The currently selected input mode is indicated in the lower right corner of the display: ANALOG, DIGITAL or TRK COPY. - Page 42 Chapter 4: Basic Operations The [TRACK COPY] button is used to digitally bounce tracks within a single XT. To digitally bounce tracks, you must first press [TRACK COPY]; the TRK COPY icon in the INPUT icon group will light. Next, select the source tracks, select (record enable) the destination tracks, and initiate recording.
-
Page 43: Input Monitor
NPUT ONITOR The Input Monitor controls consist of two buttons: [ALL INPUT] and [AUTO INPUT]. NPUT This feature determines what you will hear from the XT’s output jacks when a track is record-enabled (REC LED flashing): tape, or source. The [AUTO INPUT] button toggles the Auto Input Monitor on and off. -
Page 44: Meters
Chapter 4: Basic Operations ETERS The XT provides two buttons for meter display options: [PEAK MODE] and [PEAK CLEAR]. UTTON The [PEAK MODE] button selects the peak hold mode of the eight level meters. Each time the [PEAK MODE] button is pressed, the peak meters switch between three possible Peak Hold modes: Continuous, Momentary and Off. -
Page 45: Record Enable
ECORD NABLE To record enable a track, press the track’s RECORD ENABLE button. When you press a track’s RECORD ENABLE button for the first time, the track’s red REC LED will flash, indicating the track is in record-ready, and its INPUT LED will light (unless Auto Input is on and the transport is in play), indicating you will be able to monitor that track’s input. -
Page 46: Transport Controls
Chapter 4: Basic Operations RANSPORT ONTROLS The XT’s six transport control buttons resemble those of a conventional tape recorder, although there are several extra features. JECT Press the [EJECT] button to eject the tape from the XT. If the tape is moving, it will stop before ejecting. -
Page 47: Record/Punch In Or Out
pressing [PLAY] will cause the XT to start playing after it arrives at the corresponding tape location ([PLAY] LED will flash to indicate deferred play mode). Pressing [PLAY] while recording causes the XT to punch out (recording stops and playback continues). Pressing [PLAY] in any mode other than locating causes the transport to enter play mode, and the [PLAY] LED lights. -
Page 48: Sample Rate (Clock)
Chapter 4: Basic Operations [STOP] to thread the tape ([STOP] LED is lit). Entering play or record more will also thread the tape, if it was previously unthreaded. • Punch out . When recording, pressing [STOP] will exit record mode and stop the transport. -
Page 49: Displaying Frames Vs. 100Ths/Seconds
is similar to the audio you are recording. The longer crossfade time allows for a smoother transition and is more useful when punching in new material that is very different from what is already on tape, or when punching in low-frequency signals. Crossfading always begins at the punch point and continues for the amount of time you have specified. -
Page 50: Pitch Control
The counter will not elapse in real time when the pitch is set to a value other than zero. • When you change the pitch on ADAT-XT, the sampling rate will also change. The lowest sampling rate is 40.4 kHz, the highest is 50.8 kHz. •... -
Page 51: Track Delay
RACK ELAY Track Delay lets you delay individual tracks up to 170 ms, in order to achieve a more desirable “feel.” For example, if the bass track is anticipating the beat, you can push it back so it’s “in the pocket” by delaying it a few milliseconds. If you need one track to play back earlier than the others, try offsetting all other tracks by the same amount. -
Page 52: Autolocation Controls
Chapter 4: Basic Operations UTOLOCATION ONTROLS The XT’s autolocation controls consist of 10 Locate Point memories which can be set either manually or “on the fly”, and recalled instantly. Each Locate Point’s address can be displayed and set using either Absolute or Relative Time. -
Page 53: Setting Locate Points
ETTING OCATE There are two ways of storing Locate Point memories: manually or “on the fly.” To store a Locate Point memory “on the fly”: ¿ Press [PLAY] to engage playback. Alternatively, the transport may be engaged in either Rewind, Review, Fast Forward, Cue, Record or Stop mode (i.e. -
Page 54: Auto Looping
100 consecutive loops. If this is not to your liking, this safeguard may be disabled. This is done by holding the [SET LOCATE] button and pressing [AUTO RETURN]. However, Alesis recommends doing so only when you absolutely have no other alternative. The 100 loop limit will be enabled again once [STOP] is pressed. -
Page 55: Auto Record
ECORD The Auto Record function lets you determine exactly where recording should begin and end beforehand, so that the machine automatically takes you in and out of record. Locate Points 2 and 3 determine the in and out points. After setting both Locate Points 2 and 3, press the [AUTO REC] button to enable this function;... - Page 56 Chapter 4: Basic Operations automatically recognizes the shorter length of the ST-60 because the hubs used in the cassette are larger. However, there is no way for the XT to tell apart a ST-120, ST-160 or ST-180 tape, since these all use the same, smaller size hubs. In this situation, the XT assumes the tape length to be that of a ST-120 tape.
- Page 57 OOTSWITCH ONTROLS The XT provides two footswitch jacks: [LOCATE/PLAY/LRC REMOTE] and [PUNCH IN/OUT] . Both accept any momentary, single pole/single throw, 1/4-inch mono (T/S) footswitch. During power-up, the XT checks the footswitch to determine whether it is normally open or normally closed type, and calibrates itself accordingly. If you use a footswitch and its operation seems “reversed,”...
-
Page 58: Adat Xt Reference Manual
Chapter 4: Basic Operations XT R SING THE EMOTE The XT hand-held remote provides the following functions: • Transport functions: Rewind, Fast Forward, Stop, Play and Record. • Autolocation functions: Locate 1, Locate 2, Locate 3, Locate 4, Set Locate and Auto Loop •... - Page 59 Combine this feature with the ability to bounce tracks in the digital domain, and you have the ability to perform cut-and-paste style assembly editing. YNCHRONIZING ACHINES ADAT XT Reference Manual Multiple ADAT-XT Operation: Chapter 5 HAPTER ADAT-XT PERATION INPUT OUTPUT...
- Page 60 Synchronization requires a dual male, 9 pin D connector cable for each slave to be synchronized. Use only Alesis cables. Alesis Sync Cables are available in three different lengths: 8", 30", and 30' from your dealer. Other types of cables may cause incorrect commands to be received, and erratic sync performance.
- Page 61 If the master’s FORMAT icon is on, and you are extending the format, and the slave tape is not formatted: • The slave plays, but the TIME counter reads “noFO” (no format) while flashing the FORMAT icon. ADAT XT Reference Manual Multiple ADAT-XT Operation: Chapter 5 LAVE APES NABLED OMPLETE ORMAT...
- Page 62 Chapter 5: Multiple ADAT-XT Operation If the master’s FORMAT icon is on, and you are extending the format, and the slave tape is formatted: • If the slave’s FORMAT icon is on, the slave autolocates to the same time as the master, then format extension begins with the master.
- Page 63 (both balanced and unbalanced). Alesis’ proprietary multi-channel digital bus carries the 8 tracks of a source XT or ADAT. These 8 channels are routed in a one-to-one relationship to the 8 tracks of the target XT which can record the digital audio.
- Page 64 IGITAL Recording digital audio onto the XT from a source other than an ADAT Compatible device requires a digital audio interface, like the Alesis AI-1. The AI-1 converts either AES/EBU or S/PDIF digital audio protocols into the Alesis Multichannel Optical and [RECORD] on the master XT.
- Page 65 In addition, the Tape Offset feature can be used even if the XT is the master machine in a multiple ADAT system. This is important especially when using the XT with one or more original ADATs as slaves.When offsetting the XT’s ADAT XT Reference Manual Multiple ADAT-XT Operation: Chapter 5 ONSIDERATIONS...
-
Page 66: Locate 0
Chapter 5: Multiple ADAT-XT Operation tape location, the value is displayed and edited within a + or - 1 hour range, since this is the maximum length of the XT’s tape. Example: If you wanted to use the same take of the background vocals of a song from the first chorus for chorus 2 and 3, you could bounce those track(s) to another machine. - Page 67 XT would cause some phase cancellation when combined with the original signal. Therefore, it is important that you either monitor the original signal or the tape’s input signal on your mixer, but not both. ADAT XT Reference Manual Multiple ADAT-XT Operation: Chapter 5 ADAT PEED ITCH...
- Page 68 Chapter 5: Multiple ADAT-XT Operation OLARITY IFFERENCES The original ADAT was designed to invert its analog input signal internally before the audio was sent through the A/D (analog-to-digital) converter and recorded onto tape. The digital representation of the data (as stored on tape) was therefore inverted relative to the analog input (i.e., a positive voltage at the analog input is stored as a...
- Page 69 Multiple ADAT-XT Operation: Chapter 5 If you are replacing one or more of your ADATs with XTs and have been using the short, 8" sync cables, you will need to use 1 meter cables (or longer) to make the connection between ADATs and XTs. This is because the [SYNC IN] and [SYNC OUT] connectors have been moved on the XT rear panel to the opposite side, and the shorter cables will no longer reach.
- Page 70 Chapter 5: Multiple ADAT-XT Operation ADAT XT Reference Manual...
- Page 71 VERVIEW This chapter is designed to give you an idea of the multitude of applications for the XT. These applications are not broken down into great detail. Therefore, where applicable you will need to refer to other sections of this manual for instructions on how to setup the XT for a particular job.
- Page 72 Naturally, the audio signals would need to be split and connected to both sets of inputs. If you are using an Alesis BRC with a multiple ADAT system, you can take advantage of a feature called continuous recording . By splitting the system into two (or into two sets of machines), you can offset the second set by a specific amount of time.
- Page 73 This requires a synchronizer interface, such as the Alesis AI-2 or BRC. The connections consist of running a balanced 1/4" TRS cable between the AI - 2’s [SMPTE IN] connector and the VTR’s SMPTE OUT (if timecode is recorded onto...
- Page 74 Chapter 6: Applications If your sequencer generates MMC commands, you should be able to put your sequencer into play and have the XT follow along. However, don’t be surprised if the XT does not immediately go into play. When a PLAY command is sent from the sequencer, the XT is issued a locate command, telling it where the sequencer is positioned (in timecode).
- Page 75 Press [PLAY] and [RECORD] on the slave ADAT. ALCULATING The Alesis BRC provides a way of setting tape offsets using any of the 20 Locate memories in a song. This means you can set a Locate at one point, another Locate at another position, then have one of the slave ADATs offset by the amount of time between those two Locate positions.
- Page 76 Chapter 6: Applications ª Press [EDIT VALUE], then press [LOCATE 5]. Edit Mode will now be selected. The TIME counter will display a time for Locate 5 (like 0:00:47.30 ). Write this number down or memorize it. Press [TAPE OFFSET] (while still in Edit Mode) and enter the value that was displayed for Locate 5 (0:00:47.30).
- Page 77 IGITAL NALOG ECORDING Digital recording works very differently from analog recording. With analog recording, tape containing millions of tiny magnetizable particles move past a record head. The magnetic field around this head fluctuates according to the audio signal present at the tape recorder’s input.
- Page 78 Appendix A: Digital Recording Concepts Digital audio requires lots of numbers to represent an analog version of the same sound. Analog signals may require at least 20kHz frequency response to reproduce audio faithfully. Digital signals for the same 20 kHz audio requires a frequency response of several million Hertz.
- Page 79 ROUBLESHOOTING ROUBLE HOOTING If you are experience problems while operating the XT, please use the following table to locate possible causes and solutions before contacting Alesis customer service for assistance. Symptom The display does not light when the [POWER] switch is turned on.
- Page 80 Appendix B: Troubleshooting HECKING OFTWARE The current software version may be determined by holding [SET LOCATE] and pressing [FAST FWD]. The XT will momentarily indicate the current operating software version installed in the TIME counter. RROR ISPLAY The TIME counter has a secondary mode which, when selected, will display only the minutes and seconds of the tape position, and the error rate while the transport is engaged in play or record.
- Page 81 ADAT H AINTENANCE The heads of each ADAT are pre-aligned at Alesis. No user adjustment is necessary. Over the course of time, depending on the quality of the tapes used and the environmental conditions where the ADAT and its tapes are stored, head cleaning may become necessary.
- Page 82 Appendix B: Troubleshooting ISPLAY The XT keeps track of how long the head has been actively spinning against tape (i.e., threaded in stop, or play, or cue/review). This can help determine how long it has been since the last time it was serviced or cleaned. To display the head time counter: Hold [SET LOCATE] and press [STOP]: The number of drum hours will briefly appear in the TIME counter.
- Page 83 Tape a note to the top of the unit describing the problem, include your name and a phone number where Alesis can contact you if necessary, as well as instructions on where you want the product returned. Alesis will pay for standard one-way shipping back to you on any repair covered under the terms of this warranty.
- Page 84 Appendix B: Troubleshooting Contact your local Alesis dealer for warranty assistance. The Alesis Limited Warranty applies only to products sold to users in the USA and Canada. Customers outside the USA and Canada are not convered by this Limited Warranty and may or may not be covered by independent distributor warranty in the county of sale.
- Page 85 The edges of the tape have become damaged. If only one tape is found to cause this problem, don't use it. If the problem is seen with several tapes, the machine should be taken in for service. Contact Alesis for service. Er 0 Tape Load Error: This may be a problem with the TAPE LOAD or (insert) switch.
- Page 86 Appendix D: Specifications Er 7 Clean Heads: If this error message is seen, it may indicate that the heads are in need of cleaning. See page 75 for information about cleaning your heads. Er 8 Sync Lost: Error message 8 normally occurs when the tape reaches the end while formatting or recording.
- Page 87 XT or ADAT. At this point, you should call Alesis Product Support. If the problem does not occur, and the tape works fine, then we need to look at your XT. You need to call Alesis Product Support.
- Page 88 Appendix D: Specifications Heads: Approximate Recording Times: ST-60: ST-120/SE-180: ST-160/SE-240: ST-180/SE-260: Fast Wind Rate: Audio Number of Audio Channels: Audio Conversion: Record (A/D): Playback (D/A): Sample Rate: Vari Speed Range: Frequency Response: Dynamic Range: Distortion: Channel Crosstalk: Wow and Flutter: Reference Level: Analog Inputs/Outputs Connectors:...
- Page 89 Digital Inputs/Outputs Connectors: Communications Protocol: General Power Requirements: Power Consumption: Operating Temperature: Operating Humidity: Dimensions (H x W x D): Weight: CAUTION: Danger of explosion if battery is incorrectly replaced. Replace only with the same or equivalent type. AVERTISSEMENT: Risque d'explosion si cette pile est mal utilisée tel que introduite faussement dans l'appareil ou remplacé...
- Page 90 Glossary A/D or Analog-to-Digital Converter The device that converts an analog audio signal to digital audio. Once encoded, all audio is stored or processed as a series of numbers rather than as the audio itself. AES/EBU Interface A two-channel, digital audio hardware/software standard. The AES/EBU interface allows for data communication between professionally-oriented digital devices (such as digital signal processors, hard disk recording systems, synthesizers with AES/EBU outputs, digital audio workstations, etc.).
- Page 91 Bouncing means taking audio from one track and placing it on another. The term, sometimes called “bouncing down,” also describes the process of mixing several tracks onto one or two. A bus generally refers to any common signal pathway. In a mixer, a bus is usually a wire that is or can be made common to the outputs of any or all channels in the mixer.
- Page 92 Glossary Fiber Optical Connector A device that transmits signals through light instead of conventional wire. Advantages include higher speed and the ability to carry multiple chanels of information over a single, thin cable. House Sync A video signal distributed to any device that requires a reference to maintain proper sync relationship with other devices.
-
Page 93: Sample Rate Conversion
Output A path through which audio passes from one device to another. Types of outputs vary in connector type, level, use (sends, monitor, mix), and electrical characteristics (impedance, balanced or unbalanced). They can be analog or digital. Oversampling The process of taking more samples than is required in order to more accurately reconstruct a digitized signal back into analog audio. - Page 94 S/PDIF Interface Similar to the AES/EBU interface, but created by Sony and Philips with consumer applications in mind. The optional AI-1 from Alesis offers both the consumer S/PDIF interface and professional AES/EBU format for use with the XT. S-VHS Acronym for Super Video Home System, an improved version of VHS with greater resolution and dubbing capabilities, as well as improved sound.
-
Page 95: Adat Xt Reference Manual
ABS/REL Button 15, 35 Absolute Time 35, 48 ADAT 55, 59, 63-65 AI-1 61 AI-2 69 All Input 39 Analog Recording 71 Auto Input 39 Auto Play 19, 50 Auto Record 20, 50-51 Auto Return 19, 50 Autolocation 48 Backup 60 Bandwidth 72 BRC 52, 68 Chase 34... -
Page 96: Adat Xt Reference Manual
Index ADAT XT Reference Manual...
Need help?
Do you have a question about the ADAT-XT and is the answer not in the manual?
Questions and answers