Advertisement
Quick Links
Advertisement

Related Manuals for Daewoo AVS1400


Summary of Contents for Daewoo AVS1400
- Page 1 Internet & FM Radio...
-
Page 2: Important Safeguards
IMPORTANT SAFEGUARDS When using electrical appliances, basic safety precautions should always be followed. These instructions should be saved for future reference: • Read and familiarise yourself with all operating instructions before using this Internet & FM Radio. • Before plugging your unit into the mains, visually check that the unit is intact and has not suffered any transit damage. - Page 3 and persons with reduced physical, sensory or mental capabilities or lack of experience and knowledge if they have been given supervision or instruction concerning use of the appliance in a safe way and understand the hazards involved. Children shall not play with the appliance.
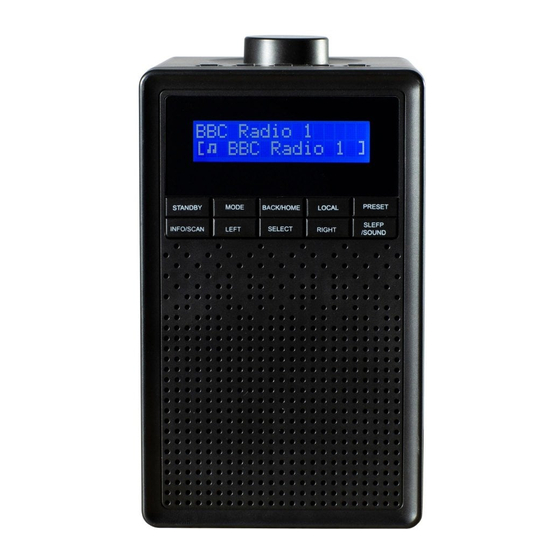
- Page 4 Description of Parts – Front Panel Favourite Preset buttons (1 – 5). Back/Home button, press to return to a previous menu Mode – Switch between Internet and FM radio. Standby – Briefly press to power up the radio, briefly press again to put the radio in standby. Info/Scan –...
- Page 5 Description of Parts – Rear Panel Battery compartment. DC power input Jack. Battery compartment cover. Stereo Headphone Jack socket. Telescopic Aerial (15) shown in the locked position. Mains Adaptor. Small DC Power Plug. Before the first time you use your Internet/FM Radio Please read these operating instructions thoroughly and keep them in a safe place for future reference.
-
Page 6: Manual Setup
Battery Warnings • Do not mix old and new batteries together. • It is recommended that batteries are removed from the radio if it is not to be used for a long period of time. • CAUTION: There is a danger of explosion if the batteries are incorrectly fitted. •... - Page 7 5. Once the password has been accepted the display will show ‘Connecting’ and connect to the Wi-Fi network, after which, the radio will return to the initial menu as below: 6. After a few seconds the initial menu will show on the display, with one of the following 3 options: <...
- Page 8 c. <Local Radio> - select from the following ‘Local Radio’ station options, press the Select button (8) to enter the option: 1. DAB (UK Stations) 14. Community 27. Kids 40. Rock 2. Top10 15. Country 28. Latin 41. Soundtrack 3. United Kingdom/All 16.
- Page 9 Recalling a preset Internet radio station using the preset function – Please note that presets are saved in the ‘My Favorite’ option • Press the Preset button (11) briefly to enter Preset recall mode. • Press the Left (6) and Right (9) buttons to scroll through the saved presets in <My Favorites> press the Select button (8) once the desired preset radio station has been found.
- Page 10 Saving presets automatically using the Scan function. Press and hold the Info/Scan button (5) for 2 seconds and the FM radio will automatically scan the whole FM radio band. The first 10 radio stations found during the scan will be stored into the presets which are recalled normally as below.
- Page 11 e. Time – Press the Left (6) and Right (9) buttons to set the alarm on hours and minutes. Press the Select button (8) to confirm. f. Sound – Press the Left (6) and Right (9) buttons to select from the various sounds to wake up to Melody, Internet Radio, FM or Beep.
- Page 12 ii. Threshold – a. Stereo Threshold – Press the Left (6) and Right (9) buttons to set the level at which the audio switches into stereo select from weak, strong or default. Press the Select button (8) to confirm. b. Seek Threshold – Press the Left (6) and Right (9) buttons to set the level at which the strength of the stations are detected during an FM radio scan, select from weak, strong or default.
- Page 13 Sleep/Sound button (10) a) Sleep: Press the Sleep/Sound button (10) briefly once will to enter the sleep timer mode – see ‘h. Sleep Timer’ above on page 11. b) Sound (Internet radio only): Press and hold the Sleep/Sound button (10) to enable the ‘Sounds’ sleep menu, use the Left (6) and Right (9) and Select (8) buttons to select from the various sleep sounds as below: Birds...
- Page 14 App control of your Internet Radio The Internet Radio can be controlled remotely using your mobile phone, Tablet, etc. NB Before proceeding ensure your Phone, Tablet, or other device is connected to the same Wi-Fi network as the Internet Radio. Next download the free App called ‘AirMusic Control’, this is available from Google Play for Android and also for Apple on the App Store: Android Icon...
- Page 15 ‘Local Radio’ Option Selected: 1. The Main Page of the App 2. Page showing Local Radio Page showing Local Radio station playing. showing the options. option Selected. ‘Internet Radio’ Option Selected: 4. Page showing the 1. The Main Page of 2.
- Page 16 Remote control of your Radio Return to Enter Next Previous Page Power Off Mute Volume+ Previous Volume- Back/Home Internet/FM Favorites radio mode Set Sleep Display Dimmer Set Alarm Presets Above: the remote page of the Press the ‘Remote’ icon App. (arrowed) on the Main Page of the App.
-
Page 17: Technical Specification
Technical Specification AVS1400 Model Number 6V (4x 1.5V AA Batteries) or DC 5V @1A Power Supply Mains Adaptor Input: AC 100-240V ~ 50/60Hz 0.15A. Output: DC 5V @1A Unpacked Weight Approx. 595g (without batteries) Dimensions (Approx.) Approx. 95 (w) x 105 (d) x 155 (h) mm Operating Temperature Range 0°C to + 40°C... - Page 18 Waste electrical products should not be disposed of with household waste. Please recycle where facilities exist. Check with your Local Authority or retailer for recycling advice. Daewoo Electricals is a registered trademark. Produced and imported under licence by ESG Ltd Manchester M3 1JS www.esgltd.com...
Need help?
Do you have a question about the AVS1400 and is the answer not in the manual?
Questions and answers