FALMEC Down draft 90 Instruction Booklet
Hide thumbs
Also See for Down draft 90:
- Instruction booklet (89 pages) ,
- Instruction booklet (69 pages) ,
- Instruction booklet (27 pages)
Table of Contents

Related Manuals for FALMEC Down draft 90


Summary of Contents for FALMEC Down draft 90
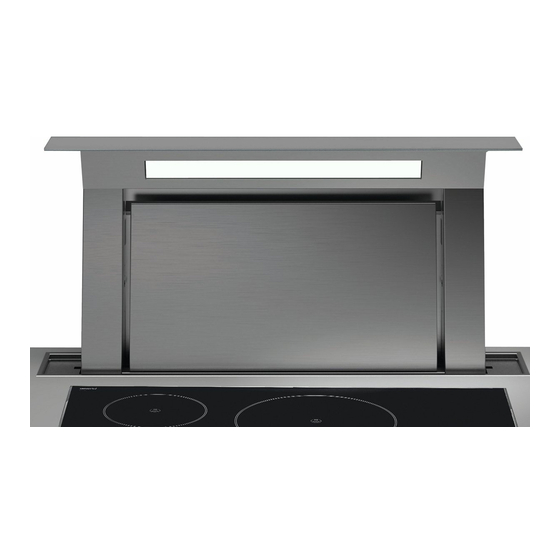
- Page 1 f a l m e c .c o m INSTRUCTIONS BOOKLET Down draf t 90 D own d raf t 120 INSTRUCTIONS BOOKLET MODE D'EMPLOI MANUAL DE INSTRUCCIONES LIBRETTO ISTRUZIONI i n s t a l l a t i o n v i d e o...
- Page 2 12 1/8” - 308 mm 8 5/8” - 220 mm 4 1/4” 109 mm 42 1/2” - 1081mm Down draft 90 81 lb 3 1/4” - 84 mm 31 3/8” - 798 mm 37 kg 28 5/8” - 726 mm 4 1/2”...
- Page 3 EN - Remote motor. Down draft 90 - 120 FR - Moteur monté séparément. ES - Motor externo. IT - Motore remoto. 3 1/4” - 84 mm 4 1/2” 109 mm 30 3/4” - 781 mm 3 5/8” - 92 mm ø1/4"...
- Page 4 EN - Installation with back motor FR - Installation avec moteur à l'arrière ES - Instalación con motor parte trasera IT - Installazione con motore posteriore Down draft 90 - 120 Rear view 15 5/8” - 396 mm Down draft 90 - 120...
- Page 5 EN - Recess hole dimensions (1), fixing to the supporting surface (2) / 8 ” FR - Dimensions du trou pour l'encastrement (1), ” - fixation sur le plan d'appui (2) 7 / 8 ” - ES - Medidas orificio para encajar (1), 6 / 8 fijación en el plano de apoyo (2) IT - Misure foro per incasso (1),...
- Page 6 EN - Temporary electrical connection (3); opening the hood for installation (4)(5). FR - Branchement électrique provisoire (3) ; ouverture de la hotte pour l'installation (4) (5). ES - Conexión eléctrica provisional (3); apertura de la campana para la instalación (4)(5). IT - Collegamento elettrico provvisorio (3);...
- Page 7 EN - Replace the original “inlet” (5) with the bracket fixing the motor to the hood (6); secure the motor to the hood if the air exhaust is on the front (7). For other directions see (8) (9). INLET FR - Remplacer "inlet" original (5), avec l'étrier de fixation du moteur sur la hotte (6) ;...
- Page 8 EN - Side movement of the air exhaust FR - Déplacement latéral de la sortie d'air ES - Desplazamiento lateral de la salida del aire IT - Spostamento laterale dell'uscita aria OUTLET 180° 90° 360°...
- Page 9 EN - Configuration with back motor FR - Configuration avec moteur à l'arrière ES - Configuración con motor parte trasera IT - Configurazione con motore posteriore 360° OUTLET...
- Page 10 FR - Configuration avec moteur monté séparément : Tuyaux rectangulaires (13) ; tuyaux ronds (14). ES - Configuración con motor externo: Tubos rectangulares (13); tubos redondos (14). IT - Configurazione con motore remoto: Tubi rettangolari (13); tubi tondi (14). Motor / 2 ” ONLY FALMEC MOTORS! Motor ONLY FALMEC MOTORS!
- Page 11 EN - Electrical connection: onboard motor (15); remote motor (16). FR - Branchement électrique : moteur à bord (15) ; moteur monté séparément (16); ES - Conexión eléctrica: motor a bordo (15); motor externo (16). IT - Collegamento elettrico: motore a bordo (15); motore remoto (16).
- Page 12 EN - Brackets fixing to the TOP (17). Fixing the control unit to the hood (18). Hand anti-crushing warning (19). FR - Étriers de fixation au TOP (17). Fixation unité de contrôle à la hotte (18). Avertissement anti-écrasement des mains (19).
-
Page 13: Safety Instructions And Warnings
SAFETY INSTRUCTIONS ELECTRICAL SAFETY AND WARNINGS The electrical system to which the hood is to be connected must be in accordance Installation operations are to be carried with local standards and supplied with out by skilled and qualified installers in ac- earthed connection in compliance with safety cordance with the instructions in this book- regulations in the country of use. -
Page 14: Intended Use
It is imperative that this instructions booklet is filters: in this case, grease and dirt will deposit in the kept together with the equipment for any future equipment and compromise its operation. consultation. Accessible parts of the hood can be hot when used at If the equipment is sold or transferred to another per- the same time as the cooking appliances. -
Page 15: Operation
In case of: OPERATION • devices fitted with cables without a plug: the type of plug to use is a ''standardised'' one. The wires must be connected as follows: yel- WHEN TO TURN ON THE HOOD? low-green for grounding, blue for neutral and brown for the live. The Switch on the hood at least one minute before starting to cook to direct plug must be connected to an adequate safety socket. -
Page 16: Maintenance
If the pushbutton panel is completely inactive, before con- Reconnect the hood to the electrical power supply, making tacting the Technical assistance service, disconnect power sure that the lights and motor are off. temporarily to the appliance (about 5“), possibly by acting on the main switch, to restore normal operation. - Page 17 DISPOSAL AFTER END OF USEFUL LIFE METAL ANTI-GREASE FILTERS It is advised to frequently wash the metal filters (at least once a month) leaving them to soak in boiling water and cleaning solution for 1 hour, taking care not to bend them. The crossed-out trash or refuse bin symbol on the appliance Do not use corrosive, acid or alkaline detergents.
-
Page 18: Consignes De Sécurité Et Mises En Garde
CONSIGNES DE SÉCURITÉ SÉCURITÉ ÉLECTRIQUE ET MISES EN GARDE Le circuit électrique, auquel est reliée la hotte, doit être aux normes et muni d’un Le travail d'installation doit être effectué raccordement à la terre, conformément par des installateurs compétents et quali- aux normes de sécurité... -
Page 19: Destination D'utilisation
manuel. chauffée pourrait s'enflammer. Il est très important que ce manuel d'instructions Ne pas allumer de flammes nues sous la hotte. soit conservé avec l'appareil pour toute consulta- Ne pas cuisiner avec une flamme nue sous la hotte. tion future. Ne jamais utiliser la hotte sans les filtres métalliques Si l'appareil devait être vendu ou transféré... -
Page 20: Instructions De Montage
l'intérieur de la hotte) ; FONCTIONNEMENT • la fiche et le câble d'alimentation ne rentrent pas en contact avec des températures supérieures à 70 °C ; • l’installation d'alimentation soit munie d'un raccordement à la terre efficace et correct, conformément aux normes en vigueur ; QUAND FAUT-IL ALLUMER LA HOTTE ? •... -
Page 21: Entretien
nément (environ 5”) l’alimentation électrique de l’appareil électromé- Rebrancher la hotte au secteur, en vérifiant que les lumières nager, de préférence au moyen de l’interrupteur général, pour rétablir le et le moteur sont éteints. fonctionnement normal. Si cette opération ne s’avère pas efficace, contacter le service d’ A ssis- 2) - ASSOCIATION DE LA RADIOCOMMANDE À... - Page 22 FILTRES MÉTALLIQUES ANTI-GRAISSE ÉLIMINATION EN FIN DE VIE Il est conseillé de laver souvent les filtres métalliques (au moins tous les mois) en les laissant tremper pendant une heure environ dans de l'eau bouillante avec du produit vaisselle, en évitant de les plier. Le symbole de la poubelle barrée reporté...
-
Page 23: Seguridad Eléctrica
INSTRUCCIONES DE SEGURIDAD SEGURIDAD ELÉCTRICA Y ADVERTENCIAS La instalación eléctrica a la cual se conecta la campana debe respetar las normas co- Las operaciones de instalación deben efec- rrespondientes y tener obligatoriamente tuarlas instaladores competentes y cualifi- una conexión a tierra según las normas de seguri- cados, siguiendo cuanto se indica en este dad del país de uso;... -
Page 24: Destino De Uso
antes de instalar o de usar el aparato o realizar descalzos. operaciones de limpieza en el mismo. Controle siempre que todas las partes eléctricas, (lu- El Fabricante declina toda responsabilidad por ces, aspirador), estén apagadas cuando no se use el posibles daños que puedan ser provocados direc- equipo. -
Page 25: Conexión Eléctrica
CAMPANA DE RECIRCULACIÓN INTERNA (FILTRANTE) CONEXIÓN ELÉCTRICA (parte reservada solo a personal cualificado) En esta versión, el aire pasa a través de los filtros de carbón activo para ser purificado y reciclado en el am- Antes de efectuar cualquier tipo de operación en la campa- biente. - Page 26 PANEL DE MANDOS TÁCTIL DESCRIPCIÓN DE LOS MANDOS DE LA TRANSMISORA Puesta en marcha del motor e in- cremento de la velocidad de 1 a 4. La cuarta velocidad solo está acti- ON/OFF (led blu fijo) va durante unos minutos. Encendido/apagado del motor y Vel1 DOWN ON/OFF (led blu intermittente)
-
Page 27: Mantenimiento
MANTENIMIENTO MAGNET Antes de realizar cualquier tipo de limpieza o de manteni- miento, desconecte el equipo desenchufándolo o usando el interruptor general. No deben utilizarse detergentes que contengan sustancias abrasi- vas, ácidas o corrosivas ni paños con superficies rugosas. Un mantenimiento constante asegura un buen funcionamiento y un óptimo rendimiento a lo largo del tiempo. - Page 28 ELIMINACIÓN AL FINAL DE LA VIDA ÚTIL El símbolo del contenedor tachado que se encuentra en su equipo indica que el producto es un RAEE, es decir, un “Re- siduo de Aparatos Eléctricos y Electrónicos” y, por tanto, no se puede eliminar en la basura indiferenciada (o sea, junto con los “residuos urbanos mixtos”), sino que se tiene que eliminar por separado siguiendo las operaciones correspondientes para su reciclaje,...
-
Page 29: Istruzioni Di Sicurezzae Avvertenze
ISTRUZIONI DI SICUREZZA La presa usata per il collegamento elettrico deve es- sere facilmente raggiungibile con l’apparecchiatura E AVVERTENZE installata: in caso contrario, prevedere un interruttore generale per disconnettere la cappa al bisogno. Il lavoro d’installazione deve essere esegui- to da installatori competenti e qualificati, Ogni eventuale modifica all’impianto elettrico dovrà... -
Page 30: Installazione
della cappa. Per questa operazione il costruttore rac- In caso di utilizzo contemporaneo di altre comanda l’utilizzo delle salviette in dotazione, dispo- utenze (caldaie, stufe, caminetti, ecc.) ali- nibili anche in acquisto mentate a gas o con altri combustibili, Esigere parti di ricambio originali. provvedere ad una adeguata ventilazione del locale in cui avviene l’aspirazione dei fumi, se- DESTINAZIONE D'USO... -
Page 31: Funzionamento
SCARICO FUMI PULSANTIERA TOUCH CAPPA AD EVACUAZIONE ESTERNA (ASPIRANTE) In questa versione, fumi e vapori vengono convogliati verso l'esterno attraverso il tubo di scarico. ON/OFF (led blu fisso) A tal fine, il raccordo d'uscita della cappa, deve essere Accensione/spegnimento motore e Vel1 collegato tramite un tubo, ad un'uscita esterna. -
Page 32: Manutenzione
Per la pulizia della cappa, realizzata in acciaio inox spazzolato, il Co- Trasmissione comando attiva struttore consiglia l'utilizzo delle salviette "Magic Steel" che si possono anche ordinare on-line sul sito www.e-falmec.com. PROCEDURA DI ATTIVAZIONE In alternativa e per tutti gli altri tipi di superfici, la pulizia va eseguita... - Page 33 FILTRI METALLICI ANTIGRASSO SMALTIMENTO A FINE VITA Si consiglia di lavare frequentemente i filtri metallici (almeno ogni mese) lasciandoli in ammollo per circa 1 ora in acqua bollente con de- tersivo per piatti, evitando di piegarli. Il simbolo del cestino barrato riportato sull’apparecchiatura in Non usare detergenti corrosivi, acidi o alcalini.
- Page 34 NOTE - NOTES...
- Page 35 NOTE - NOTES...
- Page 36 Falmec S.p.A via dell’Artigianato, 42 z.i. 31029 Vittorio Veneto Treviso — Italy info@falmec.com falmec.com Codice / Code Matricola / Serial Number...
Need help?
Do you have a question about the Down draft 90 and is the answer not in the manual?
Questions and answers