Table of Contents
Advertisement
Advertisement
Table of Contents

Related Manuals for Fancom LUMINA 47


Summary of Contents for Fancom LUMINA 47
- Page 1 LUMINA 47 LUMINA 47 LUMINA 47 TOUCH MANUAL VERSION C1...
- Page 2 N.B.: The original, authentic version of this manual is the English version produced by Fancom B.V. or one of its daughter companies (referred to further as Fancom). Any modifications introduced to this manual by third parties have neither been checked nor approved by Fancom. Modifications are taken by Fancom to include translations into languages other than English and the insertion and/or deletion of text and/or illustrations to/from the original contents.
-
Page 3: Table Of Contents
Lumina 47 Table of contents Table of contents General introduction ..........................1 How to use this manual ........................1 Fancom helpdesk ........................... 1 F-Central FarmManager™ ......................1 Safety instructions and warnings ....................1 Working ............................... 3 User ................................4 Daily management .......................... 4 Animal management ........................ -
Page 4: General Introduction
For any questions and support, please contact the local Fancom Sales & Service Center. F-Central FarmManager™ Virtually all Fancom equipment can be controlled and managed from a central location. This requires the F-Central FarmManager software package and a communication module. The screens in the control computers are also used in F-Central FarmManager. - Page 5 The control computer is a piece of electronic apparatus. There is always a risk of a malfunction occurring. Fancom has made every effort to ensure that an alarm is given in the event of an emergency. Unfortunately, a 100% guaranteed cannot be provided as not all circumstances are under Fancom's control.
-
Page 6: Working
Working The Lumina 47 weighs individual animals, irrespective of the number of animals on the scales at any one time. The amount of manure on the scales also has no influence on the measurements. The figure below shows an example... -
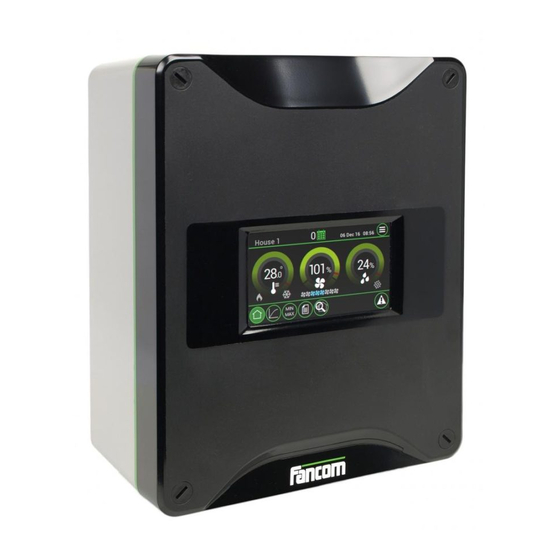
Page 7: User
Lumina 47 User User This section describes a number of user tasks. These are the basic tasks that can be performed using the Lumina Daily management This section contains information about general management. The house management can be assessed quickly using the screen Overview. - Page 8 Overview Readout of the current day number. Weight Readout of the current animal weight. The Lumina 47 re-calculates this value each hour using a special formula. Growth Readout of the daily weight increase per animal. The Lumina 47 re-calculates this value each hour.
-
Page 9: Animal Management
Lumina 47 User History data tab page Overview Day / Week Week Readout of the day (or week) number of the current cycle. Weight Readout the animal weight on that day (or week). Readout of the theoretical animal weight for that day (or week), calculated from the curve. - Page 10 Lumina 47 User 3.2.1 Animal management data The overview screen shows the number of animals present in the house. More data is displayed in the screen below. Overview Animal data screen displays the total numbers set up, mortality and delivered. The date of the last change is shown behind each piece of information.
- Page 11 Lumina 47 User 3.2.2 Set up flock Set up the animals as soon as they enter the house. If control is based on the curve, the control computer will use the settings from the curve. If not enter these settings manually.
- Page 12 Lumina 47 User 3.2.3 Animal mortality The term mortality refers to sick or dead animals that have been removed from the house. As mortality decreases the number of animals, the controls must also be adjusted. This can be done as follows: •...
- Page 13 Lumina 47 User 3.2.4 Delivering animals When animals are delivered they leave the house. These animals are booked out of the control computer. Animals can also be delivered at intervals. When all the animals are delivered the control computer sets the day number to 0, and switches to control based on the empty settings.
-
Page 14: Settings
Lumina 47 User Settings 3.3.1 Growth standard tab page Overview Curve Week Setting of a day/week number per bending point (max. 24 bending points). Setting of the corresponding theoretical weight for each bending point. tab page... - Page 15 Lumina 47 User 3.3.2 Time and date For correct computer functioning, the system time and date must be current. Before making settings, check the system time and date. Overview Date Setting of the current date. Time Setting of the current time.
-
Page 16: Installer
Lumina 47 Installer Installer This section describes the installer displays of the installation menu. Installing the control computer 4.1.1 Installation menu The installer can configure the control computer using the installation menu. This menu also contains screens for standard system settings and diagnoses. - Page 17 Lumina 47 Installer 4.2.1 System tab page SYSTEM SYSTEM Common Clock type Setting of the 12 or 24 hour time indication. Time Date Setting of the current time and date Computer name Setting of the name of the control computer.
- Page 18 Lumina 47 Installer tab page SYSTEM SYSTEM Access Change password Setting of a password to protect advanced user settings (option More) from use by AdvancedMode non-authorised users. • The password must contain four numbers. • Enter code 1111 to deactivate the password protection.
- Page 19 Lumina 47 Installer 4.2.2 SD Card Menu The set data and the operating program in the control computer can be transferred to an SD-card. This data can be copied back onto the control computer from the SD-card. This must only be performed by an authorised installer, except when backups are made.
- Page 20 Lumina 47 Installer 4.2.3 Application The application menu contains the data of the control computer. SYSTEM APPLICATION 4.2.4 Communication C is a communication bus used to connect printed circuit boards in the control computer (e.g. AI.4). tab page...
- Page 21 If no IO-net modules are connected, the control computer doesn't give alarms during the Simulation Mode. FNet is the Fancom Network. Several control computers can be linked via this network. FNet is also used to operate the connected control computers from a PC.
- Page 22 Lumina 47 Installer Tab page Slaves shows the connected I2C modules and IO-Net modules and additional diagnostic data. It is intended to be used as a service tool to find communication errors. tab page SYSTEM COMMUNICATION Slaves Reset counters Setting used to reset all data to zero simultaneously.
-
Page 23: Setup
Setup House number Setting of a unique house number. This is important if the computer has been included in a network (Fancom FNet). Nbr. of scales Setting of the number of scales connected to this computer (1 or 2). Uniform. calc Setting of how the computer must calculate the uniformity percentage: based on 10% or 15%. - Page 24 Lumina 47 Installer 4.4.2 Tab page Calibration After installation, the weigher must be calibrated and adjusted. Use the functions on this tab page. These settings apply to all weigher types. tab page Weighing Calibration Calibrating weigher To calibrate the weigher, a calibration weight is required. Use a calibration weight that is nearly as heavy as the maximum empty weight of the weigher/blender.
- Page 25 Lumina 47 Installer Maximum tare Setting of the maximum weight that is deducted from the gross weight to obtain net weight. If the actual tare is below the Maximum tare , the tare of the weigher is ascertained. Dosing in can then continue normally afterwards. If the Maximum tare exceeded, no more dosing in can take place.
-
Page 26: System Alarms
Lumina 47 System alarms System alarms Alarm message Cause Action FNet alarm No communication with PC Check wiring and connections I/O-net alarm No communication with I/O-modules Check wiring and connections I2C alarm No communication between internal Check wiring and connections circuit boards 1, 2 …... -
Page 27: Technical Specifications
Relay 1 (alarm relay): voltage free max. 2A 60Vdc/30Vac Communication I/O-Net for extra inputs and outputs using I/O-modules. FNet, Fancom network for intercommunication of control computers and PC connection. Excitation voltage 5 Vdc 2 × Max. input signal 78 mVdc 8x350 Ω... -
Page 28: The Inside Of The Control Computer
Lumina 47 Technical specifications The inside of the control computer FDP25... -
Page 29: Iob.0
Lumina 47 Technical specifications IOB.0 Relay 1 Digital output (Alarm relay) I2C connection to IOB Dipswitch I2C address select fixed on address 3 (dipswitch 1-2 on OFF) Weigh input 1 Weigh input 2 (not used) - Page 30 Extending load cell cable The standard cable from the load cells to the Lumina 47 is 10 metres. This cable can be lengthened by maximum 40 metres. When lengthening the cable, follow the diagram below. The standard 4-core cable is lengthened using a...
-
Page 31: Connection Fnet And I/O-Net
The control computer and the second I/O network module require a terminal resistor. The first I/O network module is looped. This does not require a terminal resistor. The Fancom Greenlink cable (UTP 1x2x0.8mm, unshielded twisted pair) used to wire the FNET and I/O net. Maximum cable length = 1200 meters. -
Page 32: Appendix: Eg Declaration Of Conformity
Lumina 47 Appendix: EG declaration of conformity Appendix: EG declaration of conformity Manufacturer: Fancom B.V. Address: Industrieterrein 34 City: Panningen (the Netherlands) Hereby declares that the: Lumina 47 Complies with the provisions of the: Low voltage directive 2006/95/EC according to NEN-EN-IEC 61010-1: 2010...
Need help?
Do you have a question about the LUMINA 47 and is the answer not in the manual?
Questions and answers